
Auto-darkening and fixed-shade welding helmets can both protect your eyes when they are rated, fitted, and used correctly. The better choice depends on how often you weld, which process you use, how much visibility you need between starts, and whether you want simple passive protection or adjustable lens control.
Quick Answer
Choose an auto-darkening welding helmet if you weld often, switch between MIG/TIG/stick settings, or want to keep the hood down while positioning the torch. Choose a fixed-shade helmet if you want a simple, durable, low-cost setup for repeatable work at one shade level.
Key Takeaways
- Auto-darkening helmets improve visibility before and after the arc, which helps with starts, tack welds, TIG work, and frequent repositioning.
- Fixed-shade helmets are simpler, cheaper, and very reliable, but the shade must still match the process and amperage.
- Shade #10 is common, but it is not correct for every welding job. Always check the helmet label, welding process, amperage, and manufacturer guidance.
- For safety, look for ANSI Z87.1 or equivalent eye/face protection marking, inspect the lens, and test any auto-darkening filter before striking an arc.
At a Glance
| Time Required | 5–10 minutes to compare shade range, safety marking, fit, weight, sensors, and replacement lenses. |
| Difficulty | Easy for basic shop work; moderate if you weld several processes or low-amperage TIG. |
| Tools Needed | Helmet manual, welder amperage range, process type, spare cover lenses, and safety glasses for grinding or setup work. |
| Cost | Fixed-shade helmets are usually the budget choice; auto-darkening helmets cost more because of sensors, electronics, and adjustable filters. |
How Auto-Darkening and Fixed-Shade Helmets Differ
Auto-darkening and fixed-shade welding helmets differ in how they control lens darkness while you work.
An auto-darkening welding helmet uses an auto-darkening filter, arc sensors, and electronic controls. The lens stays in a lighter state while you set up the joint, then darkens when the sensors detect the welding arc. That lets you keep the hood down while you position the torch, start the bead, and inspect your work between tacks.
A fixed-shade welding helmet uses a passive lens that stays at one shade number all the time. Shade #10 is common for many general welding jobs, but it is not universal. The correct shade depends on the process, amperage, and the manufacturer’s chart.
The simple tradeoff is this: auto-darkening gives you better workflow and adjustment, while fixed shade gives you lower cost, fewer parts, and dependable passive protection.
| Feature | Auto-Darkening Helmet | Fixed-Shade Helmet |
| Lens behavior | Light before the arc, dark during welding. | One constant dark shade. |
| Best for | Tack welding, TIG starts, changing positions, and mixed processes. | Repeatable bench work at one known shade. |
| Main advantage | Better visibility and fewer hood lifts. | Simple, rugged, and affordable. |
| Main drawback | Higher cost and more settings to manage. | Less visibility between welds unless you lift the hood. |
How Auto-Darkening Welding Helmets Work
You get arc-triggered lens darkening through optical sensors that detect the welding arc and signal the filter to switch from a lighter viewing state to a darker protective shade.
Most auto-darkening helmets let you adjust shade, sensitivity, and delay. Shade controls darkness. Sensitivity controls how easily the lens reacts to the arc. Delay controls how long the lens stays dark after the arc stops.
This matters because welding light changes by process. A bright MIG arc, a low-amperage TIG arc, and plasma cutting do not behave the same way. A helmet that lets you tune the lens gives you more control when conditions change.
Arc-Triggered Lens Darkening
When the welding arc starts, sensors on the front of the helmet detect the flash and activate the auto-darkening filter. Many helmets switch very quickly, but the exact switching speed depends on the model. Check the manufacturer’s specification instead of assuming every helmet performs the same.
The main benefit is workflow. You can see the joint before you strike the arc, keep both hands in position, then continue welding without nodding the hood down or lifting it between every tack.
Sensors and Shade Control
Auto-darkening helmets commonly use two to four sensors. Two sensors can work well for simple bench welding. Four sensors are better when your hand, torch, pipe, or workpiece may block one sensor from seeing the arc.
Shade range is also important. Many helmets cover common welding shades in the 8–13 range, while some include separate cut or grind modes. The right setting still depends on your process and amperage.
Warning: Never weld with an auto-darkening helmet in grind mode. Grind mode is meant to prevent sparks from triggering the dark filter while grinding. If you forget to switch back before welding, your eyes may not get the intended arc-darkening response.
What Fixed-Shade Welding Helmets Offer
Fixed-shade welding helmets provide a constant lens shade. That simple design is why many welders still like them for repeatable work.
With a fixed-shade helmet, there are no batteries, sensors, sensitivity knobs, or delay settings to manage. You choose the correct passive lens for the job, put the hood down, and weld from a consistent view.
The main benefit is reliability. The main limitation is visibility before and after the arc. Because the lens stays dark, you may need to lift the helmet to reposition the joint, inspect a tack, or line up the next start.
- You choose one shade for the job.
- You avoid electronic controls and battery checks.
- You get lower replacement costs.
- You give up the convenience of a lens that changes automatically.
If you weld the same process at the same amperage every day, a fixed-shade helmet can be practical. If you change materials, amperage, or positions often, auto-darkening usually feels easier.
Auto-Darkening vs Fixed-Shade: Comfort and Visibility
Comfort starts with what you can see and how often you need to move your head. With auto-darkening helmets, the lens is lighter before the arc, so you can line up the joint without lifting the hood. That helps when you are tack welding, learning starts, working in tight spots, or making many short welds.
Many auto-darkening helmets also offer a larger viewing area, which can improve awareness of the puddle, joint, and surroundings. A large viewing window is not just a comfort feature; it can help you avoid awkward neck angles.
A fixed-shade helmet can still be comfortable, especially if it is light and balanced. Some passive helmets are simple enough to wear for long sessions without feeling bulky. The downside is that the dark lens can make setup and inspection slower.
For visibility, auto-darkening usually wins. For simplicity and light weight at a lower price, fixed shade still has a strong case.
Which Welding Helmet Fits Your Process?
Which helmet fits your process depends on arc brightness, amperage, position, and how often you need to stop and restart.
- MIG welding: Auto-darkening is convenient for tack welds and bodywork. Fixed shade can work well for repeatable shop beads if the lens shade is correct.
- TIG welding: Auto-darkening is often the easier choice because low-amperage starts and tight positioning demand better visibility and responsive sensors.
- Stick welding: Either type can work. Choose auto-darkening if you change rods or positions often; choose fixed shade if you run steady beads at known settings.
- Flux-core welding: Auto-darkening helps with starts and cleanup between passes, but a fixed-shade helmet can be a rugged budget choice.
- Plasma cutting: Use the shade recommended for the cutter and amperage. Do not assume a welding shade or grind mode is correct for cutting.
You should choose the right helmet for your work environment, not just for habit. If lighting changes, the workpiece blocks your view, or you weld many short beads, auto-darkening can save time and reduce frustration. If your work is predictable and budget matters most, fixed shade may be enough.
Pro Tip: If you weld out of position, around tubing, or inside tight frames, choose an auto-darkening helmet with four sensors. Extra sensors reduce the chance that your hand, torch, or workpiece blocks the arc from the lens.
Products Worth Considering
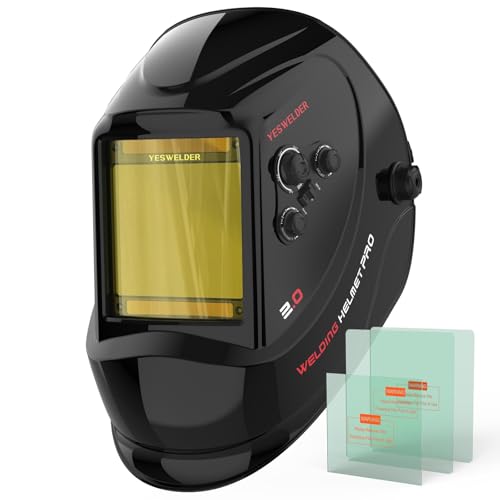
LARGE VIEW WITH TRUE COLOR CLARITY: See more of the weld puddle, joint edges, and work position through a wide 3.93" x 3.66" viewing area. The 1/1/1/1 true-color optical clarity provides a clearer, more natural view than traditional green-tinted lenses, helping support better visibility for detailed welding, fabrication, and garage projects.

【FASTER AUTO-DARKENING】Features high-end auto-darkening lenses with 4 premium arc sensors, switching from light to dark in 1/25000 sec. Easily adjust the shade and sensitivity of the lenses for different working environments, perfect for TIG/MIG/ARC welding. Dark state level: 4/9-13.

AUTO DARKENING FILTER - This welding helmet comes with high-end auto-darkening lens and 4 premium arc sensors which let you adapt to different working environments by adjusting the lens's shade and sensitivity while you are operating ARC/MIG/TIG Welding. DIN4 on light state, DIN5-9/9-13 on dark state.
Why Shade Level Matters for Arc Protection
Shade level matters because it controls how much visible light reaches your eyes while the lens also helps protect against welding radiation. The correct shade must match the process and amperage.
The OSHA eye and face protection standard says filter lenses must have a shade number appropriate for the work being performed. OSHA’s table lists different minimum protective shades for different operations, including shielded metal arc welding, gas metal arc welding, flux-cored arc welding, gas tungsten arc welding, plasma arc welding, plasma cutting, torch brazing, and oxygen cutting.
That is why shade #10 is common but not universal. For example, OSHA’s table lists gas metal arc welding and flux-cored arc welding at shade 10 for 60–500 amps, while gas tungsten arc welding is listed at shade 8 below 150 amps and shade 10 at 150–500 amps.
If the shade is too light, the arc may be uncomfortable and unsafe. If it is too dark, you may lose puddle visibility and make poor starts. OSHA’s rule of thumb is to start with a shade that is too dark to see the weld zone, then move lighter only until you can see well without going below the minimum.
Shade #10 is a common welding lens, not a universal answer. Your process, amperage, and manufacturer chart decide the right shade.
Why Viewing Area and Sensors Matter
A helmet’s viewing window and sensor layout affect how well you can track the puddle, joint, arc, and surrounding work area.
A larger viewing area helps you see more of the workpiece without moving your head as much. That is useful when you weld long seams, fit-up work, brackets, tubing, or body panels.
Sensor layout matters most on auto-darkening helmets. If the sensors cannot see the arc, the lens may not react the way you expect. This can happen when welding in tight corners, around pipe, under a car, or near a fixture that blocks the arc flash.
- Larger viewing areas improve situational awareness.
- More sensors help the helmet detect the arc from difficult angles.
- Good sensitivity control helps with low-amperage TIG and bright shop lighting.
- Clean cover lenses help sensors and optics work correctly.
If you choose auto-darkening, test the lens before welding and keep the sensors clean. If you choose fixed shade, make sure the passive lens is clean, undamaged, and matched to the process.
Durability and Replacement Costs
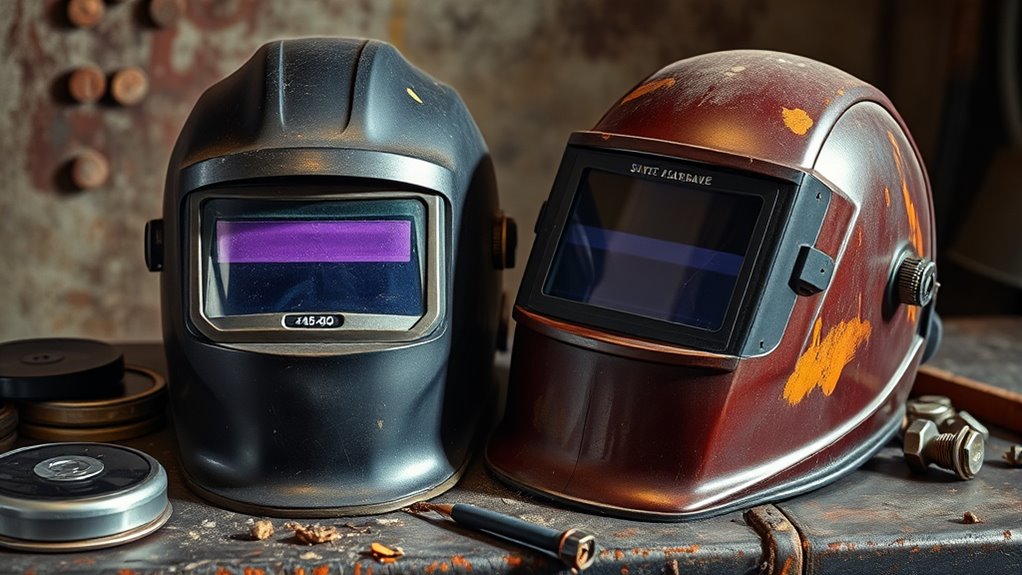
Once you compare visibility and shade control, durability and replacement cost become the next practical filter.
Auto-darkening helmets cost more because they include sensors, an auto-darkening filter, controls, batteries or solar-assist power, and replaceable cover lenses. If the electronics fail outside warranty, replacement can be more expensive than replacing a passive helmet.
Fixed-shade helmets use simpler passive lenses. They usually cost less to buy, less to maintain, and less to replace. That makes them appealing for rough shop use, schools, farm repairs, and backup helmets.
Both styles need care. Replace cracked cover lenses, clean spatter from the front lens, store the helmet away from impact and moisture, and inspect the shell before use. A cracked shell or damaged lens can compromise protection.
Note: Keep a spare fixed-shade helmet or hand shield in the shop. It gives you a backup if an auto-darkening battery dies, a cover lens cracks, or a guest needs basic protection while observing safely from outside the arc area.
How Safety Standards Affect Your Choice
Safety standards should be the first filter when you compare helmets. A welding helmet is not just a comfort item. It is eye and face protection for radiation, sparks, spatter, and impact hazards.
OSHA requires appropriate eye or face protection when workers are exposed to hazards such as flying particles, molten metal, and injurious light radiation. OSHA also says eye and face protective devices must comply with listed ANSI/ISEA standards or be shown to be at least as effective.
For a helmet buyer, that means you should look for clear safety marking, follow the manufacturer’s instructions, and avoid no-name helmets with unclear ratings. Check the helmet shell, lens, cover plates, and headgear before welding.
- Look for ANSI Z87.1, Z87+, or equivalent eye/face protection marking.
- Match the shade to your welding process and amperage.
- Use safety glasses when grinding or when the hood is raised around flying particles.
- Replace damaged cover lenses and cracked parts before welding.
The CDC/NIOSH eye safety guidance also stresses proper coverage, comfort, and peripheral vision. A helmet that meets a standard but fits poorly can still leave you frustrated or exposed.
How To Choose the Right Welding Helmet
Choose your welding helmet by starting with the work, then matching the helmet to it. Do not start with price alone.
If you weld often, switch processes, do TIG, or make many short welds, an auto-darkening helmet usually gives you better visibility and smoother starts. If you weld occasionally, work at one known shade, or need a low-cost backup, a fixed-shade helmet can be the smarter buy.
Products Worth Considering
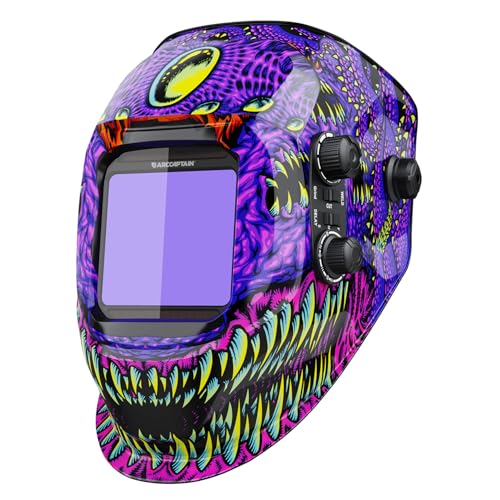
AUTO DARKENING FILTER - This welding helmet comes with high-end auto-darkening lens and 4 premium arc sensors which let you adapt to different working environments by adjusting the lens's shade and sensitivity while you are operating ARC/MIG/TIG Welding. DIN4 on light state, DIN5-9/9-13 on dark state.

AUTO DARKENING FILTER - This welding helmet comes with a high-end auto-darkening lens and four premium arc sensors, allowing you to easily adapt to various working environments by adjusting the lens shade and sensitivity while welding (ARC/MIG/TIG). The lens operates at DIN4 in the light state and DIN5-9/9-13 in the dark state.

Advanced Eye Protection with Blue Light Blocking Technology: This welding helmet features cutting-edge Blue Light Blocking outer lens, shielding your eyes from harmful blue light during welding, protects your eyes by filtering out most of harmful high energy blue light rays while letting through the less harmful portion of the blue light spectrum. This ensures long-lasting eye comfort and safety, making it ideal for extended welding sessions
Shade Type Options
Shade type is one of the most important helmet decisions because it affects visibility, comfort, and protection.
- Auto-darkening: Best when you need to see before the arc, change settings, tack often, or work in tight positions.
- Fixed shade: Best when you want a simple passive lens for repeatable work.
- Variable shade range: Useful if you weld MIG, TIG, stick, and plasma at different amperages.
- Passive shade swap: Useful if you prefer fixed helmets but need different lenses for different jobs.
Safety and Comfort
Safety and comfort should guide your choice just as much as lens type. A helmet that is too heavy, loose, reflective inside, or poorly balanced can make long welds harder.
Check the headgear adjustment, lens clarity, viewing area, and shell coverage. If you wear prescription glasses, make sure the helmet has enough room and still seals out stray light. If you grind, wear impact-rated safety glasses and use the right face protection for the task.
Match Helmet to Task
Use this simple checklist before buying:
- Process: MIG, TIG, stick, flux-core, plasma, or mixed work.
- Amperage: Match shade to the current range.
- Position: Flat bench work, overhead, pipe, automotive, or tight repair work.
- Visibility: Decide whether you need a large viewing area.
- Sensors: Pick more sensors for blocked or awkward arcs.
- Maintenance: Check cover lens cost and battery access.
- Standard marking: Confirm ANSI Z87.1, Z87+, or equivalent marking.
When you match these features to the task, the right helmet becomes clear. Auto-darkening is usually the best all-around choice for frequent welding, while fixed shade remains a dependable option for simple, repeatable work.
Auto-Darkening Helmet Setup Checklist
Before welding with an auto-darkening helmet, run a quick check. This takes less than a minute and can prevent visibility problems.
- Inspect the front cover lens for cracks, heavy spatter, and scratches.
- Clean the sensors so they can see the arc.
- Check the battery or low-battery indicator if your helmet uses replaceable batteries.
- Use the test button if your helmet has one.
- Set the shade for your process and amperage.
- Adjust sensitivity for the shop lighting and arc intensity.
- Set delay so the lens stays dark long enough after the arc stops.
- Confirm grind mode is off before welding.
If the lens flickers, reacts late, or does not darken consistently, stop and fix the issue before continuing.
Frequently Asked Questions
What is the difference between auto-darkening and fixed-shade welding helmets?
Auto-darkening helmets use sensors and an electronic filter that darkens when the arc starts. Fixed-shade helmets use a passive lens that stays at one darkness level. Auto-darkening helmets are more convenient for changing work, while fixed-shade helmets are simpler and usually cheaper.
Why do welders lose their eyesight?
Welders can damage their eyes when they weld or grind without proper protection. Welding hazards include intense visible light, ultraviolet radiation, infrared radiation, sparks, spatter, and flying particles. Proper shade selection, rated eye and face protection, and safe work habits reduce that risk.
Is shade 9 dark enough for welding?
Shade 9 can be appropriate for some limited operations, but it is not enough for many common welding setups. OSHA’s table lists shade 10 for gas metal arc welding and flux-cored arc welding at 60–500 amps. Use the OSHA table, your helmet manual, and your welder settings before choosing shade 9.
Is shade 3 dark enough to weld?
No. Shade 3 is not dark enough for arc welding. OSHA’s table lists shade 3 for torch brazing and light oxygen cutting, not for MIG, TIG, stick, or flux-core welding. For arc welding, use the proper welding shade for the process and amperage.
Are auto-darkening helmets safe?
Yes, a quality auto-darkening helmet can be safe when it is properly rated, set up, tested, and maintained. Look for ANSI Z87.1 or equivalent marking, keep the sensors clean, replace damaged cover lenses, and make sure grind mode is off before welding.
Do professional welders still use fixed-shade helmets?
Yes. Some professional welders still prefer fixed-shade helmets for simple, repeatable work because they are durable, predictable, and inexpensive to maintain. Many others prefer auto-darkening helmets for TIG, tack welding, production work, and jobs with frequent starts and stops.
Conclusion
Choosing between an auto-darkening and fixed-shade welding helmet comes down to your process, shade needs, visibility, comfort, and budget. Auto-darkening helmets are usually better for frequent welding, TIG starts, tack welds, and changing jobs. Fixed-shade helmets are still a strong choice for simple, repeatable work when you know the correct shade and want lower cost.
For the safest choice, do not rely on helmet style alone. Check the safety marking, match the shade to the process and amperage, inspect the lens, and follow the manufacturer’s instructions before you strike an arc.
Sources
- OSHA 1910.133 Eye and Face Protection — filter lens shade requirements and eye/face protection rules.
- eCFR 29 CFR 1910.133 — current federal regulation text, shade table, and ANSI/ISEA compliance language.
- OSHA Eye and Face Protection Overview — workplace eye injury prevention and PPE overview.
- CDC/NIOSH Eye Safety for Workers — eye injury hazards, welder burn risk, and fit/coverage guidance.




