
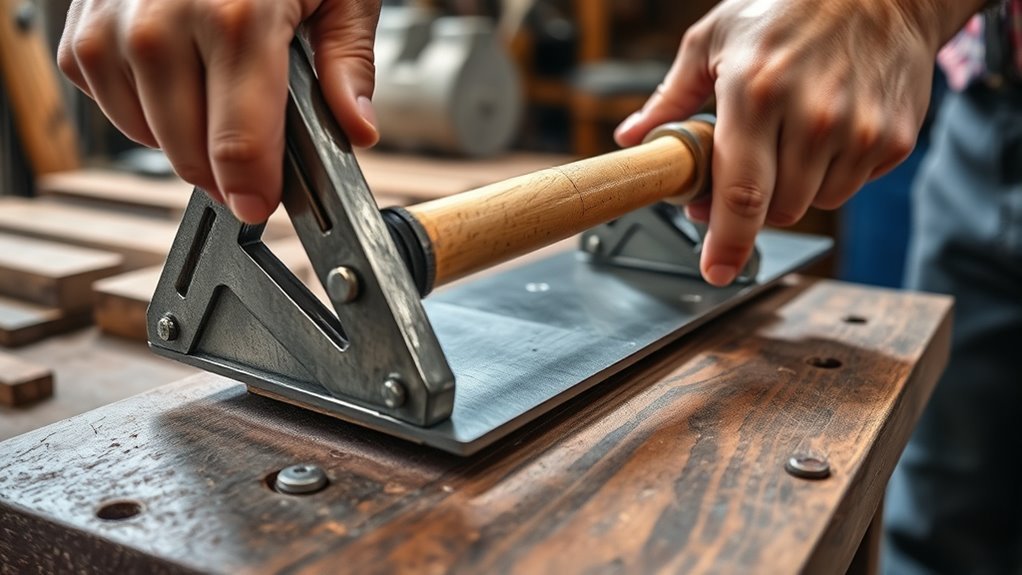
You can bend sheet metal without a brake press by creating a rigid forming edge and applying force in a slow, controlled way. The key is to mark the bend accurately, choose a bend radius the material can tolerate, clamp the sheet securely, and allow for springback before you finish and deburr the edge.
Quick Answer
To bend sheet metal without a brake press, mark—not groove—the bend line, clamp the sheet tightly between straight angle irons or blocks, and lift the free flange with slow, even pressure. Use a rounded forming edge when needed, allow for springback, protect the surface, and deburr the finished part.
Key Takeaways
- Mark the bend line clearly, but do not cut a deep score or groove into the sheet.
- Use angle iron, hardwood blocks, a vise, hand seamers, or a curved form based on the bend length and shape.
- Choose an inside bend radius that suits the metal, thickness, alloy, temper, and grain direction.
- Clamp the work to a rigid bench and add more clamps along long bends so the center cannot lift.
- Expect some springback and check the released angle before making a final adjustment.
- File or deburr sharp edges and inspect the bend for cracks, dents, and distortion.
At a Glance
| Time Required | About 20 to 45 minutes for one small, straightforward bend |
| Difficulty | Easy to moderate; precision and thicker material increase the difficulty |
| Tools Needed | Straight angle iron or hardwood blocks, clamps, measuring tools, marker, square, and file; a vise, hand seamers, or soft-faced mallet may help |
| Cost | Low if you already own clamps and straight forming bars |
Before You Begin
Estimated time: Plan on 20 to 45 minutes for a small bend. A long bend, thick sheet, finished surface, or close dimensional tolerance can take longer because the setup and test fitting matter more than the actual bending.
Work on a rigid bench with enough clear space to support the entire sheet. A light sawhorse may tip or flex when you lift a long flange, so secure the forming bars and support large workpieces before applying force.
Wear cut-resistant handling gloves and safety glasses with side protection. Sheet-metal edges can be extremely sharp, and hammering, filing, or grinding can release flying particles. OSHA requires suitable eye or face protection where flying particles create a hazard, as explained in its eye and face protection standard.
- Sheet metal
- Two straight pieces of angle iron or two flat hardwood forming blocks
- Strong C-clamps, bar clamps, or locking clamps
- Straight edge, ruler, tape measure, caliper, or combination square
- Fine-tip permanent marker or layout pen
- Hammer, preferably used through a hardwood block, or a soft-faced mallet
- Bending pliers or hand seamers for short flanges
- Masking tape, thin cardboard, or clean shims for protecting finished surfaces
- Metal file, deburring tool, or guarded grinder for finishing
- Protractor, angle finder, or square for checking the completed bend
Warning: Do not force a tight, nearly sharp bend into thick, hardened, brittle, or unknown sheet metal. The outside surface can crack while the free flange can spring suddenly if a clamp slips. Keep your face and body outside the sheet’s possible movement path.
Check the Metal and Bend Radius
Before choosing a bending method, identify the material as closely as you can. Mild steel, stainless steel, aluminum, copper, brass, and coated sheet do not bend the same way. Alloy, temper, thickness, bend length, grain direction, prior cold work, and surface coating can all change how much force the bend needs and whether the outside face will crack.
Avoid treating “aluminum” as one predictable material. Some aluminum alloys and tempers form readily, while others need a larger inside bend radius. Stainless steel generally requires more force and may show more springback than a similar piece of mild steel.
The inside bend radius is the radius on the inside of the finished corner. A bare, sharp angle-iron edge produces a very tight radius, which may be unsuitable for the metal. When the material needs a gentler bend, place a smooth round bar, radius strip, pipe, or rounded hardwood edge at the forming line. Manufacturer guidance on sheet-metal bend radii explains why radius must be matched to the material and design.
Note: If the bend is part of a structural, vehicle-safety, pressure-containing, lifting, aircraft, or other critical component, do not rely on an improvised bend without approved material data and design verification.
Tools for Bending Sheet Metal
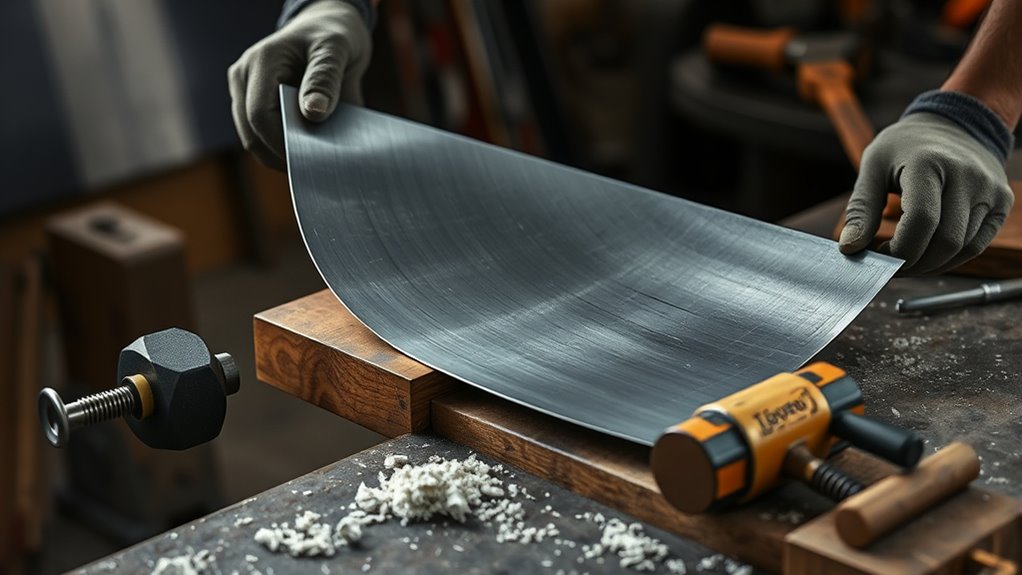
Simple tools can give you good control when you bend sheet metal without a brake press. The best setup depends on the length of the bend, the flange size, the sheet stiffness, and the finish you need to protect.
- Angle iron and clamps: Best for a long, straight bend when the bars are straight and firmly attached to a rigid bench.
- Bench vise: Useful for short brackets and narrow pieces that fit fully between the jaws.
- Hand seamers or bending pliers: Good for short flanges, small corrections, and sheet-metal edges.
- Hardwood blocks: Helpful when you need a wider contact area or want to reduce scratches and dents.
- Pipe or round bar: Better for a curved bend or a larger inside radius.
- Soft-faced mallet: Useful for working along a bend gradually without striking the metal directly with a hardened steel hammer.
The forming tool should control the bend without cutting into the sheet: straight bars produce straight folds, while a rounded former produces a safer, larger radius.
Angle iron works well because it creates a rigid guide. Clamp the metal between two straight pieces of angle iron, but inspect the corner first. Remove burrs and use a radius strip or rounded former if the bare corner would make the bend too tight.
Match your tools to the material thickness and bend length. Thin, narrow stock needs less force. A wide or long flange acts as a large lever but also places more load on the clamps and bench. Choose the simplest setup that provides alignment, pressure, support, and a suitable radius.
If you plan to weld the bent part later, consider the maximum fillet weld size so the joint size matches the thinner connected part rather than simply adding an oversized bead.
Products Worth Considering

High-Quality Construction: This 12-inch metal folding tool is constructed from cold-rolled carbon steel, ensuring high strength and durability for long-lasting use. The folding seams are formed by two 1.5mm cold-rolled steel plates that are stamped and welded together, providing excellent structural integrity and precision

Manual Hand Seamers Sheet Metal Tools: Use as a sheet metal duct bender for HVAC projects

Excellent Metal Bending Tool: This 6-inch straight jaw sheet metal bender is designed to bend, seam, flatten or straighten sheet metal. It can help you easily bend and flatten up to 30 gauge cold rolled sheet, 18 gauge galvanized sheet and 30 gauge sheet stainless steel sheet
Plan for Springback and Finished Size
Sheet metal does not always stay at the exact angle you reach while it is clamped. After the force is removed, elastic recovery may cause the bend to open slightly. This is called springback.
Make the first bend gradually, release the pressure, and measure the angle. If it opens, re-clamp the part and overbend it by a small amount. Do not guess at a large correction, because the required overbend changes with the material, radius, thickness, and bend angle.
Precision parts also need an allowance for the material that stretches through the bend. Bend allowance and K-factor are used to calculate the flat blank needed for a finished flange dimension. Current Autodesk sheet-metal guidance notes that K-factor depends on the material, thickness, and bend angle.
For a one-off home project, the most reliable method is often a test strip:
- Cut a small piece from the same sheet with the same grain direction.
- Mark a bend using the same tools and radius planned for the final part.
- Bend it, release it, and measure the angle and flange dimensions.
- Adjust the final layout or overbend based on the measured result.
Pro Tip: When appearance or fit matters, make the test bend on scrap from the actual sheet. Material labels alone cannot account for your exact forming edge, clamp setup, grain direction, and leverage.
Mark the Bend Line First
Before bending, mark the bend line accurately so the metal folds in the intended location. Use a straight edge or ruler to draw the line, then check the measurement from both ends before clamping the sheet. Use a caliper or tape measure when the flange dimension needs tighter control.
Place the mark on the less-visible face when the finished face needs to stay clean. Masking tape can make a dark line easier to see and can also reduce light surface scratches from the clamping bars.
Do not use a screwdriver, cutoff wheel, or other tool to cut a groove along the bend. A deep score removes material and creates a stress concentration. A very light scribe mark may be used strictly as a layout mark on suitable unfinished material, but it should not reduce the sheet thickness.
A clear bend line helps you hold alignment and reduce errors. Practice on scrap metal first so you can test the layout, pressure, radius, and joint preparation before making the final bend.
Mark once, check twice, and let the metal follow the layout instead of trying to correct a misplaced line after the bend has started.
Clamp the Angle Iron in Place
Set the lower piece of angle iron or the lower forming block on a rigid bench to create a stable base. Clamp or bolt it to the bench so it cannot rotate when force is applied.
Place the sheet on the lower guide and align the marked bend line with the forming edge. Set the second piece of angle iron or a straight pressure bar on top. Use clean cardboard, masking tape, plastic film, or thin protective shims between the tool and sheet when the face is painted, polished, or coated.
- Verify that the lower forming bar is straight, square, and firmly secured.
- Align the entire marked line with the forming edge.
- Clamp both ends, then add more clamps along a long bend so the center cannot lift.
- Tighten the clamps evenly until the sheet is rigid and cannot slide.
- Support the free portion of a large sheet so its weight does not twist the bend.
Look along the clamped edge before bending. The top bar should press the sheet evenly, with no visible gaps, rocking, or clamp interference. Make sure the clamps will not block the free flange as it rotates upward.
If the sheet is galvanized, avoid damaging or heating the coating during the bending operation. If the part will later be welded, review how to prepare galvanized steel for welding. Zinc-containing dust and welding fumes require appropriate controls; the NIOSH zinc-oxide guidance lists metal fume fever and respiratory symptoms among the hazards of zinc-oxide exposure.
Bend Sheet Metal Along the Marked Line
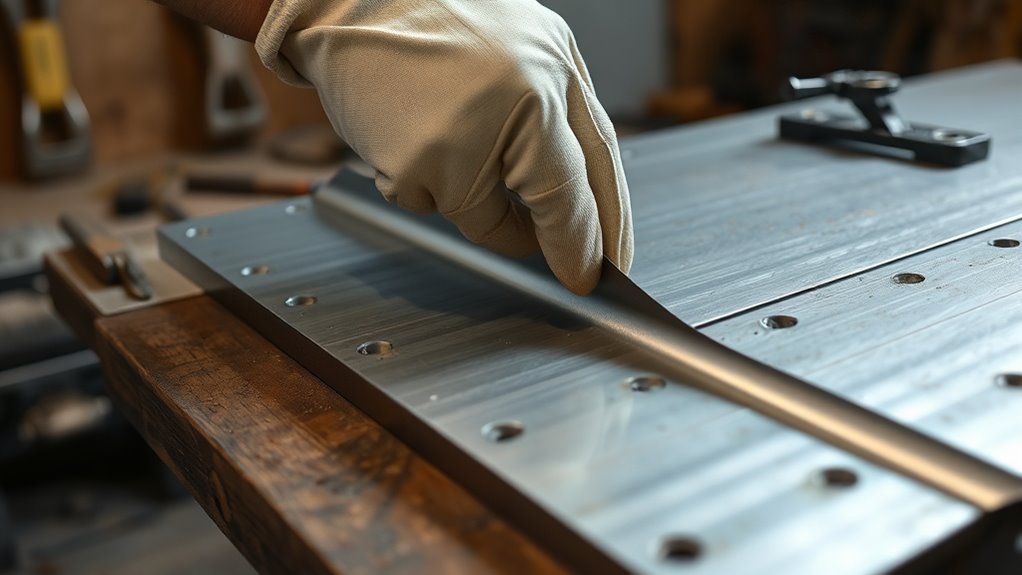
Stand in a stable position and keep your face away from the free edge. Start the bend with slow, controlled pressure near one end, then move along the bend so the angle develops evenly.
- Start the flange: Lift the free edge by hand while keeping the sheet trapped firmly between the forming bars.
- Work along the line: Move from one end to the other instead of forcing one spot to the full angle immediately.
- Use a block when needed: Press or tap through a flat hardwood block so the force spreads over a wider area.
- Check for movement: Stop if a clamp shifts, the center lifts, or the bend starts running away from the marked line.
- Approach the target gradually: Check the angle with a square, protractor, or angle finder.
- Release and recheck: Loosen the force, measure springback, and make a small correction if needed.
Use the longer edge of the sheet as leverage, but do not jerk it. Sudden force can twist the blank, pull it from the clamps, or create a sharp local kink before the rest of the bend has formed.
For a stubborn section, use a soft-faced mallet or tap a hardwood block placed against the flange. Avoid direct blows with a steel hammer on thin or finished sheet because the hammer face can stretch, dent, or mark the metal.
Watch both ends as the angle forms. If one end bends faster, reduce pressure there and work the straighter section until the angles match.
If the project also includes powered cutting or welding, review each machine’s actual output and duty-cycle rating before a long work session. Equipment described as having a 100% duty cycle must still be operated at the stated current, temperature, and manufacturer test conditions.
Protect Holes, Corners, and Finished Surfaces
Holes, slots, notches, and corners close to a bend can stretch or become distorted as the metal forms. If a critical hole must remain round or accurately located, make a scrap test or place the feature farther from the bend when the design allows.
A bend that ends in the middle of an edge may also pull or tear the adjacent material. A correctly sized bend relief can give the metal room to move without distorting the nearby flange. Protolabs explains this effect in its guidance on common sheet-metal forming issues.
For painted, anodized, polished, or prefinished sheet:
- Clean dirt and metal chips from the forming bars before clamping.
- Cover sharp tool contact points with clean tape, plastic film, or sacrificial cardstock.
- Avoid dragging the sheet through tightened clamps.
- Use a smooth hardwood block or soft-faced mallet instead of direct steel-hammer blows.
- Test the finish on scrap because some coatings can craze or split at a tight radius.
Common Mistakes to Avoid
- Bending too fast: Sudden force can twist the sheet, leave dents, or create an uneven crease.
- Using a deep score: A groove weakens the bend and can start a crack.
- Clamping only the ends of a long bend: The center can lift, producing a bowed or wavy line.
- Using a radius that is too tight: The outside face can crack, thin, or split.
- Ignoring springback: A bend that looks correct under load may open after release.
- Striking the sheet directly: Concentrated hammer blows can stretch and dent the surface.
- Forgetting surface protection: Chips trapped beneath angle iron can leave deep scratches.
- Placing holes too close to the bend: The forming zone may pull them out of round.
- Correcting the angle in one hard movement: Small re-clamped adjustments are easier to control.
Pro Tip: Draw a short witness mark across the bend line at each end. If either mark moves away from the forming edge while you tighten the clamps, realign the sheet before bending.
Troubleshooting a Hand-Bent Part
The bend is bowed in the middle
The center probably lacked clamping pressure or the forming bars flexed. Re-clamp the part with a straighter, stiffer bar and add clamps along the bend. Work the bend gradually across its full length.
The angle opens after release
This is springback. Re-clamp the part and overbend it slightly, then release and measure again. Use small corrections rather than one large movement.
One end has a sharper angle
Pressure was not applied evenly, or one clamp allowed the sheet to move. Re-clamp the bend line and work only the shallower section until both ends match.
The outside of the bend is cracking
Stop bending. The radius may be too tight, the material may be hard or work-hardened, or the bend may be running in an unfavorable direction. Do not hammer the crack closed. Use a larger forming radius or replace the part with material better suited to the bend.
The sheet has hammer dents
Use a wider hardwood striking block or a soft-faced mallet. Light dents may sometimes be planished, but repeated hammering can stretch the sheet and create additional waves.
The finished flange is the wrong length
The layout did not account for the material used in the bend. Make a test coupon and measure the resulting bend deduction or use a verified bend-allowance value before cutting another blank.
Remove Clamps and Finish the Edge
Once the bend is set, support the free flange and carefully remove the clamps. Lift off the top angle iron without dragging it across a finished surface.
Inspect the formed line under good light. Check the outside face for fine cracks, edge splitting, thinning, or flaking coating. Check the inside face for gouges caused by a sharp or damaged forming edge.
If the material tolerates the chosen radius and the angle needs a small adjustment, re-clamp it and press the flange again. You may tap a hardwood block or use a soft-faced mallet to tighten the bend, but do not crush the corner into a sharper radius than the material can accept.
Before later welding work, clean the joint area using a method suitable for the base metal and coating so you can improve fusion and reduce porosity.
Then inspect both faces for sharp edges, burrs, and small waves. Use a metal file or deburring tool to smooth rough spots. If a grinder is needed, secure the part, keep the guard installed, wear suitable eye and face protection, and follow the grinder manufacturer’s instructions.
- Support the flange and remove the clamps and angle iron.
- Measure the released angle and inspect both faces.
- Re-clamp the bend for any small angle correction.
- File or deburr exposed edges.
- Clean the part and confirm the final dimensions and fit.
When to Use a Brake or Fabrication Shop
An improvised angle-iron setup is useful for small brackets, covers, flashing, trays, and one-off repairs. It is not the right tool for every part.
Use a sheet-metal brake, slip roller, hydraulic press, or professional fabrication shop when:
- The sheet is too stiff to bend without the clamps or bench moving.
- The bend is long enough that the forming bars flex.
- You need repeated parts with matching dimensions.
- The angle or flange length has a tight tolerance.
- The material requires a controlled or unusually large bend radius.
- The part has several bends that interfere with one another.
- The sheet is hardened, spring-tempered, or prone to cracking.
- The part is structural or safety-critical.
- You need a smooth cylindrical curve rather than a straight fold.
If the setup feels unstable or requires uncontrolled hammering, stop. A larger machine or properly made forming die is safer than adding more force to a weak fixture.
Products Worth Considering

Multiple Sizes for Every Project: Choose from 12", 18", or 24" lengths to match your specific needs, whether you’re working on HVAC ductwork, roofing panels, or custom sheet metal fabrication with your sheet metal bender

30-Inch Straight Bending: This sheet metal brake handles up to 30 in wide metal sheets for easy, straight-line bends—no complicated steps required. A solid choice for personal workshops and small-scale fabrication.

Heavy-Duty Steel Construction Built from high-strength welded steel for superior rigidity and durability. The entire frame is precision-machined and coated with anti-rust paint to ensure long-lasting performance.
Frequently Asked Questions
Can metals be bent without breaking?
Yes. Many metals can be bent without breaking when the material condition, thickness, grain direction, and inside bend radius are suitable. Ductile material tolerates more forming than hardened or brittle material. Test an unknown sheet on scrap and stop if the outside face begins to crack.
How do you curve sheet metal by hand at home?
Clamp the sheet against a smooth pipe, round bar, curved hardwood form, or other rigid former. Apply gradual pressure from one end to the other and make several light passes. A larger former creates a gentler radius and reduces the risk of a kink.
How do you curve sheet metal without a roller?
Secure a pipe or curved form to a solid bench, hold one edge of the sheet against it, and wrap the sheet around the form in small increments. Move the contact point after each pass so the curve develops evenly rather than forming one sharp bend.
Which manual tool is used to bend metal sheets?
Common manual tools include hand seamers, bending pliers, a bench vise, angle iron and clamps, hardwood forming blocks, and soft-faced mallets. Choose the tool according to the bend length, flange size, sheet stiffness, required radius, and surface finish.
What thickness of sheet metal can you bend by hand?
There is no universal maximum thickness. Hand-bending ability depends on the material, temper, width, bend length, radius, and available leverage. Thin flashing and light-gauge sheet are common hand-bending candidates. If the clamps move, the forming bars flex, or you must use uncontrolled force, use a brake or fabrication shop.
Can you make a 90-degree sheet-metal bend without a brake?
Yes. Clamp the marked bend line between rigid forming bars, lift the flange evenly, and check the angle with a square. Because the metal may spring back, you may need a small controlled overbend followed by another measurement.
Should you heat sheet metal before bending it?
Usually not for ordinary thin-sheet projects. Heating can damage coatings, change material properties, increase fire risk, and create hazardous fumes from galvanized, painted, or plated surfaces. If a bend cannot be made cold with a safe radius and stable tooling, use appropriate forming equipment or consult a qualified fabricator.
Conclusion
You do not need a brake press to make a clean sheet-metal bend, but you do need an accurate layout, a rigid forming edge, a suitable bend radius, and steady pressure. Mark the line instead of cutting a groove, secure the bars to a solid bench, and form the flange gradually across the full bend length.
Release the part and check for springback before making a small correction. Then inspect the outside face for cracks, confirm the angle and flange dimensions, and smooth every exposed burr. When the material, bend length, tolerance, or safety demands exceed the improvised setup, move the job to a brake or professional fabrication shop.
Sources
- OSHA 29 CFR 1910.133: Eye and Face Protection — supports eye-protection guidance for flying particles and mechanical hazards.
- Protolabs: The Basics of Bend Radii in Sheet Metal — supports bend-radius and dimensional-planning guidance.
- Protolabs: Avoiding Common Sheet Metal Forming Issues — supports bend-relief and nearby-feature distortion guidance.
- Autodesk: How to Calculate K-Factor for Inventor Sheet Metal — supports bend allowance, K-factor, and test-bend guidance.
- NIOSH Pocket Guide: Zinc Oxide — supports galvanized-metal fume and respiratory-hazard guidance.




