Document the damage before you touch it: take timestamped photos from multiple angles, list affected parts, and note conditions like weather or vibration. Then record the weld location, equipment model and serial number, material type, thickness, WPS, MDR, and repair plan. During repair, capture wide and close-up photos, video, and NDE results. Have the Authorized Inspector sign off, and keep the signed report, repair packet, and any R-1 form for your claim and future reference.
Document the Damage Before You Touch It
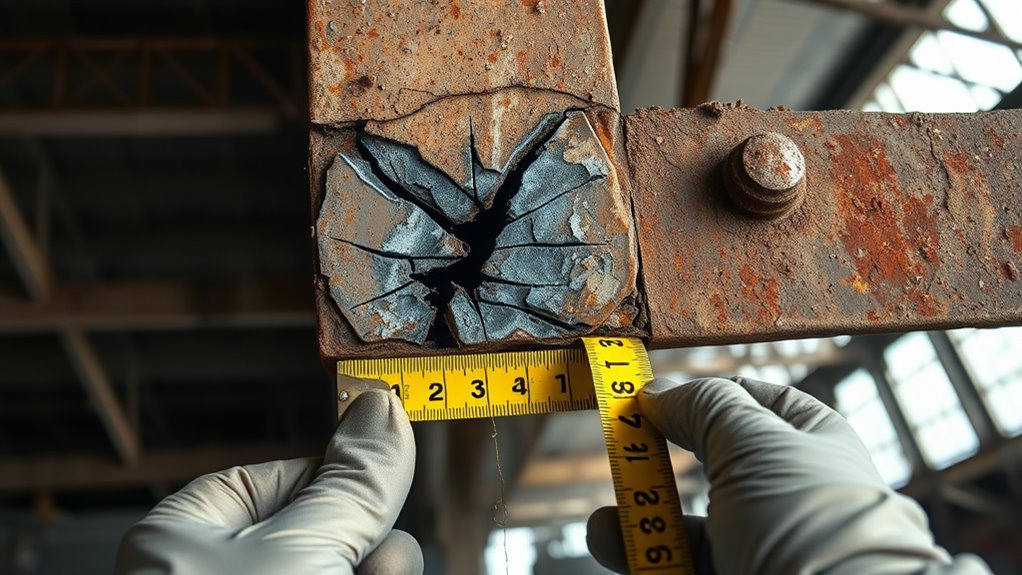
Before you touch the damaged weld, document everything thoroughly so you have a clear record of the condition. Take clear, timestamped photos from multiple angles, and don’t rely on one view. Capture the full damage and close details, so the evidence stands on its own.
Build a written inventory of every affected component, noting material type, dimensions, and exact damage location. Record visible defects like cracks, breaks, or failures, and place them in context within the structure.
Keep a log of what you observe, including weather, heat, moisture, vibration, or other conditions that may have contributed to the problem. If you can, avoid permanent repairs until the insurance adjuster reviews the site.
You can still make temporary stabilizing fixes to prevent further deterioration, but document each action before and after you do it. Your careful record protects your claim and helps you speak from fact, not guesswork, when you pursue repair and accountability. Additionally, consider assessing the rust level of the metal to determine the best approach for repairs.
Record the Weld Location and Equipment Details
Pinpoint the weld repair location by recording exact coordinates and tying it to nearby structural features, so anyone can find and verify it later. You should note the bay, elevation, grid line, pipe rack, or vessel nozzle, then add the asset tag and room for the weld repair to keep the trail clear.
Record the equipment’s make, model, and serial number so the insurance company can identify the unit without guessing. Add the material type and thickness from the MDR, since those details support compliance and help prevent disputes.
Take photos of the equipment and the affected area before and after the work, and label them with date and time. Keep a tight log of who handled the job, when they worked, and what they did. This record gives you proof, protects your claim, and keeps the process transparent. Additionally, ensure that any zinc residues have been completely removed to maintain weld integrity.
Collect the WPS, MDR, and Repair Plan
Next, collect the Welding Procedure Specification (WPS), the Manufacturer’s Data Report (MDR), and a written Repair Plan so you can document the repair against the correct standards.
The Welding Procedure Specification tells you the approved process, filler, and heat controls. The MDR shows the original material type, thickness, and construction data. Your Repair Plan should define the defect, the repair method, and the materials you’ll use.
- Match the WPS to the joint and base metal.
- Verify the MDR against the part’s actual thickness and alloy.
- Write the Repair Plan with clear steps and responsibilities.
- Keep every document together for the claim file.
If you include planned NDT in the Repair Plan, you strengthen proof of quality without surrendering control to guesswork. Additionally, ensure the correct amperage is specified in your Repair Plan to maintain weld integrity.
Keep clean copies, note revisions, and store them where you can reach them fast. When the insurer reviews your file, this record helps show you followed recognized standards and handled the repair with care.
Products Worth Considering

Includes standard welding symbols confirm to AWS A2.4 specifications Makes clear, accurate symbols quickly and neatly Template size 6 x 3-1/2 inches Translucent green template
Capture Photos, Video, and NDE Results
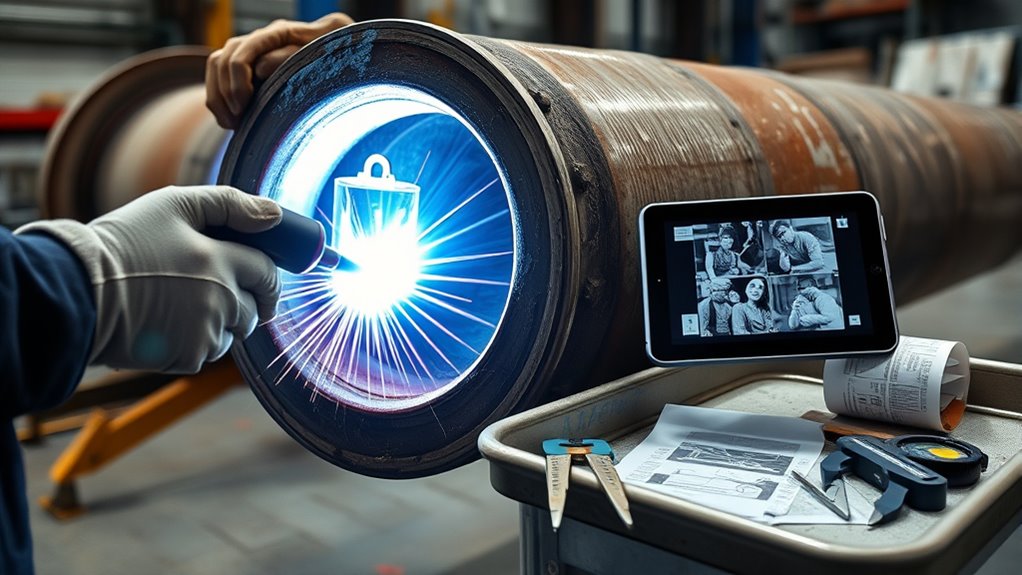
With the WPS, MDR, and Repair Plan in hand, start documenting the repair itself with photos, video, and NDE results.
Take wide shots first, then close-ups from every angle so the photos show the full defect, prep, weld passes, and finished condition.
Start with wide shots, then close-ups from every angle to capture the defect, prep, weld passes, and final condition.
Add time stamps and location tags to every file so you can prove when and where the repair happened.
Record video across the full sequence: surface prep, fit-up, welding, cleanup, and final inspection.
Keep the camera steady and capture clear audio if possible.
Save all NDE results, including Liquid Dye Penetrant or Ultrasonic Testing, with the technician’s findings and the method used.
Match each test report to the exact repair location.
Store photos, video, and test records with the WPS/PQR, MDR, and other certifications.
This creates a clean audit trail, strengthens your insurance claim, and gives you hard evidence that the repair met the required standard. Additionally, ensure that all documentation includes proper PPE usage to highlight safety compliance during the repair process.
Have the Authorized Inspector Sign Off
Have the Authorized Inspector review and sign off on the repair once the work and NDT are complete. You need this step for insurance and code compliance, because the authorized inspector confirms the weld repair meets required standards.
Verify that the inspector holds a National Board Commission and works for an ASME/National Board Accredited Inspection Agency. Confirm the proper IS or AI Commission with R endorsement before you accept the sign-off.
- Review credentials.
- Record inspection findings.
- Note any code objections.
- Obtain a signed report.
Keep the report detailed: include the repair method, inspection process, and NDT results. Incorporating advanced safety features, such as thermal overload protection, enhances the reliability of your repair process.
If the inspector rejects a repair, document the issue clearly in the official record. Store the signed documentation at your facility so you can prove the repair path later, support insurance claims, and stay ready for future audits.
File the R-1 Form and Repair Packet
You’ll complete the R-1 form and submit it to the National Board to formally document the weld repair.
Include a full repair packet with the Quality Control Weld Traveler, NDT reports, the Authorized Inspector’s sign-off, and clear details on the repair method, material type, and thickness. It’s crucial to ensure that the metal is cleaned thoroughly to prevent issues in the repair process.
Keep a copy of the R-1 form and supporting documents on file for future reference, audits, and insurance claims.
R-1 Filing Steps
Fill out the R-1 form accurately with the details of the weld repair, including the repair location, methods used, and materials involved. Then attach a complete repair packet with weld maps, NDE reports, and any relevant WPS/PQR information.
Include temporary repairs clearly so the insurer can see what you did and why.
Then follow these steps:
- Review the R-1 form for accuracy.
- Get the Authorized Inspector’s sign-off.
- Submit the form and packet quickly.
- Keep copies for audits and future claims.
You’ll protect your claim, reduce disputes, and stay compliant with codes.
Clear filing gives you control and keeps your documentation ready if questions arise later.
Repair Packet Contents
Once the R-1 form is signed and ready, assemble the repair packet with every record that supports the weld repair.
Include the signed R-1 Form, which documents the repair and goes to the National Board for record-keeping.
Add the Quality Control Weld Traveler so you can show the location, owner, and serial numbers of the welded components.
Attach all pre- and post-repair NDT reports to verify weld integrity.
List the repair methods you used and any materials you replaced, and match them to the approved WPS.
These repair packet contents help you prove compliance after property damage.
Keep a complete copy for your files so you can answer questions, defend your work, and document that the repair met code and safety requirements.
Frequently Asked Questions
What Is Welding Documentation?
Welding documentation records your weld’s materials, procedures, inspections, and results. You use it to show compliance with welding standards, justify repair techniques, and trace each weld through photographs, identifiers, WPS, PQR, and NDT.
What Are the Two Major Types of Weld Repair?
You’ve got two major weld repair types: structural and non-structural. Structural work tests your theory with strict Inspection criteria; non-structural fixes cosmetic damage. Your Weld repair techniques should match the damage and safety needs.
What Document Qualifies the Welding Procedure Specification?
A Procedure Qualification Record, or PQR, qualifies your Welding Procedure Specification by proving it meets welding standards through procedure qualifications. You’ll use it to show tested parameters, mechanical properties, and compliance for insurance review.
What NEC Article Covers Welders?
NEC Article 250 covers grounding and bonding, which you’ll use for welding safety. You still need welder certification and OSHA compliance, and your equipment should be NRTL-listed. Local code amendments can add more requirements.
Conclusion
When you finish a weld repair, your documentation can make or break the insurance claim. Nearly 1 in 4 property damage claims face delays because records are incomplete, so keep every photo, WPS, NDE report, and sign-off together. You’ve already seen how the repair packet proves what happened, where it happened, and who approved it. If you file the R-1 form promptly, you’ll give the insurer a clear, defensible trail and reduce the chance of dispute.


