Not every hole in metal needs a welded repair. For non-structural sheet metal, enclosures, gates, toolboxes, and cosmetic automotive panels, you can often use a metal-filled epoxy, an adhesive-backed patch, a riveted patch, solder, brazing, or a reinforced filler system. The right choice depends on the metal, hole size, access to the back, heat exposure, vibration, and the load the part carries.
The first decision is not which product to buy. It is whether a no-weld repair is appropriate at all. Do not use a cosmetic filler or general-purpose adhesive on a frame rail, suspension part, seat-belt anchor, trailer tongue, pressure vessel, fuel tank, or another safety-critical component. For vehicle panels, follow the manufacturer’s repair procedure before replacing a welded joint with adhesive or fasteners.
Once you confirm the area is non-structural, the repair becomes much more predictable: remove every trace of loose rust, expose solid metal, choose a patch that matches the service conditions, follow the product’s exact mix and cure instructions, then seal and coat both sides so corrosion does not restart.
Quick Answer
To fill a hole in metal without welding, remove rust to solid metal, roughen and clean the area, then use metal epoxy for a small non-structural hole or bond and rivet a sheet-metal patch over a larger opening. Finish with filler only for smoothing, then prime, seal, and paint both sides.
Key Takeaways
- Use no-weld methods only on non-structural parts unless an engineered or OEM procedure specifically allows them.
- Remove rust, paint, scale, oil, and weak metal before applying any adhesive, solder, patch, or filler.
- Use a backing patch for an open hole. Ordinary body filler is mainly a shaping material, not a structural bridge.
- Follow the exact product ratio, working time, clamp time, cure temperature, and surface-preparation instructions.
- Protect the front, edges, seams, and back of the repair from water and road salt.
At a Glance
| Time Required | About 30 to 90 minutes of active work, plus the product’s cure time |
| Difficulty | Beginner for epoxy putty; intermediate for bonded, riveted, soldered, or brazed patches |
| Tools Needed | Eye protection, gloves, abrasives, cleaner, patch metal or mesh, applicator or rivet gun, clamps, and finishing supplies |
| Cost | Low to moderate; cartridge adhesives and their applicators cost more than putty or basic fasteners |
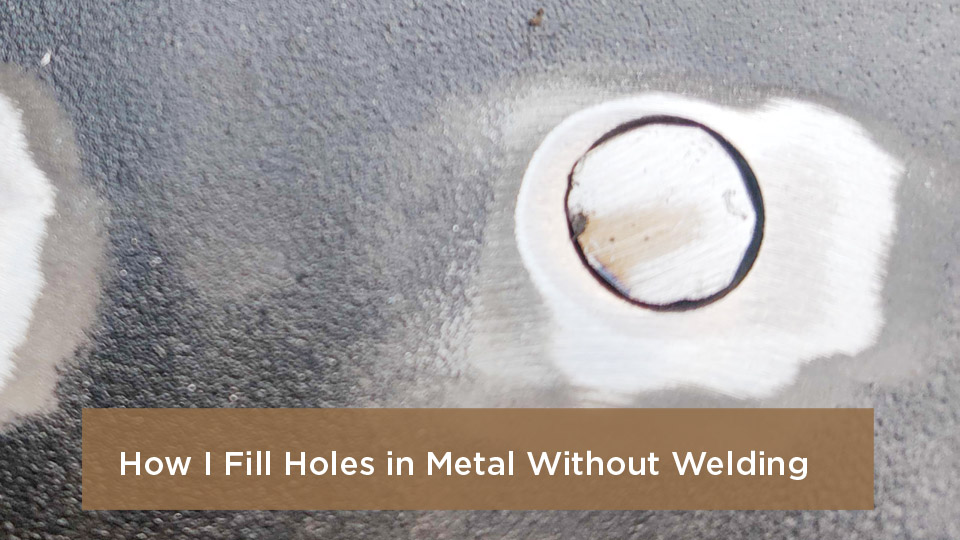
Image source credited by the original publisher as Reddit.
What Causes Holes in Metal and Why Avoid Welding Sometimes
Holes usually come from rust, drilling mistakes, impact damage, abrasion, or repeated flexing. Rust holes are the hardest to repair because the visible opening is often smaller than the weakened area around it. A screwdriver or pick may break through metal that still looks intact, so you must keep cleaning until you reach firm material.
Welding is still the normal choice for many structural and high-load repairs, but it is not always practical for thin cosmetic sheet. Welding heat can distort a panel, damage paint and coatings on the back, or create hazardous fumes from galvanized coatings, old paint, plating, and contamination. A no-weld patch also helps when power, shielding gas, or safe hot-work conditions are unavailable.
That does not make every cold repair equal to a weld. The repair must match the job. Adhesives distribute load over a broad overlap, rivets provide a mechanical clamp, solder seals small compatible joints, and body filler smooths the final surface. None of these facts makes a general-purpose filler suitable for a frame or another safety-critical part.
Choose the Right No-Weld Repair Method
Warning: Stop if the damaged metal carries suspension, steering, braking, towing, occupant-restraint, rollover, pressure, or fuel-system loads. Use the vehicle or equipment maker’s repair procedure or have a qualified fabricator inspect it. If you are unsure whether a part is structural, treat it as structural.
| Method | Best Use | Main Limitation |
|---|---|---|
| Metal-filled epoxy putty | Small holes, pits, and worn areas in non-structural metal | Not a substitute for solid metal in a high-load or hot area |
| Bonded sheet-metal patch | Larger openings in thin panels when you can overlap sound metal | Needs correct adhesive, clamping, cure temperature, and surface preparation |
| Riveted or bolted patch | Gates, covers, enclosures, truck-bed skins, and other inspectable non-structural work | Fastener holes can become corrosion points unless sealed |
| Soft solder | Pinholes and small seams in compatible thin steel, copper, or brass | Lower strength and heat resistance; flux residue must be removed |
| Brazing | Close-fitting metal patches and joints needing more strength than soft solder | Uses much more heat and still creates hot-work and fume hazards |
| Reinforced filler or UV patch | Cosmetic holes and quick non-structural repairs within the product’s rating | Performance varies widely; not for structural, pressure, or high-heat service |
| Body filler or glazing putty | Final shaping over sound metal or a completed patch | Should not be used as the only support across a large open hole |
Note: Hole diameter alone does not decide the method. A small hole beside a hinge, latch, mount, or bend may see more stress than a much larger hole in the middle of a flat cover.
Inspect and Prepare the Metal Before Filling the Hole
Preparation controls whether the repair lasts. An adhesive cannot bond reliably to flaky rust, chalky paint, oil, silicone residue, or weak metal. Solder and brazing filler also need clean, compatible surfaces that wet properly.
- Identify the metal and coating. Check whether the part is carbon steel, stainless steel, aluminum, galvanized steel, copper, brass, or a plated alloy. Choose a filler, patch, flux, and coating that the manufacturer approves for that substrate.
- Check the load and service conditions. Consider vibration, flexing, water, salt, sunlight, chemicals, and operating temperature. Do not place ordinary epoxy or body filler close to an exhaust, burner, brake friction surface, or another hot zone.
- Remove loose material. Grind, sand, wire-brush, or cut away rust and thin edges until the remaining metal is firm. Feather paint back far enough to expose a clean bonding area.
- Degrease safely. Use the cleaner specified by the adhesive, filler, or coating maker. Let it evaporate fully before sanding, bonding, soldering, or heating. Keep flammable cleaners away from ignition sources.
- Roughen the bonding area. Many panel adhesives call for coarse abrasion on bare metal. For example, 3M instructs users to remove rust, primer, and paint from the bond area and prepare the surface as directed in its technical data sheet.
- Dry-fit the patch. Make sure it lies flat, overlaps sound metal, and leaves room for clamps or fasteners. Round sharp patch corners to reduce snagging and stress concentration.
- Plan corrosion protection. Avoid direct contact between dissimilar metals when possible. Seal the seam and protect the hidden side after the repair.
Pro Tip: Shine a work light across the surface after rust removal. Low-angle light makes remaining pits, thin edges, and missed scale easier to see before you commit to the patch.
Epoxy Fillers for Small, Non-Structural Holes
Metal-filled epoxy putty is one of the simplest cold-repair options. It is useful for a small hole in a toolbox, enclosure, appliance cover, gate skin, or another non-structural part. It can seal water out and can be sanded or drilled after cure when the product allows it.
Products Worth Considering
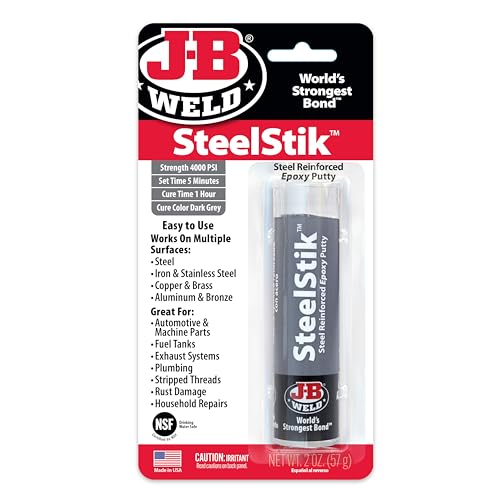
J-B Weld Steelstik: A Hand Mixable Two Part Epoxy Putty Stick That Is Steel Reinforced & Non-Rusting To Quickly Repair Or Rebuild Anything Made Of Metal! J-B Weld Steelstik Is Certified By The Nsf And Is Safe For Contact With Potable Water

J-B Weld Steelstik: A Hand Mixable Two Part Epoxy Putty Stick That Is Steel Reinforced & Non-Rusting To Quickly Repair Or Rebuild Anything Made Of Metal! J-B Weld Steelstik Is Certified By The NSF And Safe For Contact With Potable Water.

MULTI-PURPOSE REPAIR SOLUTION - This hand-mixable two-part epoxy putty is perfect for a variety of repair tasks, both underwater and above. Ideal for fixing leaks, filling holes, cracks and uneven surfaces, bonding different materials, sculpting, and modeling, offering a robust alternative to traditional welding methods.
How Epoxy Fillers Work and When to Use One
Two-part epoxies cure through a chemical reaction between resin and hardener. Metal powder may improve machinability, appearance, or heat transfer, but it does not turn the cured material into welded steel. Product strength numbers also use different tests. A putty’s published “strength” cannot be compared directly with a panel adhesive’s lap-shear result or with the strength of the base metal.
For example, J-B Weld SteelStik lists a five-minute set time, a one-hour cure time, and a 4,000 PSI product strength rating. Those values apply to that product under its test conditions. They do not establish that it is safe for a frame, engine mount, suspension bracket, or pressure-containing repair.
Step-by-Step Guide to Filling a Hole with Epoxy
- Remove paint, rust, oil, and weak metal from the front and back of the hole.
- Roughen the clean metal with the grit recommended by the product maker, then remove sanding dust.
- For an open hole, fit a clean metal backing disc, perforated patch, or approved reinforcement behind the opening. A thin patch spreads the load better than a deep plug of putty alone.
- Mix or knead only the amount you can place within the product’s working time. Do not assume every epoxy uses equal parts.
- Press the material firmly into the surface profile and around the patch edge. Slightly overfill the front so you can sand it level.
- Hold the backing in place without squeezing out the entire bond line. Follow the stated clamp and cure times at the stated temperature.
- Sand only after full cure, then prime and coat the repair. Seal the back and edges as well as the visible face.
Epoxy Repair Pros, Cons, and Common Failures
| Aspect | Advantage | Limitation |
|---|---|---|
| Heat input | No welding arc or torch is required | Service heat can soften or degrade some products |
| Application | Easy to shape on small repairs | Mix ratio, temperature, and working time are product-specific |
| Water sealing | Can form a continuous seal on properly prepared metal | Pinholes or exposed edges can let moisture behind the patch |
| Finishing | Many products can be sanded, drilled, and painted | UV exposure and incompatible coatings may affect durability |
If the epoxy stays soft, the likely causes are poor mixing, an incorrect ratio, low temperature, or expired material. If it peels away cleanly, surface contamination or inadequate abrasion is more likely. If it cracks with the metal, the area is probably flexing more than the repair system can tolerate.
Soldering Holes Shut in Thin Sheet Metal
Soft solder melts below brazing temperature and does not melt the base metal. It can close a pinhole or bond a small backing patch to clean copper, brass, or compatible sheet steel while using less heat than brazing or welding. Less heat means a lower risk of distortion, not zero risk.
Soldering Basics for Metal Repairs
Successful soldering depends on wetting. The base metal must be clean, the flux must match the metal, and the joint must reach the solder’s working temperature. A 60/40 tin-lead alloy has a published melting range of 361°F to 376°F (183°C to 191°C), but lead is toxic. Use a suitable lead-free solder where practical and follow the solder and flux safety data sheets.
For steel, nickel, and stainless steel, a more active acid flux may be needed. The Harris Stay-Clean technical sheet says the flux works on those metals, is not suitable for aluminum or magnesium, and leaves corrosive residue that must be removed after soldering.
Hands-On Steps for Soldering a Small Hole
- Confirm the part is safe for hot work and contains no fuel, solvent, pressure, combustible liner, or hidden flammable material.
- Remove paint, plating contamination, oxide, and rust around the hole. Tin a test coupon first if you are unsure the solder will wet the metal.
- Fit a small, compatible backing patch when the opening is too large for solder to bridge reliably.
- Apply only the amount of flux needed. Wear eye protection and chemical-resistant gloves appropriate for the flux.
- Heat the joint evenly. Let the hot base metal melt the solder rather than melting a blob directly in the flame.
- Feed enough solder to wet the joint and form a small fillet. Stop before the surrounding sheet overheats or buckles.
- Let the repair cool naturally. Remove flux residue exactly as the flux maker directs, then dry, sand, prime, and paint.
Soldering Tips and Limitations
A temperature-controlled iron or a large soldering copper gives better control than an oversized open flame on delicate sheet. The tool must still deliver enough heat to bring the joint to temperature quickly. Long, weak heating can spread more heat into the panel than a controlled, properly sized tool.
| Soldering vs. Epoxy | Soldering | Epoxy |
|---|---|---|
| Heat involved | Low compared with brazing or welding | No external heat is normally required |
| Bond type | Metallurgical wetting of compatible surfaces | Chemical and mechanical adhesion |
| Best use | Pinholes, seams, and small patches in compatible thin metal | Small non-structural fills and bonded backing patches |
| Main risk | Heat distortion, fumes, and corrosive flux residue | Poor cure or adhesion from bad mixing and surface preparation |
Brazing a Metal Patch Without Melting the Base Metal
Brazing uses a filler metal that melts above about 840°F (450°C) but below the melting point of the base metal. The liquid filler flows through a close-fitting joint by capillary action. A sound brazed joint can be stronger and more heat-resistant than a soft-soldered joint, but it also puts much more heat into the work.
Use brazing only when the base metal, filler, flux, joint clearance, and service conditions are compatible. Clean and fit the patch closely, apply the specified flux, heat the joint evenly, and let the base metal melt the filler. After cooling, remove the flux and restore corrosion protection.
Warning: Brazing is hot work. It can ignite hidden material, damage coatings, distort thin sheet, and create hazardous fumes. Never braze a used tank, drum, fuel component, or closed cavity unless a qualified procedure has made it safe, cleaned it, disconnected it, and vented it.
Adhesive Patches and Two-Part Panel Adhesives
A bonded sheet-metal patch is usually more reliable than packing a large opening with putty. The patch overlaps solid metal, while the adhesive spreads load and seals the seam. This approach works well on selected non-structural automotive skins, doors, covers, cabinets, and similar sheet-metal parts.
Products Worth Considering

OEM Recommended Auto Adhesive – Professional two-part epoxy designed for bonding auto body panels; trusted by OEMs for non-structural repairs like quarter panels, roofs, and door skins.

J-B Weld AutoWeld is a high-strength, impact-resistant automotive adhesive, filler & sealer. AutoWeld dispenses in a 1:1 mix ratio, sets in 15 minutes, and can be sanded and painted in 30 minutes. Once cured, AutoWeld has a strength of 3770 PSI

Two-Part Urethane Adhesive: Bonds steel and aluminum for automotive collision repair applications including quarter panels, roofs, box sides, van sides, utility vehicle sides and door skins
When and Why Adhesive Patches Work
Use an adhesive that specifically lists both the substrate and the service. Automotive panel bonding products are not general structural substitutes. The 3M Panel Bonding Adhesive technical data sheet limits the product to outer-body, non-structural panel attachment unless the vehicle maker specifically directs otherwise. It also tells users to treat a doubtful component as structural.
For one published U.S. test condition, 3M reports about 3,935 PSI overlap shear on 0.057-inch steel at 73°F after a seven-day laboratory cure. That is not a universal joint rating. Substrate thickness, bond-line thickness, preparation, temperature, loading direction, and cure all change the result.
Step-by-Step: Applying a Bonded Patch
- Cut a patch from compatible sheet metal and give it enough overlap to bond to firm material. Deburr the edges and round the corners.
- Dry-fit the patch. Mark its position and clamp locations before mixing adhesive.
- Prepare both surfaces exactly as the adhesive maker directs. For 3M 08115, the published process includes removing rust, paint, and primer from the bond area and applying adhesive to cover the bare metal.
- Dispense and mix the adhesive with the specified cartridge, nozzle, or ratio. Discard any initial material the manufacturer tells you to purge.
- Spread a continuous layer across the bond area, position the patch, and clamp it evenly. Tool the squeeze-out to seal the edge.
- Keep the assembly clamped for the full required time. For 3M 08115 at 73°F, the published values are a 90-minute work time, four-hour clamp time, and 24-hour full cure; colder conditions take longer.
- After cure, feather the edge with the approved filler if needed. Prime, seam-seal, topcoat, and protect the hidden side.
UV-Cure and Self-Adhesive Repair Patches
UV-activated fiberglass patches can be useful for quick cosmetic repairs where their shape and service ratings fit the job. RapidFix states that its fiber patch cures in about five to ten minutes under a UV lamp or bright sunlight and may take about 50 minutes on a cloudy day. Treat that as a product-specific claim, not a rule for all UV patches.
| Patch Type | Typical Advantage | Check Before Use |
|---|---|---|
| Two-part panel adhesive and sheet metal | Broad, sealed bond over sound metal | OEM approval, substrate, overlap, cure temperature, and structural classification |
| UV-cure fiberglass patch | Fast cure and easy shaping | UV access, temperature range, chemical exposure, and non-structural suitability |
| General two-part epoxy and backing patch | Simple tools and flexible patch design | Bond strength, heat limit, water exposure, and full cure |
Mechanical Fasteners: Rivets, Bolts, and Screws
Mechanical fasteners make the load path visible and inspectable. They are useful on access panels, guards, gates, covers, trailer skins, truck-bed sheet, and other non-structural parts. The patch must still be strong enough, and the fastener type, diameter, spacing, grip range, and material must match the job.
How Rivets and Bolts Hold a Patch
Blind rivets expand behind the work and clamp a patch when you can reach only one side. Bolts and nuts give stronger clamping and can use washers or backing plates to spread load. Rivet nuts create reusable threads, but they do not fill a damaged opening by themselves.
Choose compatible metals or isolate dissimilar materials to limit galvanic corrosion. Aluminum rivets in wet contact with steel, for example, may need a barrier coating and careful sealing.
Installing a Fastened Patch Step by Step
- Remove rust and weak metal, then make a patch that overlaps sound material.
- Clamp the patch in place and mark an even fastener pattern away from the damaged edge.
- Drill the first holes, install temporary fasteners or clamps, then drill the remaining holes so the patch cannot creep.
- Deburr every hole. Apply the approved primer, sealant, or adhesive between the patch and base metal if the repair system calls for it.
- Install rivets within their specified grip range, or tighten bolts to the fastener maker’s torque requirement. Do not crush thin sheet.
- Seal fastener heads, patch edges, and the rear seam. Finish with compatible primer and paint.
Comparison Table for Fastener Choices
| Fastener | Access Needed | Best Feature | Main Caution |
|---|---|---|---|
| Blind rivet | One side | Fast installation in thin sheet | Grip range, hole size, and rivet material must match |
| Bolt and nut | Both sides | Removable and easy to inspect | Use washers or a backing plate so thin metal does not tear |
| Rivet nut | One side | Adds a reusable threaded attachment point | Needs enough sound metal to resist spinning and pull-out |
| Sheet-metal screw | One side | Simple for light-duty removable covers | Can loosen under vibration and strip thin material |
Body Fillers and Putty for Smoothing the Repair
Body filler is most useful after the hole already has support from sound metal, a bonded patch, a riveted patch, or a reinforced repair material. Standard lightweight filler shapes the surface and feathers the patch edge. Glazing putty fills small pinholes and sanding scratches near the end of the process.
Mixing and Applying Body Filler for a Smooth Finish
Follow the product directions instead of using a guessed hardener amount. The 3M Bondo Original Filler instructions call for cleaning, sanding to bare metal with 80-grit, mixing only a small batch, applying a thin pressure coat, allowing about 20 minutes to cure, then shaping with 80-grit and finishing with 180-grit or finer. The same instructions say to apply it at 45°F (7°C) or above.
- Sand the cured patch and surrounding metal so the filler has a clean, keyed surface.
- Mix a small batch to a uniform color on a clean, non-porous mixing board.
- Press on a thin first coat to wet the surface, then add only enough material to restore the contour.
- Let it harden fully before sanding. Shape the repair with coarse paper, then feather it with finer grits.
- Use glazing putty only for small surface defects, then apply the compatible primer and paint system.
| Filler Type | Best Use | What It Should Not Do |
|---|---|---|
| Lightweight polyester body filler | Contour and feather a completed patch | Bridge a large unsupported opening or replace structural metal |
| Fiberglass-reinforced filler | Small rust-out repairs within the product’s stated limit | Cover active rust or carry a safety-critical load |
| Glazing and spot putty | Pinholes, scratches, and minor surface defects | Build deep thickness or support an open hole |
| Metal-reinforced filler | Cosmetic repairs that need drilling or tapping when rated | Replace a designed bracket, mount, or structural joint |
Finish the Patch and Prevent New Rust
A patch can look finished on the front while rust starts behind it. Water enters through unsealed seams, fastener holes, pinholes, and bare edges. The final coating system is therefore part of the repair, not decoration.
- Remove sanding dust and clean the surface with a coating-compatible cleaner.
- Apply the primer specified for the bare metal, filler, and topcoat. Do not assume every zinc-rich primer is compatible with every filler or paint system.
- Seal lap joints and fastener lines with an approved seam sealer where water can enter.
- Apply the topcoat to the required film build and let it cure before weather exposure.
- Protect the hidden side with primer, paint, cavity wax, or another approved corrosion coating.
- Inspect outdoor and road-salt repairs periodically. Repair chips before moisture reaches the seam.
Zinc-rich coatings can provide sacrificial, cathodic protection on properly prepared steel when used as part of a compatible system. The Rust-O-Zinc technical data sheet, for example, requires thorough cleaning and specified surface preparation before application.
Safety Gear and Best Practices for Any No-Weld Repair
Wear safety glasses with side protection, gloves suited to the chemical and sharp-edge hazards, and hearing protection when grinding or drilling. Control dust at the source. A respirator must match the actual contaminant and be used within a proper respiratory-protection program when required; a basic nuisance mask is not a universal solution.
Read each adhesive, flux, solder, cleaner, primer, and filler safety data sheet. Many products can irritate skin and eyes, release vapors, or burn. Keep uncured chemicals away from sparks and flame, and do not use chlorinated cleaning vapors around hot work.
Heating galvanized steel can create zinc oxide fume associated with metal fume fever. OSHA recommends ventilation and local exhaust controls that keep fumes out of the breathing zone, while NIOSH lists metal fume fever symptoms such as chills, fever, cough, nausea, and chest tightness.
Warning: Do not solder, braze, grind, or heat a used fuel tank, drum, pressure vessel, or closed container as a casual DIY repair. OSHA requires used containers to be thoroughly cleaned of flammable and toxic residues before hot work and requires hollow spaces to be vented. Tank work should be handled by a qualified professional.
When to Call in Welding or a Professional Repair
Use an approved welded, brazed, bonded, or mechanically fastened procedure when the part’s design requires it. Get professional help for:
- Vehicle frame rails, pillars, rockers, strut towers, suspension brackets, subframes, seat mounts, and seat-belt anchors
- Trailer tongues, hitches, lifting points, roll structures, ladders, scaffolds, and load-bearing guards
- Fuel tanks, gas cylinders, pressure vessels, boilers, hydraulic components, and closed containers
- Brake, steering, exhaust, or high-temperature components
- Large rust areas where the surrounding metal is thin, layered, cracked, or inaccessible from the back
- Cast or heat-treated parts where the repair process can change material properties
- Any repair for which the equipment maker specifies a particular procedure, fastener, adhesive, or inspection
Conclusion: Pick the Repair That Matches the Job
A durable no-weld repair starts with honest limits. Epoxy putty is convenient for a small non-structural hole. A bonded or riveted sheet-metal patch is usually better for a larger opening. Solder and brazing can join compatible clean metal, but they still introduce heat and fumes. Body filler belongs at the finishing stage, not in place of missing structural metal.
Whatever method you choose, remove rust to solid material, follow the product instructions, protect both sides from corrosion, and inspect the repair after it has seen real vibration and weather. When the part carries a critical load or contains pressure or fuel, stop and use a qualified repair procedure.
Frequently Asked Questions
Can I fill a hole in stainless steel without welding?
Yes, for a non-structural repair. Use an epoxy or panel adhesive approved for stainless steel, a compatible mechanical patch, or a suitable soldering system with an active flux. Remove corrosive flux residue completely. Do not use Harris Stay-Clean on aluminum or magnesium, and do not assume a stainless cosmetic repair is suitable for a load-bearing part.
What is the strongest no-weld option for load-bearing metal?
There is no universal strongest method. A designed bolted or riveted joint, structural adhesive, or brazed joint may carry high loads when an engineer, OEM, or qualified procedure specifies the materials, overlap, fasteners, surface preparation, and inspection. Do not choose a general-purpose epoxy by its PSI label alone.
Can I put body filler directly over a rust hole?
Do not spread ordinary body filler over active rust or a large unsupported opening. Remove rust to firm metal and install a sound backing or patch first. A fiberglass-reinforced filler may bridge a small opening only when its manufacturer specifically allows that hole size and service.
How do I prevent the repaired area from rusting again?
Remove all loose rust, seal the patch edge and fastener holes, apply a compatible primer and topcoat, and protect the hidden side with paint, seam sealer, or cavity wax. Avoid trapping water between overlapping sheets and inspect chips or seam cracks before corrosion spreads.
Is soldering safe for galvanized metal?
It requires careful hazard control. Heating galvanized metal can generate zinc-containing fumes, and active flux adds chemical hazards. Use effective local exhaust, keep your head out of the plume, follow the flux and solder safety data sheets, and consider a cold patch when safe fume control is unavailable.
Will a no-weld patch hold up outdoors?
It can when the product is rated for the temperature, water, sunlight, chemicals, and movement involved. The patch must bond to sound metal, and the front, seam, fasteners, and back must be sealed and coated. Inspect repairs exposed to road salt, standing water, or constant vibration.
Can I repair a fuel tank hole with epoxy or solder?
Do not treat a leaking fuel tank as a normal sheet-metal patch. Fuel residue and vapor can ignite, and a failed repair can release fuel near heat or electrical sources. Remove the tank from service and use the vehicle or tank maker’s approved professional repair or replacement procedure.
Sources
- 3M Panel Bonding Adhesive Technical Data Sheet: non-structural use, preparation, work time, clamp time, cure time, and laboratory shear data
- 3M Bondo Original Filler Instructions: surface preparation, mixing, curing, sanding, and minimum application temperature
- J-B Weld SteelStik Product Data: product-specific set time, cure time, and strength rating
- OSHA 29 CFR 1910.252: hot-work, container cleaning, venting, PPE, and ventilation requirements
- NIOSH Pocket Guide: Zinc Oxide: zinc oxide exposure symptoms and respiratory hazard information
- Harris Stay-Clean Liquid Soldering Flux Technical Sheet: compatible metals, corrosive residue, cleaning, ventilation, and PPE