Rust holes are not repaired by welding directly over rust. The lasting method is to cut back to sound metal, identify the panel material, fit a matching patch, join it with controlled heat, and restore every corrosion-protection layer on both sides. This guide covers small, non-structural steel body-panel repairs; structural, high-voltage, aluminum, or high-strength-steel work belongs with a qualified collision-repair technician.
Quick Answer
To repair a rust hole, cut out every thin or pitted section until only sound metal remains. Make a same-material, similar-thickness patch, clamp it flush, tack it in place, and join it with spaced, overlapping tacks. Then grind carefully and restore primer, seam sealer, paint, undercoating, and cavity protection as required.
Key Takeaways
- Never weld over rust, paint, body filler, seam sealer, undercoating, or rust converter.
- Confirm the vehicle, model year, panel material, and OEM repair procedure before cutting or welding.
- Use matching sheet metal—not metal mesh—as the permanent weld-in patch.
- Control heat with tight fit-up, test coupons, spaced tacks, and cooling time between welds.
- Protect both sides of the repair with a compatible paint system, seam sealer, cavity wax, and undercoating where the vehicle originally used them.
At a Glance
| Time Required | Several hours of active work; primer, seam sealer, paint, and cavity-protection curing can extend the job across multiple days. |
| Difficulty | Advanced DIY for a small cosmetic mild-steel outer panel; professional-only for structural, high-strength-steel, aluminum, hybrid, or EV-related areas. |
| Tools Needed | Short-circuit MIG welder, matching wire and gas, grinder/cutoff tool, sheet-metal tools, clamps, PPE, local fume extraction, fire extinguisher, and paint/corrosion-protection supplies. |
| Cost | Variable. Consumables may be moderate if you already own suitable equipment; buying a welder, PPE, ventilation, and paint tools can cost more than professional repair. |
What’s in This Article
- Why Proper Rust Repair Matters
- Decide Whether the Repair Is Safe to Weld
- Tools and Materials Needed for Rust Hole Welding
- Before You Begin Welding Rust Holes
- Preparing the Rust Area: Step-by-Step Guide
- Welding Techniques for Filling Rust Holes Effectively
- Troubleshooting Common Welding Problems
- Priming, Sealing, and Painting for Protection
- Top Welding Mistakes and How to Avoid Them
- Frequently Asked Questions
- Conclusion
- Sources
Why Proper Rust Repair Matters
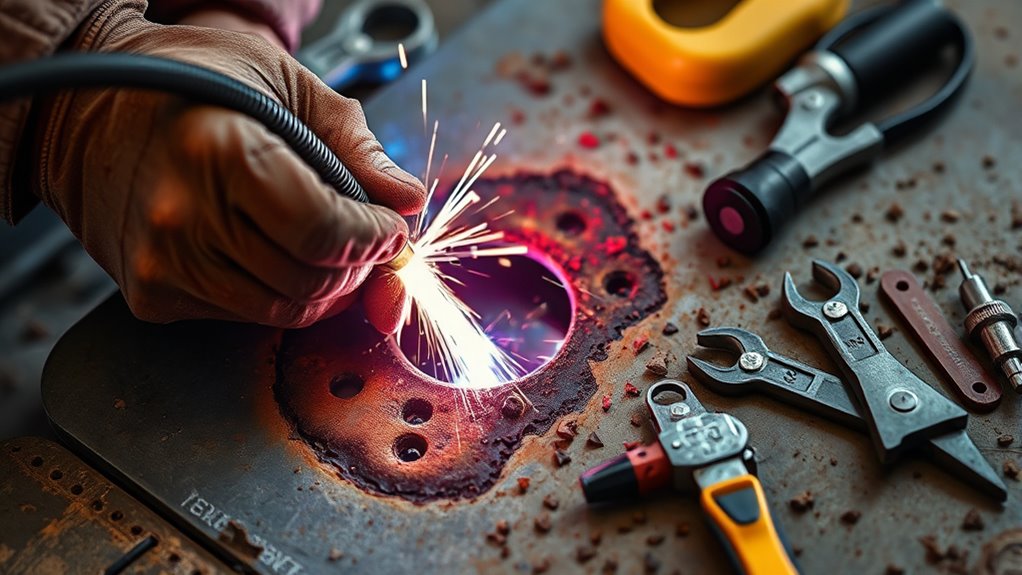
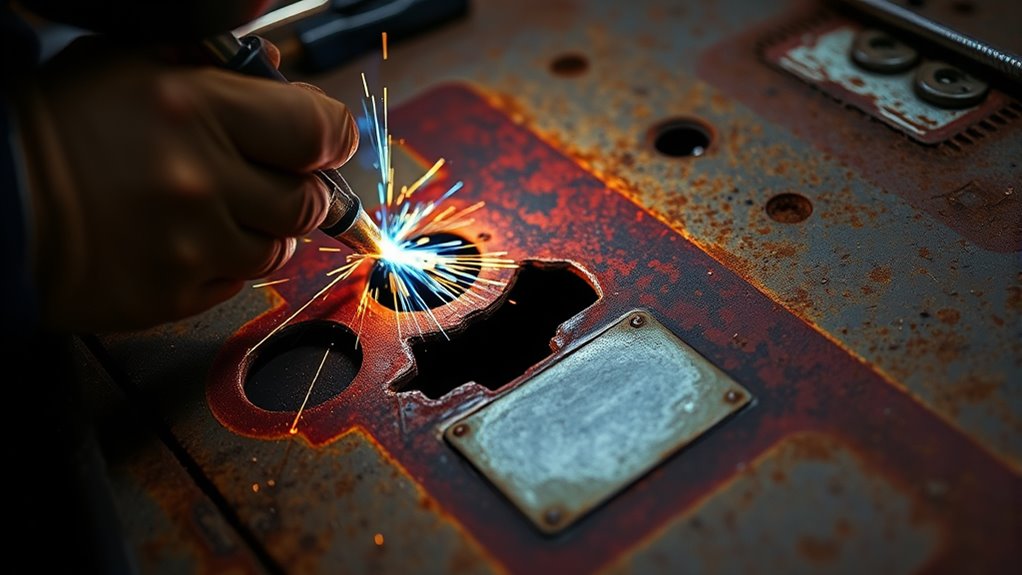
A rust hole is usually larger than it looks. Paint, seam sealer, and undercoating can hide pitting and paper-thin metal around the visible opening. Welding to that weak edge creates porosity, burn-through, and a repair that can crack or rust again.
Proper repair protects more than appearance. Rust near a pillar, rocker reinforcement, frame rail, suspension or subframe mount, seat or seat-belt anchor, windshield opening, or crash structure can affect how the vehicle carries loads and protects occupants. Those areas require the exact model-year body repair procedure, not a generic patch.
Body filler does not replace missing metal. On a cosmetic steel outer panel, a flush butt-welded patch can produce a clean repair when the surrounding metal is sound. On structural panels, however, the approved joint type, sectioning location, welding process, wire, and corrosion-protection steps must come from the vehicle manufacturer.
The visible hole is only the starting point. The repair boundary belongs where the metal is full-thickness, clean, and strong—not where the paint still looks acceptable.
Decide Whether the Repair Is Safe to Weld
Before buying metal or setting up a welder, identify the vehicle by VIN and model year and check the OEM body repair manual. Modern bodies may combine mild steel, galvanized steel, high-strength steel, ultra-high-strength steel, aluminum, adhesives, foams, and tailored reinforcements in one area.
For example, Honda warns that some 1,500 MPa ultra-high-strength-steel parts must not be MAG welded because welding heat can reduce their strength. Honda also directs technicians to isolate high voltage before welding on a hybrid and to follow the model-specific body repair manual. Those examples show why the repair method cannot be chosen from panel appearance alone. See the Honda body repair information.
Warning: Do not DIY-weld rust in frame rails, pillars, rocker reinforcements, crumple zones, suspension or subframe mounts, seat or seat-belt mounts, battery enclosures, or other structural points. Stop if you find high-strength steel, aluminum, adhesive-bonded joints, orange high-voltage cables, a traction battery, fuel-system parts, airbag components, or inaccessible combustible material near the work.
Cosmetic Versus Structural Rust
- Potential DIY scope: A small hole in a confirmed mild-steel, non-structural outer skin with clear access to both sides.
- Professional inspection required: Rust that reaches seams, reinforcements, mounting points, crash structures, or multiple panel layers.
- Replacement may be safer: A panel with widespread thinning, many pinholes, heavy scaling, or no practical access for backside corrosion protection.
If the panel cannot be positively identified, treat the repair as professional work. A magnet, spark color, or visual guess is not enough to identify every modern body material.
Tools and Materials Needed for Rust Hole Welding
Good equipment does not make a weak panel weldable, but the wrong equipment can make a sound patch difficult to install. For thin mild-steel outer panels, a gas-shielded short-circuit MIG setup usually gives better control and a cleaner weld than self-shielded flux-core wire. The vehicle procedure and welder manual still control the final choice.
Essential Welding Tools
Use a MIG welder that can feed small-diameter solid steel wire smoothly at low settings. A common mild-steel starting point is 0.023- or 0.025-inch ER70S-6 wire with an argon/CO2 shielding-gas blend, but wire, gas, polarity, and settings must match your machine and the panel. The older Lincoln Pro-MIG 135 manual, for example, specifies 0.025-inch L-56 wire with 75-80% argon and 20-25% CO2 for GMAW; it is a model-specific reference, not a universal recipe. See the Lincoln Pro-MIG 135 operator’s manual.
You will also need a cutoff wheel or body saw, grinder, sanding discs, sheet-metal shears or snips, a hammer and dolly, clamps or welding magnets, a marker, measuring tools, cardboard for a template, and scrap metal that matches the patch thickness for setup tests.
A clean copper spoon or copper backing plate can support the joint temporarily and absorb some heat while you close a small gap. It is a welding aid, not a permanent structural backing piece.
Recommended Safety Gear
Wear safety glasses with side shields under a welding helmet, and choose the helmet shade for the process and current. A welding helmet is not a substitute for impact-rated glasses or goggles when grinding fragments and wire-brush bristles can fly.
Use leather welding gloves, non-melting long sleeves and pants, closed leather footwear, and hearing protection when grinding or cutting. Remove rings, watches, and loose clothing. Keep hair secured.
Welding fumes can contain metals and gases from the base metal, wire, paint, plating, rust treatments, seam sealer, and undercoating. Use local exhaust that draws the plume away from your breathing zone. A dust mask is not welding-fume protection; respiratory protection must be suitable for the hazard, fit correctly, and be used according to applicable instructions. OSHA advises cleaning coatings from weld surfaces and using ventilation or respiratory protection when controls do not keep exposure safe. See the OSHA welding-fume fact sheet.
Warning: Never weld where sparks, heat, or current can reach fuel lines, a fuel tank, brake lines, wiring, carpet, foam, insulation, seam sealer, undercoating, airbags, or a high-voltage battery. Remove or protect hazards according to the OEM procedure, and do not improvise around fuel or high-voltage systems.
Necessary Materials Overview
The permanent patch should be the same material type and as close as practical to the original panel thickness. For a steel cosmetic panel, use clean automotive sheet steel rather than metal mesh. Matching thickness helps the patch and panel heat at similar rates and reduces the chance of a stiff, distortion-prone repair.
Gather compatible welding wire and gas, abrasives, wax-and-grease remover approved for the paint system, a two-component epoxy or urethane primer if specified, seam sealer, basecoat and clearcoat or a compatible single-stage finish, undercoating or stone-chip coating where originally present, and cavity wax for closed sections.
Rust converter belongs only on remaining non-welded surface corrosion when its manufacturer and the paint system permit it. Keep converter, primer, paint, filler, oil, and solvent residue out of the actual weld zone.
| Material | Correct Use |
|---|---|
| Matching sheet steel | Preferred permanent patch for a confirmed non-structural steel outer panel. |
| OEM replacement panel or approved section | Required when the manufacturer specifies replacement, a joint location, or a particular attachment method. |
| Copper backing plate or spoon | Temporary support behind a small weld area; remove it after welding. |
| Metal mesh | Not a proper weld-in body-panel patch and not a substitute for sound sheet metal. |
Before You Begin Welding Rust Holes
Estimated total time: A small cosmetic patch often takes several hours of cutting, fitting, welding, metal finishing, and surface preparation. Primer, seam sealer, paint, and cavity wax add drying or curing time, so the full project may span more than one day.
Check both sides of the damaged panel and every nearby cavity. Remove trim, carpet, insulation, foam, seam sealer, undercoating, and other combustible or fume-producing material far enough to prevent heat, sparks, and conduction from reaching them. Do not rely on the visible side alone.
Follow the OEM power-down procedure before welding. That may include saving settings, switching the ignition off, disconnecting the 12-volt battery in a specified order, waiting for restraint-system capacitors to discharge, and protecting sensitive modules. On a hybrid or EV, 12-volt disconnection does not make the high-voltage system safe. High voltage must be isolated and verified by a properly trained technician using the vehicle procedure.
Attach the work clamp to clean bare metal as close to the repair as the process allows, without clamping through painted, rusty, or moving parts. Route welding current away from bearings, electronic modules, and wiring. Secure shielding-gas cylinders upright and follow the cylinder, regulator, and welder instructions.
Move fire hazards away or shield them with suitable fire-resistant barriers. Keep an appropriate, fully charged extinguisher within immediate reach. OSHA’s general hot-work rule requires removal or guarding of nearby fire hazards, and its shipyard fire-watch guidance uses at least 30 minutes of post-work monitoring as a minimum benchmark. Inspect both sides and concealed areas during welding and for at least 30 minutes afterward; continue longer if heat reached a cavity or combustible material. See OSHA 29 CFR 1910.252.
What You’ll Need
- MIG welder capable of stable low-output short-circuit welding
- Wire, shielding gas, contact tip, polarity, and drive-roll setup specified for the machine and panel
- Same-material, similar-thickness patch sheet
- Cardboard template, marker, ruler, caliper or micrometer, and straightedge
- Cutoff wheel or body saw, sheet-metal shears, grinder, sanding discs, and deburring tools
- Clamps, magnets, hammer and dolly, and an optional removable copper backing tool
- Approved cleaner, compatible two-component primer, seam sealer, paint system, undercoating, and cavity wax
- Welding helmet, safety glasses, leather gloves, protective clothing, hearing protection, and suitable respiratory protection when required
- Local fume extraction or effective ventilation
- Fire-resistant blankets or barriers, an appropriate extinguisher, and a second person for fire watch when hidden hazards are present
- The VIN-specific OEM body repair and electrical safety procedure
Preparing the Rust Area: Step-by-Step Guide
Preparation determines whether the weld joins solid metal or merely bridges contamination. Work slowly enough to expose the true edge of the damage before making the patch.
Assessing Rust Damage Extent
- Inspect both sides. Find seams, reinforcements, wiring, fuel or brake lines, foam, undercoating, and areas you cannot protect after welding.
- Confirm the panel material. Use the VIN and model-year body repair information to identify mild steel, HSS/UHSS, galvanized steel, aluminum, or a mixed-material joint.
- Strip the finish. Remove paint, filler, seam sealer, undercoating, and scale until clean metal is visible beyond the apparent damage.
- Probe the edge. Use a pick or light hammer pressure to locate pitting, pinholes, and thinning. Do not weld to metal that flexes, flakes, or tears easily.
- Mark the cut line. Place it entirely in sound, full-thickness metal and outside structural seams or reinforcements unless an OEM procedure specifies the location.
If the sound-metal boundary keeps expanding, replacing the panel or a larger approved section is usually safer and faster than stacking small patches.
Cleaning and Preparing the Surface
- Protect the vehicle. Cover glass, paint, interior surfaces, wiring, hoses, and nearby panels from sparks and abrasive debris.
- Cut out the damaged metal. Stay just inside the final line, then trim gradually to the finished opening.
- Deburr and straighten. Remove sharp edges and use a hammer and dolly to return the opening to its original contour.
- Make a template. Trace the opening on cardboard and verify the contour before cutting metal.
- Cut the patch. Transfer the template to matching sheet metal and trim in small steps.
- Clean the weld zone. Bring the front, back, patch edges, and work-clamp point to bright, dry metal. Remove cleaner residue before welding.
- Protect inaccessible overlaps correctly. Use weld-through coating only where the OEM and coating manufacturer call for it, such as an enclosed overlapping flange. Keep a butt-joint fusion edge bare unless the approved system says otherwise.
- Clamp the patch flush. Check the shape from several angles and confirm that the back side remains accessible for inspection and corrosion protection.
Do not apply rust converter and then weld through it. Treat only remaining non-welded surface rust after the hot work is complete and only when the finishing-system instructions allow it.
Selecting Appropriate Patch Material
Measure the original sound panel where possible and choose the same type of sheet metal with similar thickness. A much thicker patch is harder to shape and can concentrate stress and heat at the edge. A thinner patch burns through sooner and lacks the original panel stiffness.
For a cosmetic outer skin, a close-fitting flush butt joint minimizes the moisture-trapping overlap behind the repair. Miller notes that thin-sheet fit-up must be tight because even a small gap can invite burn-through. See Miller’s guide to welding sheet metal with MIG and TIG.
Do not choose the joint solely for convenience. Plug welds, lap joints, sectioning joints, adhesives, brazing, and resistance spot welds are acceptable only where the vehicle procedure or a legitimate cosmetic-panel design calls for them.
Pro Tip: Make two or three practice joints from offcuts of the actual patch sheet. Tune the machine, contact-tip distance, travel angle, tack length, and cooling rhythm on those coupons before touching the vehicle.
Welding Techniques for Filling Rust Holes Effectively
Thin body metal needs enough heat for fusion but not enough sustained heat to warp the panel or open a hole. The goal is not a long continuous bead. The goal is a sequence of sound, overlapping tacks that eventually closes the seam.
1. Set Up the Welder on Matching Scrap
Install the correct wire, contact tip, drive-roll groove, gas, and polarity. Start with the machine’s chart for the measured metal thickness, then test. A good coupon weld lies reasonably flat, fuses both edges, shows no porosity, and does not burn a large hole.
Keep the wire extension and contact-tip-to-work distance within the machine’s recommendation. For the cited Pro-MIG 135, Lincoln specifies about 3/8 inch and illustrates a 3/8- to 1/2-inch contact-tip-to-work distance—not 1/2 to 5/8 inch measured from the gun nozzle. Your welder may specify a different range.
2. Tack the Patch in Position
- Place the first tacks at separated points around the patch rather than next to one another.
- Check panel height and contour after every few tacks. Correct movement before the seam becomes rigid.
- Add more tacks between the first set, alternating to a cool part of the panel each time.
- Let the metal air-cool between tacks. Do not quench the hot panel unless the vehicle or material procedure specifically permits it.
3. Close the Seam With Overlapping Tacks
Continue filling the spaces with brief tacks until the seam is closed. Each new tack should tie into sound metal and the edge of the previous tack without sitting on top as a cold lump. Move around the patch so no area collects sustained heat.
Watch the back of the joint when possible. Proper fusion should reach both edges without leaving long unfused sections, heavy icicles, or holes. If the patch begins to sink, crown, or oil-can, stop and let the panel cool before continuing.
4. Inspect Before Grinding
Use a bright light from the opposite side to find pinholes. Look for soot tracks, porosity, edge cracks, and missed sections. Repair defects only after the area is clean and cool. Do not bury pinholes under body filler.
Grind in short passes with a controlled abrasive angle. Remove proud weld metal without thinning the surrounding panel. Finish with a finer abrasive only after the joint is level enough to metal-finish.
Pro Tip: If a small gap keeps opening, place a clean removable copper spoon behind it, shorten the tack, and return to your scrap coupon before changing several machine settings at once.
Troubleshooting Common Rust-Hole Welding Problems
| Problem | Likely Causes | Correction |
|---|---|---|
| Burn-through | Thin edge, wide gap, excessive heat, long tack, or slow movement. | Stop, cool, trim back to sound metal if needed, improve fit-up, support with removable copper, and retest settings on scrap. |
| Porosity | Rust, paint, sealer, oil, poor gas coverage, a draft, blocked nozzle, or excessive distance. | Remove the defective weld, clean to bare dry metal, check gas flow and leaks, clean the nozzle, block drafts without blocking ventilation, and restore correct distance. |
| Warping or oil-canning | Too many adjacent tacks, long welds, overgrinding, or a poorly shaped patch. | Stop adding heat, let the panel cool, verify contour, spread tacks farther apart, and avoid grinding the surrounding sheet thin. |
| Tall bead with poor fusion | Low heat, poor work-clamp contact, excessive wire speed, or placing metal on top of the joint instead of fusing both edges. | Clean and reposition the clamp, retest voltage and wire speed on scrap, and aim each tack at both panel edges. |
| Recurring pinholes | Contamination, missed seam sections, or rust extending beyond the cut line. | Reopen and clean the defect. If the metal keeps disappearing, enlarge the cut to sound metal rather than chasing holes with filler wire. |
Finish Your Welding Project: Priming, Sealing, and Painting for Protection
A rust repair is unfinished until the original corrosion barriers are restored. The visible face may need primer, surfacer, color, and clearcoat, while the back may need primer, seam sealer, undercoating, and cavity wax. Missing one layer can let moisture attack the weld from behind.
1. Metal-Finish and Clean the Repair
Grind only enough to level the weld. Hammer-and-dolly work can correct small contour changes, but stop if the panel has stretched badly or if the repair area is structural. Remove grinding dust and clean the surface with products approved by the selected paint system.
A thin skim of compatible body filler may refine a stable cosmetic panel after the metal repair, but filler must not bridge a hole, conceal active rust, or serve as structure. Follow the filler and primer maker’s approved substrate sequence.
2. Prime and Seal the Front Side
Do not assume that self-etching primer alone provides a complete corrosion system. 3M states that true self-etching primers can interfere with some seam sealers and that a high-quality two-component epoxy or urethane primer is generally the better sealer substrate. Follow the vehicle, seam-sealer, and paint-system instructions. See 3M’s seam sealer and coating guidance.
Recreate seam sealer only where the vehicle originally used it or where the repair procedure specifies it. Match the original bead shape and keep drain paths open. Apply primer, seam sealer, surfacer, basecoat, and clearcoat—or a compatible single-stage system—in the order and film thickness specified by the products.
3. Protect the Back Side and Cavities
Clean and coat the back of the weld wherever access allows. Restore undercoating or stone-chip protection after the primer system has cured as required. Apply cavity wax inside rockers, pillars, wheelhouse overlaps, and other closed sections only after hot work and paint curing are complete.
A complete repair restores the coating and sealing layers the vehicle originally used. Internal weld areas are often the easiest surfaces to overlook, so apply the specified cavity protection after the primer and paint system has cured and all hot work is complete.
Note: If you cannot clean, inspect, prime, and protect the rear of the repair, moisture can return from inside the panel even when the exterior paint looks perfect.
Top Welding Mistakes and How to Avoid Them
- Welding over rust or coatings: Cut back farther and clean both sides to bare, dry metal.
- Skipping OEM material identification: Confirm the VIN, model year, panel material, and approved repair method before cutting.
- Using metal mesh as the patch: Use matching sheet metal or the specified replacement panel.
- Running a continuous bead: Use separated, overlapping tacks and allow cooling time.
- Using one universal gun distance: Follow the contact-tip-to-work distance in your welder manual and measure from the contact tip, not the nozzle.
- Using rust converter in the weld zone: Keep every unapproved coating out of the fusion area.
- Ignoring the back side: Remove combustibles before welding and restore internal corrosion protection afterward.
- Overgrinding: Level the bead without thinning the original panel or creating new low spots.
- Using filler as structure: Apply only a thin cosmetic skim after a stable metal repair.
- Ending the fire watch too soon: Recheck both sides and concealed cavities for at least 30 minutes, and longer when conditions warrant.
Note: Rust in frame rails, suspension mounts, pillars, seat-belt anchors, rocker reinforcements, battery enclosures, or other major load paths needs a qualified collision-repair inspection and the exact OEM procedure.
Frequently Asked Questions
What is the best filler for rust holes in cars?
No filler is the best repair for a metal hole. Cut out the rust and install sound matching metal first. After the welded cosmetic repair is stable, a thin layer of compatible body filler may smooth minor surface irregularities. Filler must not replace metal in structural or safety-related areas.
Can you apply body filler over rust holes?
No. Body filler over an open rust hole traps moisture and has no sound metal foundation. Remove the rust, weld or install the approved metal repair, protect the back side, and use filler only as a thin finishing layer when the product and paint system allow it.
Can two-part epoxy fill a rust hole?
An epoxy patch may be a temporary cosmetic repair on a small non-structural item, but it does not restore a car body’s original metal strength or approved crash performance. Do not use it on structural panels, mounts, seams, or safety-related areas. A proper body repair uses sound metal and the specified joining method.
How do you repair rust holes on a car body?
Identify the panel and OEM procedure, remove nearby hazards, cut out all weak metal, make a matching patch, test the welder on scrap, tack the patch flush, close the seam with spaced overlapping tacks, inspect and grind carefully, then restore primer, seam sealer, paint, undercoating, and cavity wax.
Can you weld directly over rust?
No. Rust is oxidized, weakened metal and contaminates the weld. Grind or cut until the joint reaches clean, full-thickness metal. If the sound edge keeps moving outward, replace a larger section rather than trying to bridge the damage with extra wire.
How do you stop rust from coming back after welding?
Remove all rust, avoid leaving pinholes, and restore the vehicle’s corrosion barriers on both sides. That normally means a compatible primer and paint system on the exterior plus seam sealer, undercoating, and cavity wax where originally used. Keep drain holes open and inspect the repair periodically.
Can you weld a rusted rocker panel or frame rail?
Not with a generic patch method. Rockers often contain structural reinforcements, and frame rails are major load paths. They may require complete-part replacement, approved sectioning locations, resistance spot welding, brazing, adhesives, or other model-specific procedures. Have a qualified collision-repair professional inspect the vehicle.
Is the process different for aluminum, hybrids, or electric vehicles?
Yes. Aluminum needs dedicated tools, contamination control, and a compatible joining process. Hybrids and EVs require model-specific high-voltage isolation and heat precautions, while modern steel bodies may contain parts that must not be sectioned or arc welded. Use the VIN-specific OEM body repair manual and trained technicians.
Safety Disclaimer: This article is general information, not a substitute for a vehicle manufacturer’s repair procedure, formal welding training, exposure assessment, or professional collision-repair advice. Do not attempt structural, restraint-system, fuel-system, aluminum, high-strength-steel, hybrid, or EV repairs without the required training, tools, and service information.
Conclusion
A durable rust-hole repair begins by refusing to weld over rust. Confirm the panel and repair method, cut back to full-thickness metal, fit a matching patch, and practice the settings before welding the vehicle.
Use spaced tacks to control heat, inspect the seam before grinding, and protect both faces of the repair. Primer and paint alone are not enough when the original panel also used seam sealer, undercoating, or cavity wax. When rust reaches structural or modern mixed-material areas, professional repair is the safe choice.
Sources
- OSHA — Controlling Hazardous Fume and Gases During Welding — coating removal, ventilation, fume positioning, and respiratory-protection principles.
- OSHA — 29 CFR 1910.252 General Welding Requirements — fire-hazard removal, guarding, and hot-work precautions.
- Lincoln Electric — Pro-MIG 135 Operator’s Manual — model-specific wire, gas, polarity/setup, and contact-tip-to-work-distance guidance.
- Miller Electric — Successfully Welding Sheet Metal With MIG and TIG — tight fit-up and heat-control guidance for thin sheet.
- Honda — Accord Hybrid Body Repair Information — examples of VIN/model-specific high-strength-steel, sectioning, welding, and high-voltage restrictions.
- 3M Collision Repair — Seam Sealers and Coatings — primer compatibility, seam-sealer substrates, and corrosion-protection practices.


