To weld a T-joint for auto body fabrication, start by thoroughly cleaning the metal surfaces to guarantee proper adhesion. Position the vertical piece against the flat surface, using small tack welds to secure them together. Use a MIG or TIG welder, keeping your handpiece at a slight angle for effective heat application. Maintain a consistent speed to create an even bead, and monitor heat to avoid burn-through. There’s more to learn about techniques and common pitfalls to guarantee strong, durable welds.
Understanding T-Joint Welding Basics
When you’re welding a T-joint, it’s essential to understand the fundamental mechanics behind it. A T-joint connects two metal plates at a right angle, and the weld bead should appear triangular along the inside corners.
Understanding the mechanics of a T-joint is crucial for achieving a strong, triangular weld bead.
You’ll notice that the edge of the vertical piece melts faster than the flat surface, so managing heat is vital. Before you start the main weld, use tack welds—small, evenly spaced spots—to temporarily hold the pieces in place. This prevents movement and maintains alignment.
Ensure your angle and heat direction are correct to create a consistent weld bead that effectively covers the tack welds. Additionally, it’s important to clean metal thoroughly before welding to enhance weld quality.
A well-executed T-joint should exhibit even heat distribution and a clean, triangular appearance, reflecting the quality of your work. Master these basics, and you’ll set the foundation for strong, reliable joints in your fabrication projects.
Essential Tools and Materials for T-Joint Welding
To create strong T-joints, having the right tools and materials is essential for success. Here’s a quick reference for what you’ll need:
| Tool/Material | Purpose | Notes |
|---|---|---|
| Welding Machine | Fuses metal together | Choose MIG or TIG based on your project |
| Welding Helmet | Protects your eyes from UV radiation | Make sure it’s auto-darkening for convenience |
| Gloves | Safeguards your hands | Use heat-resistant gloves |
| Protective Clothing | Shields skin from sparks | Wear flame-retardant clothing |
You should also clean your metal workpieces thoroughly with a wire brush or grinder to remove any contaminants. Tack welds help secure the joint, so make them small and evenly spaced. Finally, make sure you have a suitable filler material, like ER70S-6 for mild steel, for the best weld strength. Preheating your metal can improve the weldability and arc stability of the joint, ensuring a stronger bond.
Products Worth Considering

Wide Application Range: Shade 3.5/9-13 supports TIG, MIG, MMA/ARC and Grind, and the helmet accommodates magnifying lenses for close-up and detailed work.

【FASTER AUTO-DARKENING】Features high-end auto-darkening lenses with 4 premium arc sensors, switching from light to dark in 1/25000 sec. Easily adjust the shade and sensitivity of the lenses for different working environments, perfect for TIG/MIG/ARC welding. Dark state level: 4/9-13.

Advanced Eye Protection with Blue Light Blocking Technology: This welding helmet features cutting-edge Blue Light Blocking outer lens, shielding your eyes from harmful blue light during welding, protects your eyes by filtering out most of harmful high energy blue light rays while letting through the less harmful portion of the blue light spectrum. This ensures long-lasting eye comfort and safety for extended welding sessions
Preparing a T-Joint for Welding
- Clean the Edges: Make sure the edges of your metal are free from rust, paint, or oil. This promotes proper adhesion during welding.
- Position the Workpieces: Align the flat surface of the base metal parallel to the edge of the vertical piece. This configuration forms a proper T-joint.
- Tack Weld: Use small, evenly spaced tack welds to temporarily secure the metal pieces together. This prevents shifting and aids in achieving alignment.
Before you start welding, double-check that the edges fit together tightly. Additionally, ensure that any zinc residues have been thoroughly removed to avoid compromising the weld integrity.
Misalignment can complicate the welding process and compromise the strength of the final joint.
Products Worth Considering

Hold Parts In Position During Cool Down To Minimize Distortion Due To Contraction

【Heavy-Duty Cast Iron Construction】Made of high-strength cast iron and steel with excellent tensile strength, our right angle clamp ensuring durability and long service life. The surface is sprayed with plastic to resist rust and corrosion for reliable performance in demanding workshops.

Robust Capacitance: Efficiently handles up to 300 Amps, ensuring optimal performance in various welding applications.
Mastering the Welding Technique for a Strong Joint
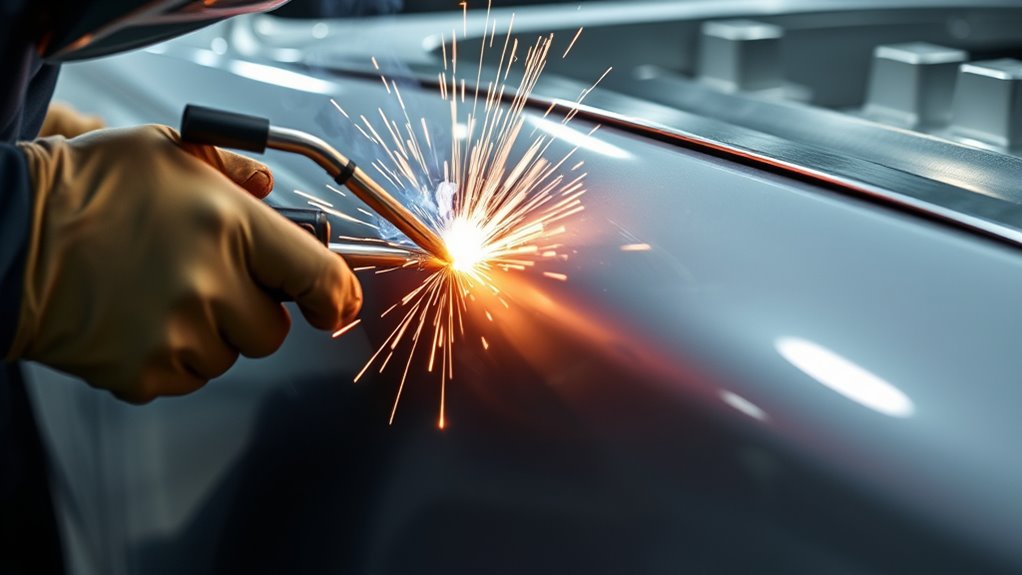
Now that you’ve prepared the T-joint, it’s time to focus on the welding technique that will guarantee a strong and reliable joint. Start by putting on your safety gear—gloves, helmet, and protective clothing are essential.
Position the handpiece at a slight angle to direct heat effectively onto the flat surface, ensuring proper penetration into the T-joint. Use tack welds to temporarily secure the pieces, placing them evenly apart to avoid shifting during welding.
Maintain a consistent speed and motion to create an even bead with a triangular shape, vital for structural integrity. Make sure the weld bead fully covers the tack welds for a smooth finish, preventing weak points.
Finally, monitor heat distribution closely to avoid burn-through or warping, which can compromise weld quality. By mastering these techniques, you’ll achieve a strong, reliable joint. Additionally, proper joint preparation is essential for a successful weld, ensuring optimal bonding and strength.
Common Mistakes to Avoid When Welding T-Joints
When welding T-joints, inadequate surface preparation can lead to contamination, jeopardizing the strength of your welds. Additionally, improper tack weld placement may cause misalignment during the main welding process, resulting in compromised quality. Pay close attention to these factors to guarantee a strong and reliable joint. Consistent arc length is also crucial for achieving optimal penetration and bead appearance.
Inadequate Surface Preparation
- Failing to Clean: Always remove rust, paint, or coatings from the weld area to guarantee solid fusion.
- Misalignment: Verify the edges and flat surfaces of your metal pieces are properly aligned to prevent uneven melting.
- Skipping Tack Welds: Don’t skip tack welds or improperly space them; this can cause misalignment during the welding process.
Improper Tack Weld Placement
Always aim for small, evenly spaced tack welds to keep your workpieces stable, preventing warping or sliding. Skipping tack welds can make it hard to control heat and position, leading to poor-quality welds.
Additionally, avoid placing tack welds near the edges; this can create excess heat concentration, causing burn-through or warping.
Finally, guarantee your main weld covers the tack welds completely; failing to do so can leave weak spots, diminishing the strength and durability of your T-joint.
How to Check if Your Weld Is Strong?
- Visual Inspection: Look for uniformity; a consistent triangular bead indicates strong penetration. Check for gaps or imperfections, as these weaken the weld.
- Bend Test: Apply pressure to the weld. A robust weld should resist cracking or breaking under stress, showcasing its strength.
- Thickness Check: Use a file or grinder to examine the weld’s thickness. A well-executed weld will have a smooth finish without excessive buildup, indicating proper execution.
Additionally, monitor for any warping or distortion in the base metal. A strong weld maintains the original shape of the joined materials, guaranteeing structural integrity. Proper edge preparation is crucial to ensuring a strong bond and minimizing the risk of failure.
T-Joint Welding: Career Opportunities and Training
As you consider a career in T-joint welding, understanding the training and opportunities available is essential.
Welding apprenticeships typically last from one to four years, providing hands-on training in T-joint welding and other techniques. Many vocational schools and community colleges offer specialized programs that often lead to certification, enhancing your qualifications.
The welding industry is projected to grow by 3% from 2021 to 2031, creating ample job opportunities, especially in auto body fabrication.
With the rise of online registration for these programs, accessing education has never been easier.
Skilled welders can expect competitive salaries, with median annual earnings around $45,000, depending on your experience and location. Additionally, proficiency in 3-in-1 welder functionality can further enhance your employability in various welding roles.
Pursuing a career in T-joint welding not only equips you with essential skills but also offers a pathway to financial stability and professional growth.
Frequently Asked Questions
What Type of Weld Can Be Used on a T Joint?
You can use a fillet weld or a groove weld for a T joint, depending on your strength requirements. Ascertain proper weld preparation to achieve a strong bond, especially with thicker materials. Choose your welding process wisely.
What Is the Process of T Joint Welding?
To perform T-joint welding, clean surfaces, tack weld for stability, then apply consistent heat with your handpiece. Use effective welding techniques to guarantee a uniform bead and structural integrity throughout the joint.
How to Weld T Joint 7018?
To weld a T-joint with 7018, clean the metal, set your machine to 70-90 amps, use a stringer bead technique, and guarantee complete coverage over tack welds for a strong, uniform joint. Inspect your work.
What Does a Tee Weld Look Like?
A tee weld features a triangular cross-section, showcasing smooth, consistent weld finishes. You’ll notice a clean shift between metal pieces, ensuring structural integrity, with no defects. Proper technique yields a visually appealing and strong joint.
Conclusion
T-joint welding might seem challenging at first, but with practice and the right techniques, you’ll quickly gain confidence. Don’t worry if you make mistakes initially; even seasoned welders learn from them. Focus on mastering your tools and understanding the materials. As you improve, you’ll not only create stronger joints but also open doors to exciting career opportunities in auto body fabrication. Remember, every expert was once a beginner, so keep pushing your skills forward!


