Uphill vs. Downhill Welding: Which Direction Should You Use?
Choosing the wrong vertical welding direction can leave your weld weak, uneven, or hard to control. Uphill welding and downhill welding both have a place, but they solve different problems. This guide explains when to use each method, how they affect penetration and speed, and what you should watch before you strike an arc.
Quick Answer
Use uphill welding when you need more penetration, stronger welds, and better control on thicker material. Use downhill welding when you need faster travel on thinner metal and want to reduce burn-through. For structural work, uphill welding usually gives you the safer choice, but downhill welding can work well on light-gauge metal when the joint allows it.
Key Takeaways
- Uphill welding gives you deeper penetration and better fusion on thicker materials.
- Downhill welding moves faster and works better on thin metal when burn-through is a concern.
- Your electrode choice, amperage, angle, and travel speed affect both methods.
- Uphill welding usually needs more skill because you must control the puddle against gravity.
- Downhill welding can look clean, but weak fusion can occur if you move too fast.
Uphill vs. Downhill Welding: A Comparative Overview
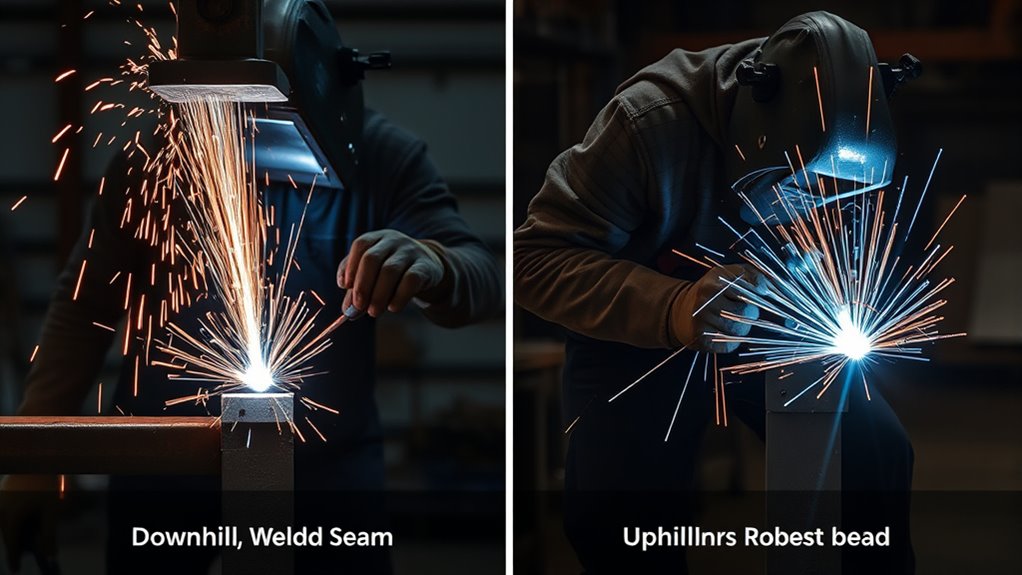
When you compare uphill and downhill welding, start with gravity. Uphill welding moves upward against gravity, while downhill welding moves downward with gravity.
Uphill welding works well on thicker materials because it helps you build a stronger bead with better sidewall fusion. You often use a slower travel speed and close puddle control.
Downhill welding moves faster because gravity helps the puddle flow. This method can suit thinner metals because it uses less heat in the joint and can reduce distortion.
Amperage settings depend on the electrode, process, position, and base metal thickness. For example, a small E7018 electrode often needs less amperage in vertical-up work than it would in flat or horizontal welding.
Skill level matters. Uphill welding requires steadier hand control because the molten pool wants to sag. Downhill welding feels easier at first, but you still need the right speed to avoid weak fusion.
Each method serves a different purpose. Uphill welding fits work where strength and penetration matter most. Downhill welding fits faster work on thinner material where the joint design allows it. Understanding critical parameters like amperage and voltage can greatly influence the quality of your welds.
Uphill Welding: Techniques and Benefits
Uphill welding, also called vertical up welding, helps you get deeper penetration on thicker material. It also gives you more time to tie the weld into both sides of the joint.
You can use weaving or stringer beads to control the molten weld pool. Stringer beads usually give you a narrow bead, while a small weave can help fill a wider joint.
The E7018 electrode often works well for vertical-up stick welding when the base metal and job requirements match it. E6010 or E6011 electrodes can also work in many field and root-pass applications.
Use weaving or stringer bead techniques to control the molten pool and improve bead shape.
Uphill welding takes more practice, but it can reduce common defects when you control heat and travel speed well. Move too slowly, and the bead may get too large. Move too fast, and the weld may not fuse into the joint.
This technique fits structural applications, frames, heavy plate, and many vertical joints where strength matters. Learning uphill welding improves your control and helps you make stronger welds in demanding positions.
Understanding flux core welding techniques can also help you improve vertical weld control in flux-core applications.
Products Worth Considering

Product Introduction: E7018 welding rod is suitable for both AC and DC applications and can be used for all position welding

Product Introduction: E7018 welding rod is suitable for both AC and DC applications and can be used for all position welding

AWS A 5.1-04 : E7018
Downhill Welding: Key Insights
Downhill welding gives you a faster way to weld vertical joints on thinner sections. Gravity helps the puddle move down the joint, so you can travel quicker than you would with uphill welding.
- Use it on pipes and thin steel sections when the procedure allows it.
- Use it to reduce burn-through and distortion on light-gauge metal.
- Choose common electrodes such as E6010 or E6011 when they fit the job.
- Control travel speed carefully to avoid weak fusion.
Downhill welding can feel easier for beginners, but it has limits. The bead may not penetrate as deeply, which makes it a poor choice for many thick or highly stressed joints.
The lower heat input can reduce distortion, but it can also create lack of fusion if you move too fast. A clean surface matters because dirt, rust, paint, and oil can weaken the weld. Proper cleaning techniques can significantly improve weld quality.
Keep your pace steady and watch the puddle, not only the arc. Downhill welding can help you finish thin-metal jobs faster without losing control.
Products Worth Considering

[PRODUCT] Premium shielded metal arc welding (SMAW) electrode E6010 for stick welding carbon steel in metal fabrication, maintenance and repair works.

AWS A 5.1-04 : E6010
[PRODUCT] Premium shielded metal arc welding (SMAW) electrode E6010 for stick welding carbon steel in metal fabrication, maintenance and repair works.
Key Differences in Weld Quality and Techniques
Uphill and downhill welding differ in penetration, speed, heat input, and the way you control the puddle. These differences affect the final strength and appearance of the weld.
| Aspect | Uphill Welding | Downhill Welding |
|---|---|---|
| Penetration | Deeper penetration for thicker materials | Shallower penetration for thinner metals |
| Electrode Movement | Needs tighter puddle control and steady movement | Uses faster travel with less manipulation |
| Heat Input | Uses slower travel and more puddle control | Uses faster travel and less heat in the joint |
| Best Use | Heavy plate, structural joints, and thicker sections | Thin sheet, light repairs, and approved pipe work |
Uphill welding usually gives you better fusion because you can hold the puddle longer at the joint edges. Downhill welding can be fast and clean, but it can also hide weak fusion under a smooth bead.
Electrode choice matters. E7018 often suits uphill welds, while E6010 and E6011 often suit downhill work when the job allows them. Always match your amperage, polarity, and electrode size to the material and welding process.
Using the correct amperage helps you improve weld quality in both techniques.
Warning: Do not use downhill welding on a critical thick joint unless the welding procedure allows it.
What Challenges Do Welders Face?
Welders face several challenges in vertical positions. Gravity affects the puddle, the bead shape, and the way heat builds in the joint.
- Control molten metal before gravity pulls it out of the joint.
- Keep heat input steady to limit distortion and burn-through.
- Work safely at heights when ladders or scaffolding enter the job.
- Use sound technique to reduce undercut, slag inclusions, and poor penetration.
In uphill welding, you must manage the molten metal with care. If you lose control, the bead can sag or trap slag.
You also need steady heat control. Too much heat can make the puddle run, while too little heat can cause poor fusion.
Safety matters more when you work above floor level. Use stable footing, dry gloves, safe cable placement, and proper fall protection when the job requires it. Maintaining optimal weld quality helps you create stronger and more reliable joints.
Mastering Vertical Welding: Essential Tips
Mastering vertical welding starts with puddle control. You need to adjust your angle, speed, and heat based on the joint type and metal thickness.
Watch the edges of the puddle and make sure the weld ties into both sides. Good bead quality comes from steady movement, not rushed movement.
You should also consider maximum fillet weld size when strength and joint design matter.
Essential Welding Techniques
Vertical welding techniques help you make stronger welds in positions where gravity works against you. Focus on control before speed.
- Use uphill welding when you need deeper penetration and stronger fusion.
- Use downhill welding when thin metal needs faster travel and less heat.
- Choose E7018 for many uphill stick welds when it fits the job.
- Choose E6010 or E6011 for many downhill and root-pass jobs when allowed.
- Lower amperage slightly for vertical-up welding when the puddle gets too fluid.
Keep your hand steady and hold a consistent arc length. Adjust your electrode angle as the puddle changes.
Practice on scrap metal before you weld an important joint. This helps you find the right speed and heat setting.
Pro tip: If the puddle sags during uphill welding, shorten your arc and reduce travel speed in small steps.
Safety and Equipment Considerations
When you do vertical welding, protect yourself first. Wear proper personal protective equipment (PPE), including a welding helmet, gloves, and flame-resistant clothing.
Set your welding machine correctly for the electrode and process. Direct current electrode positive (DCEP) often supports penetration in many stick-welding setups, but you should follow the electrode and machine guidance.
Clean the joint before you weld. Remove paint, oil, rust, and moisture so you reduce porosity and other defects.
Keep the right electrode angle and distance from the workpiece. Check your leads, holder, ground clamp, and electrodes before you start.
When Should You Choose Uphill or Downhill Welding?
Choose uphill welding when the job needs strength, penetration, and better fusion. This often includes thick plate, heavy brackets, frames, and structural joints.
Choose downhill welding when the metal is thin and heat control matters more than deep penetration. This often includes light repairs, thin sheet metal, and some pipe procedures.
If you feel unsure, check the welding procedure, joint design, and base metal thickness. For critical work, follow the approved procedure instead of choosing by speed alone.
Frequently Asked Questions
What Is the Difference Between Uphill and Downhill Welding?
Uphill welding moves upward against gravity and gives you deeper penetration on thicker materials. Downhill welding moves downward with gravity, so it works faster and often suits thinner metal.
Is 7018 Better Uphill or Downhill?
E7018 usually works better for uphill welding because it supports strong, controlled welds on thicker joints. Downhill E7018 can be difficult and may not meet the needs of many structural jobs.
Can You Make $100,000 a Year Welding?
Some welders can earn $100,000 a year, especially in skilled, certified, or high-demand fields. Your pay depends on your location, process skills, certifications, overtime, industry, and job risk.
Is Uphill or Downhill Welding Harder?
Uphill welding is usually harder because you must control the puddle against gravity. Downhill welding can feel easier, but it still needs careful speed control to avoid weak fusion.
Can You Downhill Weld Thick Steel?
You should avoid downhill welding on thick steel unless an approved welding procedure allows it. Thick steel usually needs deeper penetration, which uphill welding can provide more reliably.
Conclusion
Your best choice depends on material thickness, joint strength, and the welding procedure. Uphill welding gives you stronger penetration and better control on thick material, while downhill welding helps you move faster on thinner metal.
Before you start, check your electrode, amperage, polarity, and joint design. Practice both methods on scrap so you can see how the puddle reacts in real time.
Once you understand the limits of each direction, you can choose the method that gives your weld the right balance of strength, speed, and control.


