You should start with the flat welding position, also called 1G or 1F. It gives you the easiest setup, the best visibility, and the most control over the weld pool. Gravity helps keep the bead stable, so you can focus on arc length, travel speed, and bead placement. Clamp the workpieces level, set your parameters, and practice steady passes first. Once you’ve got that down, you’ll be ready for the next position.
Where Should Beginners Start?
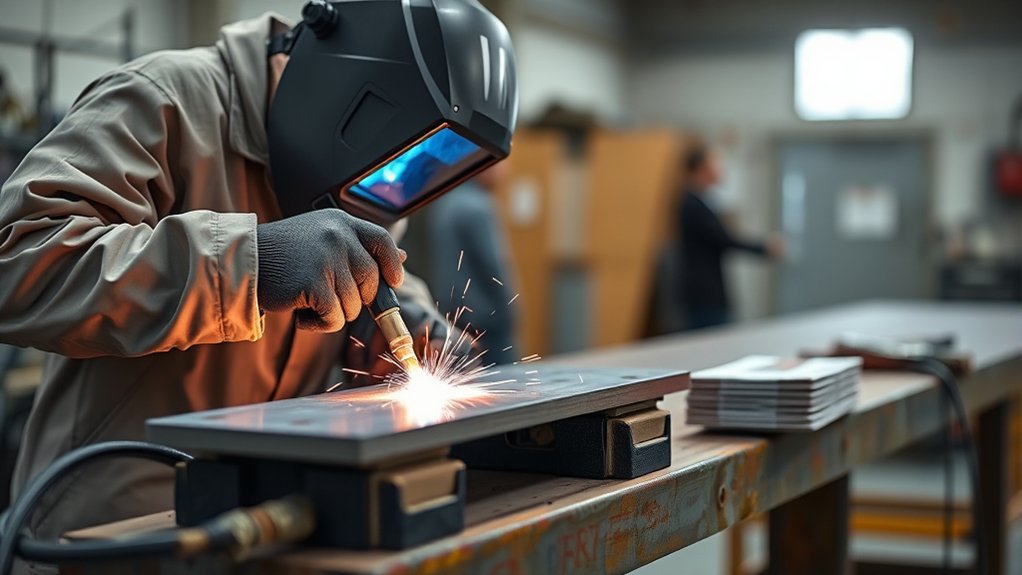
If you’re just starting out, begin with the Flat Welding Position, also called 1G or 1F. In this flat position, your workpieces rest horizontally, so you can direct the arc from above and let gravity help you control penetration and bead shape. That makes it the easiest of the welding positions for beginners to practice fundamental techniques with less strain and more clarity. You can try different processes and filler metals here, building skill without fighting awkward angles. Keep your arc length steady, move at a consistent travel speed, and watch how each pass affects weld quality. Repeating these drills helps you learn control, not guesswork, and that discipline builds confidence. With enough practice, you’ll create cleaner beads and prepare yourself for the horizontal position and other more demanding welding positions. This first step gives you a strong technical base and a path toward freer, more capable welding. Additionally, maintaining a proper stick-out length is crucial for achieving optimal arc stability in your welds.
Why Flat Welding Is the Best First Step
You should start with flat welding because gravity works with you, helping the weld pool stay controlled and reducing sagging or defects. This position also gives you easy joint access, so you can practice different processes and set up your work without extra difficulty. As you build core skills like arc length control, travel speed, and bead consistency, you’ll gain the confidence needed for harder positions. Additionally, mastering flat welding lays the foundation for understanding flame-resistant clothing, which is crucial for safety in various welding positions.
Easy Gravity Control
Flat welding, also called 1G or 1F, is the easiest position for beginners because you apply the weld from above and gravity helps control the molten metal. In this flat welding position, you keep your work horizontal, so the weld pool stays calm and the bead forms evenly. You can practice core techniques without fighting gravity, and that freedom lets you build confidence fast.
| Focus | What you do | Effect |
|---|---|---|
| Arc length | Hold it steady | Better control |
| Travel speed | Move consistently | Smoother bead |
| Weld pool | Watch it closely | Fewer defects |
Use this setup to refine timing, aim, and rhythm. Because most processes work flat, you can explore and grow without unnecessary strain.
Accessible Joint Setup
An accessible joint setup makes flat welding the best first step because you can work directly above the joint while gravity keeps the weld pool stable. In the flat welding position, you gain an accessible joint, better control, and a clear view of the puddle. For beginners, that freedom lowers stress and sharpens your focus on essential techniques.
- Picture the torch or electrode hovering over a clean, open seam.
- See the molten metal settle evenly instead of sagging.
- Notice your hand guiding a straight, steady travel path.
- Imagine using different welding processes while keeping the same calm setup.
This layout supports fundamental skills, letting you practice bead placement and arc length without wrestling gravity. Start here, build confidence, then move forward.
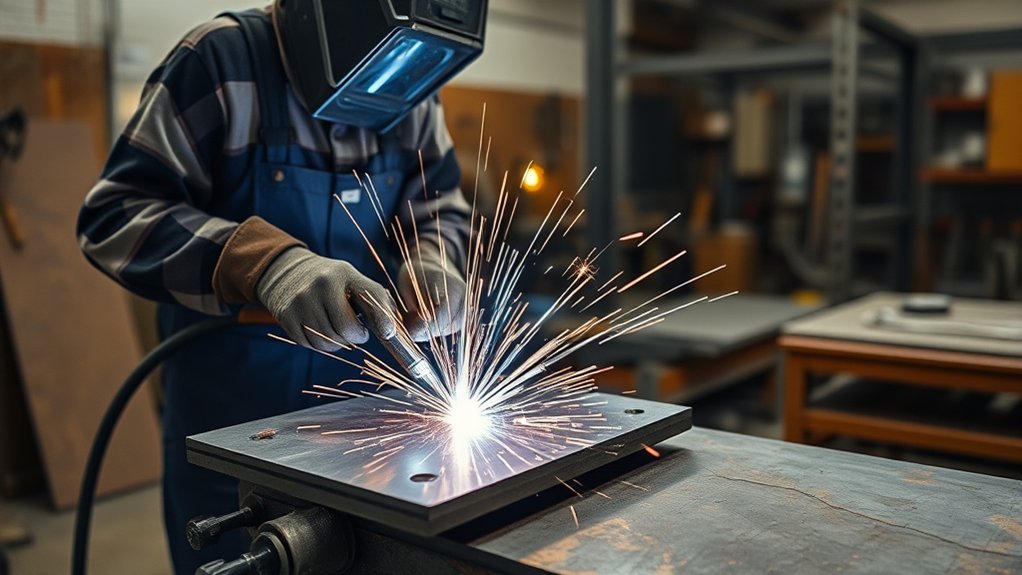
Builds Core Skills
Start in the flat position, where gravity helps the molten metal flow into the joint, making it easier to achieve good penetration and a uniform bead. In the flat welding position, you can focus on foundational skills instead of fighting awkward angles. You’ll keep a steady arc length, control travel speed, and watch the puddle move with clarity. Those habits sharpen weld penetration and help you avoid undercut, porosity, and overlap. Because all welding processes work here, you can test methods, compare results, and learn what each setup teaches you. As beginners, you gain confidence faster when the work feels manageable. That freedom lets you practice purposefully, build discipline, and raise welding proficiency. Master this first step, and you’ll be ready for tougher positions with control.
Flat Welding Position Basics
In the flat position, you place the workpieces horizontally and weld from directly above the joint, so gravity works with you and makes 1G or 1F the easiest starting point. This setup gives you better access and control, and it works well with nearly any welding process. As you practice, keep a steady arc length and consistent travel speed to build clean, uniform beads. Additionally, ensuring proper workspace setup can greatly enhance your welding experience and help minimize common mistakes.
Products Worth Considering

Wide Application Range: Shade 3.5/9-13 supports TIG, MIG, MMA/ARC and Grind, and the helmet accommodates magnifying lenses for close-up and detailed work.

Advanced Eye Protection with Blue Light Blocking Technology: This welding helmet features cutting-edge Blue Light Blocking outer lens, shielding your eyes from harmful blue light during welding, protects your eyes by filtering out most of harmful high energy blue light rays while letting through the less harmful portion of the blue light spectrum. This ensures long-lasting eye comfort and safety, making it ideal for extended welding sessions
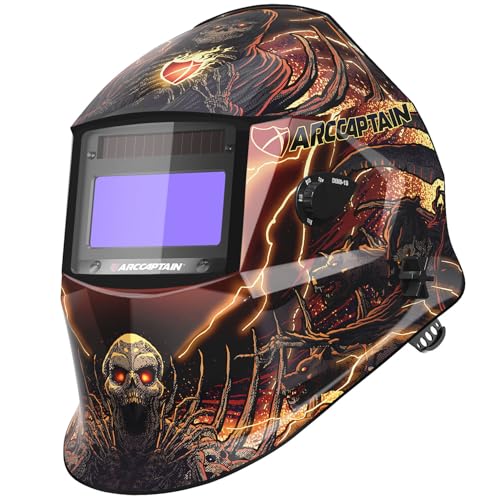
【FASTER AUTO-DARKENING】Features high-end auto-darkening lenses with 4 premium arc sensors, switching from light to dark in 1/25000 sec. Easily adjust the shade and sensitivity of the lenses for different working environments, perfect for TIG/MIG/ARC welding. Dark state level: 4/9-13.
Why Flat Is Easiest
Flat welding position basics are the easiest place to start because you’re working with the joint lying horizontally, which gives you clear access and better control. As a beginner, you can use gravity to your advantage in the flat welding position: molten metal settles into the groove, improving penetration and bead shape. This setup is versatile across SMAW, TIG, and MIG, so you can practice one welding process after another without changing your stance. Build your foundational skills by holding a steady arc length and keeping travel speed even.
- Flat plate on a bench, bright and open
- Torch or electrode moving straight ahead
- Smooth bead filling the joint groove
- Clean, controlled line across the metal
1G And 1F Basics
1G and 1F welding positions give you the best place to begin because the workpieces sit horizontally, making the joint easier to see, reach, and control. In the flat welding position, 1G for groove welds and 1F for fillet welds, gravity helps the molten metal settle into the joint. You can use any welding process here, so beginners get a versatile space to learn the basics without extra struggle. Keep a stable arc length and steady travel speed to help the bead form evenly and achieve proper penetration. This position gives you real control while you practice, build confidence, and prepare for harder positions like vertical or overhead. Start here, work with purpose, and let skill grow from a strong foundation.
Beginner Skills To Practice
Now that you’ve started with 1G and 1F, you can focus on the core skills that make flat welding feel controlled and repeatable. In this welding position, gravity helps you keep the weld pool steady, so you can build confidence fast. Use these beginner skills to shape each bead:
- Hold a proper work angle near 45 degrees.
- Watch the weld pool and keep it centered.
- Maintain a consistent travel speed.
- Run practice passes on scrap material.
Keep your arc length stable so the bead stays clean and uniform. Flat welding gives you clear visibility, better access, and room to correct motion. When you practice with intention, you train your hands to move with freedom, not fear, and you set yourself up for stronger results in every next welding position.
How to Set Up a Flat Weld
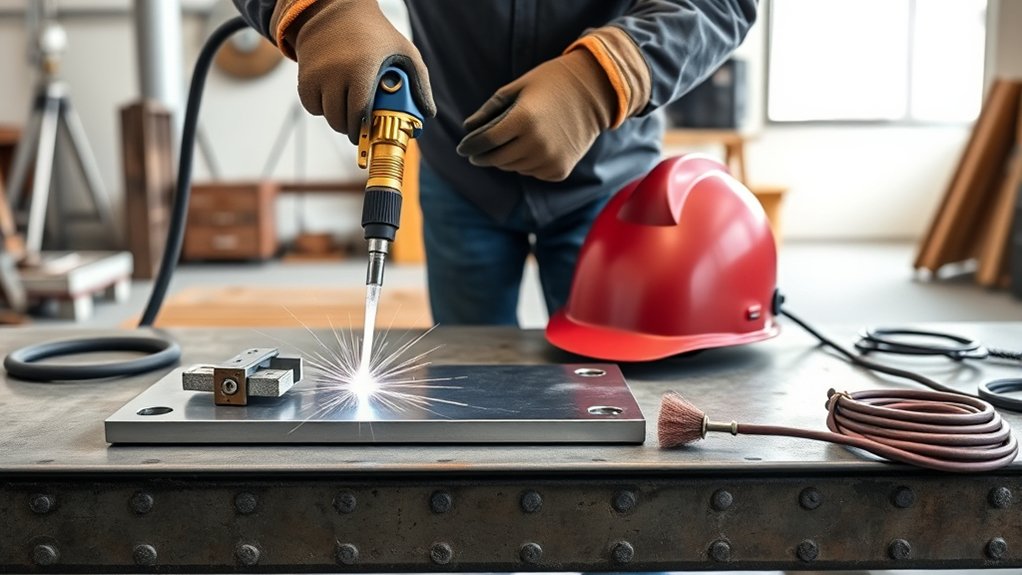
To set up a flat weld, position your workpieces securely on a level surface so they stay stable and give you full access to the joint. Clamp them tight, then check alignment before you strike the arc. Choose filler metal made for flat work, like E7018 or E70T-1, so your weld matches the job. Set your welding parameters—amps and volts—to suit material thickness; this helps you build a clean, uniform bead without forcing the metal. Hold a torch angle near 45 degrees to control penetration and protect the puddle. Keep your travel speed steady and your arc length consistent as you practice the technique on scrap. Remember, proper fillet weld sizing is essential to ensure structural integrity and prevent issues during welding.
| Setup step | Why it matters |
|---|---|
| Secure position | Stops movement |
| Correct filler metal | Improves compatibility |
| Dialed welding parameters | Balances heat |
| Steady torch angle | Controls weld pool |
Use these basics, and you’ll weld with more confidence, freedom, and control.
Which Welding Position Comes Next?
After you’ve mastered the flat position, move on to horizontal welding to practice controlling the puddle against gravity. Keep a steady angle and travel speed so the weld doesn’t sag, because that control builds the habits you’ll need next. From there, try vertical welding, where you’ll adjust your technique for vertical up or down and strengthen your pool control for more advanced work. Consistent practice in these positions will improve your amperage settings and ensure better weld penetration.
Horizontal Position Practice
Once you’re comfortable with the flat position, the next step is horizontal welding, or 2G, which teaches you how to manage gravity as the molten metal wants to sag. In this horizontal welding position, keep your workpiece vertical and move with a consistent travel angle to protect weld quality. Hold a steady 45-degree angle, and watch the puddle like a compass. Keep heat input controlled; too much invites defects, too little weakens fusion. Use stringer beads for cleaner, tighter passes.
- Picture a bright bead running across a steel wall.
- Imagine the puddle staying centered, not drooping.
- See your torch gliding smoothly, hand calm and free.
- Feel mastery build with each controlled pass.
Vertical Position Progression
With horizontal welding under your belt, the next logical step is vertical position work, or 3G, where you’ll learn to control the weld pool as gravity starts pulling the molten metal down the joint. You’ve already built control in the flat position and horizontal position, so now you can refine travel speed, arc angle, and heat input. Weld upward or downward based on the joint and procedure, and watch the puddle closely so it doesn’t sag or run. Keep your safety gear on, because vertical welding demands focus and discipline. This stage builds welding proficiency by teaching you to adapt, stay calm, and work with changing forces. Mastering vertical position work prepares you for the overhead position, where control matters even more.
Why Horizontal Welds Are Harder
Horizontal welds (2G) are harder because you have to control the puddle against gravity, not with it. In horizontal welds, gravity pulls molten metal down, so the welder needs steady hands and precise control of the weld puddle to avoid inconsistent welds. Keep a consistent 45-degree torch angle and maintain heat control so the puddle stays tight instead of sagging. You’ll feel the difference fast: the bead wants to droop, the edges can wash out, and small mistakes show up quickly. Practice these checkpoints:
Horizontal welds demand steady control against gravity—keep the puddle tight, the angle consistent, and the bead in line.
- See the puddle as a small river resisting a slope.
- Lock your torch angle like a compass needle.
- Watch for shiny buildup before it rolls.
- Move only as fast as the puddle can follow.
With repetition, you’ll gain control of the welding and make clean, strong beads. Remember that mastering proper joint preparation is crucial for achieving high-quality welds. Keep practicing; this position builds skill and freedom.
Vertical Welding: Up or Down?
Vertical welding gives you two choices: vertical up (uphill) or vertical down (downhill), and each one changes how you control the puddle. When you go uphill, you move slower, but you gain better control of the weld pool. That makes this technique a strong fit for thicker materials, where you need deeper fusion and steady buildup. When you choose downhill, you travel faster, so it works better on thinner materials, but you must keep precise control to avoid defects. In both vertical techniques, watch heat input and travel speed closely; too much heat can cause sagging, and too little can leave incomplete fusion. You don’t need perfection on day one. Start with practice on scrap, learn how the vertical puddle responds, and build confidence one bead at a time. With disciplined control, you can choose the direction that fits the job and work with more freedom. Additionally, understanding the recommended amperage range is crucial for achieving optimal weld quality.
Why Overhead Welding Comes Last
Overhead welding comes last because it asks the most from your body and your skill. You work in an awkward stance, so this physically demanding position tests your strength, balance, and attention at once. Hot metal and slag can fall toward you, so you need strict safety precautions and protective gear before you try it.
Overhead welding demands strength, balance, and strict protection before you trust the puddle above you.
- Picture sparks raining downward.
- Picture a molten puddle clinging overhead.
- Picture your gloves and hood shielding you.
- Picture steady hands guiding every pass.
Puddle control matters most here, because gravity wants to pull the bead away. If you’re a beginner, build confidence in the fundamental positions first. Master flat and horizontal welding so you can read the puddle, move with purpose, and trust your technique. Then overhead won’t feel like a barrier; it’ll feel like the next step in your freedom to weld with control.
Additionally, understanding flux core welding techniques can significantly improve your overhead welding skills.
How Filler Metal Affects Position Choice
Filler metal can steer which welding position you should practice first, because some wires and rods are made for specific orientations. As a beginner, you should match filler metals to the welding process and the position you’re learning. E70T-XX products often work best in flat and horizontal positions, so they can narrow your practice if you need flexibility. E71T-XX options are suitable for all positions, which lets you move from flat to vertical and overhead without changing materials. That freedom helps you focus on technique instead of chasing compatibility. TIG and MIG processes usually accept all positions, but always check the filler metal rating before you strike an arc. When you choose the right filler, you improve suitability, reduce frustration, and get stronger and consistent welds. Make that decision intentionally, and you’ll build skill with purpose while keeping your path to ideal results open. Moreover, using ER308L filler wire can enhance your results when working with 304 stainless steel in various positions.
How to Practice for Harder Welds
Once you’ve matched your filler metal to the process and position, you can use practice to build up to tougher welds with less frustration. Start in the Flat Position, where gravity helps you control puddle shape and bead uniformity. Use scrap plate and short practice sessions to repeat the same joint until your stable arc length and travel speed feel automatic.
- A clean bead on flat scrap.
- A steady torch hand above a marked line.
- Molten metal held in place on the Horizontal Position.
- A notebook showing weld defects and corrections.
Then move into the Horizontal Position to learn heat control and keep molten metal from sagging. Record each run so you can spot undercut, porosity, and uneven ripples before they become habits. As you improve, these drills will prepare you for advanced welding positions like Vertical and Overhead, where precision gives you freedom, confidence, and control.
Frequently Asked Questions
Which Welding Position Is the Easiest for Beginners?
You’ll find flat welding easiest for beginner welding because gravity helps. Use best techniques, smart equipment choices, and safety practices. Avoid common mistakes, pursue skill development, try project ideas, and use learning resources confidently.
Why Do Welders Not Live Long?
Welders can live shorter lives; studies show higher illness rates. You can reduce health risks with welding safety, protective gear, and ventilation. Manage exposure effects, respiratory issues, physical demands, and stress factors to improve career longevity.
Is It Better to Learn MIG or TIG First?
You’ll usually learn MIG first: its MIG advantages include easier setup, lower equipment costs, and a gentler learning curve. TIG precision comes later for specialty material types, while your personal preference, safety practices, and project suitability guide you.
What Is the Golden Rule in Welding?
You’ll keep a stable arc length—the golden rule. Pair it with safety practices, equipment maintenance, welding techniques, material preparation, joint design, avoiding common mistakes, following industry standards, and steady skill progression for consistent, strong welds.
Conclusion
Start with flat welding, because it gives you the most control and the clearest view of your puddle. You’ll build steady hands, learn to set your machine, and practice filler metal placement without fighting gravity. Once you’re comfortable, move to vertical, then overhead. Think of it as your welding apprenticeship, not a race. If you keep practicing with purpose, you’ll develop the skill and confidence to tackle tougher positions safely and cleanly.


