
When I first set up my home welding shop, I thought a low-cost machine and the ability to strike an arc would be enough. I was wrong. The quality of your power supply, ventilation, work area, consumables, joint preparation, and safety habits matters just as much as the welder itself.
Like many beginners, I burned through thin steel, fought an unstable arc, and bought supplies that did not match the work. A better approach is to choose one process, build a safe workspace around it, follow the machine and consumable charts, and practice on scrap before making anything that must carry a load.
This guide walks through a practical home welding setup for beginners, including process selection, machine features, tools, PPE, power, ventilation, gas-cylinder handling, a first practice weld, and the most common problems to fix.
Quick Answer
For most beginners, start with a 120-volt or dual-voltage MIG machine that can also run self-shielded flux-core wire. Add a welding helmet, safety glasses, gloves, flame-resistant clothing, ventilation, a metal table, clamps, and cleaning tools. Use the machine’s setup chart, practice on scrap, and leave structural or safety-critical welds to a qualified welder.
Key Takeaways
- MIG is usually the easiest process to learn indoors; self-shielded flux-core is useful outdoors because it does not need bottled shielding gas.
- Choose a welder by output range, duty cycle, input power, supported wire or electrodes, and the thickest metal you realistically plan to weld.
- Ventilation, fire control, eye and skin protection, dry electrical conditions, and secure gas cylinders are part of the setup—not optional extras.
- Start every job with clean metal, the correct filler, the correct polarity, and settings from the machine and consumable manufacturer.
- Practice joints should be cut, bent, or broken after cooling so you learn whether the weld fused properly instead of judging appearance alone.
At a Glance
| Time Required | About 2–6 hours to plan, arrange, and test the shop; skill practice is ongoing |
| Difficulty | Beginner setup; welding skill ranges from beginner to advanced |
| Tools Needed | Welder, PPE, metal table, clamps, wire brush, grinder, measuring tools, ventilation, and an appropriate fire extinguisher |
| Cost | Rough planning range: $600–$2,000 or more, before major electrical work; local prices vary |
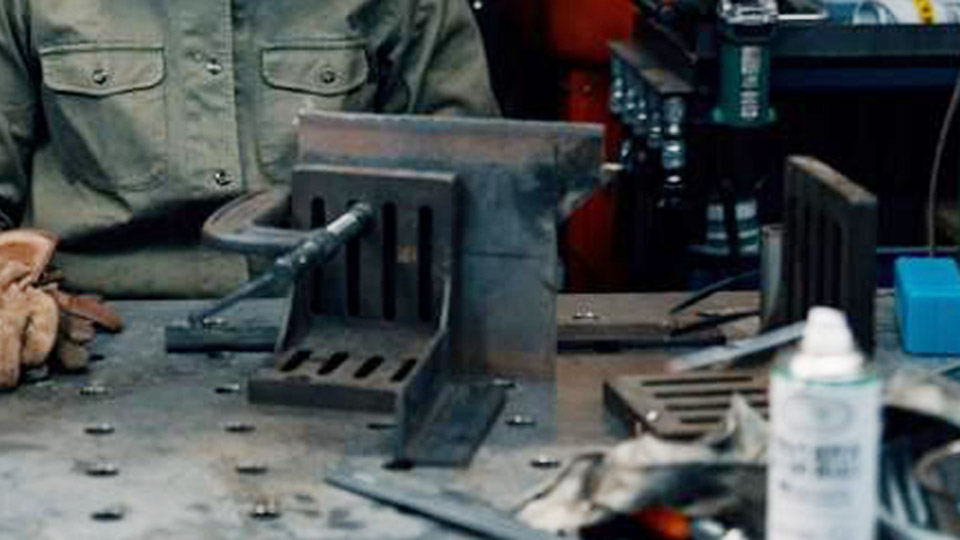
A clear, uncluttered welding area makes setup checks and safe movement easier. Image by thefabricator.
Why a Home Welding Setup Matters
A proper setup does more than make welding convenient. It reduces exposure to ultraviolet radiation, fumes, burns, electric shock, flying debris, and fire. The U.S. Occupational Safety and Health Administration lists metal fumes, UV radiation, burns, eye damage, electrical shock, cuts, and crush injuries among the main welding hazards. Review OSHA’s welding hazards and solutions before arranging the shop.
A dedicated area also improves weld quality. Clean metal, stable workholding, suitable power, dry consumables, and repeatable machine settings make it easier to diagnose a bad bead. You spend less time guessing whether the problem came from your technique, the machine, the joint, or the material.
Warning: Do not use beginner practice welds on vehicle frames, suspension parts, steering parts, roll cages, trailer couplers, lifting devices, pressure vessels, gas cylinders, or other safety-critical structures. Those jobs may require engineered procedures, code compliance, inspection, and a qualified welder.
Choose the Right Welding Process
Your first machine should match your usual material, thickness, location, power supply, and learning goals. MIG, self-shielded flux-core, Stick, and TIG can all work in a home shop, but they do not have the same setup needs.
| Process | Best Fit | Main Advantages | Main Limits | Beginner Fit |
|---|---|---|---|---|
| MIG/GMAW | Indoor mild-steel fabrication, sheet metal, general repairs | Easy arc starts, fast travel, no slag with solid wire | Shielding gas is affected by wind; metal must be clean | Best starting point for many people |
| Self-shielded flux-core/FCAW-S | Outdoor repairs and portable work | No gas cylinder; tolerates light drafts better than gas MIG | More smoke, spatter, and slag; polarity depends on the wire | Beginner-friendly with cleanup practice |
| Stick/SMAW | Outdoor work, thicker steel, farm and repair tasks | Portable, no external shielding gas, broad electrode selection | Harder arc starts, slag removal, more difficult on thin sheet | Moderate learning curve |
| TIG/GTAW | Precise work on clean steel, stainless, and aluminum | Excellent heat and puddle control; clean finish | Slow, coordination-heavy, and less tolerant of contamination | Usually better as a second process |
MIG Welding: The Easiest Starting Point for Many Beginners
MIG feeds a continuous solid wire through a gun while shielding gas protects the molten weld pool. Miller’s first-welder guide describes MIG as easy to learn and suitable for a wide range of DIY work. The same wire-feed machine may also support flux-core, which gives you an outdoor option without bottled gas.
When to use it: Choose gas MIG for clean indoor work on mild steel and other supported metals. Aluminum MIG normally needs a machine and wire-feed system designed for soft aluminum wire, often with a spool gun or push-pull system. Do not assume every MIG unit can weld aluminum well.
Polarity and gas: Solid-wire MIG on mild steel normally uses DCEP, also called electrode positive. A 75% argon/25% carbon-dioxide blend is a common all-purpose choice for short-circuit MIG on carbon steel. Always confirm the wire label and machine chart before connecting the leads.
Settings: Do not copy one voltage and wire-speed pair into every machine. Metal thickness, joint shape, wire diameter, gas, position, and machine design all change the starting point. Use the chart inside the welder first. As a rough cross-check, Miller’s parameter guide estimates about 125 amps for 1/8-inch steel and about 250 inches per minute with 0.030-inch wire, then directs the user to adjust voltage for a stable arc.
Pro Tip: The familiar “bacon sizzle” can help you notice a stable short-circuit MIG arc, but sound is not a weld-quality test. Check bead shape, toe tie-in, penetration on practice coupons, and the manufacturer’s setup chart.
Self-Shielded Flux-Core: Better for Outdoor Portability
Self-shielded flux-core wire creates its own shielding system, so it does not need a gas bottle. It works better than gas MIG in light outdoor air movement, but it produces slag, smoke, and more cleanup. Many hobby machines switch polarity when changing between solid MIG wire and self-shielded flux-core.
Important: Do not assume every flux-core wire uses DCEN. Many common self-shielded wires do, while others specify DCEP. Follow the exact polarity printed on the wire spool or data sheet.
Stick Welding: Rugged and Portable
Stick welding uses a flux-coated consumable electrode. It is useful for outdoor repairs and thicker steel because there is no external shielding-gas stream to disrupt. It can tolerate less-than-perfect field conditions better than solid-wire MIG, but the joint should still be cleaned as thoroughly as practical.
Electrode selection: E6011 is often chosen for repair work and can run on AC or DCEP when the specific product permits it. E7018 is commonly used where low-hydrogen weld metal is needed, but storage and procedure requirements matter. Never use the old rule “DCEN for most rods.” Read the electrode package and the welder manual.
Storage: Keep electrodes dry and in the condition required by the manufacturer. A sealed household container may help ordinary hobby rods avoid humidity, but it is not a substitute for controlled low-hydrogen electrode storage where a code or procedure applies.
TIG Welding: Precision With a Steeper Learning Curve
TIG uses a nonconsumable tungsten electrode, shielding gas, and often a separate filler rod. It gives excellent puddle control but requires steady torch distance, heat control, and filler-hand coordination.
Polarity: Conventional TIG on steel and stainless uses DCEN. Aluminum is usually welded on AC with a suitable AC TIG machine. Miller’s TIG basics guide also notes that modern inverter machines commonly use ceriated or lanthanated tungsten rather than treating pure tungsten as the default.
Contamination: If the tungsten touches the puddle or filler, stop, let it cool, and regrind or replace it. Use a dedicated grinding surface for tungsten so you do not carry steel or abrasive contamination back to the weld.
Pick a Welding Machine That Fits the Work
The right beginner welder is not automatically the machine with the highest advertised amperage or the longest feature list. Start with the jobs you will actually do, then compare the specifications below.
Products Worth Considering
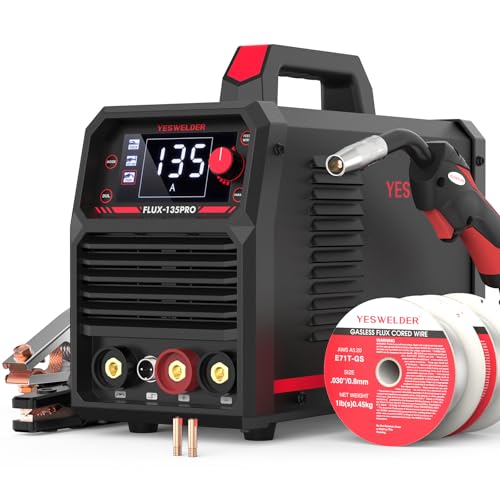
READY OUT OF THE BOX: Start welding immediately! It masterfully handles Gasless Flux Core MIG, Stick, and Lift TIG (Extra Lift TIG torch required). This budget-friendly 3-in-1 machine includes extra E71T-GS .030''&.035'' flux core wires, known for its smooth arc and high feedability. Say goodbye to heavy shielding gas cylinders—perfect for outdoor, windy, or all-position welding.

4-IN-1 MIG Welder: The welder machine offers GAS MIG/Flux Core MIG/Lift TIG/ MMA welding modes (Note: WP-17V TIG torch must be purchased separately). It can easily handle welding stainless steel, carbon steel, and even thicker steel materials, meeting diverse welding requirements.

WELD ANYWHERE: Plug in the Weld-Pak 90i MIG wire feed welder anywhere 120V input power is available; It's designed to use with flux-cored welding wire (1/4” max thickness) or solid MIG wire (3/16" max thickness)
Machine Features That Matter
- Input power: Choose 120 volts if portability and existing household receptacles matter most. Choose dual-voltage 120/240 volts if you want room for thicker material and higher output.
- Output range: Check the minimum output for thin sheet and the realistic single-pass capacity for your thickest planned material.
- Duty cycle: This tells you how long the machine can weld within a stated test period at a stated output before it must cool. Compare duty cycles at similar amperage, not just the largest percentage on the box.
- Process support: Confirm whether “TIG capable” means scratch-start DC TIG only or includes high-frequency start, foot-pedal control, and AC for aluminum.
- Consumable availability: Contact tips, liners, drive rolls, gun parts, and replacement leads should be easy to obtain.
- Polarity change: A clear, accessible polarity change is useful when switching between solid MIG wire and self-shielded flux-core.
- Thermal protection: Over-temperature protection helps protect the machine, but it does not increase the rated duty cycle.
- Service and warranty: Favor a machine with an accessible manual, parts support, and a service path you can verify before purchase.
Practical Beginner Machine Classes
- Indoor steel projects: A quality 120-volt or dual-voltage MIG/flux-core machine with 0.023- and 0.030-inch solid-wire capability.
- Outdoor repair work: A DC Stick machine with enough open-circuit voltage and output for the electrodes you plan to run, or a wire-feed machine approved for self-shielded flux-core.
- Room to grow: A dual-voltage multiprocess unit, provided each advertised process has the controls you need rather than only basic scratch-start capability.
- Aluminum TIG: An AC/DC TIG machine designed for aluminum, not a DC-only TIG feature.
Note: Manufacturer thickness claims assume particular joint preparation, wire or electrode, position, technique, and sometimes multiple passes. Use the manual’s weld chart and do not treat a maximum thickness number as proof that a beginner weld is structurally sound.
Essential Tools and Supplies
The welder is only one part of the shop. The following equipment helps you prepare joints, hold parts, protect yourself, and inspect practice welds.
Products Worth Considering

Long lasting quality

▶【Excellent Protection】Leather welding sleeves are 17.91 in /45.5 mm long, suitable for 18-20 in long arm sizes, providing comprehensive and excellent protection, shielding your arms from welding splashes and high-temperature heat

Welding Work Protectors Set: With front pockets, this work apron allows you to store and easily access any small tools or essentials you need while working, keeping you organized and efficient in completing your tasks, convenience and practicality.
Personal Protective Equipment
- Welding helmet: Use a helmet with a filter shade suitable for the process and current. Auto-darkening is convenient, but the helmet must be functioning, correctly set, and worn before the arc starts.
- Safety glasses: Wear impact-rated safety glasses with side protection under the helmet, including during chipping and wire brushing.
- Gloves: Use dry leather welding gloves suited to the process. TIG gloves favor dexterity; MIG and Stick gloves usually provide more heat protection.
- Clothing: Wear flame-resistant long sleeves, cuffless long pants, and leather footwear. Avoid meltable synthetic clothing and open pockets or cuffs that can catch sparks.
- Grinding protection: Use safety glasses, a face shield, hearing protection, the grinder guard, and a wheel rated for the tool’s speed.
- Respiratory protection: Control fumes at the source first. When a respirator is needed, select a NIOSH-approved type for the specific hazard and make sure it fits. A random dust mask is not a universal welding-fume solution.
Workholding and Metal Preparation
- A sturdy steel welding table or fire-resistant work surface
- C-clamps, locking pliers, fixture clamps, and squares
- A dedicated carbon-steel wire brush for mild steel and separate stainless brushes for stainless or aluminum work
- An angle grinder with appropriate grinding, flap, and cut-off wheels
- Files, a deburring tool, soapstone or paint marker, tape measure, and combination square
- A chipping hammer for Stick and flux-core slag
- Clean scrap coupons of known material and thickness
Filler Metals and Electrodes
Match the filler to the base-metal grade, joint requirements, service conditions, and welding process—not just the metal’s broad name.
- Mild-steel MIG: ER70S-6 solid wire is a common all-around choice. A 0.030-inch diameter works across many home-shop thicknesses, while 0.023-inch wire can make thin sheet easier to control.
- Stick: E6011 is useful for many repair situations; E7018 is used for higher-strength, low-hydrogen work when the procedure and storage are correct. Follow the electrode manufacturer’s polarity and amperage range.
- TIG steel: ER70S-2 is commonly used for clean carbon-steel TIG work, subject to the joint specification.
- Stainless: ER308L fits many 304-series stainless joints, but not every stainless grade. ER309L is commonly considered for stainless-to-carbon-steel transitions. Confirm both base metals before choosing filler.
- Aluminum: ER4043 and ER5356 have different compatibility, strength, ductility, color-match, and service-temperature considerations. Identify the aluminum alloy before selecting one.
Safety First: Protect Yourself and the Shop
Welding is hot work. The setup must control fire, fumes, radiant energy, electrical hazards, compressed gas, and nearby people before the first arc.
Ventilation and Fume Control
Keep your head out of the plume and use local exhaust ventilation that captures fumes near the arc without pulling shielding gas away from the weld. An open garage door alone may not control exposure, especially when air is still or the work is deep inside the garage. NIOSH notes that welding-fume exposure varies with the process, filler, base metal, coatings, and confined-space conditions; see its welding-fume guidance.
Warning: Do not weld metal with unknown coatings. Galvanized, stainless, painted, plated, lead-, cadmium-, chromium-, mercury-, or beryllium-containing materials can create serious exposure hazards. Do not clean metal near an arc with chlorinated brake cleaner or other chlorinated solvent. Identify the material and coating, review the safety data, and use the required controls.
Do not treat a respirator as permission to weld anything indoors. Source capture and material identification come first. Confined-space welding requires specialized procedures, atmospheric testing, rescue planning, and training; it is not a beginner home-shop task.
Fire Prevention
- Move combustible materials, fuel, aerosol cans, sawdust, cardboard, rags, and solvents away from sparks and hot metal.
- Check cracks, wall openings, shelves, the opposite side of partitions, and areas below the work where sparks can travel.
- Keep suitable fire-extinguishing equipment inspected and immediately accessible.
- Use welding curtains or screens to protect bystanders from arc radiation and sparks, without blocking needed ventilation.
- Inspect the area during the work and again after the weld is finished. Use a fire watch when hidden or nearby combustibles could ignite.
- Mark hot metal or isolate it so another person does not pick it up.
OSHA’s general welding requirements call for movable fire hazards to be relocated, guards where hazards cannot be moved, suitable extinguishing equipment, and fire-watch precautions when conditions require them.
Warning: Never weld, cut, or heat a drum, tank, pipe, wheel, cylinder, or other closed container that contains—or may once have contained—fuel, solvent, gas, pressure, or an unknown substance. Professional cleaning, testing, purging, venting, and authorization may be required, and some containers must not be repaired by welding at all.
Electrical Safety
- Keep gloves, clothing, the floor, and the work area dry. Do not weld in rain or standing water.
- Inspect the power cord, electrode holder or gun, work lead, connectors, and insulation before use.
- Plug the machine into a properly installed receptacle and branch circuit that match its rating label and manual.
- Turn off and unplug the machine before opening covers, changing internal polarity connections, or servicing the wire drive.
- Attach the work clamp to clean metal near the weld. The work clamp completes the welding circuit; it is not a substitute for the equipment grounding conductor in the power cord.
- Have a qualified electrician install or evaluate a 240-volt circuit, damaged receptacle, or questionable garage wiring.
Shielding-Gas Cylinder Safety
- Secure the cylinder upright with a chain, strap, cart, or other suitable restraint.
- Keep it where sparks, hot slag, electrical current, and impact cannot reach it.
- Close the cylinder valve when work is finished and relieve pressure according to the equipment instructions.
- Remove the regulator and install the valve-protection cap before moving a capped cylinder unless it is secured on a purpose-built carrier.
- Store cylinders in a dry, ventilated, protected location—not in an unventilated cabinet.
- Use only the correct regulator, hose, fittings, and gas for the process.
These practices align with OSHA’s compressed-gas cylinder handling rules, which require upright restraint and protection from heat, sparks, damage, and electrical circuits.
Set Up the Workspace
Your shop does not need to be large, but it needs clear movement paths, controlled sparks, usable ventilation, and enough room to keep hot work away from stored items.
Layout and Surface
- Put the welding table where you can reach all sides without stepping over leads.
- Route power, work, gun, torch, and gas lines so they do not cross sharp edges or walking paths.
- Keep the floor free of sawdust, paper, leaves, fuel, oil, and trip hazards.
- Provide bright general lighting plus task lighting that does not shine into the helmet sensors.
- Separate grinding sparks from gas cylinders, vehicles, glass, and finished surfaces.
- Keep children, pets, and unprotected observers out of the hot-work zone.
Electrical Supply and Extension Cords
In U.S. homes, the usual nominal choices are 120 volts and 240 volts—not “110” and “220” as exact ratings. The required branch circuit depends on the machine’s input current, plug, duty cycle, and manufacturer instructions.
A generic “12-gauge cord is always enough” rule is unsafe. Voltage drop and heating depend on cord length, conductor size, machine input, connections, and ambient conditions. Avoid an extension cord when practical. When one is allowed, use the exact minimum conductor size and maximum length stated in the welder manual, fully uncoil it, keep connections dry, and inspect it before use.
Check Local Rules Before Welding at Home
Local fire codes, building rules, leases, homeowners’ association rules, and insurance policies may restrict hot work, cylinder storage, electrical changes, or commercial activity in a residential garage. Confirm the rules that apply to your property before buying equipment or striking an arc.
Step-by-Step Guide to Your First Practice Weld
Start with a simple flat-position MIG bead or butt joint on clean 1/8-inch mild-steel coupons. This is practice—not a structural part.
- Read the manual: Confirm input power, polarity, wire size, gas, PPE, duty cycle, and the machine’s setup chart.
- Identify the metal: Use known, uncoated mild steel. Do not practice on galvanized, painted, plated, oily, or mystery scrap.
- Prepare the coupons: Remove mill scale, rust, oil, and paint from the weld zone and the work-clamp area. Deburr sharp edges.
- Set up the wire and gas: Install the correct drive roll, 0.030-inch ER70S-6 wire, matching contact tip, DCEP polarity, and the shielding gas specified by the wire and machine.
- Set the controls: Use the chart inside the machine for 1/8-inch mild steel, joint type, wire, and gas. Make a test bead and fine-tune one control at a time.
- Clamp the joint: Align the coupons with a small, consistent gap only if the joint plan calls for it. Tack both ends and check that the pieces stayed square.
- Position the gun: For a flat butt joint, hold the gun close to perpendicular across the joint with a travel angle of roughly 5–15 degrees. Maintain the stickout recommended by the machine or wire maker.
- Run a short bead: Keep the wire on the leading edge of the puddle and travel steadily. Stop if the arc, gas, wire feed, or visibility becomes abnormal.
- Let it cool safely: Treat the metal as hot even when it no longer glows. Do not quench a coupon unless the practice procedure specifically calls for it.
- Inspect and test: Look for a consistent bead, toe tie-in, undercut, overlap, cracks, and porosity. Cut and etch, bend, or break practice coupons using a safe method so you can evaluate fusion below the surface.
A smooth-looking bead can still have poor fusion. Practice becomes useful when you inspect what happened inside the joint, not only how the surface looks.
Common Beginner Mistakes and Fixes
| Problem | Likely Causes | What to Check |
|---|---|---|
| Porosity or pinholes | Contamination, missing gas, leaks, drafts, clogged nozzle, excessive stickout | Clean to bare metal; verify cylinder, flow, hose, nozzle, gas type, and gun position |
| Burn-through | Too much heat, slow travel, large gap, wire too large for thin sheet | Lower the chart setting, shorten weld time, improve fit-up, or use smaller wire if supported |
| Cold, tall bead or poor toe tie-in | Low voltage or current, travel too fast, poor work-clamp contact, wrong polarity | Confirm chart, polarity, clean clamp contact, travel speed, and joint preparation |
| Excessive spatter | Wrong polarity, poor voltage/wire-speed balance, contamination, long stickout | Verify wire data, clean metal, correct stickout, then adjust from the chart |
| Wire feeding surges | Wrong drive roll, excess tension, worn tip or liner, rusty wire, sharp gun-cable bend | Match the roll and tip, inspect liner and spool, reduce bends, and replace damaged wire |
| Stick electrode keeps sticking | Current too low, long hesitation, poor angle, weak work connection | Use the electrode’s range, verify polarity and clamp contact, and practice the starting motion |
| Tungsten contamination | Tungsten touched the puddle or filler; gas coverage failed | Stop and regrind; check torch angle, arc length, gas, and post-flow |
My first MIG weld looked like a lumpy caterpillar because I skipped cleaning and changed several settings at once. The better method is to return to the machine chart, correct the joint preparation, and adjust one variable at a time.
Material Compatibility and Filler Selection
“Steel,” “stainless,” and “aluminum” each include many alloys. The filler that works for one grade or service condition may be wrong for another.
- Mild steel: ER70S-6 solid wire is common for MIG; E6011 and E7018 are common Stick classifications for different procedures. Clean the joint even when the consumable can tolerate some contamination.
- Stainless steel: Identify the grade. ER308L commonly matches 304-series stainless, while dissimilar-metal joints may call for ER309L or another engineered choice. Stainless fumes can contain hazardous chromium and nickel compounds, so fume control is especially important.
- Aluminum: Remove grease with an appropriate nonchlorinated cleaner, then remove oxide with a dedicated stainless brush immediately before welding. Match ER4043, ER5356, or another filler to the exact alloy and service.
- Dissimilar metals: Do not guess. Some combinations need a transition filler, controlled heat input, special preparation, or a different joining process.
- Coated or unknown metal: Stop and identify it before grinding, heating, or welding.
Budget for the Complete Setup
A basic setup may fit near the lower end of the range when you already have suitable power, ventilation, a metal table, and some tools. A dual-voltage machine, cylinder deposit or lease, fume extraction, electrical work, and better PPE can push the total much higher.
| Category | Planning Range | Notes |
|---|---|---|
| Welder | $350–$1,300+ | Process, input power, output, duty cycle, and support change the price |
| Helmet and PPE | $120–$400+ | Include safety glasses, gloves, clothing, footwear, and grinding protection |
| Table, clamps, and prep tools | $150–$500+ | Costs drop if you already own a suitable grinder and workbench |
| Consumables and gas | $75–$350+ | Cylinder programs and local refill prices vary widely |
| Ventilation and fire control | $75–$700+ | Local exhaust can cost more but may be the most important upgrade |
| Electrical upgrade | Site-specific | Get a licensed electrician’s quote rather than estimating from the welder price |
Used name-brand equipment can save money, but inspect the leads, gun or holder, drive system, fan, controls, plug, and case. Verify that the correct manual and replacement parts are available. Never trade away PPE, ventilation, or safe wiring to afford a larger machine.
Maintain the Equipment
- Before each session: Inspect power and welding cables, work clamp, gun or holder, gas hose, regulator, consumables, and PPE.
- Wire-feed system: Keep the wire dry, use the correct drive-roll groove, set only enough tension to feed reliably, and replace worn tips and liners.
- Cooling: Keep air inlets clear and remove internal dust only as the manual directs, with the machine disconnected from power.
- Electrodes and filler: Store wire, rods, and TIG filler clean and dry. Separate stainless and aluminum tools from carbon-steel contamination.
- Gas system: Check hoses and fittings for damage or leaks using the method approved by the equipment manufacturer. Close the cylinder valve after use.
- Records: Write down the material, thickness, joint, wire or rod, gas, polarity, and successful settings. A small notebook prevents repeated guesswork.
I once left a spool of MIG wire exposed to humid air and then chased feeding and porosity problems that looked like machine faults. Dry storage and a quick pre-use inspection would have saved the troubleshooting time.
Conclusion: Build the Shop Around Safe, Repeatable Practice
A good home welding setup begins with one suitable process, reliable power, clean material, correct consumables, and a workspace designed around fumes, fire, electrical safety, and hot metal. MIG is the easiest starting point for many beginners, while self-shielded flux-core adds outdoor flexibility.
Use the machine chart instead of copying settings blindly, test every new combination on scrap, and inspect practice welds below the surface. As your skills grow, add equipment only when a real project requires it. For anything structural, pressurized, load-bearing, or safety-critical, use a qualified welder and the applicable procedure or code.
Frequently Asked Questions
What is the easiest welding process for beginners?
MIG is usually the easiest process to learn because the machine feeds the wire and starts the arc with a trigger. It works especially well for clean indoor mild-steel projects. A MIG machine that also supports self-shielded flux-core gives you a practical outdoor option.
How much does a beginner home welding setup cost?
A rough planning range is about $600–$2,000 or more. The total depends on the machine, PPE, tools, gas, ventilation, and whether the garage needs electrical work. Price the complete safe setup rather than budgeting only for the welder.
Can I weld safely in a residential garage?
A garage can be suitable when you have effective fume control, a clear hot-work zone, suitable power, dry conditions, fire protection, cylinder restraint, welding screens, and permission under local rules, your lease, and your insurance policy. An open door by itself is not a complete safety plan.
What Stick electrode should a beginner use?
E6011 is a useful practice and repair electrode when the machine supports its required polarity and output. E7018 is also common, but it has different handling, storage, and technique requirements. Use the amperage and polarity printed on the exact electrode package.
Do I need a 240-volt outlet for welding?
Not for every project. Many beginner MIG and flux-core machines run on 120 volts and are useful for sheet metal and light fabrication. A 240-volt or dual-voltage machine provides more output for thicker material and longer welding periods. Match the circuit to the machine manual and use an electrician for new wiring.
Is flux-core better than gas MIG for a beginner?
Gas MIG is usually cleaner and easier to see indoors. Self-shielded flux-core is more portable and handles outdoor air movement better because it does not rely on a gas cloud from the gun. Flux-core produces slag and more smoke, so ventilation and cleanup remain important.
Can I weld galvanized steel with a respirator?
Do not treat a respirator as the only control. Welding zinc-coated steel can create zinc-oxide fume and may require coating removal, local exhaust ventilation, hazard-specific respiratory protection, and other controls. Beginners should avoid galvanized practice material and use clean, known mild steel instead.
When should I hire a qualified welder?
Use a qualified professional for vehicle frames and suspension, lifting devices, pressure vessels, fuel tanks, structural members, trailer couplers, roll cages, code work, unknown alloys, and any joint whose failure could seriously injure someone or cause major property damage.
Sources
- OSHA: Welding, Cutting, and Brazing—Hazards and Solutions — welding health and safety hazards
- OSHA 29 CFR 1910.252: General Welding Requirements — fire prevention, ventilation, coatings, and electrical precautions
- OSHA 29 CFR 1926.350: Gas Welding and Cutting — compressed-gas cylinder handling and storage
- NIOSH: Welding Fumes and Manganese — welding-fume exposure factors and health guidance
- Miller: Buying Your First Welder — process selection for DIY users
- Miller: Setting the Correct MIG Parameters — starting wire speed, voltage, and bead troubleshooting


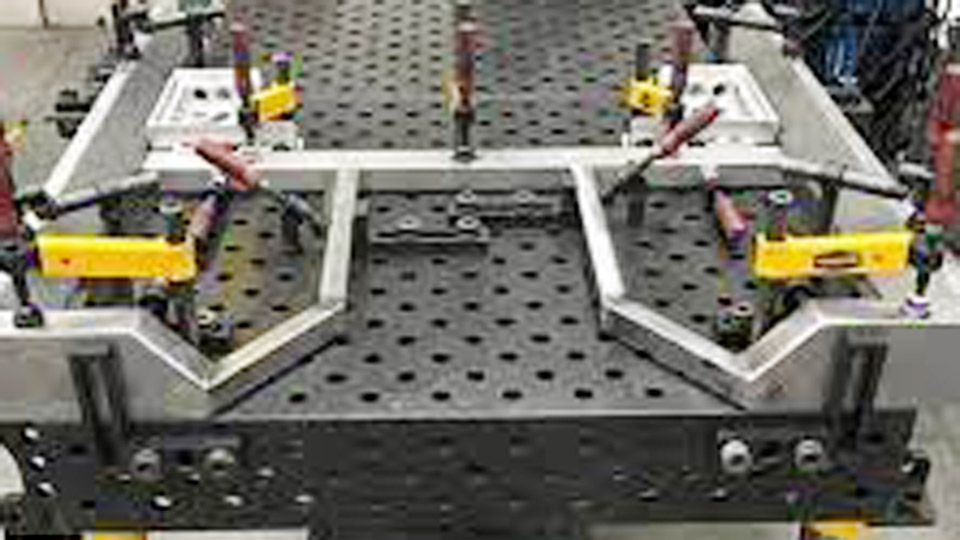
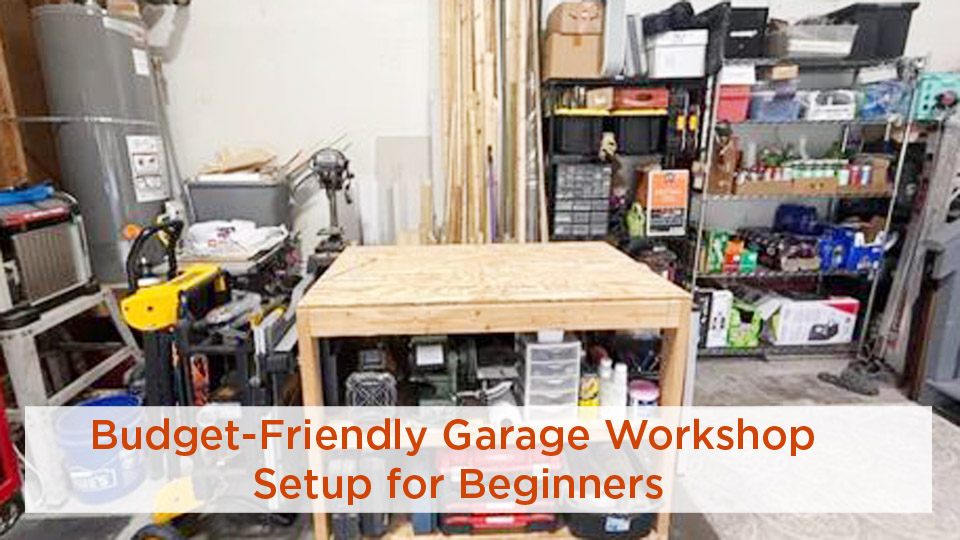
[…] Use supports or fixtures to stabilize small parts; a jig can improve repeatability and quality. See also my beginner home welding setup. […]