When I first set up a garage welding workshop on a tight budget, I learned that the welder is only one part of the job. The electrical circuit, ventilation, fire-safe work area, protective gear, table, and metal-preparation tools all affect whether a project is safe and whether the finished weld is sound.
Beginners do not need a factory-sized shop or the most expensive multi-process machine. They do need a realistic plan. This guide explains how to build a useful starter setup, choose a welding process, control fumes and sparks, organize the space, and complete a first practice project without relying on unsafe shortcuts or universal machine settings.
Quick Answer
A safe budget garage welding setup starts with a suitable electrical circuit, an all-steel work surface, effective fume control, full protective gear, fire prevention, and a welder matched to your material. For many beginners working with mild steel, a 120-volt wire-feed machine that supports self-shielded flux core is a practical starting point.
Key Takeaways
- Check the welder’s nameplate and manual before assuming an existing 120-volt garage outlet can support it.
- Use local exhaust or a purpose-built welding-fume extractor when possible; an open door or box fan alone does not prove the air is safe.
- Build the welding area around an all-steel table, a noncombustible floor, spark containment, and an accessible fire extinguisher.
- Start with the machine’s setup chart and test on matching scrap instead of copying a universal voltage or wire-speed number.
- Keep beginner projects noncritical until your welds have been tested and your skill is appropriate for structural or road-safety work.
At a Glance
| Time Required | One weekend for layout and basic equipment setup; longer if electrical or permanent ventilation work is needed |
| Difficulty | Moderate; basic welding can be learned gradually, but electrical and ventilation upgrades may require qualified professionals |
| Tools Needed | Welder, helmet, safety glasses, gloves, flame-resistant clothing, steel table, clamps, grinder, hand tools, ventilation equipment, screens, and fire extinguisher |
| Cost | Roughly $700–$1,500 for a capable starter setup; electrical upgrades, permanent exhaust, gas-cylinder deposits, and local permit costs are extra |
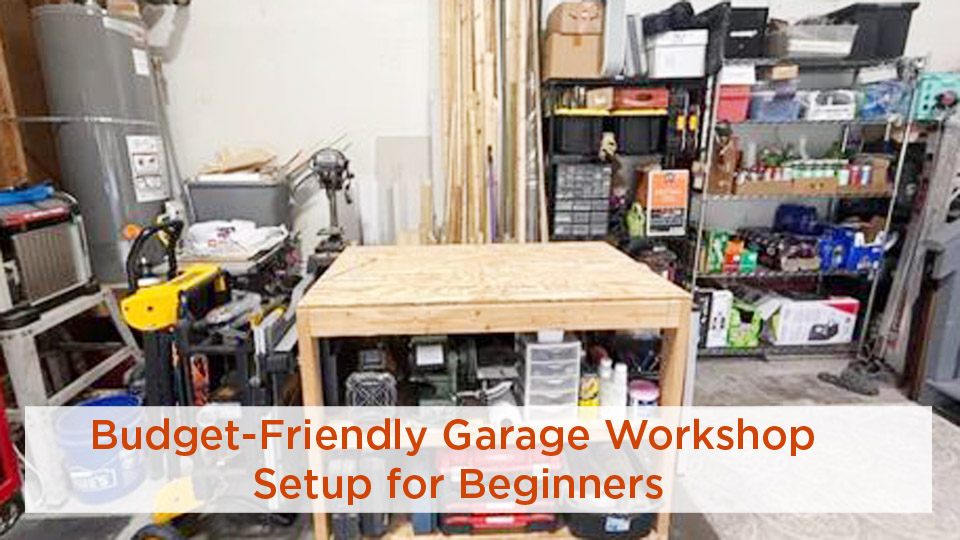
Image credit: Reddit, as noted in the original draft.
Why Set Up a Welding Workshop in Your Garage?
A home welding area gives you a place to practice, repair noncritical items, and build projects without transporting every piece to another shop. It also lets you learn at your own pace. The tradeoff is that a garage was not necessarily designed for hot work, welding fumes, compressed-gas cylinders, or high electrical loads.
A well-planned setup helps you keep leads out of walkways, control sparks, maintain a stable work position, and prepare joints correctly. Those details affect more than convenience. They can reduce contamination, poor fit-up, accidental fires, and the temptation to rush through a job.
The best approach is to start small and expand only when your projects require it. A reliable entry-level welder, good PPE, an all-steel table, effective ventilation, and basic preparation tools are more valuable than an expensive machine surrounded by an unsafe workspace.
Warning: Do not weld in a garage when combustible materials cannot be removed or protected, fumes cannot be controlled, exits are blocked, wiring is questionable, or people nearby cannot be shielded from arc radiation and sparks. Local fire, electrical, building, zoning, and insurance rules may be stricter than the general guidance in this article.
Check Whether Your Garage Is Suitable for Welding
Before buying equipment, inspect the space as if you were preparing for any other hot-work operation. Look beyond the open area around the table. Sparks can travel through doorways, wall openings, floor cracks, shelving, and gaps beneath equipment.
Floor, Walls, and Work Clearance
- Use a concrete or another noncombustible floor in the welding zone.
- Remove gasoline, propane cylinders not used for the process, paint, solvents, oily rags, cardboard, sawdust, aerosol cans, batteries, and other easily ignited materials.
- Protect immovable surfaces with welding blankets or screens rated for hot work.
- Check the opposite side of metal walls, doors, and panels because heat can conduct through them.
- Keep the path to the garage door and another usable exit clear.
- Do not weld near an open fuel system, charging lead-acid battery, or vehicle fuel tank.
OSHA’s welding and cutting requirements call for movable fire hazards to be taken to a safe place or protected with guards. Where appreciable combustible material is within 35 feet, easily ignited by sparks, or exposed through openings, a trained fire watch may be required in a workplace.
Attached Garages and Shared Air
An attached garage can allow smoke and gases to enter living areas through doors, wall penetrations, ductwork, and pressure differences. Keep the door to the house closed, avoid placing the exhaust where it can be drawn into windows or vents, and stop work if fumes move toward occupied rooms.
Never use a running vehicle as a heat source and never idle a car or truck inside an attached garage, even with the overhead door open. A carbon-monoxide alarm is an important backup device for the home, but it is not permission to operate an engine indoors.
Unknown Containers and Hollow Parts
Do not weld, cut, or heat a used tank, drum, fuel container, hydraulic component, refrigerant vessel, pressure vessel, or unknown sealed part. Residue can produce toxic vapor, fire, explosion, or pressure buildup. Hollow parts must also be vented when a qualified procedure calls for hot work.
Plan a Realistic Starter Budget
A low-cost welder can still require several hundred dollars in supporting equipment. Planning the whole setup prevents you from spending the entire budget on the machine and then improvising the safety gear or table.
| Category | Planning Range | What It Covers |
|---|---|---|
| Welder | $250–$700 | Entry-level flux-core, MIG-capable, stick, or small multi-process machine |
| PPE | $150–$350 | Helmet, safety glasses, gloves, flame-resistant clothing, boots, hearing protection, and grinder face protection |
| Table and Clamps | $100–$350 | Used, portable, or DIY all-steel table plus clamps and magnets |
| Preparation Tools | $100–$300 | Angle grinder, wheels, brushes, measuring tools, hammer, pliers, and vise |
| Ventilation and Fire Control | $100–$500+ | Welding screens, blankets, extinguisher, general airflow, or a purpose-built fume extractor |
| Consumables | $50–$150 | Wire or electrodes, contact tips, nozzles, anti-spatter product, and practice steel |
These are planning ranges rather than live price quotes. Used tools and scrap steel can reduce costs, while a dedicated circuit, permanent exhaust system, or shielding-gas cylinder can raise them.
Pro Tip: Buy in phases. Make the work area fire-safe and purchase PPE first, then add the welder, table, clamps, preparation tools, and process-specific accessories. Upgrade to gas-shielded MIG, TIG, or 240-volt equipment only when your projects justify it.
Choosing Your First Welder Without Overspending
Picking a first welder is easier when you begin with the material and project instead of a brand name. List the metals you expect to weld, their usual thickness, whether the work will be indoors or outdoors, and what electrical supply is actually available.
Products Worth Considering
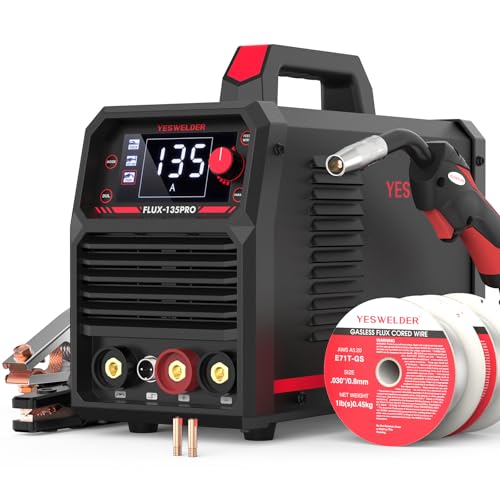
READY OUT OF THE BOX: Start welding immediately! It masterfully handles Gasless Flux Core MIG, Stick, and Lift TIG (Extra Lift TIG torch required). This budget-friendly 3-in-1 machine includes extra E71T-GS .030''&.035'' flux core wires, known for its smooth arc and high feedability. Say goodbye to heavy shielding gas cylinders—perfect for outdoor, windy, or all-position welding.

MULTIFUNCTIONAL: A 4-in-1 welder, capable of Flux Core MIG/Gas MIG/ Stick/Lift TIG (need to purchase extra tig lift torch). This unit caters to a wide range of welding applications and meets your various welding needs.

MIG, Flux Core, Stick, or TIG?
| Process | Best Beginner Uses | Main Advantages | Main Limits |
|---|---|---|---|
| Gas-shielded MIG/GMAW | Clean mild-steel sheet, tubing, furniture, and light fabrication | Easy arc starting, little slag, good control on thinner steel, and fast travel | Requires shielding gas and is sensitive to drafts and dirty metal |
| Self-shielded flux core/FCAW-S | Outdoor repairs, thicker mild steel, and portable work | No gas cylinder, better wind tolerance, and strong penetration for its size | More smoke, spatter, and slag; thin sheet can be harder for a beginner |
| Stick/SMAW | Outdoor repairs, farm equipment, and thicker steel | Portable, wind-tolerant, and compatible with many electrode types | Harder arc starting, frequent electrode changes, slag, and limited thin-sheet control |
| TIG/GTAW | Thin stainless steel, aluminum with an AC-capable machine, and precision work | Excellent heat and puddle control with clean results | Slower, more equipment-intensive, and usually harder to learn |
Many compact wire-feed welders can run both gas-shielded solid wire and self-shielded flux-cored wire. That does not make flux core a type of MIG; it means the same power source can support two different wire-welding processes when the machine, polarity, drive roll, contact tip, and wire are configured correctly.
For a beginner mainly welding mild steel, a 120-volt machine that supports self-shielded flux core can be a practical starting point. A MIG-capable model offers a cleaner gas-shielded option later. Stick is useful for outdoor and heavier work, while TIG makes more sense when thin alloys and precise control are the main goals.
Use This Machine-Selection Checklist
- Input power: Match the machine to a verified circuit, not just the shape of the receptacle.
- Material range: Check the manufacturer’s single-pass and multi-pass limits for the exact process.
- Output and duty cycle: Compare the rated amperage and the percentage together.
- Polarity: Confirm that the machine can be configured for the wire or electrode you plan to use.
- Consumables: Look for standard contact tips, nozzles, liners, drive rolls, and replacement guns.
- Controls: A clear setup chart and continuous adjustment can make learning easier.
- Service support: Check the warranty, manual availability, repair network, and parts supply.
- Future needs: Consider gas capability, a spool-gun connection, or 240-volt input only when you have a realistic use for them.
Current and Legacy 120-Volt Examples
The original Hobart Handler 140 was a popular 115-volt wire-feed machine rated at 90 amps with a 20% duty cycle and a stated mild-steel range from 24 gauge to 1/4 inch. It is now best treated as a legacy or used-market example. Hobart’s current Handler 140EZ runs on 120-volt power and is rated by the manufacturer for steel up to 3/16 inch.
The older Forney Easy Weld 140 FC-i, item 261, is a 120-volt self-shielded flux-core machine. Its manual lists 0.030-inch wire, single-pass welding through 3/16-inch steel, and up to 1/4 inch with beveling and multiple passes. Forney now also lists the Easy Weld 141 FC-i as a current compact flux-core option.
The Lincoln Electric POWER MIG 140C is another 120-volt wire-feed example. Manufacturer literature lists a 30–140 amp output range, 90 amps at a 20% duty cycle, gas-shielded MIG and flux-core capability, and an optional spool gun.
Do not choose solely by the advertised maximum thickness. Joint design, pass count, position, wire, fit-up, technique, and required strength all matter. A compact machine that can melt a test coupon is not automatically appropriate for a trailer, vehicle frame, lifting attachment, pressure-containing part, or structural connection.
Electrical and Power Planning
A household-voltage welder may draw close to the limit of a branch circuit. Before plugging it in, read the rating label and the installation section of the owner’s manual.
- Use the voltage, breaker, receptacle, and conductor capacity specified by the manufacturer.
- Have a questionable receptacle, shared circuit, damaged wiring, or planned new circuit inspected by a licensed electrician.
- Do not remove or defeat the grounding pin.
- Avoid sharing the welder’s circuit with a compressor, heater, refrigerator, charger, or other large load.
- Use an extension cord only when the manual permits it, and follow the specified wire gauge and maximum length.
- Keep cords away from hot metal, sharp edges, oil, standing water, and vehicle traffic.
- Place the welder where its cooling openings remain clear.
A duty cycle is the number of minutes within a 10-minute period that a machine can weld at a stated output. For example, a 20% duty cycle at 90 amps means up to two minutes of welding followed by the necessary cooling time during that 10-minute period. The percentage changes with output, so always use the machine’s own rating chart.
Note: A receptacle that powers lights or small hand tools without trouble may still be unsuitable for a welder. Repeated breaker trips, a hot plug, dimming lights, damaged insulation, or a discolored receptacle are reasons to stop and have the circuit checked.
Essential Safety Gear Before You Strike an Arc
Welding PPE protects against arc radiation, hot metal, sparks, noise, and flying grinding debris. It does not make an unsafe workspace safe, but it is the last line of defense when other controls are in place.
- Welding helmet: Use a helmet that meets an accepted eye-protection standard and select a filter shade appropriate for the process and amperage. OSHA’s filter-shade table lists minimum shades for common welding operations.
- Safety glasses: Wear impact-rated safety glasses with side protection beneath the helmet. The helmet is not a substitute for primary eye protection when chipping or grinding.
- Gloves: Use process-appropriate welding gloves in good condition. Heavy MIG or stick gloves provide more heat protection, while TIG gloves trade some protection for dexterity.
- Clothing: Wear flame-resistant clothing or suitable leather protection with no frayed cuffs, open pockets, synthetic fabric, or exposed skin.
- Footwear: Wear high-top leather work boots and keep pant legs outside the boots so sparks cannot fall inside.
- Hearing protection: Use plugs or muffs when grinding, chipping, cutting, or working around loud ventilation equipment.
- Grinding protection: Wear safety glasses and a face shield when grinding. Keep the grinder guard and auxiliary handle installed.
- Welding curtains: Shield anyone nearby from arc radiation and sparks without blocking safe airflow or exits.
Keep children, pets, and unprotected visitors out of the welding area. Arc radiation can injure someone who is only watching from across the garage.
Products Worth Considering

【Professional Welding Glasses】Protect the eyes from sparks, and harmful radiation under normal welding conditions, It also features anti-ultraviolet, infrared radiation, anti-glare, which can resist 99% of the harmful light to the eyes.

【True Color View & Better Clarity】TRQWH welding helmet features advanced true color technology with top 1/1/1/2 optical clarity, restoring every detail of your workpiece. Perfect for fine TIG welding or intricate fabrication where visual accuracy is critical. Plus, wide view with USB rechargeable top LED light, comfortable operation even in dim or dark environments, ideal for indoor fabrication, night repair & DIY metal work

Strong & Durable Design: Thanks to their tough polycarbonate wraparound construction, these anti-fog safety goggles offer superior protection from both direct and peripheral threats.
Ventilation and Welding-Fume Control
Welding fume is a mixture whose contents depend on the base metal, filler, coating, process, shielding gas, and surface contamination. Mild-steel fume may contain manganese and iron oxides. Stainless-steel work can involve chromium and nickel, while galvanized steel produces zinc-containing fume. Paint, plating, oil, and cleaning products can introduce additional hazards.
The most effective practical control is to capture the plume close to where it forms, before it passes through your breathing zone. A purpose-built mobile welding-fume extractor has a movable hood and filters designed for the application. Position the hood near the arc without placing it so close that it disturbs shielding gas or blocks your view.
General airflow is still useful. Open the main garage door, provide make-up air from another opening when safe, and place exhaust so contaminated air leaves the building without crossing your face or entering the home. A box fan can help direct general room air, but it is not a substitute for correctly designed source capture, and a visible reduction in smoke does not prove exposure is controlled.
Warning: Do not use an ordinary household or wet/dry shop vacuum as a welding-fume extractor unless the equipment is specifically designed and approved for the hot particles, metal fume, airflow, and fire hazards involved. Sparks and hot material can damage unsuitable hoses, filters, and collection containers.
Respirators Are Process-Specific
A P100 filter is designed for certain particulate hazards, but welding can also produce gases and vapors. The correct respirator depends on the metal, coating, process, concentration, and work environment. Tight-fitting facepieces must seal correctly, and facial hair can interfere with that seal.
Prioritize ventilation and source capture. When respiratory protection may be needed, identify the material, read the safety data sheets for coatings and consumables, follow the respirator manufacturer’s selection instructions, and seek qualified occupational-hygiene advice when the hazard is uncertain. Stop work if you develop headache, nausea, dizziness, chest irritation, unusual taste, or breathing symptoms.
Metals and Coatings Beginners Should Treat Carefully
- Galvanized or zinc-coated steel: Do not burn the coating off as a “degas” step. Identify the coating, use appropriate removal and containment methods where permitted, and provide suitable local exhaust.
- Stainless steel: Fume controls must account for chromium- and nickel-containing material. Avoid casual indoor stainless work without suitable controls.
- Painted or plated metal: Identify the coating before grinding or welding. Older paint, primers, and plating may contain hazardous metals.
- Chlorinated cleaners: Keep their vapors away from welding and ultraviolet radiation. Use only cleaners permitted by the product and welding-equipment instructions.
- Unknown scrap: Do not assume that a magnetic part is plain mild steel or that a clean-looking surface is uncoated.
Keep your head out of the plume. Ventilation should pull welding fume away from your breathing zone and toward a safe exhaust point—not draw it across your face.
Fire Prevention and Gas-Cylinder Safety
A garage often stores the exact materials that hot work can ignite: fuel, paint, cardboard, wood, oily cloth, solvents, lawn equipment, plastic, and vehicle interiors. Treat every welding and grinding session as a fire-risk operation.
Before Welding
- Move combustibles to a safe location or protect immovable items with suitable fire-resistant barriers.
- Check wall openings, shelves, the area beneath the table, the opposite side of metal panels, and nearby vehicles.
- Place an appropriate, inspected fire extinguisher near the exit where it remains reachable without crossing the fire.
- Know how to shut off the welder and gas supply quickly.
- Keep a charged phone available, but outside the spark path.
- Do not weld when flammable vapor, combustible dust, or an active fuel leak may be present.
After Welding or Grinding
Inspect the work area, floor, table underside, wall openings, shelves, and nearby objects for hot particles or smoldering material. OSHA requires a fire watch for at least 30 minutes after welding or cutting when specified fire-watch conditions exist. Using a careful post-work inspection period is a sensible home-shop habit as well.
Shielding-Gas Cylinders
Shielding-gas cylinders contain high pressure even though the gas itself may be nonflammable. Keep each cylinder upright and secured with a chain or strap to a suitable cart, wall bracket, or fixed support. Protect it from impact, heat, sparks, falling material, and electrical contact.
- Use the valve-protection cap during transport or storage when the cylinder design requires it.
- Close the cylinder valve when work is finished.
- Keep regulators, hoses, and fittings clean and undamaged.
- Move cylinders with a suitable cylinder cart rather than dragging, rolling, or lifting them by the valve or cap.
- Store cylinders in a protected, dry, ventilated location rather than an unventilated cabinet.
- Keep oxygen and fuel-gas cylinders subject to the applicable separation and barrier rules if you later add oxy-fuel equipment.
Building a Sturdy Welding Table
The welding table is the center of the setup. It must support the work, provide reliable clamping points, tolerate heat and impact, and remain stable while you weld or grind.
A Safer Budget DIY Table
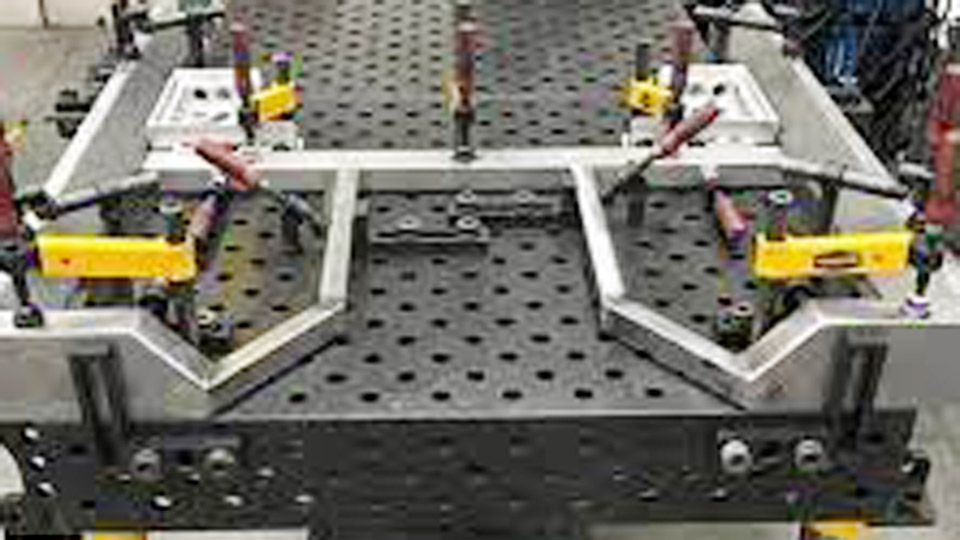
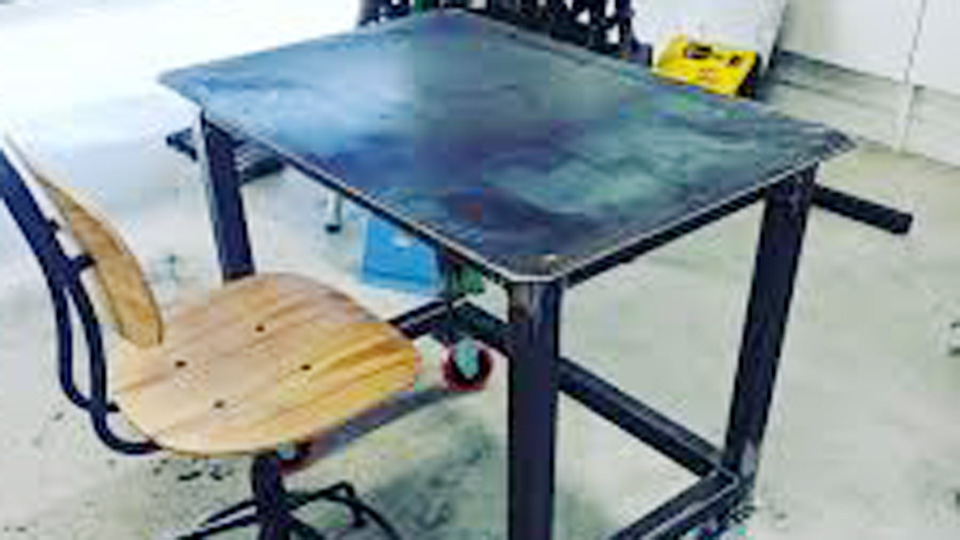
Use an all-steel design rather than a steel plate bolted over plywood. A practical small-shop table can use steel angle or square tubing for the frame, a steel top, diagonal bracing, and steel lower shelves. The exact member sizes depend on the table span and loads, so do not use a light design for engines, axles, or other heavy parts.
- A top around 30 by 36 inches fits many single-car garages.
- A 1/4-inch steel top is useful for general hobby fabrication, although it can still distort under concentrated heat.
- Add diagonal steel braces to resist racking.
- Use leveling feet or locking casters rated for the total table and workpiece weight.
- Round or dress sharp corners and deburr cut edges.
- Provide clamp access around the perimeter.
- Keep the work lead attached to clean bare metal on the workpiece or table as directed by the machine manufacturer.
A beginner who does not yet have a safe way to fabricate the table can buy a used steel table or a purpose-built portable welding table. That is safer than trying to make the first welding surface from lumber and plywood.
Controlling Wobble, Heat, and Distortion
If a table wobbles, correct the floor contact, tighten fasteners, repair cracked welds, and add steel diagonal bracing. Do not stabilize it with loose blocks that can shift during work.
Control workpiece distortion with correct fit-up, strong tacks, clamps, balanced welding sequence, shorter beads, skip welding, backing bars, and natural cooling. Do not place an open water tray beneath energized welding equipment as a general cooling method.
Pro Tip: Leave enough open space around the table to clamp from more than one side. A small table with good clamp access is often more useful than a larger table pushed tightly against a wall.
Must-Have Hand Tools and Accessories
The welder creates the arc, but most of the work happens before and after the bead. Measuring, cutting, cleaning, fitting, clamping, and inspecting determine whether the parts can be welded successfully.
| Tool | Main Use | Selection and Safety Tip |
|---|---|---|
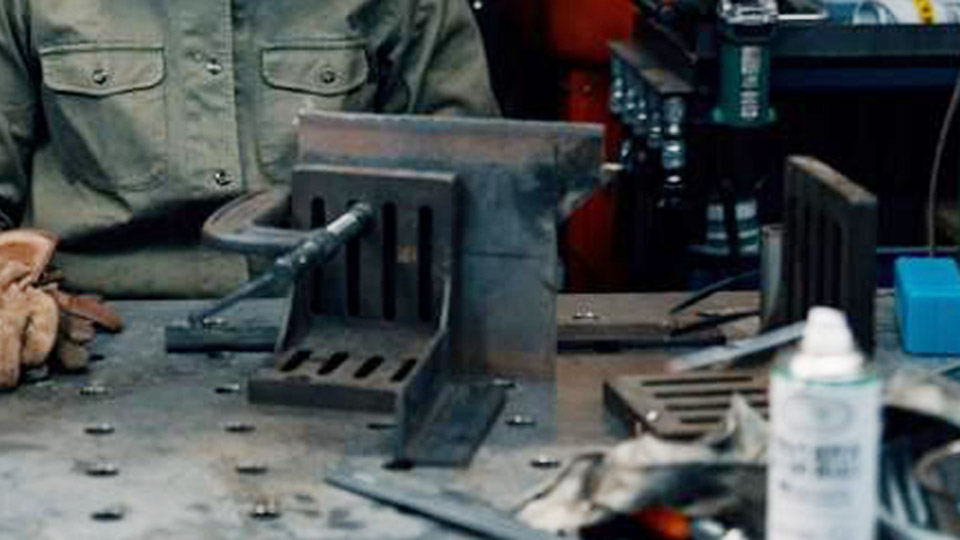
| C-clamps and locking welding clamps | Holding joints and controlling movement | Choose several throat depths and inspect screws, pads, and locking mechanisms |
| Magnetic welding squares | Temporary alignment | Use for setup, then verify with a square and clamps before final welding |
| Angle grinder | Cutting, beveling, cleaning, and finishing | Match the wheel type and rated maximum RPM to the grinder; keep the guard and handle installed |
| Bench vise | Holding, straightening, and light bending | Bolt it to a suitable steel bench or a reinforced non-welding workbench |
| Chipping hammer and wire brush | Removing slag and loose deposits | Wear safety glasses and direct chips away from people and equipment |
| Combination square and tape measure | Layout and fit-up | Check diagonals as well as individual dimensions |
| Welding pliers | Trimming wire and servicing a MIG gun nozzle | Disconnect or de-energize equipment before maintenance |
| Soapstone or metal marker | Heat-resistant layout marks | Keep marks narrow and confirm dimensions before cutting |
Angle-Grinder Setup
A grinder wheel must be the correct diameter and type for the tool and material. The grinder’s spindle speed must not exceed the maximum operating speed marked on the wheel. Inspect wheels for damage, use the correct flange, and never force an incompatible wheel onto the spindle.
Use a cutoff wheel only for cutting, not side grinding. Use a grinding wheel or flap disc for the operations it is rated to perform. Position the guard between you and the wheel and wait for the wheel to stop before setting the grinder down.
Wire, Electrodes, and Filler Metal
For a small self-shielded flux-core welder, 0.030-inch wire is common, but the exact classification must be approved by the machine and suitable for the project. E71T-11 and E71T-GS are not interchangeable labels for every application, so follow the wire data and equipment manual.
For gas-shielded mild-steel MIG, ER70S-6 is common, but gas mixture, polarity, transfer mode, material condition, and machine capability still matter. Store wire and electrodes dry and clean. Rusty wire, damp electrodes, contaminated filler, or the wrong polarity can create feeding and weld-quality problems.
Where a Portable Air Compressor Fits
A compact compressor can inflate project-vehicle tires, power compatible pneumatic tools, and clean a welder or gun liner when the equipment manufacturer specifically permits compressed-air maintenance. It should not be used to blow welding dust around the garage, clean clothing or skin, or send conductive grinding debris toward the welder. Use brushing or suitable metal-dust collection methods for routine cleanup.
Organizing the Garage Workshop
A cluttered shop increases the chance of tripping over leads, damaging a gas hose, losing a hot cutoff, or placing clean consumables in grinding dust. Divide the garage into clear zones.
- Hot-work zone: Steel table, clamps, screens, local exhaust hood, and extinguisher access.
- Grinding and cutting zone: Positioned so sparks do not enter the welder, gas equipment, storage shelves, vehicles, or doorways.
- Clean storage zone: Wire, electrodes, contact tips, nozzles, tungsten, filler rods, manuals, and measuring tools.
- Gas-cylinder zone: Upright, secured, ventilated, and protected from impact and hot work.
- PPE zone: Helmet, glasses, gloves, jacket, hearing protection, and face shield stored where they stay clean and dry.
A pegboard or steel cabinet can keep tools visible, while labeled metal bins separate new consumables from used parts. Store MIG wire separately from stick electrodes and clearly label wire classification, diameter, and required polarity.
Compare equipment by specifications, replacement-part support, safety certifications, warranty, and manual quality rather than relying only on star ratings or a low advertised price. A slightly more expensive tool with standard consumables and local support can cost less over time.
Route welding leads along the floor without creating loops across walkways. Do not hang energized cables over sharp edges, hot work, or gas-cylinder valves. Keep the work lead only as long as needed and make the connection on clean metal.
Set Up and Run Your First Practice Project
A small mild-steel bracket is a better first project than a trailer, vehicle frame, gate hinge, lifting point, or suspension part. It lets you practice measuring, cleaning, tacking, bead placement, and inspection without putting people or property at risk if the weld fails.
Preflight Checklist
- The work area is free of exposed combustibles and flammable vapor.
- The extinguisher and exit are accessible.
- Welding screens protect other people.
- Ventilation or local exhaust is operating and positioned correctly.
- The machine, gun, work lead, power cord, and plug are undamaged.
- The wire or electrode, polarity, contact tip, and drive roll match the process.
- The helmet shade and PPE are appropriate.
- The material is known mild steel with no hazardous coating.
- Matching scrap is available for setup tests.
Step-by-Step Practice Bracket
- Cut and deburr the pieces: Use two mild-steel coupons or angles of known thickness. Remove sharp burrs and verify the dimensions.
- Clean the joint: Remove rust, mill scale where required, paint, oil, and moisture from the weld area and work-clamp location using an appropriate method.
- Set the machine: Use the chart inside the machine or the owner’s manual for the wire type, diameter, process, and metal thickness. Confirm polarity before welding.
- Test on matching scrap: Run short beads and adjust only one control at a time. Look for a stable arc, consistent bead shape, and good tie-in at both toes.
- Fit and clamp: Set the pieces square, clamp them firmly, and verify the angle before tacking.
- Tack opposite sides: Place small tacks in a sequence that limits movement. Recheck the angle after each tack.
- Weld in short sections: Maintain the work angle, travel angle, contact-tip-to-work distance, and travel speed recommended for the process. Keep your head out of the plume.
- Allow controlled cooling: Let the part cool on the steel table away from combustibles. Do not handle it with ordinary gloves or quench it by default.
- Remove slag when applicable: Flux-core and stick welds require slag removal between passes and before inspection.
- Inspect before grinding: Look for cracks, visible porosity, overlap, undercut, missed joint edges, uneven profile, and incomplete fusion indicators. Grinding a bead smooth can hide evidence you need for learning.
Cutting and bending practice coupons after they cool can reveal problems that appearance alone misses. Formal weld qualification and code work require specified procedures and testing, but simple destructive practice is still more informative than judging only by a shiny bead.
Warning: Do not rely on beginner practice welds for vehicle frames, trailers, roll cages, lifting devices, pressure vessels, structural supports, safety rails, fuel systems, or other parts whose failure could cause injury. Use qualified design, procedures, inspection, and personnel for high-consequence work.
Machine Settings and Preparation for Cleaner Welds
There is no universal voltage and wire-speed pair that works for every compact welder. Begin with the exact machine’s chart, then fine-tune on matching scrap.
Check These Items Before Adjusting the Knobs
- Correct input voltage and circuit capacity
- Correct polarity for the wire or electrode
- Wire classification and diameter supported by the machine
- Correct drive-roll groove and tension
- Correct contact-tip size
- Clean liner and smooth wire path
- Clean, tight work-clamp connection
- Known base metal and coating
- Correct shielding gas and flow when using gas-shielded MIG
- No strong draft stripping shielding gas from the arc
Beveling is used when the joint design, thickness, process, and required penetration call for it. Do not automatically grind a 30-degree bevel on every 1/8-inch joint. Thin material may need a square edge, controlled gap, backing, stitch sequence, or lower heat input instead.
Preheat is also procedure-dependent. Some thicker, high-carbon, alloy, restrained, or cold-soaked components may require controlled preheat, while many small mild-steel practice pieces do not. A blanket 150°F rule is not a substitute for material identification and a welding procedure.
Troubleshooting Common Beginner Problems
| Symptom | Likely Causes | What to Check |
|---|---|---|
| Erratic arc or stubbing wire | Wire speed too high, poor work connection, wrong tip, feed restriction, low input voltage | Work clamp, contact tip, liner, drive-roll tension, extension cord, circuit, and chart settings |
| Wire burns back to the tip | Wire speed too low, excessive voltage, tip too far from work, feeding interruption | Wire path, tip condition, spool tension, drive roll, and setup chart |
| Heavy spatter | Wrong polarity, poor settings balance, contamination, excessive stick-out, unstable technique | Polarity, clean metal, wire type, voltage, wire speed, work distance, and travel angle |
| Porosity or pinholes | Dirty metal, moisture, drafts, gas leaks, wrong gas flow, damaged nozzle, excessive stick-out | Surface preparation, gas system, nozzle, wind, consumables, and material coating |
| Burn-through | Too much heat input, slow travel, wide gap, poor fit-up, unsuitable process for thin sheet | Lower chart setting, faster travel, shorter stitch welds, backing, and joint fit |
| Cold-looking bead or poor tie-in | Low heat, fast travel, long arc, poor work angle, heavy scale, oversized joint | Chart setting, surface preparation, travel speed, angle, and machine capacity |
| Undercut | Excessive voltage or amperage, long arc, fast travel, poor angle, incorrect manipulation | Reduce arc length, correct angle, adjust settings gradually, and practice steadier travel |
| Welder overheats | Duty cycle exceeded, blocked cooling vents, high ambient heat, low supply voltage | Stop welding, leave the machine powered as the manual directs for cooling, clear vents, and verify the circuit |
| Breaker trips | Undersized or shared circuit, excessive setting, long light-duty extension cord, electrical fault | Stop repeated resets, read the manual, remove other loads, and have the circuit checked when uncertain |
| Joint moves out of square | Weak tacks, poor clamping, unbalanced weld sequence, excessive heat concentration | Fit-up, tack placement, diagonal measurements, clamps, and welding sequence |
Change one variable at a time and write down the result. If the machine behaves differently from its chart on clean matching scrap, inspect the electrical supply, consumables, feed system, and work connection before assuming the front-panel setting is wrong.
Maintaining the Welder and Work Area
Basic maintenance improves feeding, arc stability, and safety. Disconnect the machine from power before opening panels or servicing components unless the manufacturer gives a specific energized test procedure.
- Inspect the power cord, plug, gun cable, work cable, electrode holder, and insulation before each session.
- Replace cracked, burned, loose, or exposed components instead of wrapping them as a permanent repair.
- Clean or replace contact tips and nozzles when worn or blocked.
- Keep drive rolls, spool area, and liner free of rust and excessive debris.
- Do not direct grinder sparks or conductive dust into the welder’s cooling openings.
- Keep cooling vents clear and maintain the wall clearance required by the manual.
- Store wire and electrodes in a dry location.
- Close gas-cylinder valves after use and relieve equipment pressure as the manufacturer directs.
- Record wire, polarity, material, position, settings, and results in a weld log.
Some manufacturers permit carefully applied dry compressed air for internal cleaning at specified intervals. Follow the manual, disconnect power, use the specified pressure and method, and wear suitable eye and respiratory protection. Do not improvise by blowing conductive dust deeper into the machine.
Wrapping Up
A useful garage welding workshop is built around control, not just equipment. Start with a suitable circuit, noncombustible work area, ventilation, fire protection, PPE, and an all-steel table. Then choose a welder that matches your material and power supply, prepare known mild-steel practice pieces, and use the manufacturer’s setup chart instead of copied settings.
Keep your early projects simple and noncritical. Clean fit-up, stable tacks, correct polarity, controlled travel, and honest inspection will teach you more than buying a larger machine. A weld log is worth keeping: note the process, wire or electrode, material thickness, joint, machine settings, problems, and corrections so each practice session builds on the last.
Frequently Asked Questions
What is the cheapest reliable welder for a garage beginner?
A reputable 120-volt self-shielded flux-core machine is often the lowest-cost practical starting point for mild-steel projects. Choose by circuit requirements, duty cycle, consumable availability, warranty, manual quality, and realistic material capacity rather than price alone. A MIG-capable wire feeder costs more once gas equipment is included but provides a cleaner option for thin steel.
Do I need shielding gas for my first setup?
No. Self-shielded flux-cored wire carries flux that protects the weld without an external cylinder. It produces more smoke, slag, and spatter than gas-shielded MIG, but it is portable and more wind-tolerant. Gas-shielded MIG is useful for cleaner work on thin mild steel when drafts can be controlled.
How can I ventilate a garage welding area?
Use source capture whenever possible by placing a purpose-built welding-fume extraction hood close to the plume. Provide make-up air and exhaust contaminated air outdoors where it cannot enter the home. An open door or box fan may support general airflow, but it does not prove exposure is controlled and must not blow away shielding gas.
What is the biggest setup mistake new welders make?
The biggest mistake is treating the welder as the whole setup. Unsafe wiring, combustible clutter, poor ventilation, weak clamping, unknown coatings, wrong polarity, and skipped preparation can cause more trouble than the machine itself. Make the workspace safe before striking the first arc.
Can I build a welding table from scrap?
Yes, provided the scrap is known, sound steel and the finished table is stable, adequately braced, free of sharp edges, and suitable for the expected load. Use an all-steel frame and top rather than placing a steel plate over lumber or plywood. Use rated casters or leveling feet and preserve access for clamps.
Do I need a 240-volt outlet to learn welding?
Not for many beginner mild-steel projects. A suitable 120-volt machine can handle practice coupons, small brackets, furniture, and light repairs within its rated capacity. A 240-volt machine becomes useful for higher output, thicker material, and longer duty cycles. Any new circuit should be designed and installed according to the machine requirements and local electrical code.
Can a beginner weld galvanized or stainless steel in a garage?
These materials require more careful fume control than clean mild steel. Galvanized coatings can release zinc-containing fume, and stainless-steel fume may contain chromium and nickel. Beginners should identify the material and coating, review applicable safety data, and use suitable local exhaust and respiratory guidance before attempting the work indoors.
Sources
- OSHA 29 CFR 1910.252 — Welding, Cutting, and Brazing — fire prevention, ventilation, coated-metal, and hot-work requirements
- OSHA: Controlling Hazardous Fume and Gases During Welding — welding-fume composition and exposure controls
- OSHA 29 CFR 1910.133 — Eye and Face Protection — minimum welding filter shades and protective-device requirements
- OSHA 29 CFR 1926.350 — Gas Welding and Cutting — compressed-gas cylinder restraint, storage, and placement
- Hobart Handler 140EZ — current manufacturer specifications for a compact 120-volt MIG and flux-core machine
- Forney Easy Weld 140 FC-i Owner’s Manual — electrical installation, duty cycle, setup chart, wire, thickness, and maintenance guidance