When I first set up a welder in my garage, I learned that the machine is only one part of the job. The circuit, ventilation, fire control, gas-cylinder storage, work surface, consumables, and personal protective equipment all affect whether the work is safe and whether the weld comes out clean.
This guide shows you the setup process I now follow for MIG, flux-cored, stick, and TIG welding. It focuses on a home garage, but the same rule applies everywhere: read the exact welder manual and consumable label before you connect power, gas, wire, electrodes, or a torch.
Quick Answer
To set up a welder in your garage, match the machine to a correctly installed circuit, clear or shield combustibles, capture fumes at the source, secure gas cylinders upright, wear complete PPE, install the correct consumable and polarity, then test on clean scrap using the manufacturer’s settings chart before welding your project.
Key Takeaways
- Size the receptacle, wiring, and breaker from the welder’s input requirements, not its advertised output amperage.
- Control sparks and hidden combustibles within 35 feet, and keep watching for smoldering fires after the last weld.
- Use source-capture ventilation near the fume plume without pulling shielding gas away from the arc.
- Match the wire, electrode, tungsten, filler, gas, drive roll, contact tip, and polarity to the process and base metal.
- Start with the machine chart and test on scrap of the same material and thickness before touching the project.
At a Glance
| Time Required | About 1 to 3 hours for workspace and machine setup, excluding new electrical work |
| Difficulty | Beginner to intermediate; electrical installation requires a qualified electrician |
| Tools Needed | Welder and manual, PPE, steel table, clamps, metal-cleaning tools, local exhaust, welding screens, suitable extinguisher, and gas equipment when required |
| Cost | Varies with PPE, ventilation, table, cylinders, consumables, and any electrical upgrade; the welder itself is not included |
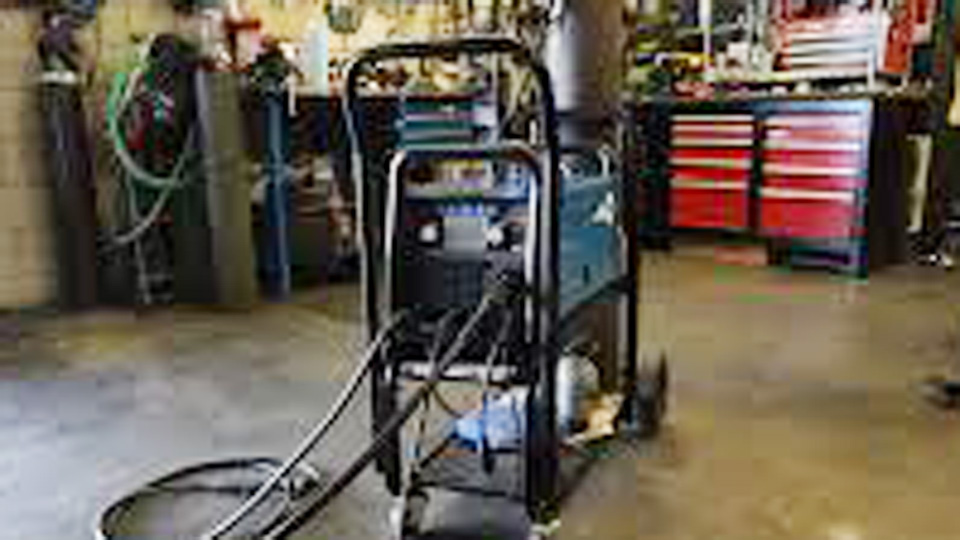
Photo by hotrod
Why a Proper Garage Welding Setup Matters
A welder can produce intense heat, ultraviolet radiation, sparks, fumes, and electric-shock hazards at the same time. A good setup controls those hazards before you strike an arc. It also gives you steady power, clean metal, stable clamping, and enough room to move the gun or torch without dragging cables through your work.
The biggest mistake is treating a garage like an empty industrial booth. Garages often contain fuel, paint, cardboard, lumber, batteries, vehicles, lawn equipment, wall cavities, and doors that lead directly into the house. Sparks can travel farther than you expect, and hot metal can stay hot long after it stops glowing. I have seen a welder damaged after its input-power needs were ignored, so I now check the data plate before I plan any setup.
Warning: This is general safety information, not a substitute for your welder manual, formal welding training, local fire and electrical rules, or advice from a qualified electrician. Never weld on a sealed, pressurized, or previously flammable container unless it has been professionally prepared under an approved procedure.
OSHA’s hot-work rule uses a 35-foot combustible-control radius and requires at least a 30-minute post-work fire watch when fire-watch conditions apply.
Choosing the Right Welder for Your Garage
Pick the process around the work you actually plan to do, the material thickness, the metals involved, your available input power, and how much cleanup you can accept. Do not buy by advertised output amperage alone. Check the machine’s input-voltage options, plug type, rated input current, recommended branch circuit, duty cycle, and supported accessories.
Products Worth Considering
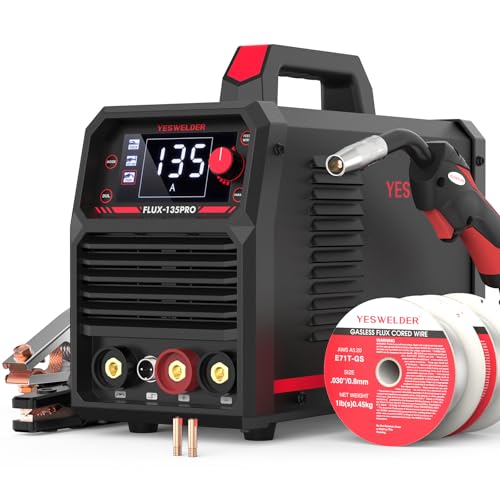
READY OUT OF THE BOX: Start welding immediately! It masterfully handles Gasless Flux Core MIG, Stick, and Lift TIG (Extra Lift TIG torch required). This budget-friendly 3-in-1 machine includes extra E71T-GS .030''&.035'' flux core wires, known for its smooth arc and high feedability. Say goodbye to heavy shielding gas cylinders—perfect for outdoor, windy, or all-position welding.

ADVANCED DOUBLE PULSE MIG FOR ALUMINUM & STEEL: This professional MIG welder features both single and double pulse MIG modes, delivers optimized thermal control for superior weld bead aesthetics and reduced spatter. The MIG250DP effortlessly welds aluminum, mild steel, stainless steel, and carbon steel.

MULTIFUNCTIONAL: A 4-in-1 welder, capable of Flux Core MIG/Gas MIG/ Stick/Lift TIG (need to purchase extra tig lift torch). This unit caters to a wide range of welding applications and meets your various welding needs.
Types of Welders for Garage Use
| Welder Type | Best For | Garage Advantages | Main Trade-Offs |
|---|---|---|---|
| MIG/GMAW | Clean mild steel, sheet metal, general fabrication | Easy arc starts, fast learning curve, low slag | Needs shielding gas for solid wire; wind can disturb the gas shield |
| Self-shielded flux-core/FCAW-S | Outdoor repairs and thicker steel within the machine’s rating | No gas cylinder; handles light outdoor air movement better | More smoke, spatter, and slag; polarity is wire-specific |
| Stick/SMAW | Repair work, heavier steel, and outdoor use | Simple equipment and many electrode choices | More smoke and slag; harder on thin sheet |
| TIG/GTAW | Precise work on steel, stainless, and aluminum with a suitable AC/DC machine | Excellent control and clean weld appearance | Slower, more skill-intensive, and sensitive to contamination |
A small MIG machine is often the easiest starting point for clean mild-steel projects. Stick and self-shielded flux-core are useful when the metal is thicker or the work moves outside. TIG gives you the most control, but aluminum TIG normally requires an AC-capable machine, while aluminum MIG may require a spool gun or push-pull system approved for that welder.
Matching the Welder to Your Power Supply
North American garage welders commonly use 120-volt or 240-volt input, but the required circuit is model-specific. A machine’s output rating, such as 140 or 200 amps, does not tell you which breaker or wire size to install. Use the input data plate and the installation table in the manual. If the required receptacle, branch circuit, or grounding system is not already present, hire a qualified electrician.
- Use the specified receptacle and plug: Do not defeat a grounding pin, use a homemade adapter, or force a plug into the wrong outlet.
- Avoid shared loads: A dedicated circuit helps prevent nuisance trips caused by refrigerators, compressors, heaters, or other garage equipment.
- Respect duty cycle: Duty cycle tells you how long the welder can operate at a stated output during a set period. Stop and let the machine cool when the manual requires it.
- Use extension cords only when approved: Follow the manual’s conductor-size and maximum-length table. Keep the cord fully uncoiled, dry, protected from damage, and as short as practical.
Note: Replacing a tripping breaker with a larger one is not a fix unless the wiring, receptacle, equipment instructions, and local code all support that change. A larger breaker on undersized wiring can create a fire hazard.
Practical Features to Check Before Buying
- Output range: Make sure the machine can go low enough for your thinnest work and high enough for your thickest planned joint.
- Polarity access: Some machines require you to move leads when switching between solid MIG wire and self-shielded flux-core wire.
- Wire system: Check supported spool sizes, wire diameters, drive-roll types, liners, contact tips, and spool-gun compatibility.
- TIG capability: Confirm whether the machine offers high-frequency start, lift-arc start, AC output for aluminum, and a foot-control connection if you need them.
- Portability and storage: Leave enough space for the machine, leads, torch, gas cylinder, and safe airflow around the case.
- Service support: Consumables and replacement parts should be easy to identify from the manual.
Basic Garage Welding Equipment Checklist
- Welder, owner’s manual, correct plug, and undamaged input cord
- Process-specific gun, torch, electrode holder, work lead, and consumables
- Stable noncombustible welding table and metal clamps
- Angle grinder, files, chipping hammer, and dedicated wire brushes for each metal type
- Local fume extractor or suitable source-capture ventilation
- Welding curtains or screens that do not block needed airflow
- Suitable, ready-to-use fire extinguisher and a way to call for help
- Complete PPE, first-aid supplies, and a dry place to store filler metals
Setting Up Your Garage for Welding
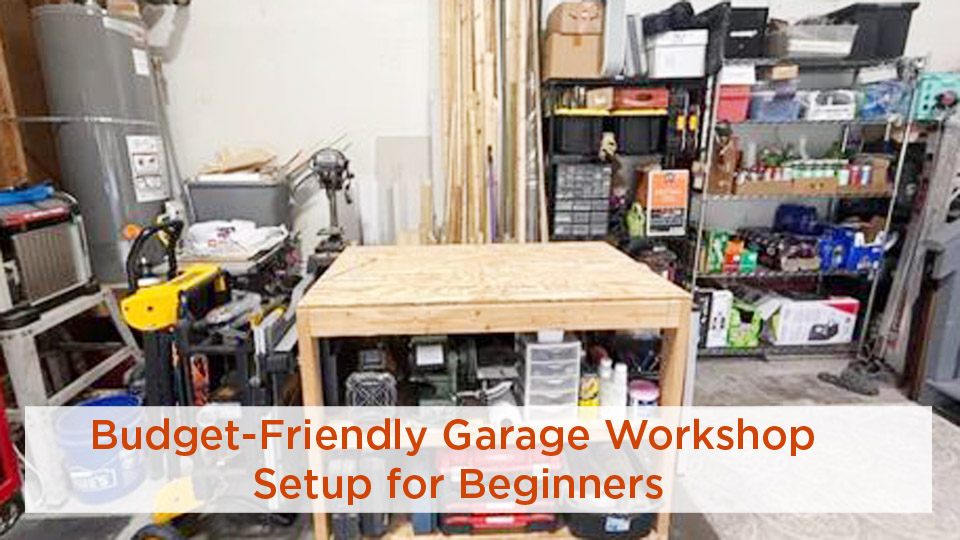
Prepare the room before you prepare the welder. I now treat every garage weld as hot work: inspect the area, control combustibles, plan where fumes will go, protect anyone nearby from arc rays, and confirm that cables will not become trip hazards.
Electrical Setup
Place the welder close enough to the correct receptacle that you can avoid a long extension cord. Keep the machine dry, upright, and away from grinding dust and direct spark spray. Inspect the plug, input cord, case, gun or torch, electrode holder, work lead, and connectors before each session. Do not use equipment with exposed conductors, cracked insulation, loose connections, or heat-damaged plugs. I learned the value of a dedicated circuit after a shared appliance load tripped a breaker in the middle of a weld.
Route power cords and welding leads along a wall or protected path instead of across a doorway. Keep them away from sharp edges, hot metal, standing water, and vehicle traffic. The machine’s protective grounding conductor must remain intact. The work lead is part of the welding circuit; it is not a substitute for proper equipment grounding and does not make wet welding conditions safe.
Ventilation and Fume Control
Opening the garage door can help, but it does not prove that your breathing zone is safe. The OSHA welding-fume fact sheet recommends keeping the fume plume away from your face and using local exhaust close to the source. Position the hood or extractor so it pulls fumes away from you without drawing them through your face or stripping shielding gas from the weld.
- Create a clean-air path: Bring replacement air in from a clean location and exhaust contaminated air outdoors where it will not enter the home, a neighbor’s window, or another occupied area.
- Keep interior doors closed: In an attached garage, prevent fumes from drifting into living spaces.
- Control coated-metal hazards: Paint, plating, galvanizing, stainless steel, cadmium, lead, and solvent residue can create serious exposures. Identify the coating and safety data before heating it.
- Do not rely on a respirator alone: Ventilation and work-position controls come first. Respirator selection, fit, cartridge choice, and change schedules must match the hazard.
- Never use oxygen for ventilation: Oxygen enrichment greatly increases fire risk.
Pro Tip: Place the extractor close enough to capture the rising plume, then run a short gas-shielded test bead. If the arc becomes porous or erratic, reposition the hood so it captures fumes without pulling the shielding envelope away.
Fire Safety
Follow a full hot-work check based on OSHA’s welding, cutting, and brazing requirements. Move combustible materials at least 35 feet away when practical. If something cannot be moved, protect it with a suitable fire-resistant shield and inspect cracks, doorways, floor openings, wall cavities, and the opposite side of metal walls where heat or sparks may travel.
- Remove vehicles, fuel cans, propane cylinders not in use, batteries, aerosols, paint, solvents, oily rags, sawdust, cardboard, and dry vegetation from the hazard area.
- Keep suitable fire-extinguishing equipment ready for immediate use and know when to stop fighting a fire and call emergency services.
- Use welding blankets or noncombustible guards where sparks can reach fixed surfaces.
- Assign another trained person as a fire watch when the layout or combustible load calls for one.
- After welding, inspect the work area and any adjacent hidden spaces for at least 30 minutes when fire-watch conditions apply.
- Mark or guard hot metal so nobody touches it by mistake.
Warning: Do not weld or cut a drum, tank, pipe, wheel, shock absorber, sealed tube, or other closed item just because it looks empty. Residue, trapped gas, pressure, or a hidden coating can cause an explosion or toxic release.
Gas Cylinder Safety
Shielding-gas cylinders contain high-pressure gas and must be treated as stored energy. The OSHA gas-cylinder rules require cylinders used for welding to be secured upright. Use a chain, strap, approved cart, or other steadying device around the cylinder body.
- Install the valve-protection cap during storage and transport when the cylinder design uses one.
- Keep cylinders away from sparks, hot slag, electrical circuits, and places where a vehicle or falling object can strike them.
- Use only a regulator and fittings intended for that gas and pressure. Never use oil or grease on oxygen equipment.
- Stand to the side of the regulator when opening a cylinder valve, and open it slowly according to the supplier’s instructions.
- Check connections with an approved leak-detection solution. Never search for leaks with a flame.
- Close the cylinder valve when the session ends, release pressure from the system as directed, and back out the regulator-adjusting screw when the manufacturer calls for it.
Workspace Prep
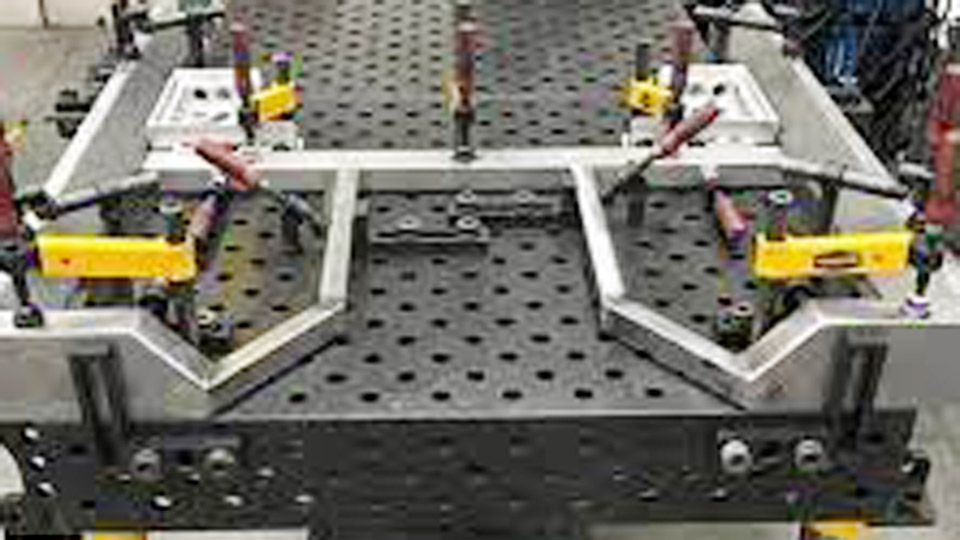
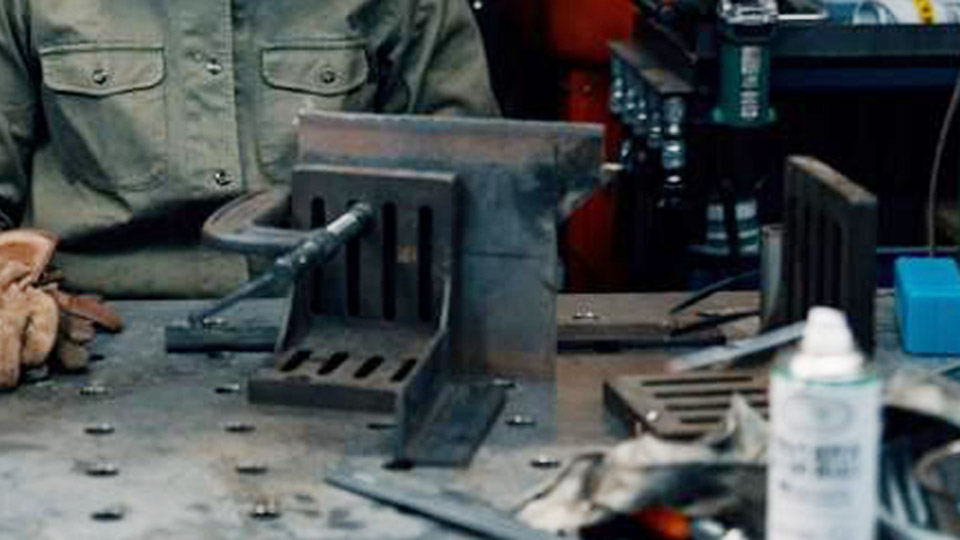
A steel table gives you a stable, noncombustible surface and makes clamping easier. The top does not need one universal thickness; it needs to stay flat and support the weight and heat of your projects without tipping. I built my first table from scrap, and the useful part was not the low cost but the flat top and solid clamping points. Level the table, lock the wheels if it is mobile, and keep the work at a height that lets you maintain a steady travel angle without leaning over the fume plume.
- Lighting: Use bright, even task lighting so you can inspect joint gaps, tack placement, and post-weld defects.
- Screens: Protect family members, neighbors, helpers, and pets from arc flash with noncombustible welding curtains while preserving airflow.
- Housekeeping: Sweep metal dust and remove trip hazards before welding. Keep grinding sparks pointed away from the welder, cylinders, and cords.
- Storage: Keep wire and filler rods clean and dry. Store low-hydrogen electrodes according to the manufacturer’s requirements, especially when code work is involved.
- Metal separation: Use dedicated stainless-steel brushes and abrasives on stainless, and keep aluminum-cleaning tools separate to reduce cross-contamination.
Step-by-Step Guide to Setting Up Your Welder
The exact controls vary by model, but this sequence works as a safe framework. Keep the machine switched off and disconnected from input power while you install internal consumables or change polarity leads.
Step 1: Read the Manual, Data Plate, and Consumable Labels
Confirm the input voltage, plug, circuit recommendation, duty cycle, supported process, polarity, wire or electrode range, and gas requirements. Inspect the shipping box and machine for damage. Tighten only the connections the manual identifies as user-serviceable. A loose work-clamp connection on my first machine caused an unstable arc until I cleaned and tightened it.
Step 2: Prepare the Area and Put On PPE
Complete the fire check, set the ventilation, position screens, remove bystanders and pets, and place the extinguisher where you can reach it without crossing the fire. Put on safety glasses, the correct welding helmet, dry gloves, flame-resistant clothing, and protective footwear before feeding wire or making a test arc.
Step 3: Install the Correct Consumables and Polarity
- MIG with solid wire: Install the correct spool, drive-roll groove, liner, and contact tip. ER70S-6 is common for mild steel. Solid-wire GMAW commonly uses electrode-positive polarity, but verify the machine chart and wire label.
- Self-shielded flux-core: Use the drive roll and tip specified for the wire. Many self-shielded wires use electrode-negative polarity, but not all wires do, so follow the label.
- Stick: Choose an electrode that matches the base metal, joint, position, required strength, and available polarity. Insert it only after the machine is configured and you are ready to test.
- TIG: Install the correct collet, cup, and tungsten diameter. A 2% lanthanated tungsten is a useful all-purpose option on many modern machines. Grind the point lengthwise on a dedicated wheel and follow the welder manual for AC or DC preparation.
Set spool-brake and drive-roll tension only high enough to feed smoothly. Excess tension can deform the wire, wear the liner, or cause bird-nesting. Keep the gun cable as straight as practical while feeding the wire.
Step 4: Connect Shielding Gas When the Process Requires It
Secure the cylinder upright before removing the cap. Confirm that the regulator matches the gas, inspect the sealing surfaces, connect the hose, and open the cylinder as instructed. Set flow while gas is actually flowing through the gun or torch, using the range in the machine or consumable guide. More flow is not always better because turbulence can pull room air into the shielding stream. I once left a regulator connection loose and wasted shielding gas, so I now leak-check every new connection.
Step 5: Connect the Work Lead to Clean Metal
Attach the work clamp to clean, bare metal on the workpiece or table, as close to the weld area as practical. Remove paint, rust, scale, and oil from the contact point. A poor connection can cause an unstable arc, heat at the clamp, or misleading setup problems.
Note: Welders often call this the “ground clamp,” but it is the work lead in the welding circuit. It does not replace the machine’s protective grounding conductor and does not prevent shock if you touch live parts or weld in wet conditions.
Step 6: Set the Machine From the Chart
Use the door chart or manual for your exact combination of metal, thickness, wire or electrode diameter, gas, joint type, and position. On MIG, set voltage and wire-feed speed together. On stick and TIG, set a starting amperage that matches the electrode or tungsten and joint. Do not copy an arbitrary dial number from another machine because numbered controls are not standardized.
Check duty cycle before long practice runs. If the thermal-protection light comes on, stop and let the machine cool with the fan unobstructed. Do not bypass thermal protection.
Step 7: Prepare a Matching Test Coupon
Use scrap of the same alloy, thickness, joint type, and orientation as the project. Remove oil, paint, rust, scale, plating, moisture, and solvent residue from the weld zone. Bevel and gap the joint only when the design or procedure calls for it, then clamp it so the fit-up matches the real work.
Step 8: Run a Test Bead and Fine-Tune One Variable at a Time
Strike the arc on the coupon and inspect arc stability, bead shape, toe wetting, penetration, porosity, undercut, spatter, and distortion. Sound can help, but it is not a complete quality test. I spent hours changing several settings at once when I learned MIG, and that made troubleshooting harder. Change one control at a time and write down the result. If the weld is load-bearing or critical, use an approved procedure and the inspection method the code or design requires.
Step 9: Shut Down Safely
Let the work cool in a protected place. Switch off the machine, close shielding-gas cylinders, release line pressure as directed, remove stick electrodes from the holder, and disconnect input power before maintenance. Coil leads loosely, store filler materials dry, mark hot metal, and complete the post-weld fire watch.
Selecting Rods and Filler Metals
Filler choice affects strength, ductility, corrosion resistance, crack sensitivity, appearance, and code compliance. Match the consumable to the exact base alloy and service condition instead of choosing only by what is already in the cabinet.
MIG Wire
- ER70S-6: A common solid wire for mild steel. Its deoxidizers help with light mill scale, but you should still remove rust, paint, grease, and heavy scale.
- ER308L: Common for welding 304 and 304L stainless steel when the joint design and service conditions allow it. Use the gas and procedure specified for the wire.
- ER4043 or ER5356: Common aluminum choices, but they are not interchangeable for every alloy or service temperature. Match the filler to the base alloy and application.
Stick Electrodes
- E6011: A deep-penetrating electrode that can handle less-than-perfect repair surfaces better than many electrodes, though cleaning is still important.
- E7018: A low-hydrogen electrode used where strength, toughness, and hydrogen control matter. Storage and redrying rules depend on the manufacturer and applicable code.
- E308L-16 or another specified stainless electrode: Match the electrode classification to the stainless grade, position, polarity, and service requirement.
TIG Filler Rods
- ER70S-2: A common TIG filler for clean carbon-steel fabrication.
- ER308L: Common for compatible 304-series stainless joints.
- ER4043 or ER5356: Common aluminum fillers selected according to the base alloy, desired strength, anodizing response, and service conditions.
Tips for Filler Selection
- Identify the base metal before welding. A spark test or appearance alone may not be enough for critical work.
- Check the consumable classification, diameter, polarity, shielding gas, position limits, and storage instructions.
- Do not assume that a higher-strength filler automatically makes a better joint. Base-metal compatibility and procedure control matter.
- Keep stainless and aluminum filler clean, dry, labeled, and separate from carbon-steel contamination.
- For trailers, lifting points, roll cages, pressure parts, or structural work, use the filler and procedure required by the governing design or code.
Safety Gear and Practices
Welding PPE must protect your eyes, face, skin, hands, hearing, and feet from arc radiation, hot metal, flying particles, and noise. It must also stay dry and in good condition. A stray spark once found a gap in one of my gloves, and that small burn was enough to end the session.
- Helmet: Use a helmet that meets the applicable eye-protection standard and select shade by process and arc current. The OSHA filter-lens table gives minimum shades for common welding operations.
- Safety glasses: Wear side-shield safety glasses under the helmet for grinding debris, slag, and particles that can enter when the helmet is raised.
- Gloves: Use dry welding gloves suited to the process. Replace gloves with holes, wet areas, or damaged insulation.
- Clothing: Wear flame-resistant cotton, leather, or purpose-made welding clothing. Avoid exposed synthetic fabric, cuffs, open pockets, and frayed edges that can trap sparks.
- Footwear: Wear high-top leather work boots with covered laces or metatarsal protection where needed. Do not tuck pant legs into the boots.
- Hearing protection: Use it for grinding, chipping, gouging, and welding positions where sparks or slag could enter the ear.
- Respiratory protection: Use only equipment selected for the actual fume hazard and worn with the required fit and medical clearance. A basic dust mask is not a universal welding-fume solution.
Keep your body insulated from the electrode, work circuit, and wet surfaces. Never weld with wet gloves or while standing in water. Disconnect the welder before opening covers or changing internal connections. Protect anyone nearby with screens and suitable eye protection.
Products Worth Considering

True Color Clear View: A 3.64" x 1.67" viewing area with 1/1/1/1 optical clarity delivers a true color view for improved visibility and reduced eye strain.

✅Arc & Flame Resistant for Life - This 7 oz material is a soft, breathable cotton. They will remain arc and flame retardant regardless of the washes and wear cycles. These cotton fr balaclavas are NFPA 70E Compliant, HRC / CAT 2, EBT = 12 cal/cm² and meet ASTM F1506.

High Quality-100% Heavy Duty Leather Apron with Gloves
Common Garage Welding Mistakes and Fixes
| Problem | Likely Causes | What to Check |
|---|---|---|
| Breaker trips or arc feels weak | Wrong circuit, shared load, excessive extension-cord drop, loose connection, or settings beyond the circuit and machine rating | Stop welding, compare the installation to the manual, remove other loads, inspect the cord and plug, and call an electrician if the circuit is uncertain |
| Porosity | No gas, wrong gas, leaks, wind, dirty metal, excessive flow, blocked nozzle, or moisture | Verify flow at the gun, leak-test connections, clean the nozzle and metal, shield drafts, and check the consumable guide |
| Heavy spatter | Voltage and wire speed are out of balance, wrong polarity, poor work connection, long stickout, contamination, or unstable gas shielding | Return to the chart, confirm polarity, clean the clamp point, shorten stickout, and adjust one setting at a time |
| Wire stubs into the work | Wire feed too high for voltage, travel too slow, or poor electrical connection | Increase voltage or reduce wire speed within the chart range, then inspect the work lead and contact tip |
| Wire burns back to the tip | Wire feed too low, voltage too high, restricted liner, wrong tip, or excessive tip-to-work distance | Correct the voltage and wire-speed balance, inspect the liner and tip, and use the recommended stickout |
| Lack of fusion | Heat input too low, travel too fast, poor joint angle, heavy scale, or insufficient joint preparation | Clean and prepare the joint, return to the chart, slow or correct travel, and verify that the machine is rated for the joint |
| Bird-nesting or erratic wire feed | Too much drive tension, wrong drive roll, kinked gun cable, dirty liner, tip blockage, or spool brake set incorrectly | Release tension, remove damaged wire safely, install the correct feed components, straighten the cable, and reset tension |
| TIG tungsten contamination | Touching the puddle or filler, poor gas coverage, dirty material, or using a contaminated grinding wheel | Stop, regrind or replace the tungsten, clean the joint, and correct torch angle and gas coverage |
Sample Project: Welding a Steel Workbench
A steel workbench is a useful practice project because it teaches measuring, fit-up, tacking, squaring, heat control, and distortion management. Keep it a noncritical shop project unless a qualified design specifies the load capacity.
- Welder: A MIG or flux-cored machine rated by its manufacturer for the chosen material and joint thickness.
- Material: For example, 1/8-inch mild-steel angle or square tube for the frame and a plate top sized for the intended load.
- Filler: A common mild-steel MIG setup is 0.030-inch ER70S-6 wire with a compatible argon/CO2 blend, but the machine and wire guides control the final choice.
- Settings: Start with the chart for the actual thickness, wire, gas, and joint. Test on matching offcuts instead of copying another welder’s dial numbers.
- Prep: Cut square, deburr edges, clean the weld zones, and clamp the parts on a flat surface.
- Process: Tack opposite corners, recheck diagonals and level, then weld in a balanced sequence to control distortion.
- Inspection: Look for missed joints, cracks, undercut, porosity, and lack of fusion. Do not grind load-carrying welds flush unless the design allows it.
- Safety: Keep the table isolated from combustibles, protect nearby people from arc rays, and complete the post-weld fire watch.
This is the kind of project where a careful setup saves more time than it costs. Good fit-up and a few measured tacks make it much easier to keep the frame square before the full welds lock it in place. The first bench I built this way has stayed solid through years of garage projects.
Meeting Welding Codes and Knowing Your Limits
DIY work is not automatically exempt from electrical, fire, building, vehicle, product-liability, or welding requirements. The governing rules depend on the material, structure, location, and end use. The current AWS D1 structural-welding documents include AWS D1.1/D1.1M:2025-AMD1 for structural steel, but another code may apply to aluminum, sheet steel, stainless steel, bridges, pressure equipment, or piping.
Do not rely on a garage test bead for trailers, suspension parts, lifting devices, pressure vessels, roll cages, structural members, or products sold to others. Those jobs may require an engineered design, material traceability, a written welding procedure, welder qualification, controlled consumable storage, inspection, and records. Radiographic or ultrasonic testing is not automatically required for every code weld; the design, contract, and governing code determine the inspection method.
Conclusion
You can set up a welder in your garage safely when you treat the whole room as part of the welding system. Match the machine to the installed circuit, remove or shield combustibles, capture fumes near the source, secure cylinders upright, protect other people from arc rays, and wear PPE selected for the process.
For the machine itself, follow the manual instead of copying generic dial numbers. Install the correct consumable, feed parts, gas, and polarity; clamp to clean metal; and test on matching scrap. The setup may take longer than plugging in the welder, but it gives you safer work, fewer troubleshooting problems, and better welds.
Frequently Asked Questions
What is the best welder for a small garage?
For clean mild-steel hobby projects, a compact 120-volt MIG machine is often the easiest place to start when the existing circuit meets the manual. Choose self-shielded flux-core or stick when outdoor use and heavier repair work matter more. Choose TIG when precise control is worth the slower learning curve.
How much electrical power does a garage welder need?
It depends on the exact machine. Read the input-voltage, input-current, plug, branch-circuit, and extension-cord requirements in the manual. Do not size the circuit from the welder’s output-amperage name. Have a qualified electrician install or verify any new receptacle or circuit.
Is it safe to weld in an attached garage?
It can be, but only after you control fire, fumes, arc rays, cylinders, and electrical hazards. Keep the door to the home closed, exhaust fumes outdoors away from occupied areas, remove combustibles, inspect hidden spaces, protect bystanders, and follow local fire, building, lease, and insurance requirements.
Is an open garage door enough ventilation for welding?
Not necessarily. Outdoor air movement or an open door does not guarantee that fumes stay out of your breathing zone. Use source-capture ventilation close to the plume, bring in clean replacement air, and position the extractor so it does not disturb shielding gas.
Can I use an extension cord with a welder?
Only when the welder manufacturer allows it. Use the conductor size and maximum length listed in the manual, keep the cord fully uncoiled and dry, and protect it from heat, sharp edges, and traffic. A light household cord can overheat and cause severe voltage drop.
What filler metal should I use for mild steel?
ER70S-6 is a common solid MIG wire, ER70S-2 is common for TIG, and E6011 or E7018 may fit stick-welding work. The final choice depends on the base metal, joint, position, required strength, polarity, gas, and applicable code. Clean the metal even when the consumable tolerates light scale.
Can a 120-volt MIG welder weld aluminum?
Some can, but only when the manufacturer approves aluminum wire and the required feeding system, such as a spool gun. Capacity depends on the machine, alloy, joint, wire, gas, and thickness. Do not assume that every compact MIG welder can produce a sound 1/4-inch aluminum weld.
How do I avoid bad welds in my garage?
Use clean, correctly identified metal; install the right consumable and polarity; make a solid work connection; control shielding gas; start from the machine chart; and test on matching scrap. Inspect the result for porosity, undercut, lack of fusion, cracks, and distortion before welding the project.
Sources
- OSHA 29 CFR 1910.252, Welding, Cutting, and Brazing — fire prevention, hot-work controls, PPE, ventilation, containers, and post-work fire watch
- OSHA, Controlling Hazardous Fume and Gases During Welding — fume hazards, coated metals, local exhaust, and respiratory controls
- OSHA 29 CFR 1910.133, Eye and Face Protection — minimum welding filter shades and eye-protection requirements
- OSHA 29 CFR 1926.350, Gas Welding and Cutting — compressed-gas cylinder handling and upright securing
- American Welding Society D1 Committee — current structural-welding code documents and material-specific code scope
- Miller, How to Set Up a Welding Space in Your Garage or Shop — practical workspace layout, lead routing, table setup, and equipment organization