How to Grind Welds With an Angle Grinder
What’s in This Article
- Essential Safety Gear and Precautions for Angle Grinding
- Choosing the Right Disc for Your Angle Grinder
- Before You Begin Weld Grinding
- Step-By-Step Guide to Weld Grinding
- How to Get a Smooth Finish on Your Welds
- Troubleshooting Common Grinding Issues
- Maintenance Tips for Your Angle Grinder After Use
- Frequently Asked Questions
- Conclusion
Rough welds can leave sharp edges, uneven seams, and a finish that looks unfinished. An angle grinder can clean them up fast, but only when you use the right disc, angle, pressure, and safety setup. This guide shows you how to grind welds with better control, safer habits, and a cleaner final surface.
Quick Answer
To grind welds with an angle grinder, wear eye, hand, hearing, and breathing protection first. Choose a disc that matches your metal and grinder speed. Hold the grinder at about a 20 to 30 degree angle, move it steadily, and use light, even pressure until the weld blends with the surface.
Key Takeaways
- Wear full safety gear before you start grinding welds.
- Match the disc type and RPM rating to your angle grinder.
- Use steady movement instead of forcing the wheel into the weld.
- Switch to finer discs when you want a smoother finish.
- Clean and inspect your grinder after each job.
Essential Safety Gear and Precautions for Angle Grinding
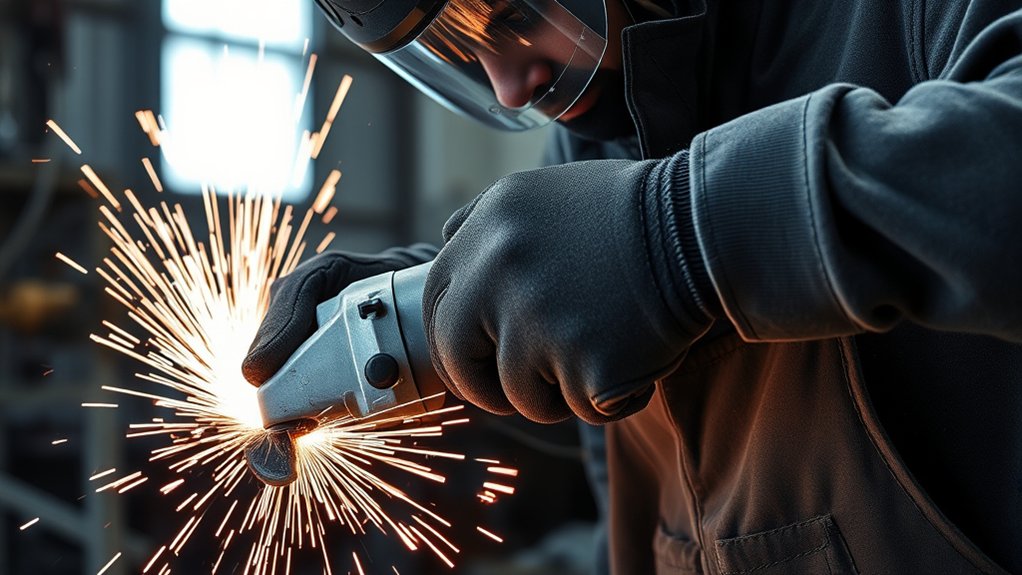
When you grind welds with an angle grinder, safety comes first. Wear proper personal protective equipment (PPE) to protect your eyes, hands, ears, lungs, and skin. Use safety glasses or a face shield for sparks and flying debris, gloves for hand protection, and hearing protection because angle grinders can get very loud.
Wear sturdy work boots and long sleeves to protect your feet and skin from hot metal. Keep your work area clean, dry, and free from flammable materials. Unplug the grinder or remove the battery before you change discs, adjust guards, or inspect the tool.
Check the guard, handle, switch, cord, and disc before you start. Inspect grinding wheels for cracks, chips, or heavy wear. If the wheel looks damaged, replace it before use.
Warning: Never use a cracked, loose, or damaged grinding disc because it can break during use.
Products Worth Considering

DEWALT ToughCoat hard coated lens provides tough protection against scratches.

Expanded Coverage – Wide-frame design with extended temples and wraparound lenses delivers greater side and frontal protection, shielding against flying debris and impact hazards in demanding environments

INFARED (IR) PROTECTION - Certified IR 5.0 protection for use in grinding, oxyfuel cutting, plasma cutting and more
Choosing the Right Disc for Your Angle Grinder
Choosing the right disc helps you grind faster, safer, and cleaner. Match the disc to the material and the job. Use grinding wheels for fast weld removal, flap discs for blending and smoothing, and cutting wheels only for cuts.
Also check the disc size, arbor size, and revolutions per minute (RPM) rating before you mount it. The disc’s RPM rating must meet or exceed your grinder’s maximum speed. A low-rated disc can fail at high speed.
Products Worth Considering

16 PIECE SET INCLUDES: Cubitron 3 1182C, 4-1/2 in x TN, 36 plus , Quick Change Fibre Discs (5), 769F, 4-1/2 in x 5/8 in-11 40 plus , T27,Quick Change Flap Discs (2), Cubitron 3 - 4-1/2 in x 1/4 in x 5/8 in-11, T27, Quick Change Grinding Wheels (2),
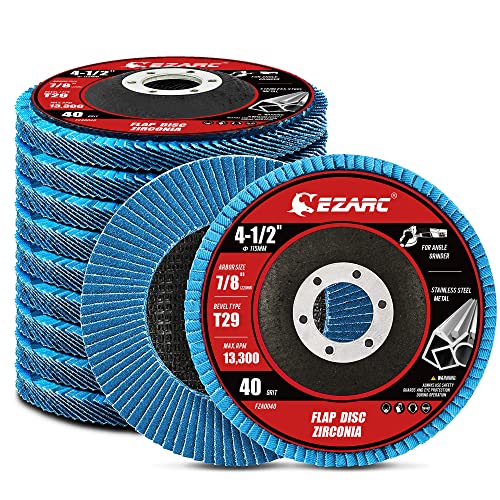
【Great Performance】EZARC flap sanding discs are made of hard zirconia material which lasts longer than standard aluminum oxide abrasive material, built for a more robust and economical grinding wheel

VALUE PACK: Pack of 20, 40 60 80 120 grit Assorted kit, 5 flap discs of each grit, 4-1/2 Inch Diameter, 7/8 Inch Arbor, Flat wheel bevel Type 27, 13300RPM maximum speed
Disc Type Selection
Select the disc based on what you need to do. Each disc has a different purpose, and the wrong choice can slow your work or create a safety risk.
- Grinding wheels: Use these for fast weld removal and shaping metal.
- Flap discs: Use these for blending welds and leaving a smoother surface.
- Cutting wheels: Use these only when you need to cut metal.
- Diamond cutting discs: Use these for masonry, stone, concrete, and similar materials.
For weld grinding, start with a disc that removes metal well without overheating the workpiece. Then move to a finer disc when you need a smoother finish.
RPM Compatibility Check
Check RPM compatibility before every disc change. Review the grinder label and the disc label, then confirm that the disc can handle your grinder’s speed. This simple check helps reduce the risk of wheel failure.
Also make sure the disc fits the grinder correctly. Do not force a disc onto the arbor, modify the guard, or use a disc that does not match the tool. Inspect the disc again after mounting it, especially if you dropped it or stored it loosely.
Before You Begin Weld Grinding
Set up the job before you touch the weld with the grinder. A stable workpiece gives you better control and lowers the chance of slips. Clamp the metal firmly so it does not move while you grind.
Clean the surface around the weld so dirt, slag, oil, and loose debris do not interfere with the disc. Keep sparks pointed away from your body, cords, gas cylinders, fuel, paint, and other flammable items. Plan your grinding path before you start.
What You’ll Need
- Angle grinder with a proper guard and side handle
- Grinding wheel or flap disc rated for your grinder
- Safety glasses or face shield
- Gloves, hearing protection, and long sleeves
- Dust mask or respirator when grinding dust may build up
- Clamps or a vise to hold the workpiece
- Brush or clean cloth for surface cleanup
Pro tip: Start with a coarse disc for weld removal, then use a flap disc for better blending.
Step-By-Step Guide to Weld Grinding
Estimated total time: Most small weld grinding jobs take about 10 to 30 minutes, depending on weld size, metal thickness, and finish quality.
Follow the steps in order so you keep control of the tool and avoid removing too much metal. Do not rush the first pass. A slow, steady approach gives you a cleaner result.
- Put on your safety gear. Wear eye protection, gloves, hearing protection, long sleeves, and breathing protection when needed.
- Secure the workpiece. Clamp the metal so it stays stable while you grind.
- Choose the right disc. Use a grinding wheel for heavy weld removal or a flap disc for blending.
- Check the disc and grinder. Confirm the disc rating, guard position, handle, cord, and switch before you start.
- Hold the grinder firmly. Use both hands and stand in a stable position.
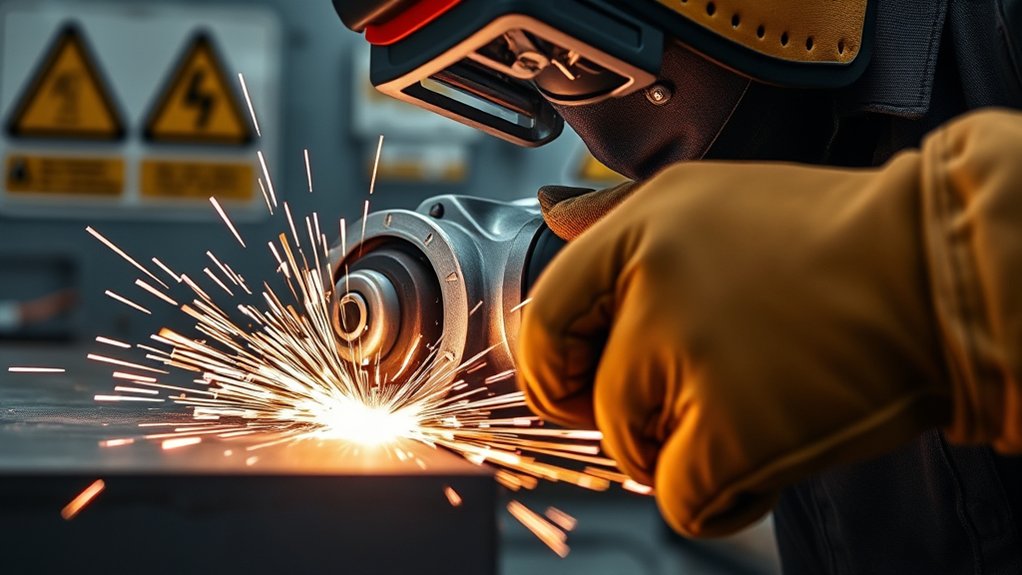
- Set the grinder angle. Hold the disc at about a 20 to 30 degree angle to the work surface.
- Start grinding with light pressure. Let the wheel cut instead of forcing it into the weld.
- Move in steady passes. Use smooth back-and-forth movement so you do not gouge the metal.
- Check your progress often. Stop, inspect the weld, and avoid grinding into the base metal.
- Finish with a finer disc. Switch to a flap disc or finishing disc when the weld sits close to flush.
Safety Gear Requirements
Use safety gear every time you grind welds. Sparks and metal fragments can move fast, and they can cause serious injury. Protect your body before you plug in the tool.
- Safety glasses or face shield: Protect your eyes and face from sparks and metal fragments.
- Hearing protection: Use earplugs or earmuffs because grinders can produce high noise levels.
- Long sleeves and protective clothing: Shield your skin from hot metal debris.
- Dust mask or respirator: Protect your lungs when grinding dust builds up.
Grinding Techniques Overview
Good technique matters more than force. Hold the grinder at about a 20 to 30 degree angle and keep the disc moving. Use steady pressure so the wheel removes metal without digging into the surface.
Watch the sparks and the surface as you work. A smooth, steady spark pattern usually shows better control. If sparks become too heavy or the grinder starts to chatter, ease up and check your angle.
After the first weld removal pass, switch to a medium flap disc or finishing disc. This helps you blend the weld into the surrounding metal. Clean the surface before the final pass so dust and grit do not scratch the finish.
Finishing Touches Essentials
A smooth finish takes more than one pass. Start with a disc that removes the weld efficiently, then move to a finer disc for blending. Do not try to get the final finish with a heavy grinding wheel alone.
- Clean the surface before you use the final disc.
- Change worn discs before they slow the job.
- Use the right disc for each stage.
- Check the surface often to avoid over-grinding.
With careful passes, you can create a cleaner and more professional-looking surface.
How to Get a Smooth Finish on Your Welds
A smooth weld finish comes from control, disc choice, and patience. Start by removing the high spots first. Do not grind the whole area deeply just to chase one raised part of the weld.
Once the weld sits close to flush, use a flap disc or finishing disc to blend the surface. Keep the grinder moving across the weld and nearby metal so the finish looks even. Avoid holding the disc in one spot because it can create dips or heat marks.
Inspect the surface from more than one angle. Touch the surface only after it cools, and watch for sharp edges. If you plan to paint the metal, clean away dust, grit, and loose particles before coating.
Troubleshooting Common Grinding Issues
Even with good technique, grinding problems can happen. Most issues come from too much pressure, the wrong disc, poor disc condition, or an unstable workpiece. Stop and inspect the setup when the grinder feels unsafe or the result looks uneven.
Excessive sparks, vibration, chatter, and high-pitched noise often point to pressure, disc, or alignment problems.
- Too many sparks: Reduce pressure and check that the disc matches the metal.
- Heavy vibration: Stop and check disc alignment, balance, and mounting.
- Slow grinding: Replace a worn disc or choose a more suitable grit.
- Gouged metal: Lower your pressure and keep the grinder moving.
- Fast disc wear: Use lighter pressure and avoid overheating the workpiece.
Common Mistakes to Avoid
Avoid removing too much base metal around the weld. You only need to smooth or blend the weld, not weaken the workpiece. Stop often and check your progress.
Do not grind without the guard or side handle. These parts help protect you and give you better control. Also avoid using a cutting wheel for side grinding because it can break under side pressure.
Maintenance Tips for Your Angle Grinder After Use
Clean and inspect your angle grinder after each use. First, unplug the tool or remove the battery. Then brush dust and debris from the vents, housing, guard, and handle.
Check the power cord, plug, switch, and side handle for damage. If your grinder uses serviceable brushes or moving parts, follow the owner’s manual for care. Do not add oil unless your model calls for it.
Remove the disc before storage when practical. Store the grinder in a dry, dust-free place where the disc and guard will not get damaged. Good storage helps keep the tool ready for the next job.
Frequently Asked Questions
How Do You Use an Angle Grinder Step by Step?
Put on safety gear, secure the workpiece, choose the correct disc, and check the grinder before use. Hold the tool with both hands, start with light pressure, and move in smooth passes across the surface.
What Is the Golden Rule in Welding?
The golden rule in welding is to prepare clean, safe, and well-fitted joints before you weld. Clean metal helps the weld form better and makes the final grinding job easier.
What Is the Step-By-Step Procedure in Using a Grinding Machine?
Inspect the machine, choose the correct wheel, secure the material, and wear proper safety gear. Start the grinder, let it reach speed, then guide it with steady pressure until you reach the needed shape or finish.
Should You Push or Pull a Grinder?
For many weld grinding jobs, pushing the grinder gives you better control and keeps sparks moving away from you. Use the method that gives you stable contact, clear visibility, and safe body position.
Can You Grind Welds Flat With a Flap Disc?
Yes, you can use a flap disc to blend welds and create a smoother surface. For heavy weld removal, start with a grinding wheel, then switch to a flap disc for the finish.
Safety Disclaimer: This article is for informational purposes only and does not replace hands-on training, workplace safety rules, or professional guidance. Always follow your tool manual, wear proper protective gear, and stop if the grinder, disc, or workpiece feels unsafe.
Conclusion
Clean weld grinding depends on safety, the right disc, and steady control. Start with proper protection, secure the metal, and let the grinder do the work instead of forcing it. Check your progress often so you smooth the weld without weakening the base metal.
After the job, clean your grinder and inspect it before storage. With practice, you can turn rough welds into smoother seams that look cleaner and feel safer to handle.


