What’s in This Article
- Why Abrasive Dust Shortens Tool Life
- Essential Safety Gear to Protect Against Dust Exposure
- Regular Cleaning Techniques to Minimize Dust Accumulation
- Setting Up Dust Extraction Systems
- Proper Storage Solutions for Abrasive Tools
- Conducting Routine Inspections for Tool Wear and Damage
- Key Practices for Safely Using Abrasive Tools
- Choosing the Right Abrasive Products for Your Tools
- Maintaining a Clean Work Environment: Tips and Techniques
- Frequently Asked Questions
- Conclusion
Abrasive dust can grind down your tools long before the cutting edge looks worn. It raises heat, blocks lubrication, and works into moving parts where it causes steady damage. You can slow that wear by controlling dust at the source, cleaning tools after use, storing them dry, and checking them often.
Quick Answer
To protect tools from abrasive dust, capture dust close to the work, clean tools after each use, and store them in a dry area. Wear eye, hand, hearing, and respiratory protection when dust, sparks, or debris could reach you. Inspect wheels, discs, bits, and moving parts often so you can replace damaged parts before they fail.
Key Takeaways
- Control dust at the source with a fitted extraction hood, vacuum attachment, or dust collector.
- Clean tools after each use so grit does not build up on cutting edges or moving parts.
- Store abrasive tools in dry, clean holders to reduce rust, chips, and impact damage.
- Inspect wheels, discs, guards, cords, and fittings before use to catch damage early.
- Match each abrasive to the tool speed, material, size, and job pressure.
Why Abrasive Dust Shortens Tool Life
Abrasive dust shortens tool life because it increases friction between cutting surfaces. That friction creates extra heat, dulls cutting edges, and can reduce the lifespan of your abrasive tools.
Dust build-up can also block proper lubrication. When fine particles work into bearings, threads, switches, and slides, they scrape those parts during normal movement.
Moisture makes the problem worse. Dust can hold dampness against metal surfaces, which raises the risk of corrosion and weakens tool parts over time.
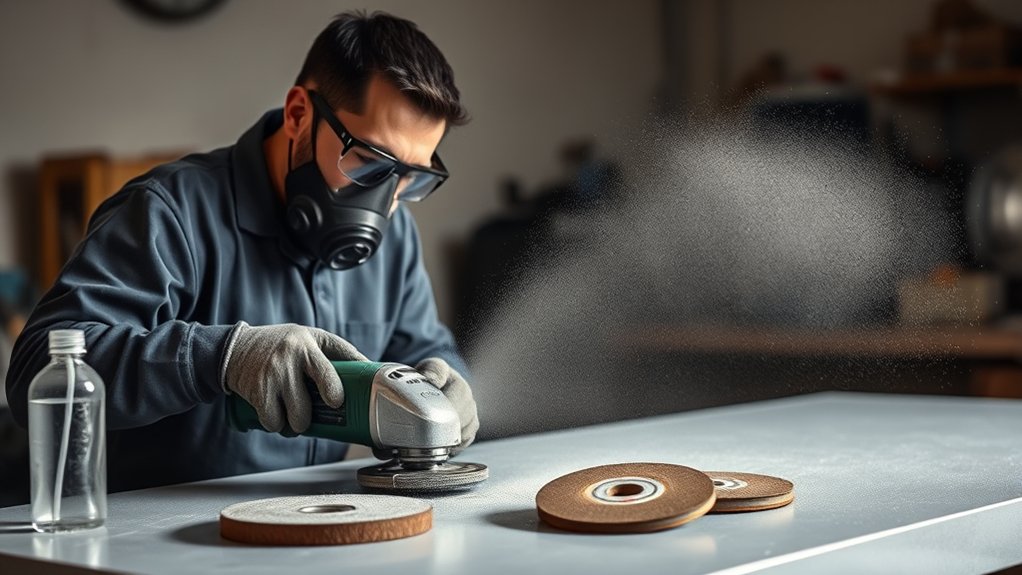
Essential Safety Gear to Protect Against Dust Exposure
In high-dust work areas, the right safety gear helps protect your eyes, lungs, skin, and hearing. Choose protective equipment based on the tool, material, and amount of dust the job creates.
Use safety gear before you start abrasive work, not after dust begins to build in the air.
- Safety Goggles or Face Shields: Shield your eyes from flying grit, sparks, chips, and dust particles.
- Respiratory Protection: Use a respirator that matches the dust hazard, especially when you cut, grind, or sand materials that may release harmful particles.
- Protective Gloves: Protect your hands from sharp edges and hot surfaces while keeping a firm grip.
- Hearing Protection: Wear earplugs or earmuffs when grinders, saws, or dust collectors create loud noise.
Warning: Never rely on a paper dust mask when the material may contain toxic dust, silica, lead paint, or other hazardous particles.
Regular Cleaning Techniques to Minimize Dust Accumulation
To maintain good tool performance, clean tools before dust hardens or packs into small gaps. A simple routine after each use can reduce heat, drag, and early wear.
Effective Cleaning Tools Selection
Select the right cleaning tools for the material and the amount of build-up. Avoid harsh methods that can scratch surfaces, damage seals, or drive dust deeper into the tool.
- Use a Soft Brush or Cloth: Remove abrasive dust and debris from vents, handles, guards, and cutting areas after each use.
- Use an Ultrasonic Cleaner for Small Parts: Clean heavy build-up on removable metal parts when the tool maker allows it.
- Use a Mild Soap Solution: Clean stubborn residue with mild soap and water, then dry parts right away to reduce rust risk.
Routine Maintenance Schedule
Build cleaning into your normal work routine. Remove metal shavings, dust, and coolant residue after each use so grit does not erode cutting efficiency or raise heat.
Use a soft brush or cloth for light cleaning. For stubborn build-up on compatible parts, use an ultrasonic cleaner and avoid harsh chemicals that may damage carbide, coatings, seals, or labels.
Apply light oil or silicone spray only where the tool maker allows it. Too much lubricant can trap dust and create a grinding paste.
Proper Storage Techniques
Proper storage keeps dust and moisture from undoing your cleaning work. It also protects abrasive wheels, discs, bits, and cutters from chips and impact damage.
- Clean Tools Regularly: Remove dust and residue before you put tools away.
- Use Designated Containers: Store tools in clean, dry toolboxes, racks, sleeves, or cases.
- Add Silica Gel Packets: Use desiccant packs in closed storage areas to help control humidity.
Check stored tools before use, especially if they sat unused for weeks. Dust, rust, or cracked abrasives can turn a simple job into a safety risk.
Setting Up Dust Extraction Systems

A good dust extraction system captures dust before it spreads through your work area. The best setup matches your tool, material, hose size, filter type, and airflow needs.
Effective System Design
Design the system around the point where dust forms. You get better capture when the hood, hose, or vacuum port sits close to the cutting, grinding, or sanding area.
- Airflow Requirement: Choose a system with enough airflow for the tool and dust type instead of relying on a one-size-fits-all number.
- High-Efficiency Particulate Air (HEPA) Filters: Use HEPA filters when fine dust creates a health or cleanliness concern.
- Hood Positioning: Place the extraction hood close to the dust source without blocking safe tool control.
Clean filters and ducts as part of your maintenance routine. Clogged filters reduce suction and let more abrasive dust settle on your tools.
Proper Equipment Selection
Select dust extraction equipment that fits the tool and the job. A portable extractor works well for mobile tasks, while a central system may suit a fixed shop layout.
| Equipment Type | Key Features |
|---|---|
| HEPA Filters | Capture fine dust particles |
| Portable Extractors | Fit changing work areas |
| Centralized Systems | Support larger dust control setups |
| Cyclone Separators | Reduce the load on filters |
| High CFM Units | Move more air for heavy dust tasks |
Regular Maintenance Practices
Your dust extraction system needs steady care to keep suction strong. Inspect hoses, seals, filters, and collection bins before heavy use.
- Clean Filters and Ducts: Remove build-up so air can move freely.
- Use the Right Filter: Match the filter to the dust hazard and the tool maker’s guidance.
- Place Units Close to the Work: Keep hoses short and direct when the setup allows it.
Pro tip: Empty dust bins before they overfill because packed dust can reduce suction and strain the motor.
Proper Storage Solutions for Abrasive Tools
When you store abrasive tools correctly, you protect their shape, edges, and bond strength. Start with a clean, dry, and well-ventilated environment because moisture can lead to corrosion.
Use designated tool holders, sleeves, racks, or cases to prevent chipping and dullness. Do not toss abrasive wheels, cutters, or bits into a loose toolbox where they can hit each other.
Place silica gel packets in enclosed storage areas to absorb excess humidity. Keep tools off the floor and away from extreme heat, direct water, and heavy vibration.
Conducting Routine Inspections for Tool Wear and Damage
Inspect your abrasive tools often so you can catch wear before it becomes a failure. Check high-use tools before each job and review stored tools before you put them back into service.
Frequent inspections help you find cracked abrasives, loose fittings, and dull edges before they cause damage or injury.
- Dull Edges and Cracks: Check cutting edges, wheels, and discs for dullness, chips, cracks, or missing material.
- Overheating Discoloration: Look for color changes that may point to excess heat and tool stress.
- Loose Fittings: Tighten or replace loose parts before you start the tool.
Keep a simple maintenance log with inspection dates, findings, and replacements. Uneven cutting patterns can also signal poor alignment, wrong pressure, or a worn abrasive.
Key Practices for Safely Using Abrasive Tools

Safe abrasive work starts before the tool turns on. Check the tool, abrasive, guard, and workpiece so you can reduce dust, kickback, breakage, and flying debris.
| Practice | Description | Purpose |
|---|---|---|
| Inspect Tools | Check abrasives for chips, cracks, or damage before use. | Reduces malfunction risk. |
| Use Personal Protective Gear | Wear safety goggles, gloves, and respiratory protection when needed. | Reduces injury risk from dust and debris. |
| Match Speed Ratings | Make sure the abrasive rating meets or exceeds the tool speed. | Helps prevent wheel or disc failure. |
Clean the work area after each operation to remove metal shavings and dust. Store tools in a clean, dry place so rust and grit do not shorten their service life.
Choosing the Right Abrasive Products for Your Tools
Choosing the right abrasive products helps your tools cut cleaner, run cooler, and last longer. Match the abrasive to the tool, material, speed, and pressure before you start.
- Speed Rating: Match abrasives to your tool’s revolutions per minute (RPM) rating so the wheel or disc can run safely.
- Material Compatibility: Use abrasives designed for the material, such as metal, masonry, wood, plastic, or composite.
- Size and Shape: Choose the correct size and shape to reduce imbalance, vibration, and poor contact.
- Bond Type: Choose a bond that suits the task, such as resin for many high-speed jobs or vitrified bonds for some grinding work.
Replace worn abrasives before they force the tool to work harder. A dull or clogged abrasive creates heat, slows the job, and can damage the tool.
Products Worth Considering
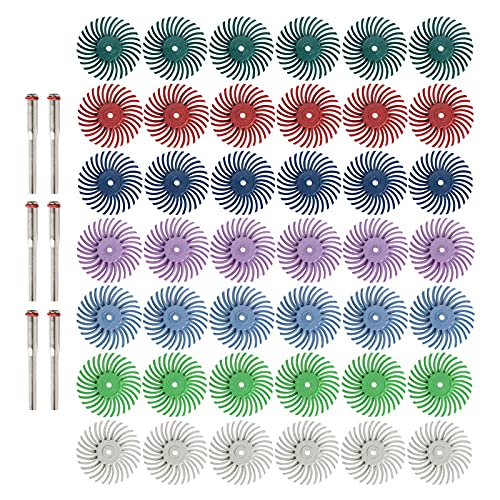
Bristles disc suit for deburring, cleaning, finishing and polishing detailed parts, tiny areas and irregular places more effectively with no scrach
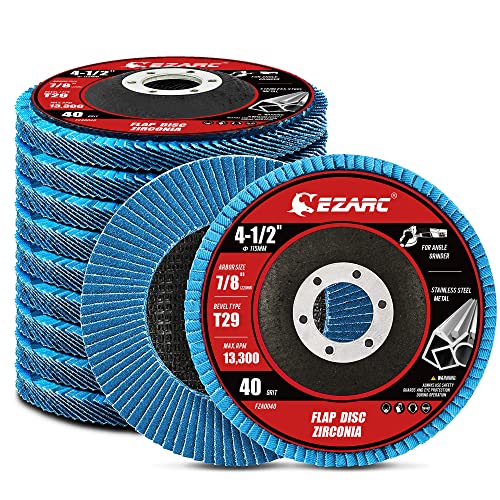
【Great Performance】EZARC flap sanding discs are made of hard zirconia material which lasts longer than standard aluminum oxide abrasive material, built for a more robust and economical grinding wheel
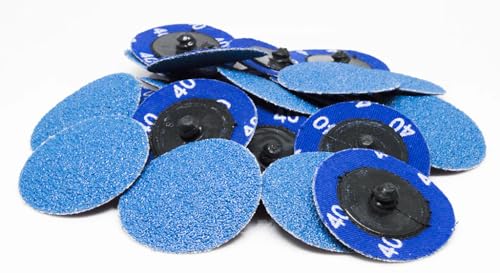
QUICK CHANGE DESIGN: These 2-inch zirconia sanding discs feature a Male R Type twist-on fastening system for quick and secure attachment. Compact diameter provides control in tight areas and contours, perfect for stock removal with professional results.
Maintaining a Clean Work Environment: Tips and Techniques
A clean work area helps protect tool life and keeps dust from spreading to nearby equipment. Clean benches, floors, vents, guards, and storage areas on a set schedule.
Use vacuum systems or dust extraction equipment to capture particles instead of sweeping dry dust into the air. Wipe surfaces and tools after each use so abrasive grit does not settle into handles, vents, and moving parts.
Store tools in dry areas with desiccant packs when humidity creates a concern. Keep air moving through the workspace to improve visibility, comfort, and dust control.
Note: Dry sweeping can lift fine dust into the air, so use a vacuum or damp cleaning method when the material allows it.
Frequently Asked Questions
What Are the Safety Precautions for Abrasive Cleaners?
Wear protective eyewear, gloves, and respiratory protection when abrasive cleaners can create dust or splashes. Keep the area ventilated, follow the product label, and avoid mixing cleaners unless the label says you can.
How May You Stop or Reduce the Amount of Dust Produced by the Use of Abrasive Wheels?
Use a dust extraction system, vacuum shroud, or wet method when the tool and material allow it. Inspect the wheel, use the correct pressure, and replace worn abrasives before they create extra heat and dust.
What Is the Best Way to Limit Exposure to Dust When Using Power Tools?
Capture dust at the source with a tool-mounted vacuum, extraction hood, or fitted dust collector. Wear respiratory protection when the dust hazard calls for it, and keep the workspace ventilated.
What Should You Try to Do First in Order to Reduce the Risks From Abrasive Wheels?
Inspect the abrasive wheel before you mount or use it. Check for cracks, chips, damage, the correct size, and the right speed rating for your tool.
How Often Should You Clean Tools Used Around Abrasive Dust?
Clean tools after each dusty job, especially around vents, guards, switches, and moving parts. For heavy-use tools, add a deeper weekly inspection and cleaning routine.
Conclusion
Abrasive dust shortens tool life when you let it build up, spread, or mix with moisture and lubricant. Capture dust close to the work, clean tools after use, and store them in dry, protected areas.
Before your next abrasive job, inspect the tool and match the abrasive to the speed, material, and task. Small habits make your tools safer, cleaner, and more reliable over time.


