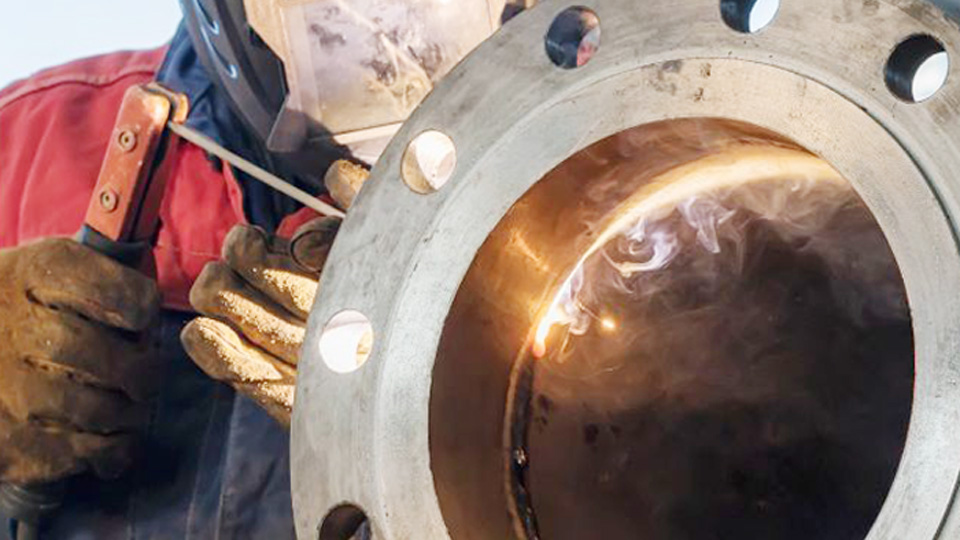
Welding sheet metal on a car is mostly a heat-control job. Thin body panels can burn through, shrink, or warp long before a bead looks finished, so success depends on choosing the right process, fitting the patch tightly, testing the setup on matching scrap, and building the joint with short, widely spaced tacks instead of a continuous bead.
Quick Answer
For most nonstructural steel body patches, use short-circuit MIG with .023-.024-inch ER70S-6 wire and C25 shielding gas. Fit the patch closely, test on matching scrap, place cool staggered tacks, and never run a continuous bead. Follow the vehicle maker’s repair procedure before welding any structural, high-strength, hybrid, or EV component.
MIG is usually the practical choice for rust patches and plug welds. TIG offers precise control but demands more skill and can still overheat a panel if you move too slowly. Self-shielded flux-cored wire works well outdoors and on heavier steel, but it puts more heat into thin sheet and is rarely the best choice for 18-22 gauge body panels.
Technical review: Updated July 20, 2026, using current Miller, I-CAR, AWS, and OSHA guidance.
Key Takeaways
- Check the vehicle-specific body repair manual before cutting or welding. Modern vehicles use mixed steels, aluminum, adhesives, and joining methods that cannot be treated like ordinary mild steel.
- For light-gauge steel, start with .023-.024-inch solid wire, DCEP polarity, C25 gas, and the welder manufacturer’s chart.
- Make and destructively test practice welds on metal that matches the panel before touching the vehicle.
- Control heat with tight fit-up, staggered tacks, full cooling periods, and a copper backing bar where access allows.
- Restore primer, seam sealer, undercoating, and cavity protection in the order required by the OEM and product maker.
At a Glance
| Time Required | Varies by patch size, access, disassembly, and refinishing; allow several hours plus coating cure time |
| Difficulty | Intermediate; structural, high-strength-steel, aluminum, hybrid, and EV repairs require vehicle-specific training and equipment |
| Tools Needed | MIG or TIG welder, matching filler, shielding gas, PPE, grinder, clamps, sheet-metal tools, copper backer, and fire-safety equipment |
| Cost | Low to moderate for a small patch when you already own the welder and PPE; much higher when equipment, refinishing, or professional structural repair is required |
Image by hotrod
Why Welding Sheet Metal Matters in Auto Repairs
Thin automotive panels are easy to overheat. A poor repair can create pinholes, distortion, weak attachment points, trapped moisture, and early corrosion. On a unibody vehicle, some panels and reinforcements also contribute to the crash-energy load path, so a repair that looks smooth may still be unsafe.
Do not assume every panel is ordinary mild steel. Current vehicles may combine mild steel, high-strength steel, advanced high-strength steel, press-hardened steel, aluminum, adhesives, rivets, resistance spot welds, GMA plug welds, and MIG brazing. I-CAR advises technicians to identify the material and follow the vehicle maker’s repair information because heat and joining limits change with steel strength. Review I-CAR’s steel repairability guidance before treating an unfamiliar panel as weldable sheet steel.
Warning: Do not section, straighten with heat, or weld a structural or high-strength component unless the vehicle-specific procedure permits that exact repair and joining method. When the procedure calls for replacement, resistance spot welding, rivet bonding, weld bonding, or MIG brazing, a general-purpose butt-weld patch is not an acceptable substitute.
Material compatibility matters as well. ER70S-6 solid wire is a common choice for clean, bare mild-steel sheet. Stainless, aluminum, and silicon-bronze applications require compatible filler, shielding gas, preparation, and equipment. Dissimilar metals also need isolation and restored coatings to limit galvanic corrosion.
Choosing the Right Welding Process for Automotive Sheet Metal
Choose the process from the OEM procedure first, then consider panel thickness, access, appearance, wind, and your skill level. For a small nonstructural mild-steel patch, short-circuit MIG is usually the easiest process to control.
Products Worth Considering

✅【ER70S-6 PROFESSIONAL PERFORMANCE】- Highest manganese-silicon deoxidizers eliminate pre-cleaning! Weld rusty/oily plates smoothly with 100% CO2 gas. Perfect for sheet metal - zero burn-through at high amps (AWS A5.18 Certified).

The unique quality of this product is that you do not have to use a shielding gas
MIG Welding for Sheet Metal Repairs
MIG, or GMAW, feeds solid wire continuously through the gun while shielding gas protects the puddle. It is efficient for tack-built butt seams and for GMA plug welds when the vehicle maker permits them. For mild steel, C25 gas, which is 75% argon and 25% carbon dioxide, provides a stable short-circuit arc with less spatter than straight carbon dioxide. Miller recommends about 25-35 cubic feet per hour for short-circuit MIG, then adjusting for the gun, nozzle, and working conditions. See Miller’s shielding-gas guidance.
For most light-gauge steel work, .023-.024-inch ER70S-6 wire gives better low-heat control than larger wire. .030-inch wire may work on 18-gauge and thicker steel when the machine, joint, and test weld support it. Use DCEP, also called electrode positive, for ordinary solid MIG wire. Always confirm polarity on the wire label and welder manual.
TIG Welding for Precision on Thin Metal
TIG, or GTAW, lets you control amperage separately from filler addition. A foot pedal or fingertip control can taper the current as the panel heats up. TIG can produce a clean, narrow bead, but it is slower than MIG and may add more total heat if you dwell or travel slowly. Use a small, properly prepared tungsten for low-amperage steel work, DC electrode negative for steel, and pure argon shielding gas. Aluminum normally requires AC TIG, dedicated cleaning tools, and alloy-matched filler.
When Flux-Cored Wire Fits
Self-shielded flux-cored wire, or FCAW-S, does not need a gas cylinder and tolerates outdoor wind better than gas-shielded MIG. Gas-shielded flux-cored wire, or FCAW-G, is mainly used for higher-deposition work on heavier material. Neither is the first choice for thin automotive skin because flux-cored wire generally puts more heat into the base metal and creates more slag and cleanup. Miller specifically advises against using flux-cored wire on thin sheet metal. See Miller’s sheet-metal welding guidance.
Comparing MIG, TIG, and Flux-Core for Car Body Work
| Process | Advantages | Limitations | Best Fit |
|---|---|---|---|
| MIG with solid wire | Fast, widely available, easy to tack, and suitable for OEM-approved GMA plug welds | Requires shielding gas and careful heat control | Most nonstructural mild-steel patches and permitted plug welds |
| TIG | Precise amperage and filler control with a clean finish | Slower, less forgiving, and capable of overheating the panel if travel is too slow | Visible seams, custom fabrication, and thin parts in skilled hands |
| Self-shielded flux-core | No gas bottle and better wind tolerance | Hotter on thin sheet, more spatter, slag, and cleanup | Outdoor or heavier steel when the joint is not an OEM collision-repair attachment |
Essential Equipment and Tools for Welding Car Sheet Metal
A small body-panel repair needs more than a welder. Gather the equipment before you cut the vehicle apart:
- A MIG welder that feeds .023-.024-inch wire smoothly, or a suitable TIG welder
- ER70S-6 wire for clean mild steel, unless the OEM procedure specifies another filler or process
- C25 shielding gas for short-circuit MIG on mild steel, plus a regulator and flowmeter
- Auto-darkening helmet, safety glasses, leather gloves, hearing protection, and flame-resistant or non-synthetic clothing
- Ventilation or local fume extraction positioned to pull fumes away without stripping shielding gas from the puddle
- Angle grinder, cutoff tool, files, sheet-metal shears, and abrasives
- Panel clamps, locking pliers, magnets used away from the active arc, Clecos, and a hammer-and-dolly set
- Copper backing bar or spoon for accessible gaps and heat sinking
- Matching sheet steel, primer, seam sealer, undercoating, and cavity protection approved for the repair
- A suitable fire extinguisher, welding blanket, and a second person for fire watch when hidden combustibles are present
Note: A respirator does not replace source capture or ventilation. Select respiratory protection from the actual coating, metal, and fume hazard, and follow the respirator maker’s fit, cartridge, and change-out requirements.
Products Worth Considering
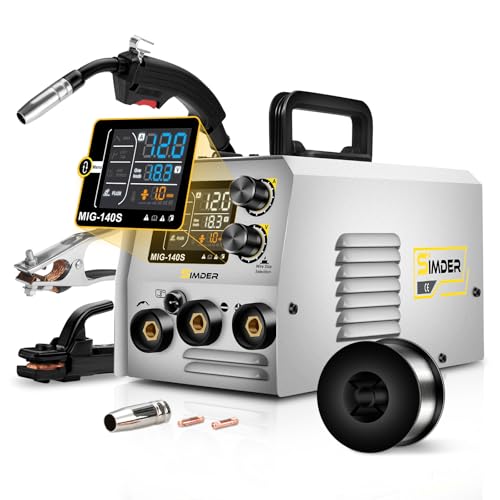
THREE-PROCESS WELDING STATION BUILT FOR FIRST-TIME USERS - Flux Core MIG, Lift TIG and Stick in one machine, so you can find the process that fits your projects without buying three separate welders. Runs on a standard 110V household outlet or 220V for heavier work - no electrician, no special wiring. Welds carbon steel, low-alloy steel, stainless steel, titanium, copper and cast iron
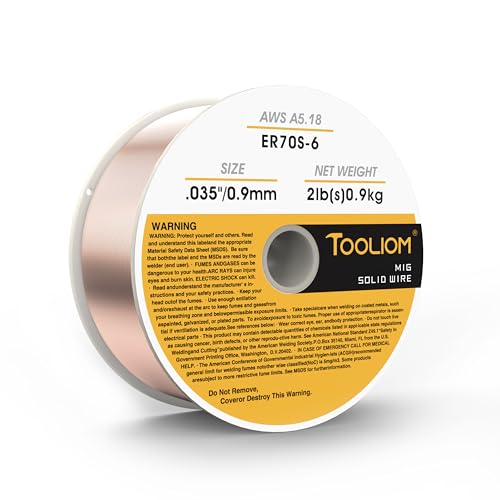
High-quality:Tooliom's .035" ER70S-6 MIG Welding Wire (2lb spool) meets all industry standards for consistent strength and performance. Enjoy smooth feeding, stable arcs, optimal penetration, and high deposition rates—everything you need for exceptional welds

【LOW SPATTER & EASY CLEANUP】Minimal Spatter, Flawless Beads: Experience exceptionally low spatter and minimal post-weld cleanup. This ER70S-6 solid wire allows you to achieve smooth, visually appealing beads with ease, saving both time and grinding effort on your metal fabrication.
Safety Considerations When Welding on Vehicles
Vehicle welding combines arc hazards with fuel, trim, wiring, airbags, electronic modules, batteries, adhesives, foam, seam sealer, and hidden corrosion products. Follow the vehicle maker’s disabling and repair procedure, not a generic battery shortcut.
- Identify the vehicle and repair procedure. Confirm the material, attachment method, sectioning limits, required weld count, and corrosion-protection steps.
- Disable electrical and restraint systems. I-CAR advises disconnecting and isolating both 12-volt battery cables, removing the negative cable first, and disconnecting the high-voltage service disconnect when applicable. The OEM procedure controls the exact sequence and SRS discharge wait time. See I-CAR’s battery and welding guidance.
- Expose both sides of the work. Remove nearby trim, carpet, insulation, wiring, modules, fuel-related parts, seam sealer, foam, and cavity wax as required. Hidden material on the back of a panel can ignite from conducted heat.
- Place the work clamp correctly. Keep the current path short by clamping close to the weld on the same panel. Route welding cables away from computers, sensors, and harnesses.
- Control fumes. Grind away paint, undercoat, galvanizing in the direct weld zone, and contamination as the repair procedure permits. Use adequate ventilation and avoid putting your head in the plume.
- Set up fire protection. Shield glass and interior surfaces, keep suitable extinguishing equipment ready, inspect the back of the panel between welding cycles, and maintain a fire watch after hot work. OSHA requires at least a 30-minute fire watch in covered workplace conditions where a fire watch is needed. Review OSHA 1910.252.
Warning: Do not weld near a fuel tank, fuel vapor, undeployed restraint component, energized high-voltage system, pressurized cylinder, or sealed cavity that has not been inspected and made safe. Stop immediately if you smell burning trim, adhesive, undercoat, or wiring.
Preparing Your Work Area and Materials
Confirm the Panel Is Appropriate for a Welded Patch
A cosmetic rust patch on an older mild-steel outer skin is different from sectioning a rail, pillar, rocker reinforcement, roof rail, or crush-zone component. Use the OEM body repair manual to decide whether the panel may be repaired, must be replaced, or requires a specific factory seam or joining method.
Remove Rust and Coatings Completely
Cut beyond perforated and deeply pitted metal until the remaining edge is sound. Clean both sides to bare metal in the weld zone. Remove paint, filler, rust, undercoat, seam sealer, adhesive, foam, oil, and zinc coating only as much as the procedure requires. Do not weld through rust, body filler, or ordinary paint.
Match the Patch and Fit the Joint
Make the patch from the same material type and a closely matching thickness. Shape it before final trimming. For a cosmetic butt joint, aim for an even, very small gap rather than a wide opening. Thin sheet with a 1/16-inch gap is already difficult to bridge without burn-through. Keep the faces flush with panel clamps or temporary fasteners.
Prepare Lap Joints and Weld-Through Primer Correctly
Use a lap joint only where the OEM procedure permits it. Apply weld-through primer to mating steel surfaces only when the vehicle maker and coating maker call for it. I-CAR notes that zinc-based weld-through primer should be removed from the direct GMA weld zone before welding, and it should not be used on aluminum. See I-CAR’s weld-through-primer guidelines.
Make and Break Test Welds
Use scrap that matches the vehicle’s metal type, thickness, coating condition, joint design, and number of layers. Adjust the machine until the arc is stable and the weld has adequate fusion without excessive burn-through. Then bend, twist, or peel the sample as appropriate to confirm the fused area before welding the vehicle. I-CAR treats destructive testing as the way to verify settings and technique before the repair weld is made. Review I-CAR’s destructive-weld-testing guidance.
Pro Tip: Keep the test coupon beside the job. When the panel position, extension-cord load, gas flow, metal stack, or access changes, make another test weld before continuing.
Machine Settings: Safe Starting Points
There is no universal voltage and wire-feed number for every machine. Transformer and inverter welders, wire brands, joint gaps, extension cords, and electrical supply all change the result. Start with the chart inside the welder or the manufacturer’s calculator, then verify the setting on matching scrap.
| Steel Thickness | Solid Wire | Gas and Polarity | Technique |
|---|---|---|---|
| 22 gauge | .023-.024 in ER70S-6 | C25 at roughly 25-35 cfh; DCEP | Individual tacks, long cooling pauses, tight fit-up, and copper backing where possible |
| 20 gauge | .023-.024 in ER70S-6; .030 in only after successful testing | C25 at roughly 25-35 cfh; DCEP | Stagger tacks around the seam and avoid joining adjacent hot spots |
| 18 gauge | .023-.030 in ER70S-6 | C25 at roughly 25-35 cfh; DCEP | Use the machine chart, test fusion, and limit bead length to control shrinkage |
Keep contact-tip-to-work distance consistent. Do not shorten stickout as a cure for burn-through: with constant-voltage MIG, a shorter electrode extension can increase current and penetration at the same wire-feed speed. Correct an overly hot arc by returning to the machine chart, reducing the appropriate setting, using smaller wire, improving fit-up, moving efficiently, and allowing more cooling time.
Note: Solid MIG wire normally uses DCEP. Many self-shielded flux-cored wires use DCEN, but not all do. Set polarity from the wire manufacturer’s instructions rather than from memory.
Step-by-Step: Welding a Patch Panel on a Car
1. Plan the Repair
Confirm that the panel is nonstructural or that the exact repair is allowed. Record the original seams, weld locations, flange widths, adhesives, sealers, and corrosion protection before disassembly.
2. Make the Vehicle Safe
Follow the OEM battery, high-voltage, and SRS disabling steps. Remove or shield nearby trim, glass, wiring, modules, carpet, insulation, foam, seam sealer, undercoating, and fuel-related components. Set up ventilation and fire protection.
3. Cut Back to Sound Metal
Mark a simple patch shape and remove the rusted area without cutting into hidden structure or wiring. Deburr the opening and inspect the back side. If corrosion continues into a reinforcement, seam, or inaccessible cavity, stop and reassess the repair.
4. Fabricate the Patch
Trace the opening onto matching sheet, cut slightly oversize, and shape it with a hammer and dolly. Trim in small steps until the patch sits flush with a close, even gap.
5. Clean, Align, and Clamp
Clean the joint to bright metal, wipe it with an appropriate residue-free cleaner, and let it dry completely. Clamp the patch so the panel faces remain level. Place a copper backing bar behind an accessible butt joint if it improves support and heat removal.
6. Set Up the Welder and Test
Install the correct wire, drive roll, contact tip, polarity, and gas. Set gas flow while gas is actually flowing. Make several welds on matching scrap, inspect them, and perform a destructive test. Adjust only one variable at a time.
7. Place the First Tacks
Place brief tacks at widely separated points to lock alignment. Move to the coolest part of the seam after every tack. Check the panel shape and the back side for fire or excessive heat before continuing.
8. Close the Seam Gradually
Add new tacks between fully cooled tacks until the seam is closed. Do not run a continuous bead across thin body steel. Let the panel cool between cycles and keep checking its shape. Do not continue simply because the surface looks cool; heat can remain concentrated around the seam and on the back of the panel.
9. Correct Distortion Carefully
Welding shrinks the seam. Light hammer-and-dolly work can stretch a shrunk tack or level a small high spot, but over-planishing makes the panel loose and wavy. Work slowly and stop when the panel returns to shape.
10. Dress the Weld Without Thinning the Panel
Lower only the proud weld metal. Keep the abrasive moving, use light pressure, and check often with a straightedge and your fingertips. Do not grind the surrounding sheet until it is paper-thin. A small file or controlled abrasive can give better feedback than leaning hard on a coarse disc.
11. Inspect the Repair
Look for cracks, pinholes, undercut, missed edges, excessive porosity, and incomplete fusion. Inspect both sides when accessible. Repair isolated defects with another short tack after the metal cools; do not hide open pinholes under body filler.
12. Restore Corrosion Protection
Clean and prime bare metal promptly. Reapply seam sealer, adhesive, undercoating, backside coating, and cavity wax in the locations and sequence required by the OEM and product maker. I-CAR notes that cavity wax is normally applied after refinishing but before trim installation, and that old foam, sealer, and cavity wax may need removal before hot work because they can ignite. See I-CAR’s corrosion-protection sequence.
13. Reassemble and Verify Systems
Reconnect batteries and restraint or high-voltage systems only by the OEM procedure. Reinstall protected wiring and trim, clear the work area, and complete any required post-repair scan, calibration, initialization, or warning-light check before returning the vehicle to service.
Butt Joints, Lap Joints, and Plug Welds
A butt joint gives a smooth cosmetic repair and avoids a moisture-trapping overlap, but it demands accurate fit-up and careful heat control. A lap joint is easier to fit but creates a hidden seam that must be approved, sealed, and protected against corrosion.
GMA plug welds are used to replace some factory spot welds only when the OEM permits them. Match the original weld locations and quantity unless the repair procedure says otherwise. I-CAR’s general fallback guidance, used only when the OEM gives no size, is an 8 mm or 5/16-inch hole when the flange is wide enough, followed by a destructive test to confirm the weld. See I-CAR’s spot- and plug-weld guidance.
Common Mistakes in Sheet Metal Welding and Fixes
| Problem | Likely Cause | Correction |
|---|---|---|
| Burn-through | Gap too wide, wire too large, settings too hot, lingering in one spot, or no backing support | Improve fit-up, use .023-.024-inch wire, return to the chart, shorten arc-on time, and use copper backing where possible |
| Warping or oil-canning | Adjacent tacks made while the panel is hot, continuous beads, poor clamping, or excessive grinding heat | Skip around the seam, allow full cooling, support the panel, and grind in short light passes |
| Porosity | Paint, rust, oil, moisture, wind, gas leak, blocked nozzle, or gas flow that is too low or too high | Clean both sides, fix leaks, shield drafts, clean the nozzle, and verify flow at the gun |
| Cold lap or poor fusion | Settings too low, travel too fast, aiming only at the filler edge, or contaminated metal | Test a corrected setting on matching scrap and confirm fusion destructively before continuing |
| Excessive spatter | Wrong polarity, unstable wire feeding, poor ground path, excessive stickout, dirty metal, or mismatched voltage and wire speed | Confirm polarity and consumables, clean the clamp area, maintain consistent stickout, and tune on scrap |
| Panel rusts after repair | Pinholes, bare backside metal, missing seam sealer, trapped moisture, or omitted cavity protection | Inspect before filler, prime bare steel, seal approved seams, and restore all OEM corrosion-protection layers |
Finishing Touches and Post-Weld Care
After the weld passes inspection, feather the dressed area without thinning the panel. Apply corrosion-resistant primer according to the refinishing system, then use body filler only over a solid, sealed repair and only on a substrate allowed by the filler maker. Restore factory seam-sealer function and appearance, paint the front and back surfaces where accessible, and apply cavity protection after hot work and refinishing are complete.
Before installing trim, inspect the back of the repair with a light or borescope. Confirm that no wire, sound deadener, foam, sealer, or coating was burned. Check drain paths and panel openings so water cannot collect behind the patch.
Advanced Tips for Pro-Level Sheet Metal Welds
- Use a push angle with solid-wire MIG. A modest push angle helps direct the arc toward the cooler leading edge and improves shielding visibility.
- Keep the panel relaxed. Over-clamping a curved panel can lock in stress that appears after the clamps come off.
- Use copper as a helper, not a cure. A backing spoon supports a small gap and absorbs heat, but it cannot compensate for rotten edges or poor fit-up.
- Separate aluminum tools. Use dedicated stainless brushes and abrasives for aluminum to avoid embedding carbon-steel contamination.
- Use MIG brazing only when specified. Silicon bronze joins at a lower temperature than steel fusion welding, but its joint design, shielding gas, machine setup, and permitted locations come from the OEM procedure. Review I-CAR’s MIG-brazing overview.
- Stop when the metal tells you to. A growing heat halo, panel movement, harsh arc, or repeated pinholes means the setup or base metal needs attention before another tack.
The best-looking tack is not automatically a safe weld. Matching material, verified settings, destructive testing, OEM-approved placement, and restored corrosion protection are what make the repair complete.
Key Takeaways and Why You’re Ready to Weld
Good automotive sheet-metal welding starts before the arc. Identify the panel, confirm the allowed repair method, make the vehicle safe, fit clean metal tightly, and prove the settings on matching scrap. Build the seam with cool staggered tacks, inspect the fusion, grind only the weld, and restore every corrosion-protection layer. For structural, high-strength, aluminum, hybrid, or EV repairs, the correct next step is often trained professional repair rather than a general garage patch.
Frequently Asked Questions
Can I weld car sheet metal without shielding gas?
You can use self-shielded flux-cored wire, but it runs hotter, creates slag and spatter, and is difficult to control on 18-22 gauge body steel. For most cosmetic steel patches, solid-wire MIG with C25 gas or TIG is easier to control.
What is the best MIG wire size for car body panels?
.023-.024-inch ER70S-6 is the usual starting point for light-gauge mild steel. .030-inch wire may work on 18-gauge and thicker metal. Use the welder chart and prove the setting on matching scrap before welding the vehicle.
How do I prevent warping when welding thin metal?
Use a tight, flush fit; place short tacks far apart; move to the coolest part of the seam; let the panel cool fully; support the back with copper where practical; and avoid continuous beads or heavy grinding pressure.
Is TIG better than MIG for a beginner working on cars?
MIG is usually faster and easier for a beginner to tack on mild-steel patches. TIG offers excellent control but requires coordinated torch, amperage, and filler handling. Either process can warp sheet metal when heat input is poorly controlled.
What safety gear do I need for automotive welding?
Use a properly shaded welding helmet, safety glasses, leather gloves, hearing protection, flame-resistant or non-synthetic clothing, suitable footwear, ventilation or local fume extraction, and respiratory protection selected for the actual hazard. Keep fire-extinguishing equipment ready and protect anyone nearby from arc radiation.
Can I weld a structural car panel at home?
Only when the vehicle-specific procedure permits the repair and you have the required training, equipment, materials, test methods, and corrosion-protection products. Many structural and high-strength components have restricted sectioning, heat, and joining rules, so professional collision repair is often the safer choice.
Sources
- Miller: Successfully Welding Sheet Metal with MIG and TIG — wire diameter, polarity, flux-core limits, fit-up, skip welding, and backing bars
- Miller: Shielding Gas for MIG Welding — C25 characteristics and short-circuit gas-flow guidance
- I-CAR: Steel Repairability — modern high-strength-steel identification and OEM-first repair limits
- I-CAR: Battery Disconnect and Welding — battery isolation, high-voltage disconnect, cable routing, work-clamp placement, and restraint precautions
- I-CAR: Destructive Weld Testing — testing matching practice welds before welding the vehicle
- OSHA 1910.252 — ventilation, PPE, fire prevention, and fire-watch requirements for covered workplaces