After welding auto body panels, you should clean the metal with degreaser, sand it with 240-grit, and remove all dust. Apply epoxy primer first for corrosion protection, then use body filler on bare metal where needed, letting it cure before block sanding with 180-grit and refining with 220- to 320-grit. Use guide coat to find lows, then seal the repair with epoxy and spray high-build filler primer before final sanding and paint, and there’s more to tune the finish.
What Primer Goes on After Welding?
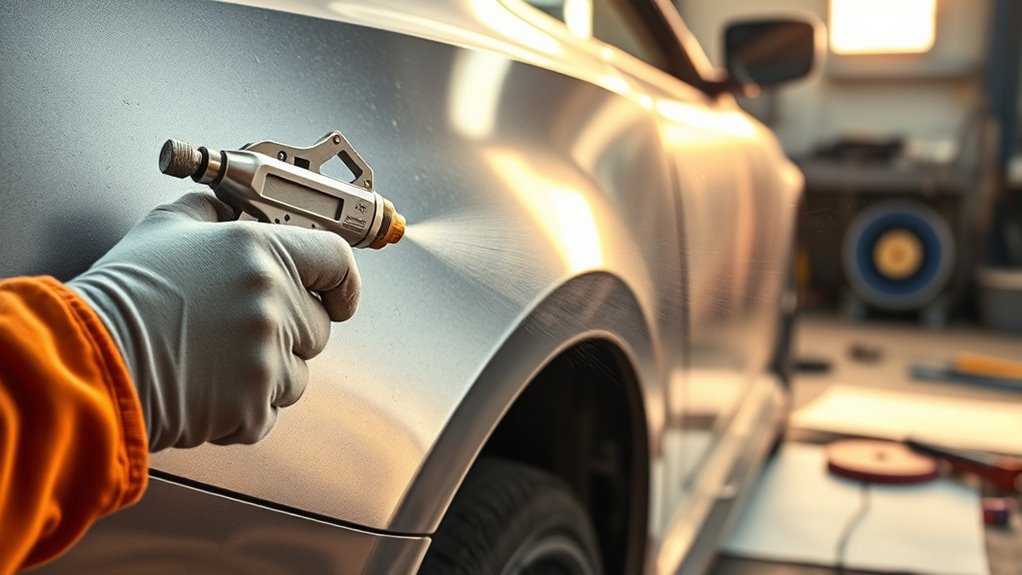
After welding, you should apply an epoxy primer first because it bonds well to clean, sanded metal and helps protect the weld from corrosion. You’re building a sealed base that locks out moisture and gives later coatings a stable anchor.
Apply it only after you’ve removed contaminants and prepared the metal properly, because bare welds flash rust fast. If you move quickly, getting primer on within 20 minutes of welding can limit oxidation and improve the final finish.
Apply primer quickly after cleaning; bare welds flash rust fast, and a fast coat limits oxidation.
Once the epoxy cures, you can scuff it and then use filler primer to level minor lows and sand scratches. That sequence matters: epoxy first, filler primer second.
Don’t skip the epoxy on bare welds, because high-build primer alone won’t give you the same corrosion resistance or adhesion.
For a clean repair, keep your work disciplined, your surfaces dry, and your coating system layered with purpose. Additionally, ensure that all zinc residues are removed to prevent weld contamination before applying the primer.
Products Worth Considering
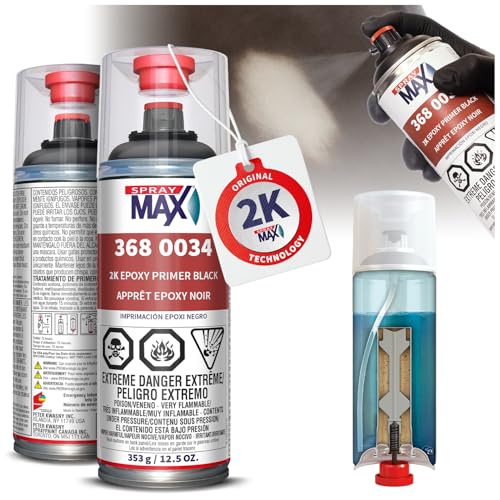
SUPERIOR CORROSION PROTECTION: This epoxy primer automotive coating provides excellent adhesion and rust protection on steel, aluminum, and galvanized metal surfaces – ideal for cars, motorcycles, and restorations.

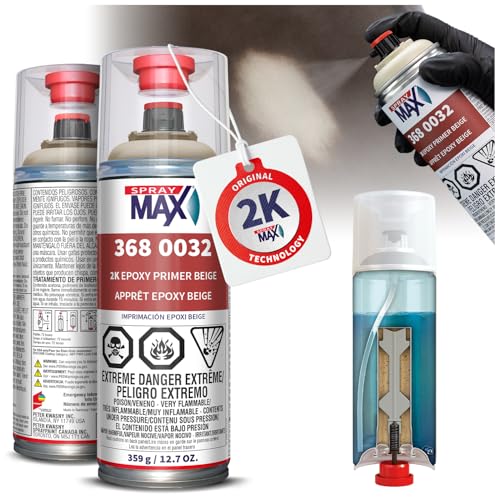
SUPERIOR CORROSION PROTECTION: This epoxy primer automotive coating provides excellent adhesion and rust protection on steel, aluminum, and galvanized metal surfaces – ideal for cars, motorcycles, and restorations.
SUPERIOR CORROSION PROTECTION: This epoxy primer automotive coating provides excellent adhesion and rust protection on steel, aluminum, and galvanized metal surfaces – ideal for cars, motorcycles, and restorations.
Clean and Scuff the Welded Panel
Clean the welded panel thoroughly with a degreaser to remove oil, residue, and any other contaminants that could keep the filler primer from bonding. Once the surface is dry, you clean and scuff the welded panel with 240 grit sandpaper, working in even passes until you’ve created a uniform tooth for adhesion. Focus on weld edges, spatter, and any rough seams, because those details will telegraph through if you leave them untreated. After sanding, inspect the area with a strong light so you can catch high and low spots before you move on. If you see a minor depression, plan for a bit of body filler later, but don’t load material onto a dirty or glossy surface. Finish by blowing off or wiping away every trace of sanding dust with a clean cloth or compressed air. This ensures that you have a clean surface ready for primer to grip.
Check for Pinholes Before Filling
Inspect the welds carefully with a bright backlight so you can spot any pinholes before you apply filler.
If you find voids, grind them out and re-weld them now, because filler over pinholes can bubble later.
Once the repair is sound, you can move on to filling with confidence. Additionally, ensure proper ventilation in the workspace to prevent inhalation of fumes during the filling process.
Inspect Welds Carefully
Before you apply any filler, check the welds under a bright light and, if possible, shine a light through them from the reverse side to reveal pinholes and other small defects.
Inspect welds carefully so you can catch flaws before they become trapped under body filler. Grind each seam smooth, then wipe away dust, oil, and weld residue; clean metal gives filler a reliable bond.
If you find pinholes, weld them shut or fill them with a suitable metal-repair material before moving on. Don’t leave any voids, because trapped air and moisture can cause bubbling, cracking, or repair failure.
A sound weld line gives you control, protects your work, and keeps the panel ready for primer.
Backlight Pinholes
Hold a bright light behind the welded repair so you can spot any pinholes that weren’t obvious from the front. Backlighting exposes pin holes that’ll trap moisture, seed corrosion, and later show up as bubbling under filler. Scan the seam methodically, then mark any defects before moving on.
| Check | Action |
|---|---|
| Backlight | Reveal pin holes |
| Defect found | Re-weld area |
| Surface finish | Grind smooth |
| Protection | Seal reverse side |
If you detect pin holes, re-weld them and grind the repair flush so the panel stays clean and ready. Apply seam sealer on the reverse side when needed to add moisture defense. This careful inspection protects your work, preserves the panel, and supports a durable, long-lasting repair.
Weld Before Filler
Weld the repair fully before you reach for filler, and use a bright light from behind to check for any pinholes that could let moisture in and cause bubbling later.
You need every spot on the welded panel sealed, because even tiny gaps weaken the repair and trap corrosion.
Grind the weld flush, remove rough edges, and clean away dust, slag, and oil so filler can bond cleanly.
If you find a pinhole, weld it shut and recheck it before moving on.
Seam seal the reverse side of the repair to block moisture intrusion and protect the finish.
When you prep this way, you’re not just covering damage—you’re building a durable, free-from-failure surface that stays solid through the whole refinish process.
Apply Body Filler Over Bare Metal
Before you apply body filler, grind the welded area smooth, remove any pinholes, and sand the bare metal with 80 grit so the surface has enough tooth for adhesion.
Mix the filler thoroughly, then spread it in thin, even layers over the prepared metal to reduce sanding and improve control.
Let it cure fully, then block sand it with 180 grit and step to finer grits until the surface is smooth and ready for primer. Additionally, ensure that the welded area is free from porosity issues to maintain the integrity of the repair.
Products Worth Considering

Original formula for repairing dents, dings, holes, large rusted areas and scratches in vehicles
Quick-Drying Formula: Our car paint scratch repair putty provides a rapid and effective solution for repairing dents and scratches. With its quick-dry feature, it ensures a flawless finish that stays intact. This auto body filler is easy to apply and sand, making repairs straightforward

High Adhesion:YOTEBLE body filler for car is specially developed for metal, aluminum and fiberglass surfaces in automobiles and fills scratches and dents with strong adhesion and peel resistance. It is heat resistant and frost resistant (-40°C to 140°C), crack resistant and bubble resistant. It also offers excellent flexibility and can withstand even slight deformation of the bodywork.
Bare Metal Prep
Start by sanding the welded area down to bare metal with 80-grit sandpaper so the filler can bond properly to a clean, uncontaminated surface. You need to remove every trace of rust, paint, and oil, because contamination weakens adhesion and leaves you fixing the same panel twice.
Inspect the weld closely for pinholes, cracks, or pits; if you find any, grind them out or re-weld them now. This prep gives you control over the repair and keeps hidden defects from surfacing later as bubbles.
Once the metal is clean and true, you’re ready for body filler. Keep the connection area broad and smooth so the panel can return to shape without fighting the repair.
Filler Application Steps
With the metal cleaned, keyed with 80-grit, and free of defects, you can move on to body filler application.
Mix the filler per the manufacturer’s ratio until the color is uniform; that tells you the hardener is blended right.
Load a plastic scraper and press the filler onto the bare steel, not over contamination or rust. Spread it in thin, even passes, then feather the edges so the repair fades into the surrounding panel.
Don’t overwork it; you want control, not drag. Let it cure fully before sanding.
Start with 180-grit to level the shape, then step to 320-grit for refinement. This sequence keeps the repair tight, durable, and ready for primer without surrendering finish quality.
Shape the Filler With Block Sanding
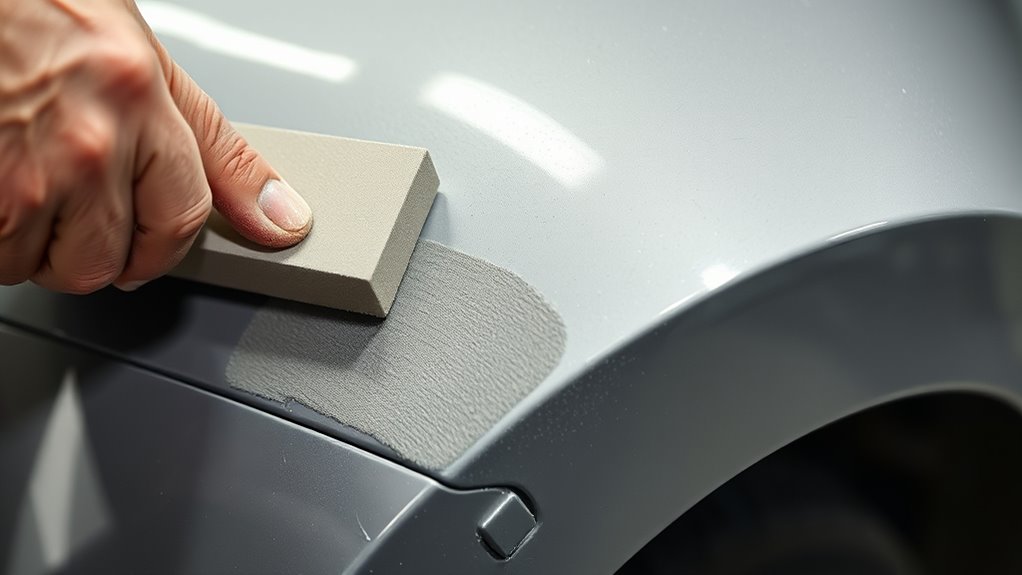
Block sanding is the best way to shape filler because it applies even pressure and lets you contour the repair area more accurately than hand sanding. You control the repair, not the other way around. Use block sanding blocks of different lengths and flex so you can follow flats, crowns, and curves without digging in.
Additionally, wearing appropriate protective clothing is important to shield yourself from potential injuries while sanding.
| Grit | Use |
|---|---|
| 180 | Fast shaping |
| 220 | Refine edges |
| 320 | Smooth finish |
| Guide coat | Reveal lows |
| Long block | Flatten panels |
Start with 180 grit, then move to 320 grit as the surface comes into shape. Check your work often and keep the block moving in straight, controlled passes. A guide coat shows low spots so you can correct them before primer. Sand until the filler sits level with, or slightly below, the surrounding metal. That gives you a clean shift and keeps the panel ready for the next stage.
Use Stopper Putty for Small Imperfections
Stopper putty, or knifing putty, is the quickest way to correct the small flaws that sanding can leave behind, like pinholes and minor surface imperfections on welded repairs.
You use stopper putty to level these defects before primer so the panel reads clean and free. Lightly scuff the surrounding area with 240 grit first; that gives the putty grip and helps prevent sink marks from showing later.
Then spread stopper putty with a plastic scraper in thin, controlled passes. Keep the layer tight to the repair so you don’t dig in or create new scratches.
Let it dry completely, then wet sand with 320 grit to smooth the surface and expose any low spots that still need attention. If you find them, refill only those areas.
When the stopper putty has fully cured, you’ve got a durable, even base that lets your finish move forward with confidence. This process is essential for achieving a cleaner weld and ensuring a smooth surface for painting.
Sand the Repair With 180 and 320 Grit
Once the stopper putty has cured, block sand the repaired area with 180 grit to shape the filler and bring it level with the surrounding metal.
Keep the block flat and work in controlled passes so you don’t dish the repair or leave waves. You’re aiming to sand the repair with 180 and 320 grit as a two-stage process: 180 grit establishes the form, then 320 grit refines it.
After the panel is shaped, switch to 320 grit and feather the edges until the surface feels smooth enough for primer. Check your work often with a clean hand and good light so you catch imperfections before they get buried. If the finer paper exposes a low spot, stop and correct it before moving on.
Switch to 320 grit, feather the edges, and check the panel often so imperfections are caught before primer.
Finish by removing every trace of sanding dust from the panel and surrounding seams so the filler primer bonds cleanly and lays out with an even, durable finish. Additionally, ensuring proper fillet weld sizing is crucial for maintaining structural integrity, especially when dealing with automotive body repairs.
Guide Coat the Panel and Spot Low Areas
Apply a light contrasting guide coat, such as black, over the sanded panel so you can clearly see low spots and surface flaws. Block sand with 320 grit to cut the high areas and expose any remaining lows, switching to 220 grit if stubborn imperfections don’t level out. Inspect the panel often and fill any exposed low areas before you move on. This process ensures a smooth finish, similar to how flux core welding necessitates precise preparation for optimal results.
Apply Guide Coat
Mist the sanded panel with a light guide coat so any low spots stand out as dark depressions while you sand.
Use a block sander with 320-grit paper for the first pass; if the fine grit doesn’t expose flaws, move to 220 grit.
Keep the block flat and work deliberately, not with a DA or orbital tool, so you don’t wash out the panel’s shape.
Watch the guide coat disappear from the high areas while it stays in the lows.
Inspect the surface often and stop when the remaining black marks show where material still needs attention.
After your initial sanding, reapply guide coat to confirm you’ve caught every imperfection.
This method gives you control, precision, and the freedom to correct the panel before filler goes on.
Block Sand Low Spots
With the guide coat on the panel, start block sanding to expose any low spots and high areas. Use a long block with 320 grit to scuff the surface in straight passes, and switch to 220 grit only when you need more bite to block sand low spots.
The black guide coat will stay in the lows, so you can spot them fast and mark them. Inspect the panel often, feathering the surface until the highs disappear and the shape evens out.
Don’t chase every shiny patch; let the guide coat show you the truth. When the surface levels, step back to 320 grit for a finer finish, then reapply guide coat to verify the panel’s freedom from hidden lows before primer.
Fill Remaining Imperfections
Dust a light guide coat over the sanded panel to make remaining lows and imperfections stand out. Block sand with 320 grit to expose flaws, then mark what still needs work to fill remaining imperfections before primer. If low spots persist, drop to 220 grit to scuff harder and open the surface for filler. Feather the targeted area with 180 grit so body filler bonds cleanly and levels fast. Reapply guide coat after filling, then sand again with 320 grit to verify the panel’s shape.
| Grit | Use | Result |
|---|---|---|
| 320 | Inspect | Reveal lows |
| 220 | Scuff | Improve adhesion |
| 180 | Prep | Bond filler |
Seal the Repair With Epoxy Primer
After welding repairs, you should seal the bare metal with epoxy primer because it bonds well and resists corrosion. To seal the repair with epoxy primer, first clean the welded zone until it’s free of dust, grease, and weld residue. Any contamination weakens adhesion and leaves the metal exposed.
Mix the primer exactly to spec, then spray thin, even coats over the full repair and a small overlap onto surrounding paint. Don’t flood the panel; light passes control build and prevent runs.
Let the coating cure for the full manufacturer time, usually 24 hours, so the film reaches full strength and barrier protection. Once cured, scuff it lightly with 320-grit sandpaper to create tooth for the next layer. Keep the pressure light so you don’t cut through.
When you work this way, you lock out moisture, protect your labor, and keep the repair ready for filler and subsequent priming. Additionally, applying a zinc-rich primer can enhance corrosion resistance and prolong the life of your repair.
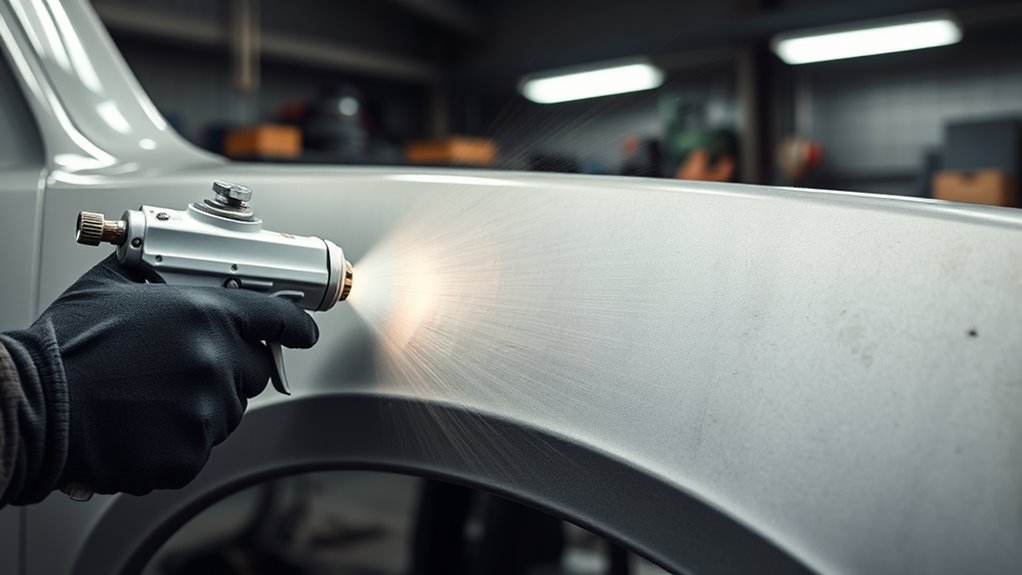
Spray High-Build Primer Before Paint
Spray a high-build primer over the repaired area to level the surface and give the paint a reliable base.
After your body filler’s fully cured, sand it with 320 grit until it’s smooth. Then apply a 2K urethane surfacer primer, because it bonds well to filler and old paint while building enough thickness to hide minor sanding marks and tiny imperfections.
Spray the high-build primer in light, even coats, and don’t flood the panel; that’ll reduce runs and keep coverage uniform. Let each coat flash and dry exactly as the manufacturer says.
When you’ve got full coverage, let the primer cure completely. Then sand it with 400 grit to refine the surface for color.
This step gives you control over the finish and helps you move from repair to paint with confidence, without being trapped by rough edges or weak adhesion.
Frequently Asked Questions
Can You Put Body Filler Over Welds?
Yes, you can put body filler over welds if you complete Weld Preparation first: grind smooth, check for pinholes, sand with 80-grit, and seal the back side. Then you’ll get strong, durable adhesion.
Do I Use Filler Before or After Primer?
You use filler before primer; for example, on a welded quarter panel, you’d fill, sand, then prime. Proper Filler Techniques help you level imperfections, avoid shrinkage, and free your repair from future print-through.
Do You Put Body Filler Over Bare Metal or Primer?
You’ll usually put body filler over bare metal for best adhesion. If you use primer, apply filler over cured epoxy, then scuff it with 240-grit during Metal Preparation, clean pinholes, and follow with high-build primer.
How to Properly Use Filler Primer?
You properly use filler primer by cleaning the surface, spraying thin coats with controlled Application Techniques, letting each coat dry, then sanding with 320-grit and checking with a guide coat before painting.
Conclusion
After you weld and shape the panel, you don’t rush to color; you build a solid foundation. Clean the metal, fill only what’s needed, and sand until the surface feels like glass under a straightedge. Then seal it with epoxy and lay down high-build primer to bridge the final scratches. Think of primer as armor: it shields your repair, locks out corrosion, and turns raw damage into a smooth road for paint to follow.


