Clean the welded floor pan first, then grind off rust, spatter, and sharp edges. Wipe away grease and dust, let it dry, and apply an epoxy primer or weld-thru primer as needed. Seal every seam and weld with automotive seam sealer, then add a rust sealer like POR-15 in thin coats. Finish with rubberized undercoating or bed liner on the interior and underside, and let it cure fully before reassembly so the finish lasts.
Prep the Welded Floor Pan for Undercoating
Start by thoroughly cleaning the welded floor pan to remove all dirt, dust, and debris so the undercoating can bond to a solid surface. You’ll need a clean, dry floor pan before you move forward, because contamination weakens adhesion and invites failure.
Inspect every weld for rough beads, spatter, and sharp edges, then grind high spots until the surface is even and controlled.
Next, apply a rust-inhibiting primer, such as weld-thru primer, to every welded area to help block corrosion beneath the coating.
After that, seam-seal all joints and weld lines to stop moisture from entering hidden gaps. Work methodically so you don’t miss any exposed connections.
Let both the primer and seam sealer cure fully, following the product instructions, before you undercoat.
When you prep with discipline, you protect the floor pan and preserve the hard-won freedom that comes from doing the job right.
Remove Rust and Clean the Metal
Use a grinder fitted with a wire wheel to strip any surface rust from the welded floor pan, then clean the metal thoroughly with a suitable metal cleaner or deoxidizer to remove oils, residue, and other contaminants that can compromise adhesion.
You should remove rust methodically, working across every seam, corner, and repair edge until the steel shows a uniform finish.
Next, sand the area with 60-80 grit paper to expose bare metal and create the mechanical tooth your undercoating needs for firm grip.
Inspect the surface under strong light and feel for pitting or discoloration; if you find any remaining rust spots, treat them with a rust prevention product like POR-15 before moving on.
Keep the panel dry throughout this process, because trapped moisture can undermine your work and invite corrosion.
When you clean and prepare the metal with discipline, you protect your space and strengthen the floor pan for the road ahead.
Choose a Weld-Thru or Epoxy Primer
With the metal fully prepped, you can choose either a weld-thru primer or an epoxy primer based on what the floor pan needs next.
If you still need to weld nearby metal, use weld-thru primer in a thin, even coat so the joint stays weldable while gaining rust protection.
If welding is done, epoxy primer gives you stronger adhesion and better corrosion resistance on bare steel, creating a firm base for undercoating.
Apply either product only after you’ve sanded to clean metal and wiped the surface with a deoxidizer. That prep helps the coating bond without trapped contamination.
Follow the manufacturer’s film thickness and curing time exactly; don’t rush the cure. A properly cured primer layer gives you a stable, durable foundation, so your restored floor pan can stand up to road abuse and keep your work free from corrosion. Additionally, ensure the metal is cleaned thoroughly to avoid issues like porosity and poor adhesion in your finished project.
Products Worth Considering

A durable, zinc enhanced coating that protects all metal surfaces
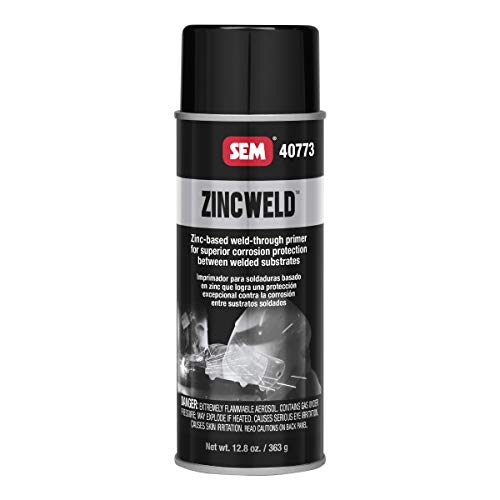
Weld thru primer

Zinc-Enhanced Protection: Durable coating with electrochemical galvanic action that continues to protect metal surfaces even when scratched
Seal Floor Pan Welds and Seams

Once the primer has cured, seal every weld and seam before undercoating the floor pan. Make sure each weld’s fully cooled and free of grinding dust, oil, and moisture so the seam sealer bonds properly.
Use a high-quality automotive seam sealer, not a general-purpose caulk, because you need a product that flexes with the metal and blocks water at welded joints. Apply the seam sealer in a steady bead, then tool it so it fills gaps, covers pinholes, and penetrates every void around the welds.
Don’t leave thin spots or exposed edges; complete coverage is what keeps corrosion from taking hold. Let the sealer cure exactly as the manufacturer specifies before you move on to undercoating. Remember to test weld on scrap to ensure the quality of your welds before applying seam sealer.
Afterward, inspect the sealed seams during routine maintenance for cracking, lifting, or trapped moisture. That vigilance helps you protect the floor pan and keep the repair strong, clean, and self-reliant.
Apply Por-15 or Another Rust Sealer
Before you apply POR-15 or another rust sealer, clean the welded floor pan thoroughly and remove every trace of rust, dust, and debris so the coating bonds properly.
Apply the sealer in thin, even coats with a quality brush or roller, and let each coat dry for about 2 to 4 hours before adding the next.
If the area sees moisture, add a second coat after the first fully cures, then plan a compatible topcoat and routine inspection to maintain protection.
Surface Prep for POR-15
Start by thoroughly cleaning the welded floor pan to remove dirt, grease, and any welding residue, since POR-15 or another rust sealer needs a contaminant-free surface to bond properly.
For floor pans, use a grinder or wire wheel to strip the surface to bare metal, especially along welds and seams where corrosion hides.
Then treat the area with a metal cleaner or deoxidizer to remove remaining oxide and improve chemical adhesion.
Let the metal dry completely; any trapped moisture can weaken the coating and compromise liberation from future rust.
Inspect the panel for missed contamination before you proceed.
Follow the product’s instructions for coat count and flash time so the sealer cures evenly and delivers durable protection across the entire welded repair.
Applying Rust Sealer
With the floor pan clean and fully dry, apply POR-15 or a similar rust sealer to the welded area so it can bond directly to the metal and seal the welds against moisture.
Before you start, verify that no rust, dust, oil, or slag remains, because contamination weakens adhesion.
If you’re using POR-15, apply its matching primer first to improve bonding and build a protective base over the welds.
Use a brush or roller for controlled coverage, especially in seams and crevices where spray can miss.
Lay on thin, even coats of rust sealer, then let each coat dry fully before adding the next.
Build protection methodically, and inspect the sealed area periodically so you can reapply if the barrier begins to fail.
Topcoat and Maintenance
Once the welded floor pan has a clean, dry POR-15 base, build the protective layer with additional coats as needed, allowing at least 4–6 hours of drying time between applications.
You can brush or spray each coat to keep coverage uniform across seams, joints, and repaired edges.
If you want extra durability, add a topcoat of rubberized undercoating after the POR-15 cures; it’ll improve abrasion resistance and reduce road noise in high-traffic areas.
Inspect the surface regularly for chips, scuffs, or lifted edges.
When you spot wear, clean the area, dry it fully, and reapply sealer before corrosion starts.
This method keeps your welded floor pan sealed, serviceable, and ready for the road.
Use a Hard-Curing Undercoating
Choose a hard-curing undercoating, such as a truck bed liner, to create a durable, moisture-resistant barrier over the welded floor pan. You’ll get the best bond when you clean the metal thoroughly, remove oil, dust, weld slag, and allow every trace of moisture to dry.
Apply the coating with a spray gun or roller, and keep your workspace ventilated while wearing gloves, eye protection, and a respirator. Build coverage with multiple thin coats rather than one heavy pass; each layer should cure fully before you add the next. That method reduces sagging, improves uniform thickness, and helps the coating lock onto the steel.
A hard-curing finish gives you a tough shell that resists abrasion, blocks water intrusion, and supports long-term corrosion control. Additionally, ensure that all zinc residues are removed before applying the undercoating to prevent adhesion issues. After curing, inspect the surface periodically for chips or wear, then recoat promptly when needed so your floor pan stays protected and ready for hard use.
Products Worth Considering

CUSTOM FITMENT | Fits 2019 - 2026 Chevrolet Silverado 1500, 6'6" Bed, 2019 - 2026 GMC Sierra 1500, 6'6" Bed (Will NOT Fit w/Drop-In Bed Liners or CarbonPro Bed)

DURABLE TRUCK PROTECTION: Our premium protective mat offers a snug fit in most truck beds, shielding from scratches, dents, dings, spills, scuffs, dirt, damage, and daily wear and tear while preventing cargo from rolling, bouncing, and sliding
CUSTOM FITMENT | Fits 2019 - 2026 Ram 1500, New Body Style w/ 6'4" Bed (Will NOT Fit Models w/Drop-In Bed Liners or Models w/RamBox)
Coat the Floor Pan Interior for Easy Cleaning
To make the floor pan interior easy to clean, start with a fully cleaned, dry surface free of dust, grease, and other contaminants. Then seal every seam and weld so moisture can’t work underneath the coating. You’ll build a serviceable interior that resists grime and simplifies maintenance.
- Apply seam sealer to every joint, lap, and weld.
- Use a roll-on bedliner or spray-on rubberized undercoating for a uniform, wipeable finish.
- Coat while the surface is still slightly tacky to improve bond strength.
- Add small drain holes in low spots so you can rinse away residue without pooling.
This method gives you a controlled, durable layer that sheds dirt instead of trapping it. Keep the film even, avoid buildup at edges, and let each pass cure per spec. Additionally, ensure you are wearing appropriate flame-resistant clothing to protect yourself during the process.
With a properly prepared substrate, your floor pan stays cleaner, easier to service, and ready for liberated, low-maintenance use.
Protect the Underside From Water and Salt
Before you coat the underside, wash the welded floor pan thoroughly with soap and water and let it dry completely so no contaminants interfere with adhesion.
Next, seal every welded joint with seam sealer to block moisture paths that can start rust.
Choose an automotive rubberized or truck bed liner undercoating; these chemistries form a tough, waterproof shield against salt, slush, and standing water.
Apply the undercoating in multiple thin passes until you reach a uniform protective thickness, because a heavier film resists corrosion and road debris better than a sparse layer.
Keep your coverage continuous across edges, seams, and exposed metal, since gaps invite water intrusion.
After the coating cures, inspect the underside regularly for chips, abrasion, or lifting.
When you find damage, clean the area and reapply undercoating promptly so the barrier stays intact and your floor pan remains protected on liberated roads. Additionally, ensure that the surface is properly prepared by grinding off zinc if welding galvanized steel to prevent weak adhesion.
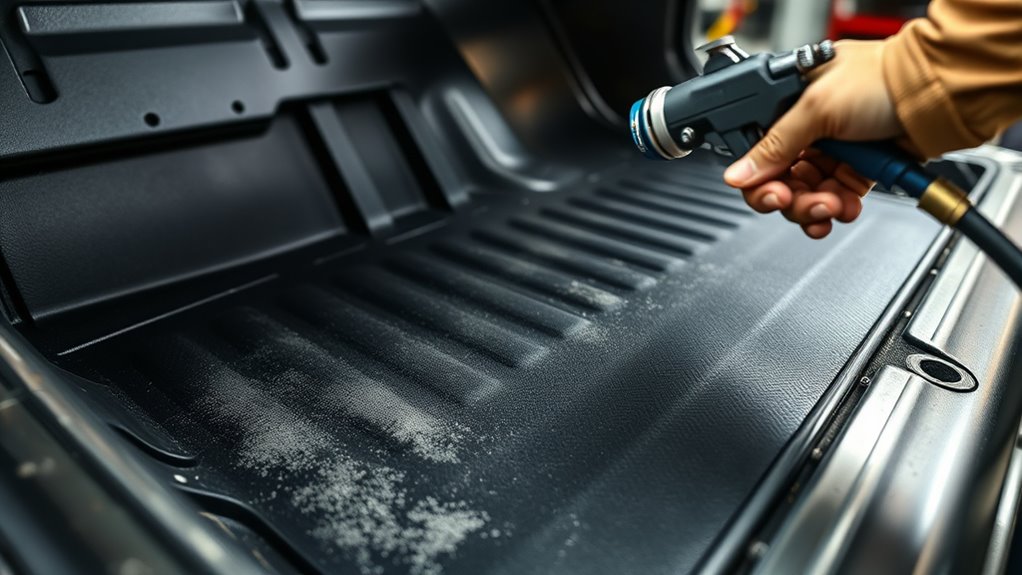
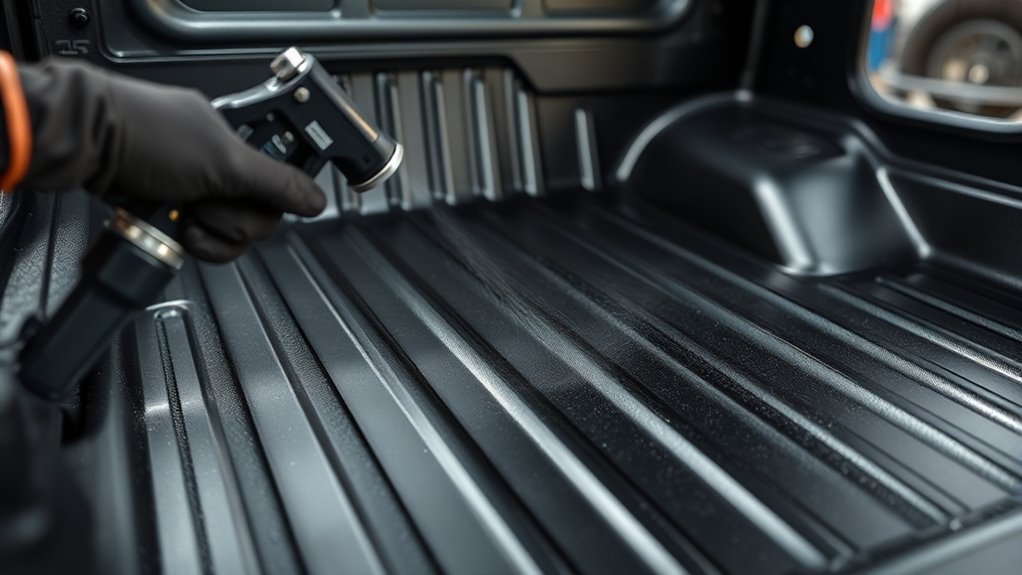
Brush or Spray the Coating
For small, detailed areas, use a brush or roller so you can control coverage and keep the undercoating even. If you spray it, keep the nozzle 10–12 inches from the welded floor pan and move steadily to avoid overspray and uneven buildup. Apply multiple thin coats, and let each one cure fully before you add the next. It’s also essential to ensure the maximum fillet weld size is adhered to, as this helps maintain structural integrity during the application process.
Brush Application Tips
A high-quality brush or roller gives you better control than spraying, especially around seams, edges, and other tight areas on a welded floor pan.
Use these brush application tips to work methodically and keep the coating where you want it. Before you start, remove dust, grease, and loose rust; if you’ve already laid epoxy prime, make sure it’s fully cured.
- Load the brush lightly.
- Spread thin, even coats.
- Let each layer dry completely.
- Recheck corners for full coverage.
A rubberized undercoating can conform to the metal and add sound insulation while it shields against corrosion.
Keep your strokes deliberate, maintain clean edges, and wear gloves plus a mask so you can work with confidence and protect your freedom to build.
Spray Application Safety
Protect yourself with proper PPE—gloves, goggles, and a quality mask—whenever you brush or spray undercoating, since fumes and overspray can irritate skin, eyes, and lungs.
For spray application safety, you should ventilate the workspace fully before you open the can or trigger the gun. Move air through the bay with fans and open doors so vapors don’t build up.
If you use a spray gun, a disposable unit helps prevent contamination and keeps the coating clean, especially with products like KBS RustSeal.
Hold the nozzle 8-12 inches from the floor pan and apply thin, even coats. Keep your passes steady, overlap slightly, and let each layer dry exactly as directed. That method gives you control, coverage, and cleaner protection.
Let the Undercoating Cure Before Reassembly
Let the undercoating cure fully before you reinstall any parts or expose the floor pan to moisture. You need to let it cure per the manufacturer’s instructions, usually 24 to 48 hours, so the film bonds correctly and protects the metal you’ve freed and rebuilt.
- Keep the area dry during the full cure cycle.
- Maintain steady temperature and humidity; extremes can slow cure or weaken the finish.
- Ventilate the workspace so fumes escape and off-gassing continues safely.
- Inspect the surface after curing; verify complete coverage before reassembly.
Don’t rush this stage. If you trap moisture or handle the pan too soon, you can compromise adhesion and invite corrosion under the coating. A controlled and predictable sharpening experience will enhance your overall project quality.
Don’t rush the cure—premature handling or trapped moisture can weaken adhesion and start corrosion beneath the coating.
Your method matters: patience here preserves the weld work, supports long-term durability, and keeps the floor pan ready for service without hidden defects.
Frequently Asked Questions
Where Not to Spray Undercoating?
Don’t spray undercoating on exposed wiring, electrical parts, fresh welds, paintable surfaces, drain holes, brake lines, or fuel lines. Use precise Application Techniques so you protect only intended areas and avoid shorts, clogging, and adhesion failures.
What Is the Best Seam Sealer for Floor Pans?
3M polyurethane seam sealer is your best bet for floor pans; it grips like a climber on granite. You’ll get superior Seam Durability, flexibility, and moisture resistance, especially after thorough cleaning, priming, and inspection.
Can You Spray Undercoating on Bare Metal?
No, you shouldn’t spray undercoating on bare metal. You need surface preparation: clean, degrease, dry, then prime with weld-thru or epoxy primer. That lets you bond properly, resist rust, and protect your floor pan.
How Many Years Does Undercoating Last?
Undercoating lasts 3–5 years, or up to 10 with quality products: road salt, moisture, temperature swings, and wear govern Durability Factors. You can inspect, touch up, and resist corrosion, reclaiming control longer.
Conclusion
Once you’ve finished the weld prep, cleaned the steel, and sealed the seams, you can apply your chosen undercoating with confidence. Whether you brush or spray, keep the layer even and let it cure fully before reassembly. This careful finish helps you keep moisture, road salts, and other unwelcome intruders at bay, while preserving the floor pan’s service life. Done methodically, you’ll leave the repair discreetly protected and ready for the road.


