To weld a truck cab corner patch, start by thoroughly cleaning the surfaces and preparing the existing metal. Use a MIG welder with appropriate settings and fit the patch by grinding away coatings and cutting the original cab corner, leaving a support lip. Secure the patch with clamps and Cleco fasteners, tack weld it to minimize heat distortion, and grind the welds for a smooth finish. Follow up with epoxy primer to prevent rust. You’ll find more detailed steps ahead.
Why Proper Preparation Is Key to Successful Welding
When you prepare properly for welding a truck cab corner patch, you set the stage for a strong, lasting bond. Start by thoroughly cleaning the surfaces; this guarantees ideal adhesion and prevents contaminants from weakening joint integrity. Scuff the e-coat on new rocker panels and apply weld-through primer to enhance protection and promote effective welding. Evaluating the existing metal condition is vital; identify areas needing reinforcement, like backing plates, to support joints and minimize warping. Marking alignment lines helps you make precise cuts and fitments, reducing gaps and improving aesthetics. Finally, inspect previous repairs and rust damage meticulously. This step is fundamental for establishing a solid foundation for your new patch panel installation. Each aspect of your preparation directly influences the quality of your weld, so take the time to do it right, and you’ll reap the benefits in durability and performance. Additionally, ensure to clean the metal thoroughly, as clean base metal significantly enhances weld quality.
Essential Tools and Materials for Truck Cab Corner Welding
Welding a truck cab corner patch requires specific tools and materials to guarantee a strong and precise bond. You’ll need a MIG welder equipped with 0.030-inch wire and a 75/25 gas mix for ideal results. Essential tools include a die grinder for cutting, Cleco fasteners to secure panels, and various clamps to maintain alignment during the welding process.
Before you start, apply weld-through primer to bare metal surfaces for corrosion protection and grind off any old paint or rust to guarantee clean metal. This preparation is vital for effective welds. Additionally, consider using a backing plate to enhance the integrity of the weld joint, reducing the risk of warping. By having these essential tools and materials on hand, you’ll set yourself up for a successful repair that stands the test of time.
Using low-hydrogen E7018 rods can also improve the strength and quality of your welds, especially in structural applications.
Products Worth Considering

High-quality: ARCCAPTAIN's ER70S-6 mig welding wire .030" meets industry standards(Net Weight: 10lbs), ensuring consistent performance, superior strength. With its smooth feeding and stable welding parameters, you can achieve optimal penetration, high deposition rates, and exceptional overall welding performance.

Welding Easy and Quick: AWS E71T-GS 030” Flux Core welding wire (The actual Net Weight of Wire is 2LB), no need for shielding gas, install it then you can welding all positions, single and multi pass welding. Great for T-joints, butt welds & lap welds.

ER4043 WELDING WIRE: A premium 5% silicon aluminum (AlSi5) filler metal designed for the MIG welding process. This composition delivers excellent fluidity and wetting characteristics, making it ideal for welding a wide range of aluminum alloys. It features a melting range of 1065°F to 1170°F, a density of 0.097 lbs/in³, and produces a consistent gray finish after anodizing.
Cutting the Patch Panel: Step-by-Step Guide
Start by test fitting the replacement patch panel over the existing cab corner to verify a proper alignment before making any cuts. Next, grind away the paint on the original cab corner to expose the metal, allowing you to assess any rust damage or previous repairs. When you’re ready for cutting the patch panel, cut the original cab corner, leaving a 1-inch lip to help clamp and support the new panel during installation. Use a die-grinder to carefully drill out factory spot welds, detaching the old panel cleanly for a smooth shift. This step guarantees that the new patch panel fits seamlessly against the existing structure. For initial cuts at end seams, the die-grinder will provide a precise and clean edge, vital for a strong weld later. Remember to ensure proper heat absorption issues during welding to prevent brittleness in the final repair. By following these steps, you’ll set yourself up for a successful patch installation.
Products Worth Considering

1/4" Air straight Die grinder-This air die grinder features a straight head, equipped with a 1/4" collet and a 1/8" collet, which could hold a variety of grinding bits, ideal for all kinds of materials. This pneumatic die grinder has a unique latch attached to the trigger mechanism that acts as a child safety lock to prevent the tool from accidentally starting up. Note: Please remove the DUST PLUG before inserting the air connector.

Stable Power Output Looking to handle medium to heavy-duty processing tasks? The Die Grinder is an ideal choice with its industrial-grade motor! Featuring an adjustable speed range of 7000-30000rpm and six-speed settings, it delivers high torque for efficient, fast work, with minimal wear and maximum durability—professional and reliable for all your heavy-duty tasks.

RELIABLE ANGLE GRINDER: The 3107G Air Die Grinder features a powerful 1/3 hp motor and a 1/4-inch collet. Powered by compressed air, this air tool has a rear exhaust and a self-locking throttle. It delivers 27,000 rpm to tackle even the most challenging jobs with ease.
Aligning and Tack Welding for Truck Cab Corner Patches
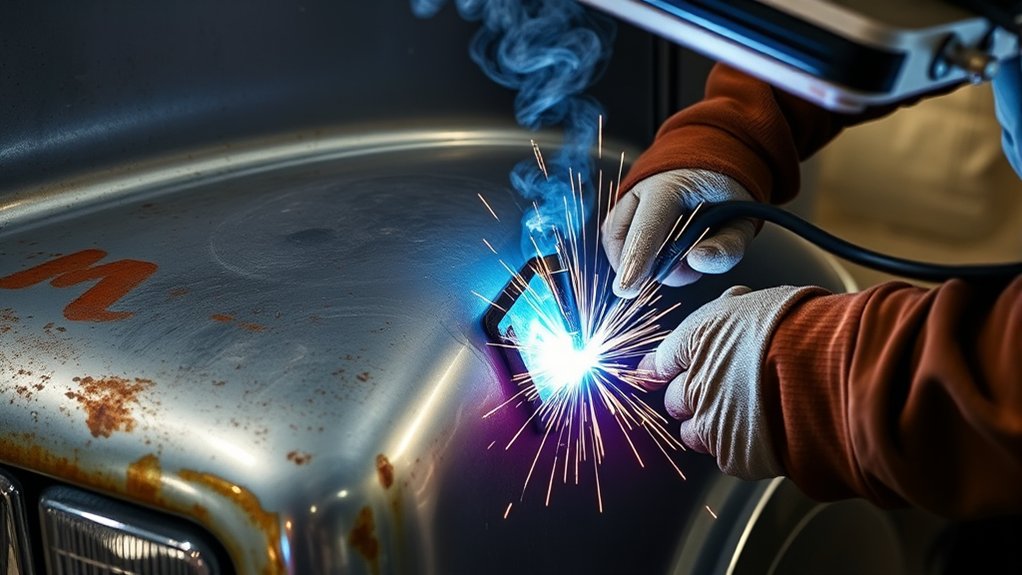
Achieving a precise alignment for your replacement cab corner patch is essential for guaranteeing a seamless integration with the existing bodywork. Start by test-fitting the patch, aligning it carefully with the existing panels to maintain door gaps and overall aesthetics. Use Cleco fasteners to secure the patch temporarily, allowing you to make necessary adjustments before permanent welding.
Clamp the new patch in place, preserving a 1-inch lip on the original cab corner; this provides a solid base for the weld. Once everything is aligned, tack weld at key points along the seam to hold the panel securely while minimizing heat, which can cause warping. Regularly check for even gaps between the replacement panel and the existing body to guarantee a professional finish. This meticulous approach to aligning and tack welding will set the stage for a durable and visually appealing repair, especially when ensuring that all zinc residues are removed before welding.
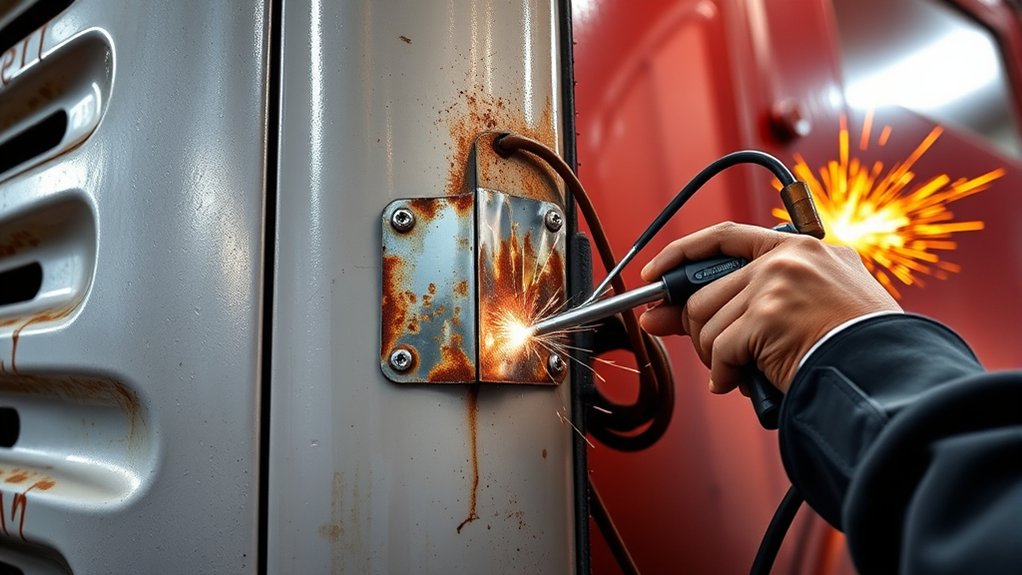
Effective Techniques for Plug Welding in Cab Corner Repairs
Plug welding is a vital technique for securing cab corner patches, guaranteeing a robust and seamless repair. Start by using a die-grinder to drill holes in the replacement patch, replicating factory spot welds. This creates a precise alignment for plug welding. Before you begin, verify the replacement panel is properly aligned and secured with Cleco fasteners; this maintains accuracy throughout the process.
When you’re ready to weld, maintain a consistent heat setting to prevent warping, using a 0.030 MIG wire for peak penetration and strength. Regularly inspect the alignment and gaps between panels during the welding process to confirm professional appearance and structural integrity. After welding, apply a cold galvanizing compound to the seams to protect against rust and corrosion. This step is essential before moving on to any finishing touches, as it safeguards your hard work and guarantees durability. Additionally, consider using ER308L filler wire for optimal results when welding stainless steel components.
Smooth Out Those Welds: Finishing Touches
Once you’ve welded the cab corner patch, it’s essential to smooth out those welds to guarantee a seamless finish. Start by grinding the welds for an even surface, then apply body filler carefully to fill any imperfections. Additionally, remember to maintain a grinding angle of 30 to 45 degrees for optimal results. Finally, prepare the area for primer by using fine grit sandpaper for a professional look.
Essential Grinding Techniques
While you might be enthusiastic to see the finished product, properly grinding your welds is essential for a seamless repair. Here are some effective grinding techniques to take into account:
- Use a flap disc grinder for better control and minimal metal removal.
- Start with a coarse grit (like 80) for initial grinding, then switch to finer grits (120-220) for a polished finish.
- Grind in the direction of the weld bead to maintain metal integrity.
- Be cautious of overheating the area, as excessive heat can warp the panel and compromise your repair.
Finally, clean the ground area thoroughly with a wax and grease remover to guarantee proper adhesion before moving on to the next steps.
Proper Filler Application
After you’ve welded the cab corner patch and ground the welds smooth, it’s important to apply body filler correctly for a flawless finish. Start by applying a thin layer of body filler to fill in low spots and pinholes, making sure it adheres well to the welded areas. Use a sanding block to feather the edges, blending it smoothly with the surrounding metal.
| Step | Details |
|---|---|
| Apply Body Filler | Fill low spots and pinholes evenly. |
| Sanding Technique | Feather edges with a sanding block. |
| Final Sanding | Use finer grit paper for a smooth finish. |
Continuously check for high spots, sanding them down for a flatter surface before priming. This guarantees maximum adhesion and a polished appearance.
Effective Priming Steps
Effective priming is essential for achieving a flawless finish on your truck cab corner patch. Follow these effective priming steps to guarantee superior results:
- Clean the welded areas using wax and grease remover for proper primer adhesion.
- Apply epoxy primer to bare metal surfaces immediately after welding to protect against rust and seal welds.
- Use high-build primer in areas needing additional sanding and blocking to smooth out imperfections.
- Mask surrounding areas carefully to avoid hard lines, guaranteeing a seamless shift to the painted surface.
Regularly inspect the primed surfaces for even coverage and quality. Make necessary adjustments to maintain high standards before painting, ensuring your work looks professional and lasts longer.
Preventing Rust: Cold Galvanizing After Welding
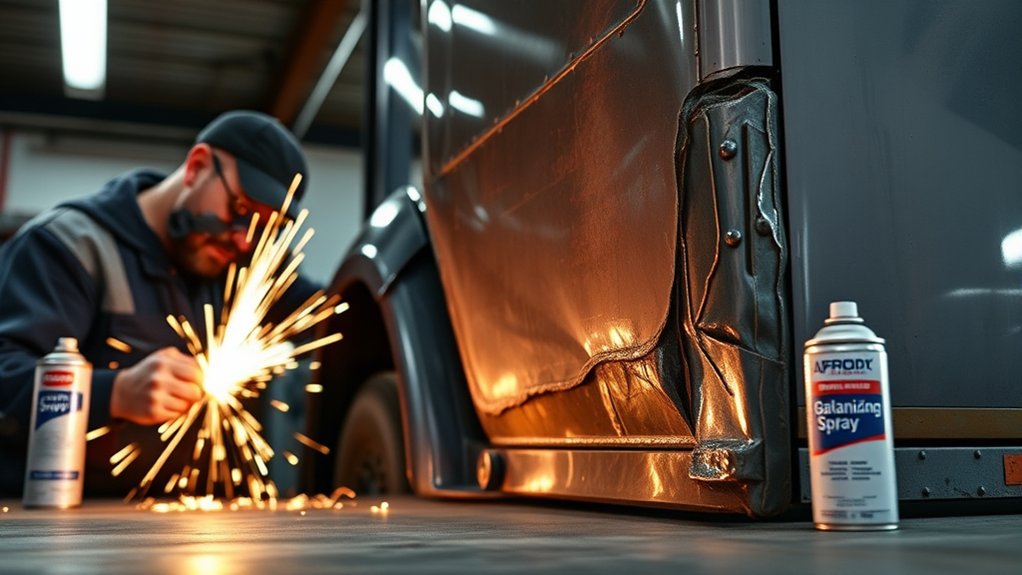
To prevent rust from forming on your truck cab corner patch, applying a cold galvanizing compound after welding is crucial. This compound contains zinc, which offers cathodic protection to the metal surface, effectively warding off moisture and corrosion. Before application, confirm the welded area is clean and free from contaminants for maximum adhesion. Additionally, ensure that all common contaminants are removed to facilitate a strong bond.
Here’s a quick reference table to guide you:
| Step | Description | Importance |
|---|---|---|
| Clean Surface | Remove dirt and rust | Confirms proper adhesion |
| Apply Thin Layers | Use multiple coats of cold galvanizing | Achieves uniform protection |
| Inspect Regularly | Check for wear and tear | Maintains rust resistance |
| Touch-Up As Needed | Reapply where necessary | Extends lifespan of repair |
| Final Check | Confirm full coverage | Guarantees maximum protection |
Final Steps: Priming and Preparing for Paint
After welding the truck cab corner, you need to focus on proper surface preparation for priming. Start by applying wax and grease remover to guarantee good adhesion, then choose the right primer, like epoxy, to protect against corrosion. Additionally, ensure that you wear flame-resistant clothing during the welding process to prevent any injuries. Finally, inspect the primed area carefully to address any imperfections before you apply the paint.
Surface Preparation Techniques
Start by thoroughly cleaning the surface with a wax and grease remover to guarantee the primer adheres properly. Effective surface preparation is essential for achieving a flawless finish. Follow these steps:
- Clean: Remove all contaminants using wax and grease remover.
- Apply Epoxy Primer: Directly coat bare metal for maximum rust protection.
- Use High Build Primer: This helps fill minor imperfections and makes sanding easier.
- Mask Surrounding Areas: Carefully cover adjacent surfaces to avoid hard lines and guarantee a smooth shift.
Continuously evaluate your surface preparation throughout the process. Meticulous sanding and blocking are critical for achieving a straight finish before you apply the final paint. A solid foundation leads to a professional look.
Choosing the Right Primer
With a solid surface preparation in place, selecting the right primer is the next step to guarantee a durable and visually appealing finish. Start by thoroughly cleaning the area with wax and grease remover to confirm proper adhesion. For bare metal spots, opt for an epoxy primer; it offers robust corrosion protection and boosts the longevity of your repair. Afterward, plan to apply a high-build primer to facilitate sanding and blocking, creating a level surface for the final paint. Don’t forget to mask off surrounding areas carefully to avoid hard lines and guarantee a clean shift. Continuously evaluate your primer application and surface preparation to uphold high standards for the subsequent painting process.
Final Inspection Steps
Inspecting your work before priming is essential for achieving a professional finish. Follow these final inspection steps to verify a flawless application:
- Clean the Surface: Apply wax and grease remover to eliminate any contaminants on the newly welded area.
- Apply Epoxy Primer: Use epoxy primer on bare metal sections for corrosion resistance and a strong foundation.
- Select High-Build Primer: Opt for a high-build primer to facilitate sanding and blocking for a smooth surface.
- Mask Surrounding Areas: Carefully mask off adjacent surfaces to prevent hard lines and maintain a clean finish.
Continuously evaluate the quality throughout these steps to guarantee a high-quality final outcome. Proper preparation sets the stage for a successful paint job.
Frequently Asked Questions
What Type of Welder Is Best for Truck Cab Corner Patches?
For truck cab corner patches, a MIG welder is your best choice. It’s user-friendly, efficient, and provides strong, clean welds. Stick welders can work too, but they require more skill and practice.
How Do I Know if My Metal Is Clean Enough?
You’ll know your metal’s clean enough when it’s free of rust, paint, and grease. Use a wire brush or grinder for metal preparation, ensuring a shiny, bare surface for ideal welding adhesion and strength.
Can I Use a MIG Welder for This Project?
Yes, you can use a MIG welder for this project. This welding technique offers great versatility and ease, allowing you to achieve strong, clean welds on your truck cab corner patch effectively and efficiently.
What Safety Gear Should I Wear While Welding?
You’ll need a welding helmet, gloves, protective clothing, and safety glasses. These essential items shield you from sparks and harmful rays, ensuring you focus on mastering welding techniques while staying safe and liberated from injury.
How Long Should I Wait Before Applying Body Filler?
You should wait at least 24 hours for the welds to cure properly. Curing time guarantees ideal adhesion and durability of the body filler, preventing future issues and promoting a lasting, high-quality finish on your project.
Conclusion
By following these steps, you can confidently tackle truck cab corner patch welding. You might worry about achieving a clean finish, but with practice, you’ll see those smooth, seamless welds come together like a professional’s work. Imagine the satisfaction of stepping back to admire your repair, knowing you’ve enhanced your truck’s durability and appearance. With the right techniques and a little patience, you’ll transform an eyesore into a sturdy, reliable corner that’ll last for years.


