To plasma cut 1/8 inch aluminum (3.2 mm) cleanly, start with the cut chart for your exact plasma cutter, torch, consumables, gas, and cutting method. A 45-amp setting can be correct on some systems, but it is not universal. CNC travel speed, handheld technique, torch height, air quality, and consumable condition all change the result.
Quick Answer
For 1/8-inch aluminum, start with your machine’s aluminum cut chart. As one mechanized example, Hypertherm lists 45 amps, 170 IPM for best quality, 263 IPM for production, and a 0.06-inch cut height. Handheld users should follow the manual, keep a steady standoff, and adjust speed from a test cut.
Key Takeaways
- Treat 45 amps as a machine-specific reference, not a universal setting for every plasma cutter.
- Do not use one generic travel-speed range. A cut chart should match the material, thickness, torch, consumables, gas, and cutting mode.
- Most portable air-plasma cutters use clean, dry air. Multi-gas industrial systems may use nitrogen-based processes when the manufacturer approves them.
- Keep the work lead on clean metal, inspect the consumables, and make a test cut on scrap from the same sheet.
- Never cut aluminum over water unless the table is designed to prevent hydrogen accumulation. Never cut aluminum-lithium alloys in the presence of water.
At a Glance
| Time Required | About 10 to 20 minutes for setup and test cuts; actual cutting time depends on the part |
| Difficulty | Beginner to intermediate |
| Tools Needed | Plasma cutter rated for aluminum, correct consumables, clean and dry air or approved gas, work lead, straightedge or CNC table, scrap aluminum, and proper PPE |
| Cost | Usually limited to electricity, compressed air or gas, and consumable wear if you already own the equipment |
Settings to Plasma Cut 1/8 Inch Aluminum

The best settings are the ones listed for your exact machine. A cut chart combines amperage, consumables, gas, pressure or flow, cut height, pierce height, pierce delay, and travel speed. Changing one item can change the others.
Products Worth Considering
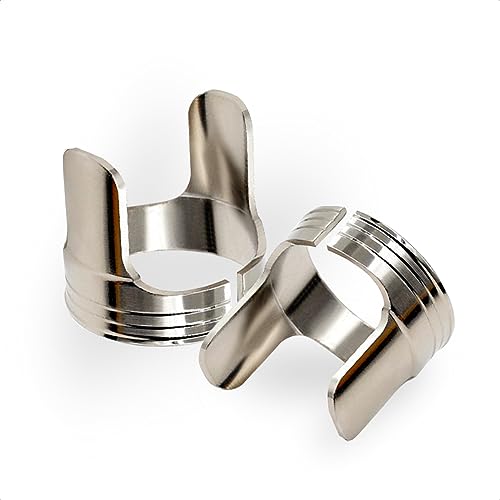
Package Including: The package contains 2 pieces of plasma double pointed spacer 60432

Package Including: 10 pieces electrodes 56576; 10 pieces nozzles 0.9mm 56811 ; Standoffs+Ring+Cap 3pk

Wide Compatibility: Compatible with CUT60, CUT60SP, CUT50DP, CUT50PI, LGK-60, LTP 5000, CUT-55DS plasma cutting machines.
Use 45 amps only when the cut chart calls for it
For a useful reference, the Hypertherm Powermax45 mechanized air cut chart lists the following values for 1/8-inch aluminum with its specified 45-amp shielded consumables:
| Setting | Powermax45 Reference | What It Means |
|---|---|---|
| Current | 45 amps | Use only with the matching 45-amp process and consumables |
| Best-quality speed | 170 IPM | Starting point for edge quality on a mechanized table |
| Production speed | 263 IPM | Faster output, not necessarily the best finish |
| Cut height | 0.06 inch | About 1/16 inch from torch shield to work |
| Initial pierce height | 0.15 inch | Higher than cut height to protect the consumables during piercing |
| Pierce delay | 0.4 second | Time before the torch begins moving |
Note: These numbers are an example for one mechanized torch and consumable set. They are not a universal recipe for every 45-amp cutter. A handheld cutter may use a different current, tip, air pressure, or technique.
Set gas pressure and flow from the manual
Do not copy a pressure number from another brand. Some cutters regulate pressure automatically, while others require a manual setting. Confirm that the compressor can maintain the required flow while the torch is firing. Use clean, dry air because oil, moisture, and particles can reduce cut quality and consumable life.
Match torch height to the cutting method
For a mechanized torch, enter the cut height and pierce height from the chart. For handheld cutting, follow the torch manual. Miller’s handheld plasma-cutting guidance uses a steady 1/16-inch to 1/8-inch standoff when the torch is not designed for drag cutting. If the torch has an approved drag shield, you may rest the shield on the workpiece as directed by the manufacturer.
Selecting the Right Gas for Optimal Aluminum Cutting

Gas choice depends on the plasma system. Portable air-plasma cutters and industrial multi-gas systems do not use the same process.
Products Worth Considering

CGA-580 Inlet Fitting
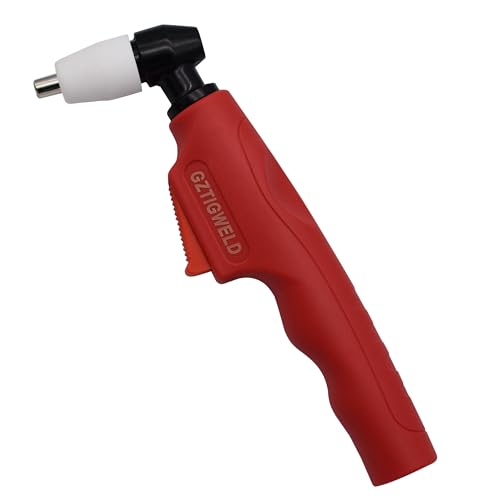
1 x PT-31 LG-40 20072 Air Plasma Cutter Torch Body / Gas Cutting Gun

TESTED AND CERTIFIED: Certification/hydro test within 12 months and DOT Approved
Air-plasma cutters
If you have a typical portable air-plasma cutter, use clean, dry air as both the plasma and shield gas unless the manual says otherwise. Air can cut aluminum effectively, but the cut face may need mechanical cleaning before welding or when appearance matters. Hypertherm’s plasma gas selection guide also stresses removing moisture, oil mist, and particles from shop air.
Compatible multi-gas systems
On high-definition or other compatible multi-gas systems, the manufacturer may specify nitrogen-based processes. Hypertherm’s aluminum gas guidance recommends nitrogen as both plasma and shield gas for aluminum under 5 mm on systems that support that process. It recommends nitrogen plasma with a water shield for material thicker than about 6 mm when the equipment is designed for it.
For aluminum thicker than 12 mm, some equipped industrial systems may use H-35 or another approved hydrogen-containing process with nitrogen shielding. Do not connect bottled gases or use a gas mixture unless the torch, gas console, regulators, hoses, ventilation, and manual are designed for it.
The correct gas is not simply “nitrogen” or “air.” It is the complete plasma-and-shield process approved for your machine, material thickness, consumables, and cutting table.
Techniques for Achieving Clean Cuts on Aluminum

Clean aluminum cuts come from a stable arc, consistent motion, correct consumables, and a dry gas supply. Use this setup sequence before you fine-tune amperage or speed.
- Confirm the material. Measure the sheet instead of relying on appearance, and verify that it is an aluminum alloy your process can cut safely.
- Clean the cutting area. Remove dirt, oil, adhesive, paint, and other coatings that can affect the work connection or produce hazardous fumes.
- Install the correct consumables. Match the nozzle, electrode, shield, and current rating to the process listed in the manual. Replace damaged or badly worn parts.
- Attach the work lead to clean metal. Put it on the workpiece when practical and close enough to the cut to avoid a weak or unstable connection.
- Set the approved current, gas, and pressure. Purge the line if the manual requires it and confirm that the gas supply remains stable under flow.
- Trace the path before firing. Check torch clearance, cable movement, straightedge position, and body position so you can complete the cut without stopping.
- Make an edge start when practical. If you must pierce, use the specified pierce height and delay. Handheld users should angle or position the torch only as the manual directs.
- Keep the torch square and the height steady. Move smoothly and watch the stream of sparks under the sheet. Make small changes after checking the finished edge.
| Parameter | Handheld Starting Point | Mechanized Starting Point | Purpose |
|---|---|---|---|
| Torch height | Use the manual; often 1/16 to 1/8 inch without an approved drag shield | Use the exact chart value; 0.06 inch in the Powermax45 example | Maintains arc stability and controls bevel |
| Gas type | Usually clean, dry air | Air or an approved multi-gas process from the chart | Affects edge finish, dross, weldability, and consumable life |
| Travel speed | Adjust from a test cut and spark direction | Use the chart; 170 IPM for best quality in the Powermax45 example | Controls dross, heat input, and edge roughness |
Pro Tip: Keep a small piece of the same aluminum beside the job. Make one short test cut, label the current and speed, then change only one setting at a time. This makes the cause of any improvement clear.
Understanding the Impact of Material Thickness

Material thickness changes travel speed, pierce delay, required power, and sometimes the consumable set or gas process. Thicker aluminum normally needs a slower cut and may require more current. Thin sheet can warp when you use too much heat or move too slowly.
The table below shows why a single “120 to 170 IPM” range should not be presented as the setting for 1/8-inch aluminum. These are best-quality speeds from the same 45-amp mechanized air chart, using the matching consumables and a 0.06-inch cut height.
| Aluminum Thickness | Best-Quality Speed | Pierce Delay |
|---|---|---|
| 1/10 inch | 240 IPM | 0.2 second |
| 1/8 inch | 170 IPM | 0.4 second |
| 3/16 inch | 120 IPM | Check your chart |
| 1/4 inch | 70 IPM | 0.5 second |
Other machines can list different values. Recheck the chart whenever you change thickness, amperage, consumables, torch type, gas, or whether the cut is handheld or mechanized.
Troubleshooting Dross, Bevel, and Rough Edges
Do not change several settings at once. Inspect the work lead, consumables, air quality, torch angle, height, and speed in a consistent order. Hypertherm’s cut-quality troubleshooting guide identifies speed, cut height, consumables, gas delivery, and torch alignment as common causes.
| Symptom | Likely Causes | What to Try |
|---|---|---|
| Heavy bottom dross | Travel speed too slow, too much heat, worn consumables, or poor gas quality | Increase speed in small steps, confirm the chart, inspect the nozzle and electrode, and drain the air system |
| Hard dross with an arc that trails far behind | Travel speed too fast or insufficient effective power | Slow down, verify input power, and confirm the correct current and consumables |
| Top spatter or damaged nozzle | Pierce height too low, moving before the pierce completes, or piercing beyond the system’s limit | Use the chart’s pierce height and delay, or edge-start the cut when possible |
| Uneven bevel | Torch not square, incorrect height, warped sheet, worn nozzle, or wrong cut direction on CNC contours | Square the torch, flatten the sheet, correct the height, replace worn parts, and check the toolpath direction |
| Arc stops or fails to transfer | Weak work connection, low air flow, moisture, damaged cable, worn consumables, or duty-cycle limit | Reconnect to clean metal, check flow under load, inspect cables and parts, and let the machine cool if required |
| Porosity when welding the cut edge | Oxide or nitride contamination from an air-plasma cut | Grind or machine the cut face to bright metal and follow the welding procedure for the alloy |
Safety Measures for Plasma Cutting Aluminum

Warning: Do not plasma-cut aluminum underwater or over a water table unless the complete table and ventilation system are engineered to prevent hydrogen accumulation. Never cut aluminum-lithium alloys in the presence of water. Trapped hydrogen can ignite and cause an explosion.
Plasma cutting exposes you to intense light, hot metal, sparks, electrical hazards, noise, and airborne fumes. Follow the cutter manual and applicable workplace rules. OSHA’s welding, cutting, and brazing guidance identifies burns, eye damage, electric shock, ultraviolet radiation, and metal fumes as major hazards.
- Protect your eyes and face. Use the shade and type of eye protection specified for your plasma cutter and amperage. Wear safety glasses under a helmet or face protection when required.
- Cover exposed skin. Wear dry welding gloves, flame-resistant clothing, closed footwear, and hearing protection suited to the job.
- Control fumes. Use effective general and local exhaust ventilation. Remove paint, solvent, adhesive, and coatings from the cutting zone when this can be done safely. Do not work in a confined space without a proper hazard assessment and ventilation plan.
- Prevent fire. Move combustible material away, keep an appropriate fire extinguisher nearby, and allow hot offcuts to cool in a safe location.
- Avoid electrical shock. Keep yourself and the work area dry, inspect leads and the power cord, and disconnect power before changing torch parts or servicing the system.
- Handle cylinders correctly. Secure approved gas cylinders upright and use the correct regulator, hose, and fittings. Nitrogen and argon can displace oxygen in enclosed areas.
- Plan for falling parts. Support the sheet and cutout so hot metal cannot drop onto you, cables, hoses, or combustible surfaces.
For water-table work, follow the table manufacturer’s written aluminum-cutting procedure and the plasma-system maker’s safety and compliance manual. Simple aeration should not be treated as a universal fix.
Frequently Asked Questions
What are the best settings for plasma cutting 1/8-inch aluminum?
Use the aluminum cut chart for your exact cutter, torch, consumables, gas, and cutting method. One Hypertherm Powermax45 mechanized air process uses 45 amps, 170 IPM for best quality, 263 IPM for production, a 0.06-inch cut height, a 0.15-inch pierce height, and a 0.4-second pierce delay. Other machines may differ.
Can you effectively cut aluminum with a plasma cutter?
Yes. Plasma can cut electrically conductive aluminum quickly. Good results depend on correct consumables, stable gas flow, a clean work connection, proper height, and a steady travel speed. Air-plasma cuts may need cleanup before welding or when a smoother cosmetic finish is required.
How do I determine the right amperage?
Match the current to the manufacturer’s process for the material and thickness. Use the listed consumables for that current. Do not assume that maximum output gives the best edge on thin aluminum. Make a short test cut and change only one variable at a time.
Which gas is best for plasma cutting aluminum?
For a portable air-plasma cutter, use the clean, dry air specified by the manufacturer. Compatible industrial multi-gas systems may use nitrogen with nitrogen, air, carbon dioxide, or water shielding depending on the process and thickness. Use only the complete gas combination listed for your equipment.
Why am I getting dross on the bottom of the cut?
Common causes include moving too slowly or too quickly, using the wrong height, worn consumables, unstable gas flow, moisture in the air, or excessive heat. Compare the edge with the cut chart, then change one setting at a time.
Can I drag the plasma torch directly on aluminum?
Only when the torch has a manufacturer-approved drag shield or drag-cutting process. Otherwise, touching the nozzle to the work can damage consumables and reduce cut quality. Use the standoff listed in the manual.
Can I plasma-cut aluminum over a water table?
Only when the table, ventilation, and operating procedure are specifically designed to prevent hydrogen accumulation. Consult the table and plasma-system manufacturers before cutting. Never cut aluminum-lithium alloys in the presence of water.
Should I clean the plasma-cut edge before welding?
Usually, yes. Mechanically clean the cut face to bright metal when an air-plasma process leaves oxide or nitride contamination. Then follow the welding procedure for the specific aluminum alloy and joint.
Conclusion
For 1/8-inch aluminum, begin with the cut chart for your exact plasma cutter rather than a generic amperage and speed range. A 45-amp mechanized process may call for 170 IPM and about a 1/16-inch cut height, but another machine can require different values. Clean gas, correct consumables, steady height, a solid work connection, and one-variable-at-a-time test cuts will do more for edge quality than copying settings from an unrelated cutter.
Related Articles
Sources
- Hypertherm Powermax45 Duramax Machine Torch Cut Charts — machine-specific amperage, speed, cut height, pierce height, and delay values
- Hypertherm: Plasma Cutting Aluminum — gas choices, edge cleanup, and water-table guidance
- Hypertherm Gas Selection Guide — air quality and plasma/shield gas combinations
- Miller: Plasma Cutting Tips — handheld standoff, work-lead placement, consumables, speed, and PPE
- OSHA Welding, Cutting, and Brazing Hazards and Solutions — fume, UV, burn, electrical, and eye hazards
- Hypertherm Safety and Compliance Manual — hydrogen explosion precautions for aluminum and water tables