Disclosure: As an Amazon Associate, we earn from qualifying purchases. If you click a link on this page and make a purchase, we may receive a small commission at no extra cost to you.
Holding small RC connectors steady while you solder can be harder than the soldering itself. The RC Connector Soldering Jig is designed to clamp common RC plugs and wire sizes so you can work with better control at the bench. Its main strengths are the adjustable 0.5mm to 9mm clamping gap, broad connector compatibility, and simple press-to-clamp design. The main tradeoff is that you still need careful alignment before applying heat, especially with small plugs or thicker wire.
Quick Verdict
Rating: 8/10, Recommended with caveats
Best For: RC hobbyists, drone builders, battery-pack users, and bench soldering tasks involving XT, EC, T plug, or JST-style connectors.
Bottom Line: This jig is a useful bench aid if you solder RC connectors often and want a more stable hold than fingers or loose clips. It is not a shortcut for careful setup, since connector alignment still matters before you touch the joint with a hot iron.
| Specification | Detail |
|---|---|
| Product type | RC connector soldering jig |
| Design | Adjustable clamping board for holding connectors and wire during soldering |
| Clamping gap | 0.5mm to 9mm |
| Wire gauge range | 0 AWG to 24 AWG, based on the supplied product copy |
| Connector compatibility | XT90, XT60, XT30, EC3, EC5, T plug, and JST plug |
| Material | Aluminum frame, based on the supplied product copy |
| Best use | Bench soldering for RC batteries, drones, cars, planes, and hobby wiring projects |
| Care note | Remove solder residue and debris after use |
| Safety note | Use with normal soldering safety practices, including a stable work surface and heat awareness |
What Is the RC Connector Soldering Jig?
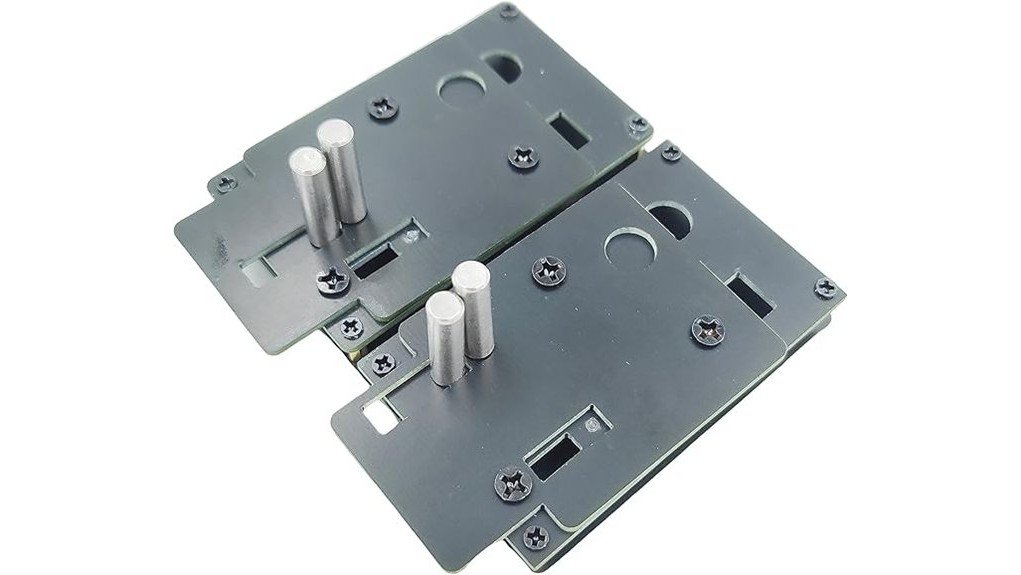
The RC Connector Soldering Jig is a small bench tool that holds plugs and wires while you solder RC power connectors. Instead of trying to balance a connector by hand, you place it in the clamping gap and adjust the hold before heating the joint.
The jig is made for common RC connector families such as XT90, XT60, XT30, EC3, EC5, T plug, and JST plug. That range makes it useful if you work on different RC cars, drones, planes, battery leads, chargers, or hobby electronics.
Its most useful feature is the adjustable clamping gap. The listed range of 0.5mm to 9mm gives you flexibility across small and larger connector shapes, although you should still test the fit before soldering.
Who Should Buy It?
Best For
- RC hobbyists who solder XT, EC, T plug, or JST-style connectors at a workbench.
- Drone, RC car, and RC plane users who need steadier connector positioning.
- Beginners who want a more controlled setup while practicing solder joints.
Skip If
- You only solder once or twice and already have a stable helping-hands tool.
- You need a jig verified for a connector type not listed in the product copy.
- You expect the jig to align every connector automatically without manual adjustment.
Before You Buy: Check your connector type before ordering. The supplied product copy lists XT90, XT60, XT30, EC3, EC5, T plug, and JST plug, but it does not verify every specialty RC connector or every plug variation.
Features and Specifications
The main reason to consider this soldering jig is control. A connector can shift when you touch it with solder or a hot iron, and that movement can lead to messy joints or poor wire position. The jig helps by holding the connector in place while you focus on heat, solder flow, and wire placement.
Adjustable Clamping Gap
The adjustable clamping gap ranges from 0.5mm to 9mm. That range matters because RC connectors vary in shape and size, especially when you move from small JST plugs to larger XT or EC connectors.
You can press the board to create the gap and then position the connector for soldering. This design keeps the setup simple, but it still rewards patience. You should confirm that the connector sits straight before heating the cup or terminal.
Wire Gauge Support
The supplied article lists wire gauge compatibility from 0 AWG to 24 AWG. That is a broad range, so you should treat it as a fit range rather than a promise that every wire and connector combination will feel equally easy to handle.
Thin hobby wire may need careful positioning so it does not shift. Thick wire may need more attention because its stiffness can pull against the connector during soldering.
Connector Compatibility
This jig supports several common RC connector types, including XT90, XT60, XT30, EC3, EC5, T plug, and JST plug. That makes it more flexible than a holder made for only one connector style.
The practical benefit is simple: you can keep one jig on the bench for several RC projects. If you regularly switch between battery packs, ESC leads, chargers, and smaller electronics, this broad connector support is the main reason to consider it.
Build Quality and Materials
The supplied product copy describes a sturdy aluminum frame. Aluminum is a useful material for a bench jig because it can provide structure without adding unnecessary bulk.
Even with a firm frame, the jig is still a holding aid, not a heavy-duty vise. Avoid forcing oversized connectors into the clamp, and do not use it as a prying or bending tool.
Ease of Use and Alignment
The design is simple enough for beginners because you do not need a complicated setup process. You place the connector, adjust the clamp, and begin soldering once the part is stable.
The main limitation is alignment. Some users may need a few tries to get small connectors lined up correctly. That is normal for this type of tool, especially when you work with tiny terminals or stiff wire.
Pro Tip: Dry-fit the connector and wire before heating the joint. If the wire pulls the connector out of line before soldering, it will likely move again when the solder starts to flow.
Compatibility and Safety
For best results, match the jig to the connector style before you begin. XT90, XT60, XT30, EC3, EC5, T plug, and JST plug are the listed connector types, so those are the safest assumptions for fit.
You should also use normal soldering safety habits. Work on a stable, heat-safe surface, keep loose wire away from the hot iron, and let connectors cool before you remove them from the jig. The jig can help hold parts, but it does not remove the burn risk that comes with soldering.
If you are soldering battery leads, make sure the battery is not connected during the work. A jig can improve stability, but it cannot protect against short circuits caused by poor wiring practices.
How It Performs in Real Use
For RC Battery Leads
The jig is most useful when you solder battery connectors such as XT60, XT90, EC3, or EC5 plugs. These connectors can be awkward to hold because the solder cup needs to stay upright while you heat and feed solder.
A stable clamp lets you keep your hands on the iron and wire instead of trying to grip the connector. That can make the joint cleaner and reduce the chance of dragging solder across the plug body.
For Small JST-Style Connectors
Small connectors can be more challenging because they leave less room for adjustment. The 0.5mm lower clamping range helps with smaller parts, but you still need a light touch.
This is where careful setup matters most. Check the angle from the side and front before soldering so the wire enters the terminal cleanly.
For Beginners Practicing Soldering
Beginners often struggle because the connector moves while they are learning how heat and solder flow behave. This jig can reduce that problem by removing one source of movement.
It will not fix poor soldering technique by itself. You still need the right iron temperature, clean tip, suitable solder, and enough practice on scrap wire before working on an important RC battery lead.
For Repeated Bench Repairs
If you solder RC connectors often, the jig can save time during setup. You do not need to rebuild a makeshift holder each time you change a plug.
The value becomes stronger when you handle different connector sizes. A single adjustable jig is easier to manage than several fixed holders if your projects vary.
How to Use It Correctly
Start by placing the connector in the clamp without solder or heat. Confirm that the plug sits straight and that the terminal you plan to solder faces the right direction.
Next, position the stripped wire so it naturally meets the terminal. If the wire has to bend hard to reach the connector, trim, strip, or reposition it before soldering. A wire under tension can move when the solder becomes liquid.
After soldering, allow the connector to cool before removing it from the jig. Pulling it out too early can disturb the joint or make the connector uncomfortable to handle.
Cleaning and Maintenance
After use, remove loose solder residue, wire strands, and debris from the jig. Small metal scraps can interfere with the next setup, especially when you work with compact connectors.
A gentle wipe is usually enough for routine cleaning. Do not scrape the clamping area aggressively unless the product instructions allow it, since rough handling can reduce the smoothness of the clamping action.
Pros and Cons
Pros
- Adjustable 0.5mm to 9mm clamping gap supports different connector sizes.
- Compatible with common RC connector types, including XT, EC, T plug, and JST plugs.
- Helps keep connectors steady while you focus on solder flow and wire placement.
- Simple press-to-clamp operation makes it approachable for hobby users.
- Useful for repeated RC bench work where makeshift holders slow you down.
Cons
- Connector alignment still requires manual checking before soldering.
- May not fit specialty connectors outside the listed compatibility range.
- Thicker or stiffer wire may require extra positioning so it does not pull the connector out of line.
Is It Worth the Price?
The RC Connector Soldering Jig is worth considering if you solder RC connectors more than once in a while. Its value comes from repeatable setup, steadier positioning, and compatibility with several common connector families.
It makes the most sense for buyers who care about control and bench organization. If you only need to repair one small connector, a basic helping-hands clamp may be enough.
The honest limitation is that this jig does not replace soldering skill. You still need clean preparation, proper wire fit, and careful heat control to get strong joints.
How It Compares to Alternatives
Compared with a basic helping-hands clamp, this jig is more focused on RC connectors. Helping-hands tools can hold many objects, but they may not grip plug bodies as neatly or consistently.
Compared with a small bench vise, this jig is easier to use for compact connector work because it is designed around small clamping gaps. A vise may be better for larger shop tasks, but the RC Connector Soldering Jig makes more sense for hobby soldering where connector position matters.
Frequently Asked Questions
Can this jig be used for XT60 and XT90 connectors?
Yes. The supplied product copy lists XT90, XT60, and XT30 connector compatibility. You should still dry-fit the plug before soldering because connector shape and wire stiffness can affect alignment.
What wire gauges does it support?
The supplied article lists support for 0 AWG to 24 AWG wire. Because that is a wide range, check your specific wire and connector together before applying heat.
Can beginners use this RC soldering jig?
Yes, it can help beginners because it keeps the connector steadier during soldering. Beginners should still practice on scrap wire first and learn safe soldering habits before working on battery leads.
Does it work with EC3, EC5, T plug, and JST connectors?
Yes. The listed compatible connector types include EC3, EC5, T plug, and JST plug. Fit can still vary by plug design, so test the clamp position before soldering.
What is the jig made from?
The supplied product copy describes a sturdy aluminum frame. Specific alloy, finish, and full construction details were not verified, so check the current seller listing if material details are critical for your setup.
How should you clean the jig after use?
Let the jig cool first, then remove solder residue, wire strands, and debris. A gentle wipe is best for routine cleaning unless the product instructions recommend a different method.
Is warranty coverage included?
The original article mentioned warranty coverage for manufacturing defects, but a verified warranty term was not available during this review update. Check the current Amazon listing and seller terms before buying.
Who should skip this soldering jig?
Skip it if you rarely solder RC connectors or need verified support for a plug type not listed in the product copy. You may also prefer a general bench vise if you mostly work on larger non-RC parts.
The Bottom Line
The RC Connector Soldering Jig is a smart buy if you regularly solder common RC connectors and want a steadier way to hold plugs and wires. Its biggest strengths are the adjustable clamping gap and broad connector compatibility, while its main limitation is the need for careful manual alignment.
Buy it if you work with XT, EC, T plug, or JST-style connectors often. Skip it if you only need a one-time repair or require verified compatibility with a specialty connector not listed in the product copy.