♻️ Why Turn an Old Bike Into a Tool?
I have always believed that the parts people discard as useless can become the backbone of clever, low-cost tools. An old bicycle is a treasure trove of mechanical components: hubs, spokes, wheel rims, cranks, pedals, axles, and sometimes even a sturdy frame. With a little welding, some basic fabrication, and a dose of creativity, you can turn those parts into a versatile light-duty finishing/rotary workshop tool for many daily projects.
When I first started experimenting with parts recycling, I remember pausing mid-project and saying, “So” as I examined how things might fit together. Later, when something clicked or a cut landed perfectly, I would exclaim, “Ah!” It is that mixture of curiosity and discovery that I want to share with you here. This guide will take you through the full transformation process: planning, disassembly, fabrication, welding tips, safety, testing, and practical uses.
🔧 What You Can Make From Bicycle Parts
There are many directions you can go. In this article I focus on turning the bicycle wheel, hub, and axle into a rotating light-duty finishing or rotary jig tool that can be driven by a simple motor or hand crank. This tool works well as a small bench-mounted finishing wheel or as a rotary jig for metal fabrication jobs; for true cutting/grinding, use a purpose-built, rated spindle/arbor with proper guards.
Why the wheel and hub? Because a wheel rim is already circular and trueable (though not automatically balanced), the hub provides a mounting point and bearings, and the axle serves as the fixed spindle you clamp to the mount. Drive the hub/rim (via pulley, friction roller, or a rated arbor)—don’t drive the axle.
🛠️ Tools and Materials You Will Need
Before you start, gather the following. Most items are typical in a small welding shop or a well-equipped garage:
- Bicycle parts: wheel(s), hub, axle, rim, spokes, and possibly the frame or fork for a stable mount.
- Motor or drive source: a small electric motor (bench grinder motor, induction motor, or DC motor), or a hand-crank/pulley system.
- Welding equipment: MIG or stick welding machine for fabricating mounts and brackets. For thin sheet work, MIG or TIG is preferable.
- Cutting and grinding tools: angle grinder, cutoff discs, flap discs, and metal files.
- Measuring and layout tools: calipers, tape, marker, square, and alignment jigs.
- Fasteners and hardware: bearings if needed, retaining nuts, bolts, washers, and locking mechanisms.
- Safety gear: welding helmet, gloves, eye protection, respirator, hearing protection, and protective clothing.
⚙️ Project Planning and Design Considerations
Every successful DIY tool starts with a simple plan. Decide what you want this repurposed bicycle tool to do. My most common goals are:
- Serve as a bench-mounted abrasive wheel for deburring and finishing.
- Act as a circular cutter for thin sheet metal only when using a purpose-built, rated grinder head/arbor with proper guards.
- Provide a small rotary table for light fabrication tasks when speed and balance are acceptable.
Key design considerations:
- Balance: Use a wheel that is trued and balanced. Any wobble will vibrate at higher RPMs and lead to poor cuts and unsafe operation.
- Bearing condition: Service or replace bearings in the hub. Smooth bearings are essential for a long-lasting tool.
- Mounting: Create a robust mount to attach the hub/axle assembly to a bench or frame. Welding a fork or bracket is often the best solution.
- Drive method: Keep the axle fixed in the mount and drive the hub/rim via a pulley on the hub (disc-rotor 6-bolt interface works well), a belt reduction, or a friction roller on the rim.
- Safety guards: Design guards around the rotating rim or disc to contain fragments and reduce risk, and include an NVR (no-volt release) switch and proper grounding.
🧰 Step-by-Step: Turning a Bike Wheel into a Bench Tool
Below is the step-by-step process I use. Take your time at each step, and check alignment and fit often. Saying “So” when I confirm a fit helps me pause and think through the next move.
1. Disassemble and inspect
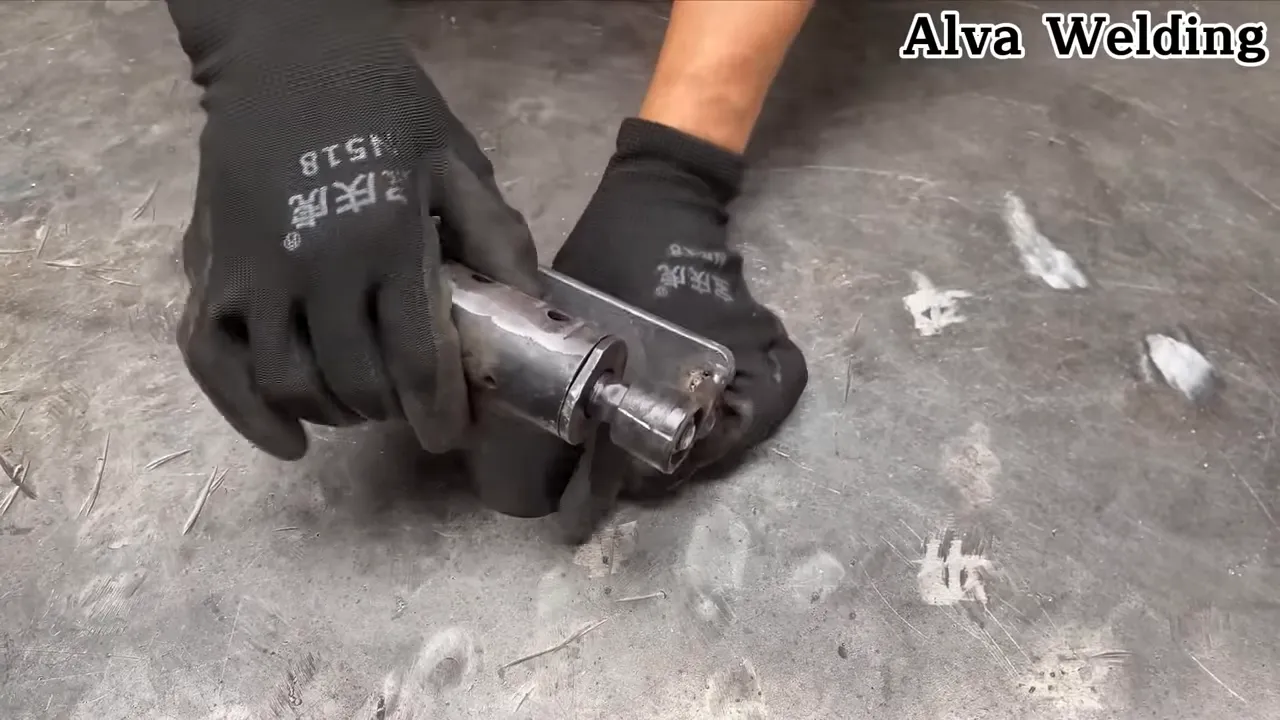
Remove the wheel from the bicycle. Strip off the tire, tube, rim tape, and any cassette or freewheel. Inspect the rim for dents and verify spokes are intact. Spin the wheel to check for wobble. If the rim is heavily bent, choose a better wheel. Avoid carbon rims. If using a rear hub, remember the freehub/freewheel will ratchet unless locked; a front disc hub is ideal.
2. Service the hub
Open the hub (if serviceable) and clean the bearings. Replace worn bearings or seals. If the hub is sealed and in good condition, you might be able to use it as-is. For higher-speed uses, I sometimes replace the hub bearings with higher-rated bearings to improve smoothness and longevity. A front disc hub also provides a convenient 6-bolt rotor interface for bolting adapters or pulleys.

3. Prepare the axle and mounting
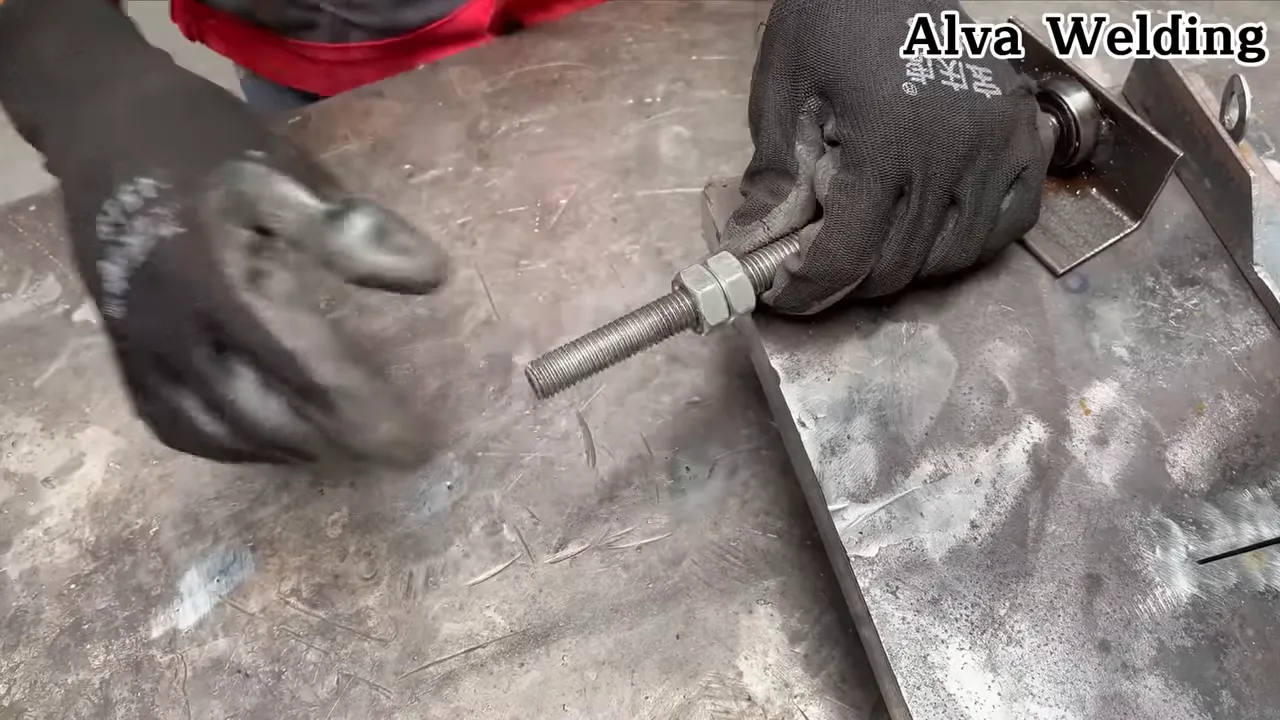
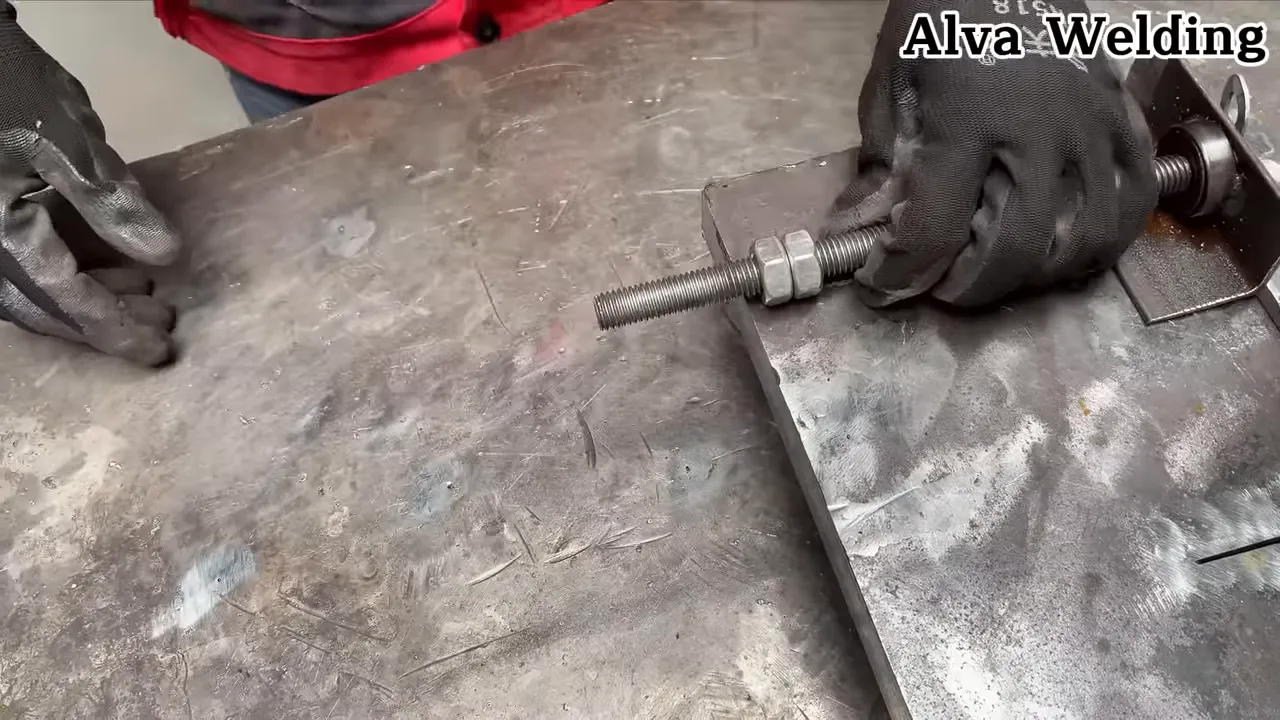
The axle should be fixed and clamped to your mount; do not attempt to drive the axle. Adapt the hub (not the axle) to accept a pulley or plate—ideally using the disc-rotor interface or a clamped adapter around the hub shell. Avoid welding directly to the axle, and ensure alignment to avoid runout.
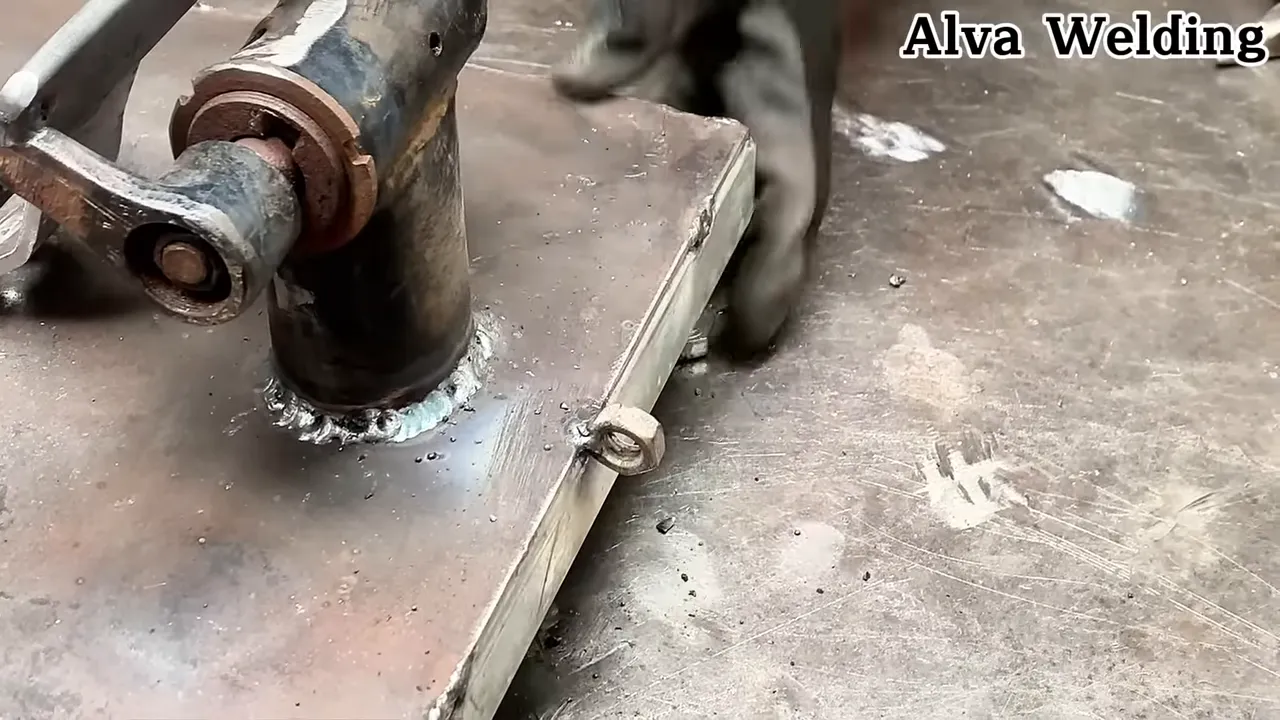
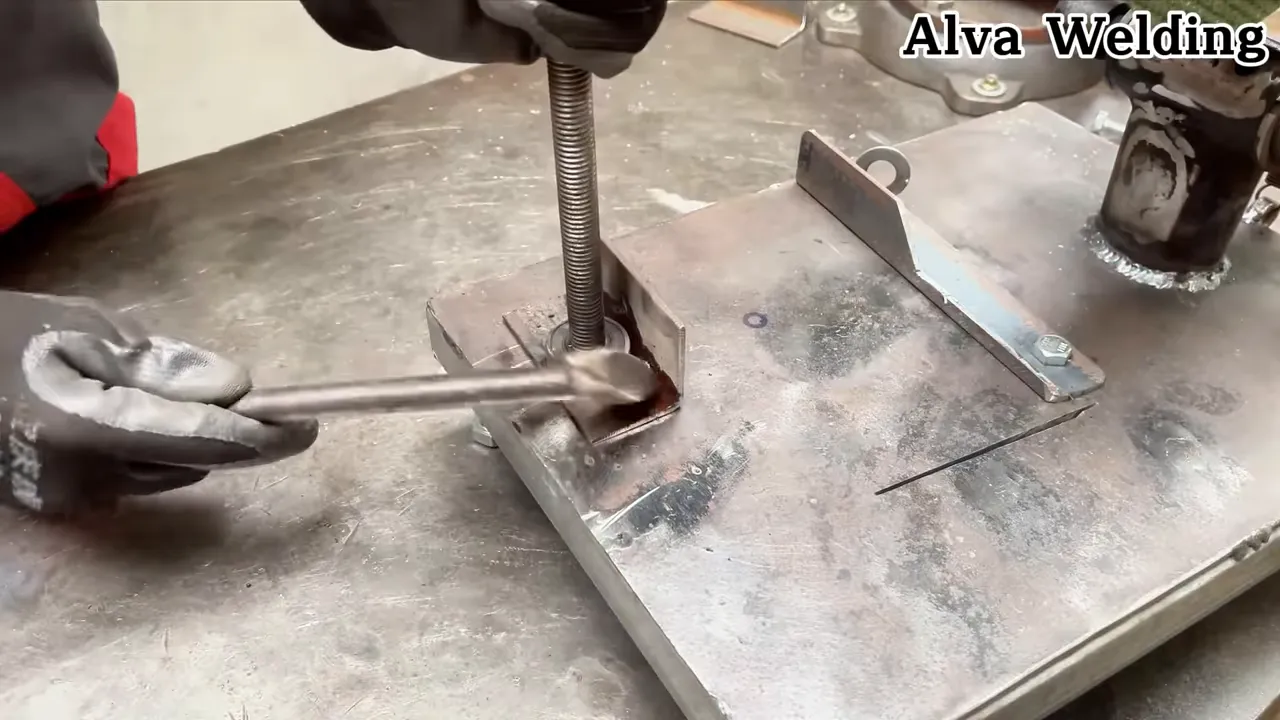
4. Fabricate a bench mount or bracket
Use square tubing, flat bar, or even the original fork to create a mounting bracket. The mount must hold the axle at a consistent height and securely fasten to your bench. Tack-weld everything, check alignment carefully, then finish-weld once satisfied. Reinforce the mount where loads will concentrate.

5. Attach drive source
Decide between friction, belt, or a rated direct spindle. For belt drive, attach a pulley to the motor and bolt a matching pulley/adapter to the hub’s rotor mount, then tension the belt properly. For friction drive, a rubber roller on the motor can bear against the rim. Direct-drive should only be via a rated spindle/arbor with proper guards. In all cases, keep the axle fixed and drive the hub/rim.
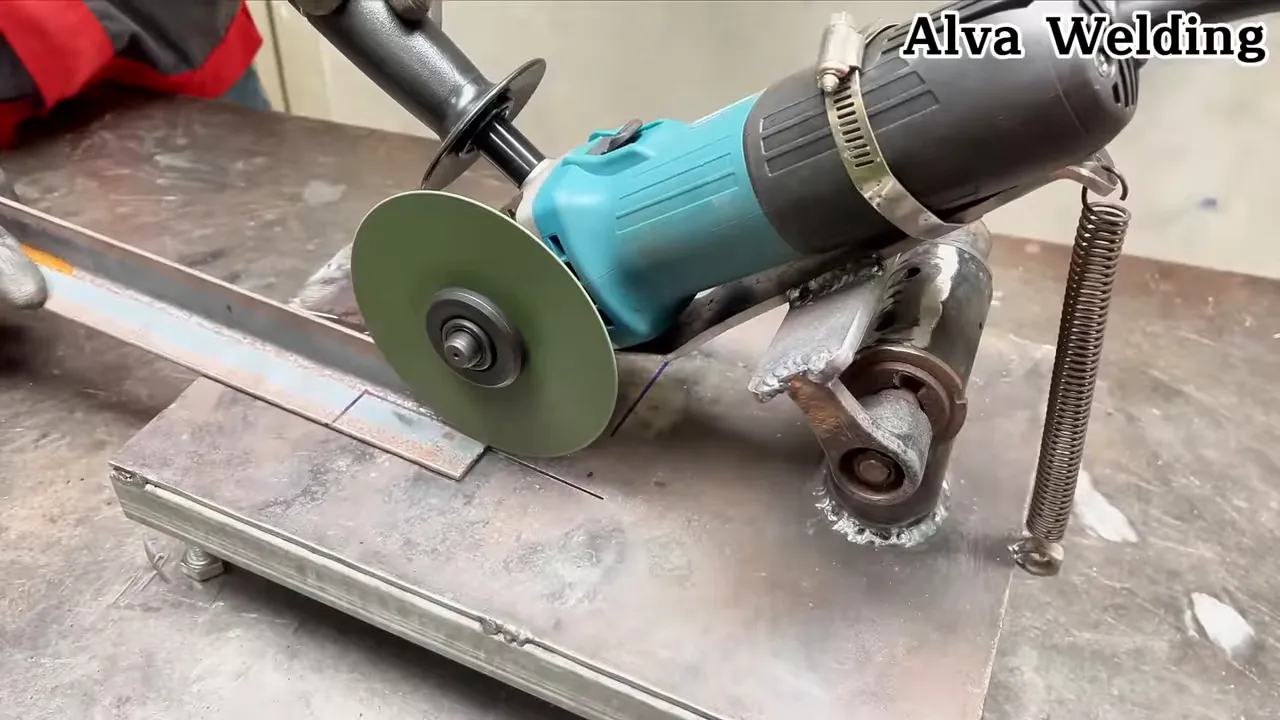
6. Add a cutting or abrasive surface
Avoid mounting angle-grinder cut-off discs to improvised plates. Instead, choose rated low-RPM accessories such as flap/sanding wheels or wire brushes designed for your speed range. If you require true grinding or cutting, use a purpose-built grinder head/spindle with its factory guards, and always stay within the accessory’s rated RPM and required surface speed.

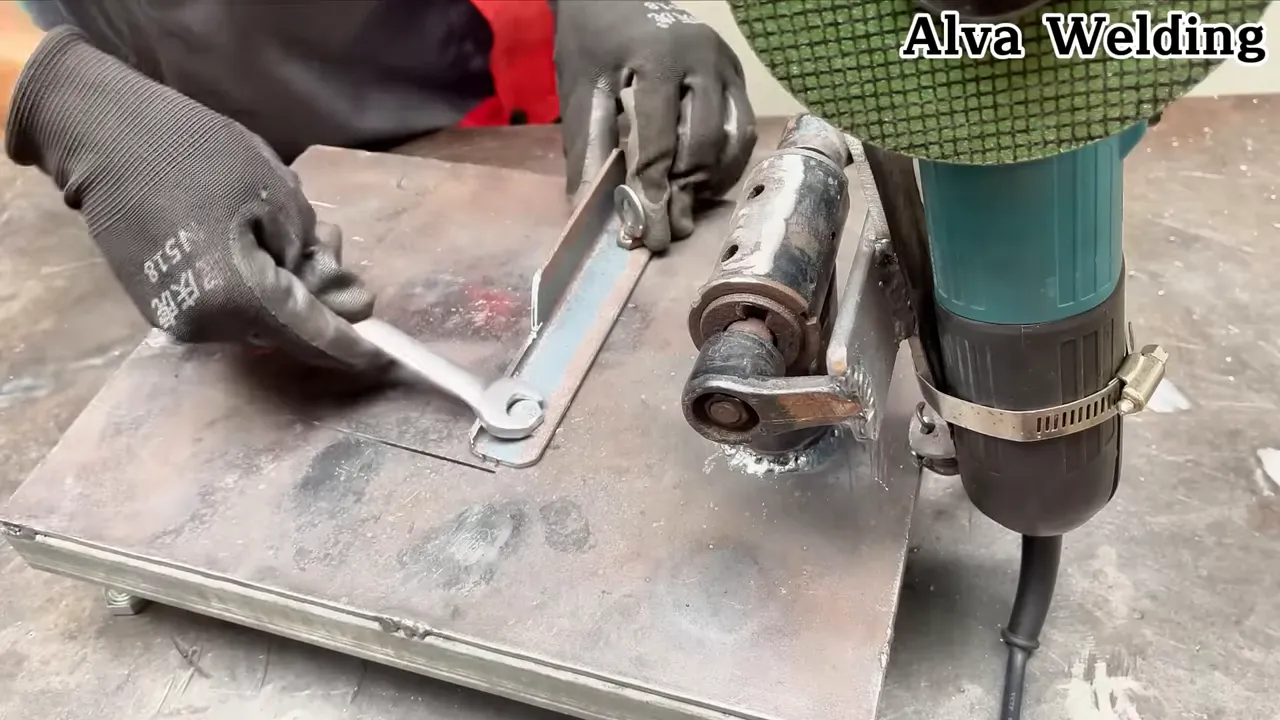
7. Balance and test run
Before cutting metal with your tool, run it at increasing speeds to listen for vibration and watch for runout. Balance the wheel and attachments by adding small weights or adjusting the adapter if necessary. Be prepared to stop the machine immediately if something feels wrong.

8. Guarding and final adjustments
Install shields and guards around the rim and disc. Add a simple adjustable tool rest to stabilize the workpiece. Also set up an emergency stop switch near the tool so you can cut power instantly if needed, and use an NVR (no-volt release) switch with proper grounding and belt/shaft guards.
🪓 Practical Uses and Demonstrations
Once your repurposed bike tool is ready and tested, it becomes a versatile workshop helper. Here are some everyday uses I rely on:
- Deburring and surface finishing: With a flap disc or abrasive wheel rated for your speed, you can quickly remove rust, paint, or burrs from edges.
- Cutting thin sheet metal: Only when using a purpose-built, rated grinder head/arbor with proper guards; otherwise keep this build to low-RPM finishing tasks.
- Shaping and profiling: Use the rotating rim to file or shape edges using mounted files or abrasive strips.
- Rotary tooling: With a variable speed setup, you can use this as a light rotary tool for polishing or sanding.
- Jig and fixture creation: The spinning wheel can be a component in a larger jig, helping with repetitive fabrication steps.

🧯 Safety: My Non-Negotiables
Safety is the most important part of any fabrication project. Even though the materials may look harmless, rotating components are dangerous. Here are the absolute must-dos before any use:
- Eye and face protection: Always wear a face shield and safety glasses. Flying debris can be lethal.
- Hearing protection: Abrasive cutting can be loud. Use ear protection.
- Respiratory protection: Cutting and grinding create fine dust and fumes. Use a respirator or work in a ventilated area.
- Guards and shields: Enclose rotating parts where possible. Shields help contain fragments from failures.
- Speed limits: Stay within the accessory’s rated RPM and observe any minimum effective speed recommended by the manufacturer.
- Emergency stop and electrical safety: Have a quick way to cut power and stop the tool immediately, use an NVR switch, ensure proper grounding/earthing, and guard belts/shafts.
🧩 Welding Tips and Techniques I Recommend
Welding is essential for making a durable mount and for modifying parts so they fit together. Here are practical welding tips that I use day to day:
- Clean joints: Remove paint, rust, and grease from anything you plan to weld. Clean metal welds stronger and with less contamination.
- Use tack welds first: Temporarily hold everything in position with tack welds. Check alignment and then fully weld.
- Avoid distorting thin parts: For thin rims or spokes, use short stitch welds to minimize heat buildup. If welding the rim directly is required, proceed with extreme caution.
- Choose the right filler: Match the filler metal to the base metal. If you are working with steel alloy rims, use a compatible steel filler rod or wire.
- Control heat: Preheat thicker sections if necessary but avoid overheating small components that could warp or lose temper. Prefer bolted adapters on disc hubs over welding thin rim sections.

🛠️ Maintenance and Troubleshooting
Repurposed tools require periodic maintenance. I routinely inspect the bearings, check fasteners, and examine the abrasive contact surfaces. Common issues and fixes:
- Vibration: Check wheel trueness, bearing condition, and balance. Tighten loose spokes if the rim is trued that way.
- Overheating bearings: Ensure proper lubrication and that the motor coupling alignment is correct. Replace bearings that show signs of heat damage.
- Disc slippage: Use secure mountings and locking mechanisms. If belts slip, increase tension or check for oil contamination.
- Excessive wear: Maintain a schedule for replacing discs and abrasive attachments. Keep spare parts for quick changes.

🔁 Variations and Upgrades You Can Try
The basic concept is a starting point. Here are some upgrades that I have tried and found useful:
- Speed control: Add a variable frequency drive for AC motors or a PWM controller for DC motors to precisely control speed.
- Quick-change adapters: Fabricate a flange system that allows you to swap different discs or attachments in seconds.
- Replaceable abrasive segments: Attach a segmented abrasive ring to the rim so you can replace only the worn pieces.
- Dust collection: Integrate a simple hood and a shop vac connection to capture dust at the source.
- Foot control: Add a foot pedal for hands-free operation when precise positioning is required.
🌍 Environmental and Cost Benefits
Repurposing an old bike into a shop tool is both economical and environmentally friendly. Instead of ending up in a landfill, bicycle parts get a second life and replace the need to buy a new specialty tool. This approach reduces waste, saves money, and helps you learn fabrication skills that are useful beyond this single project.
🎥 See It in Action
The best way to understand how components interact is by watching them move. Below I demonstrate the tool in real use so you can see balance, mounting, and cutting techniques in action.
❓ Frequently Asked Questions
Is it safe to use a bicycle rim as a high-speed grinding wheel?
A bicycle rim was not originally designed for abrasive wheel duties. It can be used at low to moderate speeds for finishing when properly balanced, with good bearings and a secure mount. Do not exceed the maximum safe speed of any accessory, observe the manufacturer’s minimum effective speed where applicable, and for high-speed grinding/cutting use purpose-built wheels and adapters with factory guards.
What type of motor should I use to drive this tool?
A small bench grinder motor, induction motor, or DC motor with sufficient torque works well. Choose a motor whose speed range aligns with the safe operating speed of your finishing accessories. For versatility, a belt-drive with different pulley sizes or a motor with variable speed control is ideal. Keep the axle fixed and drive the hub/rim.
Do I need to balance the wheel, and how do I do it?
Yes. Balancing is critical to avoid vibration. You can balance by running the wheel and marking the heavy spot, then adding small counterweights opposite it, or adjusting the adapter so the runout is minimized. For fine balance, use spoke adjustments on a trued wheel or attach small weights to the rim mount.
Can I weld directly to the rim?
Welding to a bicycle rim is possible but risky. Rims are often thin and can warp, crack, or delaminate. Do not weld carbon rims, and avoid welding aluminum unless you’re qualified. When possible, attach a hub-mounted adapter (e.g., via the disc-rotor interface) that avoids direct welding to the rim.
What safety guards should I install?
Install a fixed guard that covers a portion of the rotating surface to block fragments. Add a removable guard for changing discs, and a transparent shield or face guard for visibility. Ensure the guard is secured so it cannot come loose in operation. Use a tool rest positioned close to the accessory, and guard any belts or exposed shafts.
How do I adapt the hub to a motor shaft?
Use a flexible coupling, machined adapter, or a pulley/plate bolted to the hub (for example, via a 6-bolt disc-rotor mount). Measure both diameters precisely and design the coupling to clamp or bolt securely without introducing misalignment. Keep the axle fixed; do not attempt to drive it.
What maintenance does this tool require?
Regularly check bearings for smooth operation, inspect and tighten fasteners, replace worn discs or abrasive segments, and keep the mount free of debris. Lubricate bearings as recommended and check belts for wear and tension if you use a belt drive. Inspect guards and replace them if cracked or damaged.
Can I use this tool for cutting thick metal?
This repurposed tool is best for thin sheet metal, light-cutting tasks, and finishing. Cutting thick metal requires purpose-built cut-off saws or larger abrasive wheels rated for the job. Always select discs and speeds appropriate for the material and the thickness you intend to cut.
🧭 Final Thoughts and Encouragement
Repurposing an old bicycle into a functional metal-cutting and workshop tool is a satisfying project that blends welding skills, mechanical intuition, and creative problem solving. Throughout the build I would often say, “So” as I adjusted and checked alignments, and “Ah!” when parts fit together and the first cut turned out clean. Those simple reactions are part of the fun of hands-on fabrication.
Whether you are an experienced welder or a newcomer eager to learn, this project teaches essential skills: working with bearings, designing mounts, welding for function, and improving tool safety. It also proves that an old bike can be far more valuable than the sum of its parts when repurposed thoughtfully.
If you build your own version, experiment with different hubs, motors, and mounting strategies. Keep safety your top priority, and let the creative process guide you. With patience and care you will end up with a brilliant, low-cost tool that will live on in your workshop for years.
Happy welding, cutting, and recycling.


