Plasma cutting can look difficult when you first see the bright arc, sparks, and fast-moving torch. Clean cuts, however, come from a repeatable process: choose the right machine and consumables, supply clean air, prepare a fire-safe workspace, follow the cut chart, and move the torch with control. This guide walks you through the full setup so you can practice safely and solve common cut-quality problems.
Quick Answer
To use a plasma cutter safely, match the machine and consumables to the metal, supply clean, dry, oil-free air, attach the work clamp to clean metal, and follow the cut chart for amperage, pressure, and torch height. Wear proper protection, control fumes and sparks, and practice on scrap before cutting a finished part.
Key Takeaways
- Use a standard plasma cutter only on electrically conductive metals such as mild steel, stainless steel, aluminum, and copper.
- Follow your machine’s cut chart instead of relying on one universal air-pressure, amperage, or torch-height setting.
- Confirm that the power circuit and compressor can support the cutter continuously under load.
- Wear impact-rated eye protection, an appropriate filter shade, hearing protection, gloves, and flame-resistant clothing.
- Control fumes at their source and never guess which respirator or cartridge is suitable for an unknown coating.
- Make a test cut, inspect the edge and dross, and adjust one variable at a time.
At a Glance
| Time Required | About 10–20 minutes for one simple practice cut, including setup and safety checks; complex layouts take longer. |
| Difficulty | Beginner for straight cuts on clean scrap; intermediate for piercing, curves, and finished parts. |
| Tools Needed | Plasma cutter, approved consumables, suitable power circuit, clean air source if required, work clamp, nonflammable cutting surface, marker or guide, PPE, extinguisher, and scrap metal. |
| Cost | Variable. A practice session uses electricity, compressed air, scrap, and consumables; the cutter, compressor, ventilation, and PPE are separate equipment costs. |
What’s in This Article
- Understanding Plasma Cutting Technology
- Essential Tools and Equipment for Beginners
- Before You Begin
- Setting Up Your Workspace for Safe Results
- Steps for Clean and Precise Plasma Cuts
- Safety Measures and Protective Gear
- Maintaining and Troubleshooting Your Equipment
- Common Plasma Cutting Mistakes
- Common Plasma Cutting Applications
- Tips for Better Efficiency and Performance
- Frequently Asked Questions
- Conclusion
- Sources
Understanding Plasma Cutting Technology

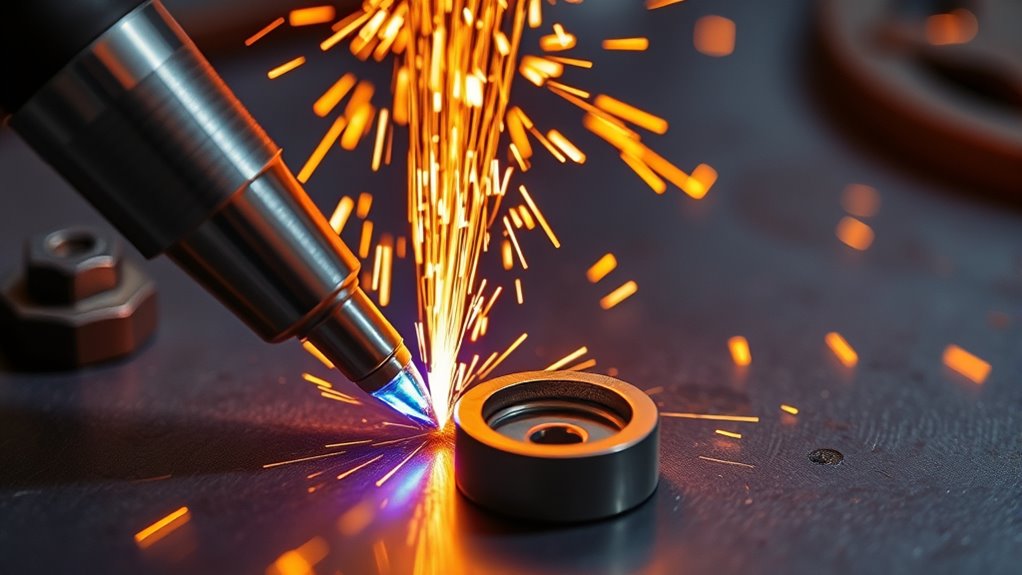
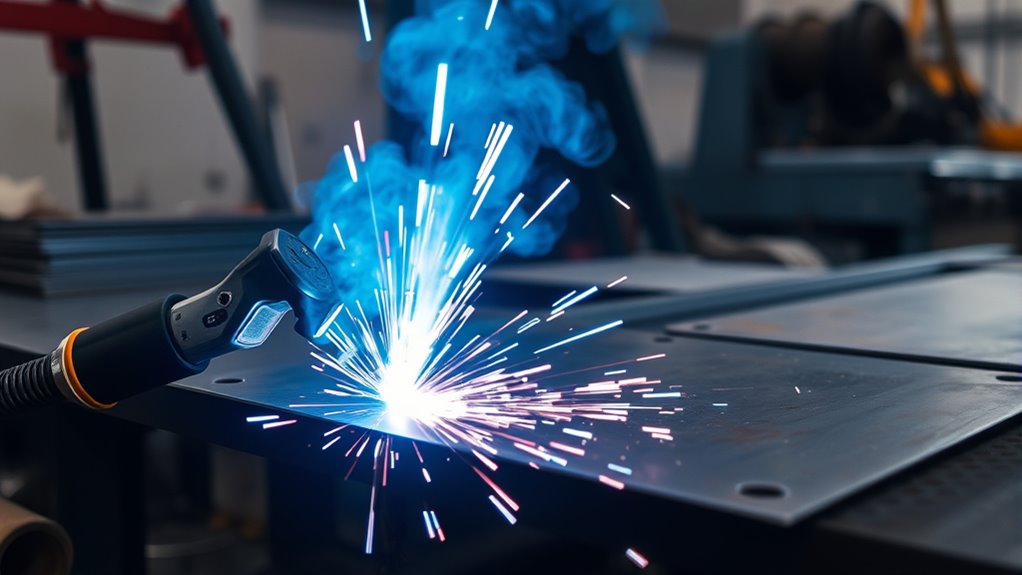
Plasma cutting uses electrical energy and a fast-moving gas to form a concentrated stream of ionized gas. The torch first creates an arc. When that arc transfers to the workpiece, the plasma jet melts a narrow path through the metal while the gas blows molten material out of the kerf.
A standard transferred-arc plasma cutter needs an electrically conductive workpiece. It can cut mild steel, stainless steel, aluminum, copper, brass, and other conductive metals within the machine’s rated capacity. It does not cut wood, glass, concrete, or other nonconductive materials in the same way.
The cutter may also use a short pilot arc to bridge the gap before the main arc transfers to the metal. Avoid firing the pilot arc into open air longer than necessary because unnecessary arc starts wear the nozzle and electrode.
The cleanest cut comes from matching the consumables, amperage, air supply, torch height, and travel speed to the material—not from turning every setting to maximum.
More amperage generally increases cutting capacity, but it does not correct every problem. A worn nozzle, weak airflow, incorrect cut height, or excessive travel speed can still prevent full penetration. For thin sheet, a lower-amperage consumable and setting may produce a narrower kerf, less heat, and easier control.
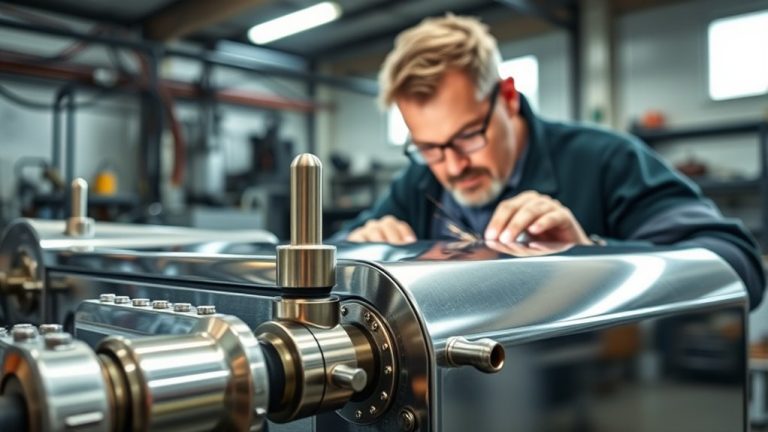
Essential Tools and Equipment for Beginners
Start with a plasma cutter that has a recommended cutting capacity greater than the metal thickness you expect to cut regularly. A machine may be able to sever thicker metal than its recommended rating, but severance cuts are slower and usually need more cleanup.
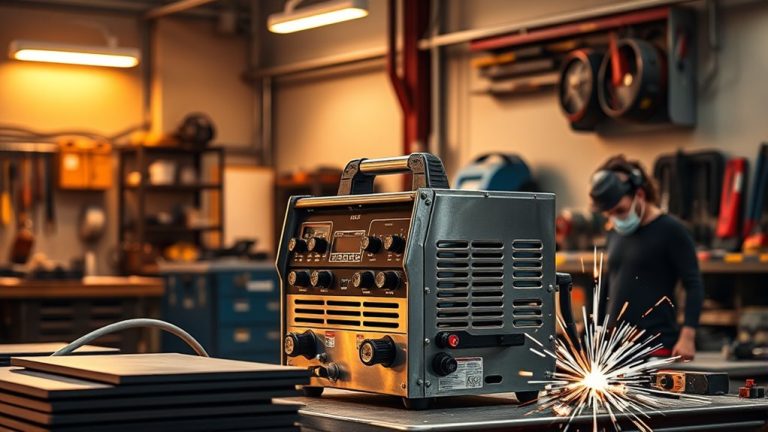
Power Supply and Circuit
Portable plasma cutters commonly use nominal 120-volt, 240-volt, or dual-voltage input in North America. Check the machine nameplate and manual for the required voltage, phase, circuit amperage, breaker, plug, and grounding method. Do not assume that an outlet is suitable because the plug can be adapted to fit.
A long or undersized extension cord can cause voltage drop, poor performance, overheating, or nuisance breaker trips. Use an extension cord only when the manufacturer allows it, and follow the specified conductor size and maximum length.
Air Compressor and Filtration
Some small cutters include a built-in compressor. Others need an external compressor that can deliver the required airflow at the machine’s specified inlet pressure. Compare the cutter’s required CFM or L/min with the compressor’s rated output at that pressure—not only the compressor’s maximum tank pressure.
The air should be clean, dry, and oil-free. Moisture, oil mist, dirt, and rust from an air line can shorten consumable life, damage torch components, and make the arc unstable. Install the water separator, filter, or dryer recommended for your machine, and drain the compressor tank regularly.
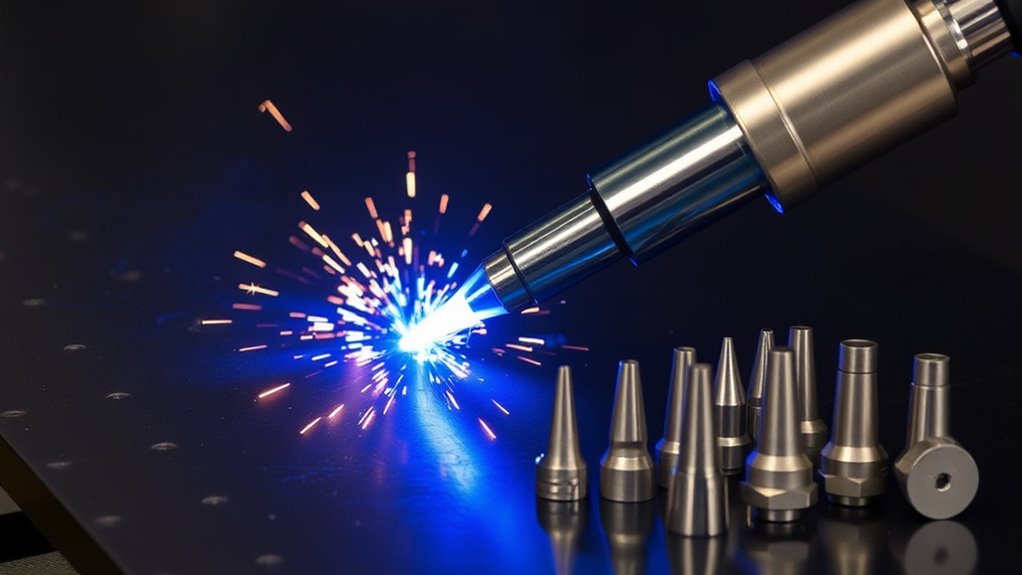
Consumables and Basic Equipment
Consumables shape and control the plasma arc. The electrode, nozzle, shield, retaining cap, and swirl ring must match the torch, amperage, and cutting process. Do not mix parts just because they appear to fit.
Your basic setup should include:
- A plasma cutter with the correct input-power connection
- A clean, dry, oil-free compressed-air source when the machine requires one
- The manufacturer-approved torch and cutting consumables
- A work lead and work clamp
- Spare electrodes, nozzles, shields, and retaining parts
- A stable, nonflammable cutting table or support
- A soapstone marker, scribe, straightedge, or template
- Fire-resistant gloves and clothing
- Impact-rated safety glasses and a plasma-cutting helmet or face shield with an appropriate filter shade
- Hearing protection
- A suitable fire extinguisher that is accessible before cutting begins
- Clean scrap metal for test cuts
Note: Duty cycle tells you how long the cutter can operate under stated conditions before it needs cooling. For example, a 50% duty-cycle rating is commonly expressed as up to five minutes of operation in a ten-minute test period. The actual limit depends on amperage, input power, temperature, and the manufacturer’s rating conditions.
Before You Begin
Estimated total time: A simple straight practice cut may take 10 to 20 minutes when setup, safety checks, the cut, cooling, and cleanup are included. More complex shapes, thicker metal, and equipment adjustments take longer.
Read the plasma cutter manual and locate its cut chart before connecting the torch. The manual identifies approved consumables, input power, air-flow requirements, pressure settings, duty cycle, cut height, pierce height, and rated material thickness.
Complete these checks before the first arc:
- Confirm that the torch trigger, retaining cap, leads, air hose, and work cable are undamaged.
- Make sure all consumables are clean, correctly assembled, and tightened as directed.
- Verify the input circuit and plug configuration.
- Check that the compressor can maintain the required flow and pressure while air is moving through the cutter.
- Drain collected water and inspect the air filter or separator.
- Identify the base metal and any paint, plating, coating, oil, or chemical residue.
- Choose the correct consumables and starting settings from the cut chart.
- Prepare a piece of similar scrap for a test cut.
Warning: Never cut a sealed container, used drum, fuel tank, pressure vessel, pipe, or hollow space that may contain flammable or toxic residue. OSHA requires used containers to be thoroughly cleaned of hazardous material before hot work, with connected lines controlled and hollow spaces vented. This work belongs under a qualified hot-work procedure, not a beginner practice session.
Clean the workpiece before cutting. Remove oil, grease, loose rust, heavy scale, paint, or plating near the cut line when it can be done safely. Plasma may cut through some surface contamination, but coatings can create hazardous fumes and may increase consumable wear or top spatter.
Setting Up Your Workspace for Safe Results

Set up the workspace before energizing the cutter. The area should be dry, well lit, ventilated, and free of combustibles that could be reached by sparks, hot slag, or falling cutoffs.
Use a stable steel cutting table, grate, or other nonflammable support that allows sparks and molten material to fall without striking a floor, hose, power cord, gas cylinder, vehicle, or hidden combustible material. Support both the finished piece and the drop so neither shifts unexpectedly.
Move paper, cardboard, rags, fuel, solvents, sawdust, aerosol cans, batteries, and other flammable items out of the hot-work area. When a combustible object cannot be moved, protect it with a suitable fire-resistant barrier and check both sides of walls, floors, and partitions for hidden exposure.
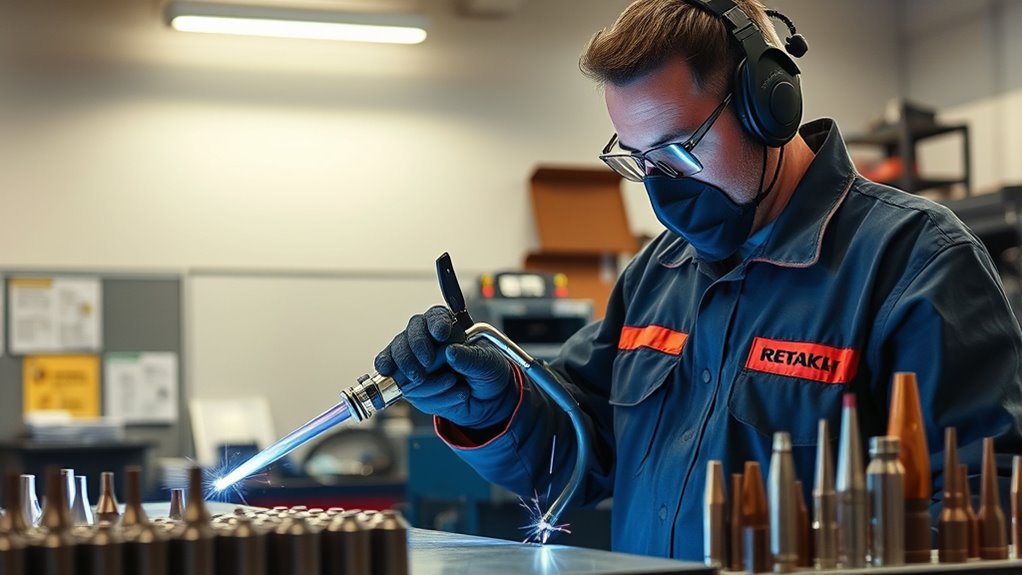
Essential Safety Gear
Wear flame-resistant clothing that covers your arms and legs. Avoid polyester, nylon, and other synthetic fabrics that can melt against the skin. Use leather or flame-resistant gloves, closed leather footwear, and clothing without open cuffs or pockets that can collect sparks.
Wear impact-rated safety glasses with side protection under the helmet or face shield. For U.S. workplaces, OSHA’s eye-protection table lists a minimum protective shade of 8 for light plasma arc cutting below 300 amps when the actual arc is clearly visible. Start with a lens that is dark enough and never go below the applicable minimum. Follow the stricter applicable workplace rule or manufacturer instruction.
Protect your hands with flame-resistant gloves. Wear hearing protection when the noise level is uncomfortable or when required by a workplace assessment. Keep bystanders behind suitable screens and make sure they do not look at the arc without protection.
Proper Ventilation Setup
Plasma cutting can produce metal fumes, fine particles, gases, and smoke. Keep your head out of the fume plume. When possible, use local exhaust or a movable extraction hood close enough to capture fumes near the cut before they enter your breathing zone.
General room airflow or an open door may not control fumes from coated, plated, stainless, galvanized, or unknown metal. Identify the metal and coating before cutting, review available safety information, and use the control method required for that material. Do not use oxygen for ventilation or for blowing dust from clothing or the work area.
Warning: If ventilation does not keep fumes out of your breathing zone, stop cutting. Do not guess which disposable mask, filter, or cartridge will protect you. In a workplace, required respirator use must be based on a hazard evaluation and an OSHA-compliant program that covers selection, medical evaluation, fit testing, training, and maintenance.
Keep chlorinated degreasers, solvent vapors, and chemical cleaners away from the cutting area. Never plasma cut in a confined or enclosed space without a formal confined-space and hot-work plan, mechanical ventilation, atmospheric evaluation, and rescue controls where required.
Work Clamp and Surface Preparation
The clamp on the work lead is commonly called a ground clamp, but its main cutting function is to complete the current path from the workpiece back to the plasma power supply. It does not replace the machine’s protective equipment grounding through an approved power connection.
Attach the work clamp to clean, bare metal on the workpiece whenever practical. Place it reasonably close to the cut and on the section that will remain supported, not on a small drop that may fall away. Remove paint, rust, scale, or oil from the contact point if needed.
Keep the torch lead, work lead, air hose, and power cable away from the spark stream and cutting path. Arrange them so you can move without pulling the torch sideways or tripping.
Steps for Clean and Precise Plasma Cuts
Clean plasma cuts come from a controlled setup and a repeatable technique. Use the following process as a general guide, but let your machine manual and cut chart control the exact settings.
- De-energize the cutter before servicing the torch. Switch the machine off and disconnect input power as directed before removing or replacing torch parts.
- Inspect and assemble the consumables. Check the electrode, nozzle opening, shield, retaining cap, swirl ring, threads, and seals. Replace damaged or badly worn parts and use only the approved combination.
- Prepare and support the workpiece. Mark the cut line, remove harmful contamination where practical, and support both sides so the metal cannot pinch, tilt, or fall unexpectedly.
- Connect and check the air supply. Set the regulator according to the manual while air is flowing if the machine requires a flowing-pressure adjustment. Confirm that pressure remains stable through the test.
- Attach the work clamp. Clamp to clean metal on the supported portion of the workpiece and check the work-lead connections for looseness or damage.
- Select amperage from the cut chart. Match the material, thickness, consumables, and process. Do not exceed the nozzle or cartridge rating.
- Choose drag or standoff technique. Rest a drag-capable shield on the metal only when the torch and installed consumables permit it. Otherwise maintain the cut height shown in the manual or use an approved guide.
- Position the torch square to the plate. Hold it near 90 degrees to the surface for a straight cut unless the procedure calls for a bevel.
- Start at an outside edge when possible. Center the nozzle over the edge and let the arc penetrate fully before beginning forward travel.
- Use the approved piercing method for interior starts. Follow the manual’s pierce-height and torch-angle instructions. On compatible handheld systems, beginning at an angle can direct molten spatter away from the front of the torch before you roll it upright.
- Move at a smooth, controlled speed. Watch through the proper filter lens. The arc and sparks should pass through the bottom of the plate rather than spraying strongly back from the top.
- Finish without stretching the arc. Maintain control through the end of the cut. Do not pull the torch far away while the arc is still attached.
- Allow post-flow and cooling. Let the machine complete its normal air post-flow before switching it off if the manual calls for it. Treat the workpiece, table, slag, and cut edge as hot.
- Inspect and clean the edge. Remove light dross with a file, scraper, chipping tool, or grinder while using the protection required for that tool.
Edge Starts Versus Piercing
An edge start is easier on the nozzle and shield because molten metal can leave the plate instead of being blown back toward the torch. Use an edge start for practice and whenever the cut design allows it.
Interior piercing is harder on consumables. The correct pierce height is usually greater than the normal cut height, and thicker material may require an angled start or another manufacturer-approved method. Never assume that a drag shield may remain pressed against the metal during a pierce.
How to Read the Cut
- Sparks spraying back from the top: You may be moving too fast, using too little power, cutting beyond the machine’s capacity, or losing the main arc.
- A wide kerf and heavy, easy-to-remove bottom buildup: Travel may be too slow, amperage may be excessive, or cut height may be too low.
- A narrow kerf with a hard bead underneath: Travel may be too fast, amperage may be too low, or cut height may be too high.
- A strongly beveled edge: Check torch angle, travel direction, nozzle wear, cut height, and travel speed.
Pro Tip: Make several short cuts on matching scrap. Change only one setting at a time, label each cut, and compare the dross, bevel, kerf, and cut face before moving to the finished part.
Safety Measures and Protective Gear

Plasma cutting combines electricity, compressed gas, intense light, hot metal, fumes, noise, and an arc that can start as soon as the trigger is activated. Safe technique begins before the torch is in your hand.
Electrical and Torch Safety
- Keep gloves, footwear, the work area, and the machine dry.
- Do not touch the torch tip, exposed electrical parts, or the workpiece with bare skin while the system is energized.
- Do not hold a small workpiece in your hand while cutting it.
- Never point the torch toward yourself or another person.
- Keep hands away from the planned cut and from falling drops.
- Turn off and isolate input power as directed before opening the torch or replacing consumables.
- Do not operate a machine with a damaged torch, cable, clamp, plug, enclosure, or safety interlock.
Fire and Explosion Safety
OSHA’s general hot-work requirements state that cutting should occur only in an area that is or has been made fire-safe. Remove combustibles, protect anything that cannot be moved, and keep a suitable extinguisher within reach.
Watch where sparks and hot drops travel. They can pass through grating, cracks, holes, drains, wall openings, or floor penetrations and ignite material that is not visible from the torch position. Inspect the surrounding area after cutting and continue any required fire watch for the period established by the site’s hot-work procedure.
Never cut near fuel, solvent containers, aerosol cans, pressurized cylinders, batteries, or flammable vapor. Do not cut a used tank simply because it looks empty. Residue or vapor can remain explosive.
Fumes and Coatings
Paint, primer, galvanizing, plating, oil, rust inhibitors, and metal alloys can change the fume hazard. Stainless steel, galvanized steel, painted salvage, and unknown scrap deserve extra caution. Identify the material and coating before applying heat.
Use local exhaust when practical. OSHA’s ventilation provisions for welding and cutting describe source-capture systems positioned close to the work and require replacement air to be clean and breathable.
Ordinary dust masks do not protect against every metal fume or gas. Workplace respirator use must follow OSHA’s respiratory-protection requirements when those rules apply.
Safety Disclaimer: This article is for informational purposes only and does not replace hands-on training, your machine manual, a hot-work permit, an exposure assessment, or workplace safety rules. Ask a qualified instructor or safety professional before cutting hazardous materials, sealed containers, unfamiliar coatings, or metal in a confined space.
Maintaining and Troubleshooting Your Equipment
Regular maintenance keeps the arc stable and protects the torch. Begin with the consumables because their condition directly affects arc shape, starting, bevel, and dross.
Consumable and Torch Inspection
Inspect the electrode for wear or an uneven pit. Check whether the nozzle opening is enlarged, oval, nicked, or blocked. Look for cracks, impact damage, heavy spatter, damaged threads, or contaminated seals.
Install parts in the correct order and tighten them only as directed. Keep new and used consumables on a clean surface. Do not apply general-purpose grease to torch parts. Use only the lubricant and amount specified by the torch manufacturer.
Air-System Maintenance
Drain the compressor tank and moisture separator. Replace filters at the required interval and inspect hoses and fittings for leaks. A pressure gauge may look normal when the torch is idle but fall below the required level while air is flowing, so perform the machine’s flowing-pressure check when applicable.
Leads, Clamp, and Cooling
Inspect the torch lead and work cable for cuts, crushed areas, heat damage, exposed conductors, loose fittings, and poor connections. Clean the work-clamp jaws and confirm that they grip firmly.
If the machine stops and shows a temperature or duty-cycle fault, release the trigger, leave the cooling airflow unobstructed, and let the system cool according to the manual. Do not repeatedly reset a thermal fault or block the machine’s vents.
Plasma Cutter Troubleshooting Guide
| Symptom | Likely Causes | Checks |
| Machine will not power on | Wrong input voltage, open breaker, loose plug, damaged cord, or internal fault | Verify the nameplate, circuit, plug, breaker, and fault indicators. Do not open the power supply unless qualified. |
| Air flows but no arc starts | Loose retaining cap, incorrect consumables, worn electrode or nozzle, trigger fault, or pressure fault | Disconnect power, inspect the torch assembly, verify the parts, and read the machine’s indicator code. |
| Pilot arc starts but will not transfer | Poor work-clamp contact, heavy coating at the clamp point, loose work cable, or excessive torch distance | Clamp to clean bare metal, inspect both work-lead connections, and use the approved starting distance. |
| Arc does not cut through | Travel too fast, amperage too low, worn nozzle, low airflow, excessive thickness, or low input power | Compare the setup with the cut chart, inspect the nozzle, check pressure under flow, and test on matching scrap. |
| Heavy, bubbly dross underneath | Travel too slow, excessive amperage, or cut height too low | Increase speed slightly or return amperage and cut height to the cut-chart setting. |
| Small, hard bead underneath | Travel too fast, amperage too low, cut height too high, or worn nozzle | Inspect the nozzle, slow down slightly, and verify amperage and height without exceeding the consumable rating. |
| Cut edge has excessive bevel | Torch not square, worn nozzle, incorrect height, wrong direction, or excessive speed | Hold the torch at 90 degrees, inspect the nozzle, check height, and compare both sides of a test cut. |
| Consumables wear unusually fast | Wet or oily air, excessive pilot-arc use, incorrect piercing, excessive amperage, wrong parts, or poor assembly | Service the air system, verify parts and settings, use edge starts when possible, and follow the approved pierce method. |
| Thermal light or shutdown | Duty cycle exceeded, blocked vents, high ambient temperature, or cooling fault | Stop cutting, keep vents clear, allow the normal cooling cycle, and investigate repeated faults. |
For a detailed explanation of slow-speed dross, high-speed dross, and top spatter, see Hypertherm’s plasma dross troubleshooting guide.
Common Plasma Cutting Mistakes
Most beginner problems come from setup choices that are easy to correct once you know what to inspect.
- Using the wrong consumable stack: Similar-looking parts may have different amperage or process ratings.
- Setting pressure without airflow: Static pressure can appear correct and then collapse when the torch begins flowing air.
- Dragging an unshielded nozzle: Contact can damage the orifice or interrupt the arc when the parts are not designed for drag cutting.
- Piercing too close to the plate: Molten metal can blow back into the shield and nozzle.
- Cutting too fast: The arc trails behind, penetration fails, and a hard bead may form underneath.
- Cutting too slowly: The kerf widens and heavy bottom dross or top spatter may appear.
- Firing the pilot arc unnecessarily: Repeated open-air starts shorten consumable life.
- Using wet or oily air: Contamination can cause unstable starting and rapid wear.
- Clamping to paint or the falling drop: The cutting-current path can become unreliable during the cut.
- Ignoring duty cycle: Repeated thermal shutdowns signal that the machine needs cooling or a lower-demand operating plan.
Pro Tip: Before an important cut, inspect the consumables, drain the air system, clean the clamp point, and make a short test cut using the same metal and thickness.
Common Plasma Cutting Applications
A well-maintained plasma cutter can handle straight cuts, curves, holes, brackets, repair patches, demolition work, bevel preparation, and metal art. The suitable job depends on machine capacity, consumables, cut-quality requirements, ventilation, and operator skill.
Handheld cutters work well for fabrication, farm repair, automotive sheet metal, shop maintenance, and rough shaping. Guides and templates improve repeatability for straight lines, circles, and repeated parts.
Computer numerical control, or CNC, plasma tables automate torch movement. A CNC system also requires correct cut height, pierce height, pierce delay, travel speed, lead-ins, work grounding, fume control, and machine-compatible consumables.
Some systems can cut expanded metal or interrupted surfaces by automatically re-establishing the arc. Check the manual before using this feature because repeated pilot-arc operation can increase consumable wear on machines not designed for it.
Plasma is not the correct process for every material or environment. Do not use it on nonconductive material, unknown chemical containers, pressurized vessels, explosive atmospheres, or confined spaces without the required professional controls.
Tank cutting needs special care because an apparently empty tank can still contain flammable vapor or residue. Do not cut tanks or sealed containers unless a qualified hot-work process has cleaned, isolated, vented, tested, and approved them.
Tips for Better Efficiency and Performance

Better plasma cutting performance comes from small checks that you repeat before every job.
- Start with the cut chart. Use the listed consumables, amperage, pressure, cut height, and speed as the baseline.
- Check air under load. Make sure pressure remains stable while the system is flowing air.
- Keep the torch square. A tilted torch creates a matching angle on the cut face.
- Use a guide. A straightedge, circle guide, or template reduces wandering and grinding.
- Support the drop. Prevent it from tipping into the torch or pulling the work-clamp connection away.
- Plan the cut order. Cut small internal features before releasing the outside profile when doing so keeps the part stable.
- Use edge starts when possible. They reduce the molten blowback associated with piercing.
- Do not overuse amperage. Match the setting to the installed consumable and job rather than running maximum output by habit.
- Replace worn parts as a set when required. A damaged nozzle paired with a fresh electrode can still produce a poor arc.
- Record successful settings. Note the machine, material, thickness, consumables, pressure, amperage, and result for repeat jobs.
Hypertherm’s guide to common plasma cutting mistakes also emphasizes correct consumables, stable gas flow, proper piercing, torch height, and travel speed.
Frequently Asked Questions
How do plasma cutting and laser cutting differ in precision?
Laser cutting commonly produces a narrower kerf, smaller heat-affected area, and finer detail on thin material when the equipment is properly configured. Plasma cutting is often more practical for fast fabrication and repair cuts on conductive plate and sheet. Actual accuracy depends on the machine, material, motion system, torch height, settings, and operator.
Can you use a plasma cutter on painted or coated surfaces?
A plasma cutter may cut through some paint, rust, or plating, but the coating can create hazardous fumes, increase top spatter, and interfere with the work-clamp connection. Identify the coating first, remove it near the cut when safe, use effective ventilation, and clamp to clean bare metal.
What are the environmental impacts of plasma cutting?
Plasma cutting uses electricity and compressed gas and can produce fumes, fine particles, noise, used filters, worn consumables, and metal scrap. Reduce waste by using correct settings, maintaining the air system, extending consumable life, capturing fumes, separating clean scrap, and following local recycling and disposal rules.
How do you dispose of plasma cutting consumables?
Allow used parts to cool and keep them out of general loose debris. Follow local waste and metal-recycling rules for copper-bearing, brass, or other consumables. Parts contaminated with paint, plating, oil, or hazardous residue may need different handling than clean metal.
Do you need certification to operate a plasma cutter?
A private home user may not need a general plasma-cutting certificate, but local laws, rental agreements, insurance terms, schools, employers, unions, and job sites can require training or authorization. Workplace hot-work, PPE, ventilation, fire-prevention, and respirator rules still apply where relevant.
Why does your plasma cutter leave so much dross?
Dross can come from travel speed, amperage, cut height, worn consumables, unstable air, or the material itself. Heavy, bubbly dross often points to slow travel or too much heat. A small, hard bead often points to fast travel, low amperage, or excessive height. Test one adjustment at a time.
What air pressure should you use for plasma cutting?
There is no universal pressure. Use the inlet-pressure and airflow requirements in your cutter manual. Some machines regulate torch pressure automatically, while others require adjustment during an air-flow test. The compressor must maintain the required CFM or L/min at the specified pressure.
Should you drag the plasma torch or hold it above the metal?
Use drag cutting only with a shield and consumable combination designed for contact with the workpiece. Other tips require a controlled standoff. The manual or cut chart determines the proper technique, cut height, and pierce height.
Can a plasma cutter cut rusty metal?
It can often cut through surface rust because the underlying metal is conductive. Heavy scale may reduce cut quality, and the work clamp still needs clean bare-metal contact. Remove loose rust and identify any coating or contamination before cutting.
Conclusion
Plasma cutting becomes easier when you treat it as a controlled process instead of a test of maximum power. Verify the circuit and air supply, use the correct consumables, clamp to clean metal, follow the cut chart, control fumes and sparks, and begin with an edge start on scrap. Inspect each test cut before changing one setting at a time. These habits produce cleaner edges, reduce grinding, protect the torch, and help you work more safely.
Sources
- OSHA 29 CFR 1910.133 — Eye and Face Protection — filter-shade and impact-protection requirements.
- OSHA 29 CFR 1910.252 — Welding and Cutting General Requirements — fire-safe work areas and used-container precautions.
- OSHA 29 CFR 1926.353 — Ventilation and Protection in Welding, Cutting, and Heating — mechanical ventilation and source-capture guidance.
- OSHA 29 CFR 1910.134 — Respiratory Protection — hazard assessment, respirator selection, fit testing, and workplace program requirements.
- Hypertherm — 10 Common Plasma Arc Cutting Mistakes — consumables, gas flow, piercing, standoff, and travel speed.
- Hypertherm — Troubleshooting Too Much Dross — causes and corrections for low-speed dross, high-speed dross, and top spatter.