Disclosure: As an Amazon Associate, we earn from qualifying purchases. If you click a link on this page and make a purchase, we may receive a small commission at no extra cost to you.
Removing factory spot welds can slow down a panel repair if your bit walks, overheats, or cuts too deep. The Spot Weld Cutter is made to help you separate spot-welded panels with more control than a standard drill bit. Its 3/8-inch double-sided rotary cutter, high-speed steel construction, and included replacement blades make it useful for auto body work, scrap removal, and light metalworking. This review helps you decide if it fits your drill setup, repair style, and need for clean panel separation.
Quick Verdict
Rating: Recommended with caveats
Best For: DIY auto body repairs, panel separation, and light metalworking where you need a 3/8-inch spot weld cutter for use with a standard drill.
Bottom Line: This cutter is a practical option if you want a simple tool for drilling through spot welds without tearing up the whole panel. The main tradeoff is that blade life depends on your drill speed, pressure, material thickness, and how carefully you center each cut.
| Specification | Detail |
|---|---|
| Product type | Spot weld cutter for panel separation |
| Cutter size | 3/8-inch cutting blade |
| Blade design | Double-sided heavy-duty high-speed rotary blade |
| Material | High-speed steel, based on the source article |
| Arbor size | 1/4-inch standard size arbor |
| Compatibility | Designed for use with common drills, including cordless drills when the drill can hold the arbor securely |
| Supported materials | Article-supported use on iron, alloy steel, and spot-welded metal panels |
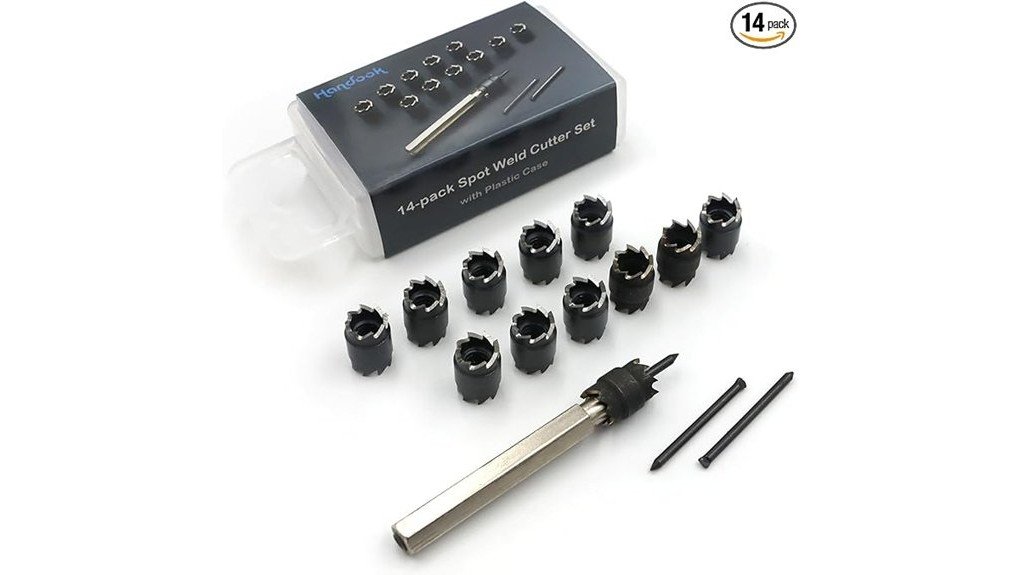
| Included accessories | 11 replacement blades |
| Best use | Automotive panel repair, spot weld removal, scrap removal, and metalworking projects |
| Care note | Clean the blades after use and store them dry to reduce corrosion and dulling |
What Is the Spot Weld Cutter?
The Spot Weld Cutter is a drill-mounted cutter designed to remove spot welds during automotive repair and metalworking. Instead of drilling a full hole through both layers of metal, the cutter is meant to cut around the spot weld so you can separate panels with less distortion.
The key article-supported details are the 3/8-inch cutting blade, double-sided rotary design, high-speed steel construction, 1/4-inch arbor, and 11 replacement blades. Those details make it better suited to controlled panel separation than a general-purpose twist bit, especially when you want to preserve the lower panel.
This tool is most useful when you are working on body panels, brackets, scrap sections, or welded sheet metal where clean separation matters. It still requires steady pressure, correct drill speed, and careful centering, so it is not a shortcut for poor prep or unsafe drilling habits.
Before You Buy: The source article does not provide a named brand, warranty term, exact drill-speed range, or confirmed manufacturer details. Check the current Amazon listing photos and description before ordering, especially if you need a specific brand, warranty, or kit layout.
Who Should Buy It?
Best For
- DIY auto body users who need to separate spot-welded panels without using a full-size cutting wheel.
- Garage and workshop users who want a 3/8-inch cutter with replacement blades included.
- Metalworking projects involving iron, alloy steel, or scrap panel removal.
Skip If
- You need a verified name-brand cutter with a clearly stated warranty from the manufacturer.
- You want a complete panel-removal kit with clamps, pry tools, center punches, or protective cases.
- You are working on heavy structural steel that requires a more specialized cutting setup.
Key Features and Benefits
The main feature is the 3/8-inch double-sided rotary blade. A cutter this size works well for many common spot welds because it removes material around the weld instead of drilling a wide hole through the entire panel stack.
The article describes the cutter as made from high-speed steel, which is a common material for cutting tools because it can handle friction better than softer steel. You still need to control heat. Too much drill speed, too much pressure, or cutting without pauses can dull the blade faster.
The 1/4-inch arbor is useful because it fits many standard drills. That makes the tool easier to use in a home garage, but the drill chuck must grip the arbor securely. If the cutter wobbles or slips, it can chatter, walk off the weld, or damage the top panel.
Materials and Build Quality
For a spot weld cutter, build quality matters because the blade has to stay sharp enough to cut the top layer while staying centered on the weld. The article-supported high-speed steel construction is a good sign for normal repair use, especially when you work slowly and avoid overheating the cutter.
The double-sided blade design can also help extend use because you can turn to the other side when one side becomes dull, depending on the blade design and condition. The included replacement blades add value for projects with multiple welds, since panel removal can dull cutters quickly when the welds are hard, dirty, painted, or rusty.
Fit and Drill Compatibility
This cutter is built around a 1/4-inch standard arbor, so it should fit many common corded and cordless drills. A cordless drill can work if it has enough torque and a chuck that holds the arbor firmly. A drill with variable speed is better because it gives you more control when starting the cut.
Before you start, tighten the chuck fully and check that the cutter spins straight. If the blade runs off-center, stop and reseat it. A small wobble can turn into a rough cut once the blade touches the panel.
Pro Tip: Mark the center of each spot weld and use a center punch before drilling. This helps the cutter stay in place and lowers the chance of skating across painted or curved sheet metal.
Ease of Use
The cutter is simple in concept: center it over the spot weld, apply steady pressure, and cut the upper layer until the panel separates. In practice, the result depends on your prep. Paint, seam sealer, rust, and undercoating can hide weld edges and make the cutter harder to control.
For cleaner work, expose the spot weld first, mark it clearly, and keep the drill square to the panel. Let the cutter do the work. Pushing too hard can overheat the blade, bend thin sheet metal, or cut deeper than needed.
How It Performs in Real Use
For Auto Body Panel Removal
This cutter makes the most sense for removing spot welds on body panels, patch sections, brackets, or donor panels. The 3/8-inch blade gives you a controlled cutting area, which can help preserve the backing panel when you do not want to drill all the way through both layers.
For Scrap and Parts Separation
When you are breaking down scrap metal or removing a damaged panel, speed and control both matter. The cutter can help you separate weld points more neatly than grinding through a seam, especially when you need to save one panel for reuse or measurement.
For DIY Garage Repairs
For DIY users, the biggest advantage is that the cutter works with common drills rather than a specialized machine. The included replacement blades also help if you are learning, since beginners may dull a blade faster while finding the right pressure and angle.
For Longer Projects
On a project with many welds, blade care becomes more important. Stop when cutting performance drops, inspect the blade, and replace it when it starts to chatter, smoke, or require heavy pressure. Forcing a dull blade can damage the panel and make the next weld harder to remove.
How to Use It Correctly
Start by cleaning the area so you can see the spot welds clearly. Use a wire brush, abrasive pad, or light sanding to remove paint and surface rust around the weld. Mark the center point before drilling.
Keep the drill straight and start slowly. Once the cutter has made a clean track, use steady pressure instead of forcing it. Your goal is to cut the upper layer around the weld, not drill a large hole through every layer of metal.
After cutting, use a panel separator, thin chisel, or appropriate pry tool with care. If the panel does not release, do not keep prying harder. Recheck the weld and cut a little more if needed.
Compatibility and Safety
This cutter is intended for metalworking and automotive repair, so eye protection is not optional. Wear safety glasses or a face shield because metal chips can come off quickly. Gloves can help protect your hands from sharp panel edges, but keep loose glove material away from spinning tools.
Do not use the cutter near fuel lines, wiring, upholstery, or flammable materials unless the area has been properly cleared and protected. If you are working on a vehicle, inspect both sides of the panel before drilling so you do not cut into hidden parts.
Because the article does not list certifications or a warranty period, check the current product listing before you buy. If you need a tool for professional collision work, compare this cutter with known shop-grade options before relying on it for daily use.
Maintenance and Blade Care
Clean the blades after use and remove metal chips before storage. A dry storage area helps reduce corrosion, especially if the tool is used around old body panels, moisture, or shop dust.
Inspect the cutting teeth before each use. Replace the blade if it is chipped, heavily dulled, bent, or cutting unevenly. A sharp blade is safer and easier to control than one that needs extra force.
Pros and Cons
Pros
- 3/8-inch cutter size works for many common spot weld removal jobs.
- Double-sided rotary blade design supports controlled cutting around the weld.
- High-speed steel construction is suitable for normal metalworking use when handled correctly.
- 1/4-inch arbor fits many standard drills.
- Includes 11 replacement blades, which helps on multi-weld projects.
Cons
- Brand, warranty, and manufacturer details are not stated in the source article.
- Blade life can vary based on drill speed, pressure, material hardness, and user technique.
- Not a full panel-removal kit, so you may still need a center punch, pry tool, clamps, and safety gear.
Is It Worth the Price?
This spot weld cutter looks like a value-focused tool because it includes the cutter setup and 11 replacement blades. That makes it worth considering if you need to remove several spot welds and do not want to buy replacement blades right away.
You get the most value from it if you do occasional garage, restoration, or DIY auto body work. If you remove panels every day in a professional shop, you may want to compare it with higher-end cutters that clearly list brand support, warranty terms, and replacement-part availability.
How It Compares to Alternatives
Compared with a standard twist drill bit, this cutter is better for preserving the lower panel because it is designed to cut around the weld rather than bore through the whole stack. Compared with grinding through a seam, it can be cleaner and more controlled, but it requires accurate centering.
Specialty spot weld drill bits, Blair-style cutters, and pneumatic panel tools may be better for professional daily use. This Spot Weld Cutter makes the most sense if you want a simple drill-mounted option with multiple replacement blades included.
Frequently Asked Questions
Can this spot weld cutter be used with a cordless drill?
Yes, the article states that it can work with cordless drills. Make sure your drill can hold the 1/4-inch arbor tightly and has enough control to start the cut slowly.
What size is the cutting blade?
The cutting blade is listed as 3/8 inch. That size is useful for many common automotive spot welds, but you should still check the weld size and panel shape before cutting.
How many replacement blades are included?
The article states that the cutter comes with 11 replacement blades. Check the current Amazon listing before buying because package contents can vary by seller or listing update.
Will it cut through both panels?
It can cut too deep if you use too much pressure or drill for too long. The goal is usually to cut the top layer around the spot weld so the panels can separate with less damage to the lower layer.
Is it beginner-friendly?
It can be beginner-friendly if you practice on scrap metal first. You need to center the cutter, control drill speed, and stop before cutting too far into the lower panel.
How do you keep the blade from walking?
Clean the weld area, mark the center, and use a center punch before drilling. Start at a slower speed so the cutter can establish a track before you apply more pressure.
What materials can it be used on?
The source article mentions use on iron, alloy steel, and spot-welded panels. For thicker, hardened, or structural materials, compare the job with the tool’s current listing and use the proper cutting method.
Who should skip this cutter?
Skip it if you need a verified brand-name tool with stated warranty coverage, a complete body-panel removal kit, or a shop-grade cutter for heavy daily use. It is better suited to targeted spot weld removal with a compatible drill.
The Bottom Line
The Spot Weld Cutter is a sensible choice if you need a 3/8-inch drill-mounted cutter for removing spot welds in DIY auto body or light metalworking projects. Its biggest strengths are the high-speed steel cutter design, 1/4-inch arbor compatibility, and 11 replacement blades, while its main limitation is the lack of verified brand, warranty, and manufacturer detail in the source article. Skip it if you need a fully documented professional tool, but consider it if you want a practical cutter for occasional panel separation.