
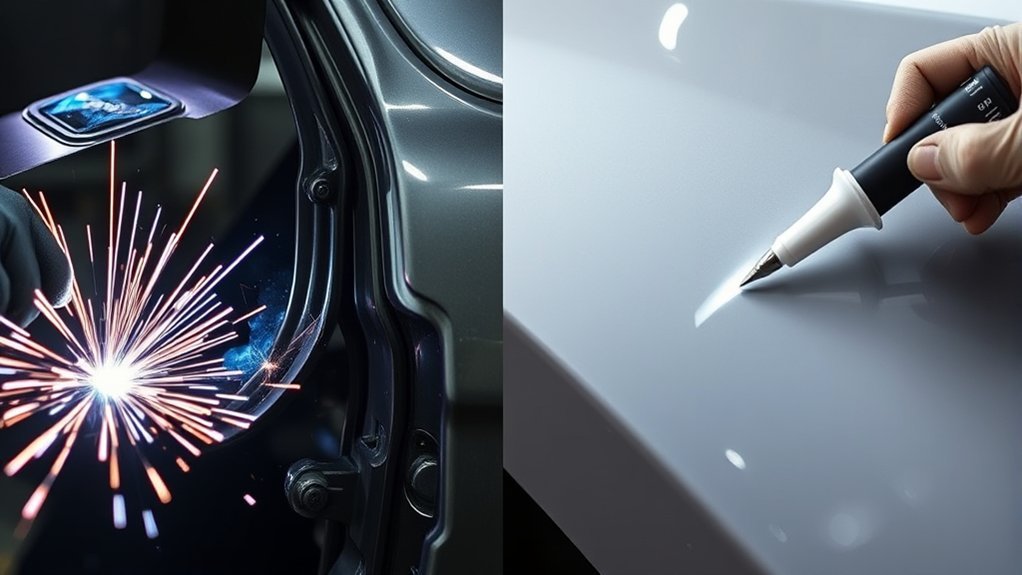
When comparing welding vs. adhesive bonding for auto body repair, the correct choice depends on the exact vehicle, panel, material, joint, and crash-load path. Welding creates a fused metal joint, while approved panel adhesives spread force across a flange and avoid much of the heat distortion caused by welding. Before using either method, identify the vehicle by VIN and follow the current model-specific body repair procedure.
Quick Answer
Use welding when the vehicle maker requires a fused joint on structural steel, a bracket, or another load-bearing area. Use an approved panel adhesive on outer panels, flanges, or mixed-material joints only where the repair procedure permits it. Never replace an OEM-required weld, rivet, or structural adhesive with ordinary panel adhesive.
Key Takeaways
- The OEM procedure decides the method. Verify the VIN, model year, body style, material, panel location, adhesive, fastener, weld type, and corrosion steps before cutting or joining anything.
- Welding is commonly required for structural steel joints, brackets, reinforcements, and locations that need an approved fused connection.
- Panel bonding adhesive is mainly used on approved outer panels, hem flanges, wide overlaps, and some mixed-material joints.
- Panel adhesive and structural adhesive are not interchangeable. Use only the product named or approved for the exact repair.
- Both methods require process control, corrosion restoration, PPE, ventilation, fire protection, and a documented final inspection.
At a Glance
| Decision Authority | The current OEM repair procedure for the exact VIN, model year, body style, panel, and material. |
| Best Use for Welding | Structural steel joints, brackets, reinforcements, and repairs that specify resistance spot welds, MIG/MAG plug welds, butt welds, or another approved heat-based process. |
| Best Use for Panel Adhesive | Approved door skins, roof skins, outer quarter panels, box sides, hem flanges, wide overlaps, and selected mixed-material joints. |
| Hybrid Joining | Weld bonding, rivet bonding, or adhesive plus approved mechanical fasteners when the repair manual specifies the complete system. |
| Main Failure Risk | Welding can overheat, weaken, warp, or burn through a panel. Adhesive can fail from the wrong product, poor preparation, contamination, incorrect bond-line thickness, movement, or incomplete cure. |
Warning: Never choose a joining method from a strength number, online demonstration, or product label alone. Repairs involving rails, pillars, rockers, strut towers, seat-belt anchors, airbag areas, battery structures, or other crash-load parts require the exact vehicle-maker procedure and trained collision-repair personnel.
Welding vs. Adhesive Bonding: Key Differences
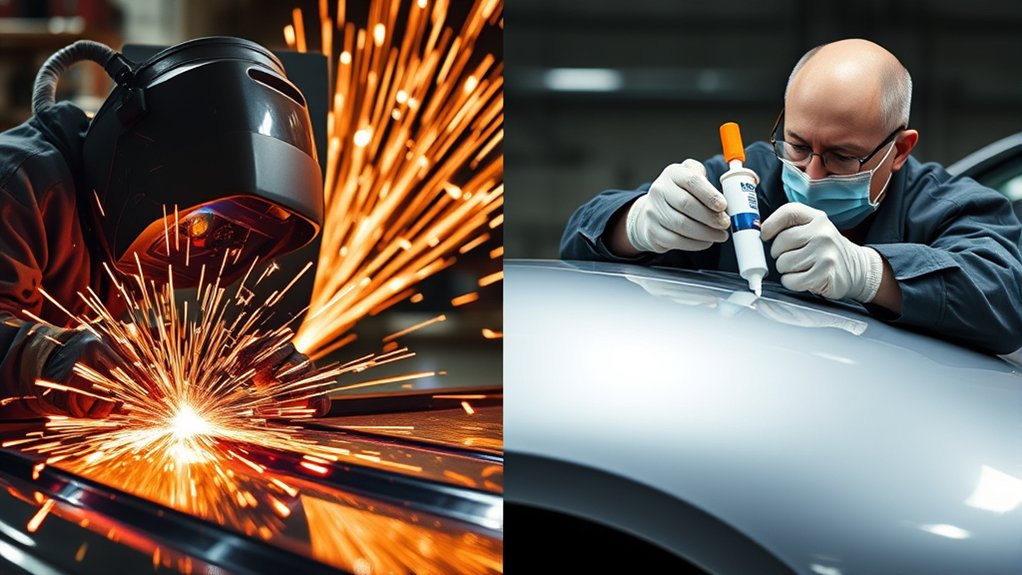
Fusion welding melts part of the base metal to form a joint. Auto body procedures may call for MIG/MAG plug welding, MIG/MAG butt welding, TIG welding in limited applications, or squeeze-type resistance spot welding. The approved process depends on the metal grade, panel thickness, access, joint design, and vehicle maker.
MIG brazing is related but different. It melts a lower-temperature filler metal while limiting how much of the base metal melts. It should be used only where the repair manual specifies it.
Adhesive bonding joins prepared surfaces with a two-part product that cures into a solid bond. The load is spread across the bonded flange instead of being concentrated only at individual weld nuggets or fasteners.
The largest practical difference is heat. Welding can create a heat-affected zone, panel distortion, burn-through, damaged coatings, and changes in high-strength steel. Adhesive bonding uses little or no joining heat, which helps preserve the shape of thin outer panels and can seal the joint when the product is applied correctly.
Adhesive bonding has different risks. The finished bond line is hidden, so the technician must control surface preparation, product selection, cartridge mixing, bond-line thickness, assembly time, clamping, fasteners, temperature, and cure before the joint is closed.
Products Worth Considering
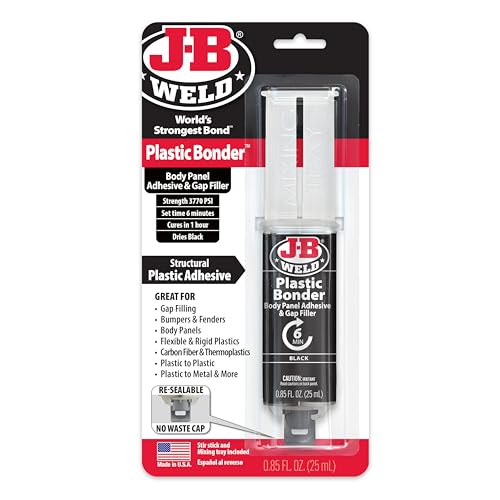
Plasticbonder: Is A Quick-Set, 2 Part, Urethane Adhesive System That Provides Strong, Lasting Repairs And Works On Thermoset, Carbon Fiber Composites, Thermoplastics, Coated Metals, Concrete & More.

OEM Recommended Auto Adhesive – Professional two-part epoxy designed for bonding auto body panels; trusted by OEMs for non-structural repairs like quarter panels, roofs, and door skins.

Two-Part Urethane Adhesive: Used to bond steel and aluminum for automotive applications including quarter panels, roofs, box sides, van sides, utility vehicle sides and door skins
Verify the OEM Repair Procedure First
“Follow the OEM procedure” means more than looking up the vehicle make. Repair information can change by model year, body style, production date, powertrain, panel, material, and exact joint location.
Before selecting welding, adhesive bonding, or a hybrid method, verify:
- the full VIN, model year, body style, and powertrain;
- the exact replacement panel and part number;
- whether the part is mild steel, high-strength steel, ultra-high-strength steel, aluminum, SMC, FRP, or another material;
- whether the part is structural, cosmetic, or attached to a structural member;
- the approved sectioning location, if sectioning is permitted;
- the required weld type, weld count, weld spacing, rivet, fastener, or adhesive;
- the approved adhesive part number and whether it is a panel or structural adhesive;
- required surface preparation, weld-through coating, primer, seam sealer, and cavity wax;
- SRS depowering, high-voltage disabling, scan, measurement, and calibration requirements.
Automakers may approve different attachment methods in different parts of the same panel. One flange may be bonded, another riveted, and a third welded. A replacement procedure may also differ from the way the panel was joined at the factory.
Lincoln’s current structural fastener and adhesive position statement, for example, requires approved adhesives, location-specific fasteners, proper mandrels, approved tools, and exact installation procedures. It warns that deviations can affect structural integrity and vehicle safety systems. Review Lincoln’s October 2025 position statement.
Note: If the repair information is missing, unclear, or contradictory, stop and obtain clarification from the automaker or its technical-information service. Do not create a substitute procedure from a similar model.
Panel-Bonding Adhesive vs. Structural Adhesive
Not every two-part adhesive serves the same purpose. Product names can sound similar even when the approved uses are very different.
- Panel-bonding adhesive is commonly intended for approved outer-body, nonstructural panel attachment, such as door skins, roof skins, box sides, and sections of quarter panels.
- Impact-resistant structural adhesive is designed for specified structural joints and crash-energy applications. It must still be named or approved by the vehicle maker for the exact repair.
- Seam sealer closes seams against water, dust, fumes, and corrosion. It is not a substitute for a load-carrying adhesive.
- Ordinary hardware-store or general industrial epoxy is not an approved collision-repair adhesive unless the vehicle maker specifically identifies it.
For example, the 3M 08115 U.S. technical data sheet describes that product primarily for outer-body, nonstructural panel attachment. It says structural parts such as pillars, rockers, towers, frame rails, and frame members require specific vehicle-maker approval and use exactly as directed.
Honda also lists standard panel adhesives and impact-resistant structural adhesives as separate applications in its September 2024 sealer and adhesive bulletin. Product category, part number, working time, and repair location all matter.
Warning: A product’s lap-shear strength does not prove that it can replace a weld, rivet, or OEM structural adhesive. Crash performance also depends on peel resistance, impact behavior, joint shape, flange width, substrate, fasteners, temperature, and the surrounding body structure.
Products Worth Considering

J-B Weld AutoWeld is a high-strength, impact-resistant automotive adhesive, filler & sealer. AutoWeld dispenses in a 1:1 mix ratio, sets in 15 minutes, and can be sanded and painted in 30 minutes. Once cured, AutoWeld has a strength of 3770 PSI

Two-part epoxy used to bond steel, aluminum, SMC, and FRP (traditional fiberglass)

Two-Part Urethane Adhesive: Bonds steel and aluminum for automotive collision repair applications including quarter panels, roofs, box sides, van sides, utility vehicle sides and door skins
Strength and Durability: Which Method Lasts Longer?
Neither method is automatically stronger or more durable in every repair. The correct joint is the one designed and validated for that location.
A weld can carry high local loads when the weld size, penetration, spacing, wire, equipment settings, and heat input are correct. A bonded joint can carry substantial load across a wide overlap when the adhesive, substrate, bond line, surface preparation, and cure are correct.
Joint design matters as much as product strength. Adhesives usually perform best when force acts across a broad overlap in shear. They are more vulnerable where an exposed edge is pulled apart in peel or cleavage. Welds concentrate load at individual nuggets or beads but may be required where there is little bonding area or where a fused connection is part of the crash design.
Welded Joint Durability
Welded joints are often required for load-bearing steel parts, brackets, reinforcements, and sectioning joints. A correct weld can restore a strong metal connection, but the process must match the steel grade and joint.
Excess heat can warp a thin panel, cause burn-through, enlarge the heat-affected zone, damage nearby adhesive or coatings, and reduce the properties of some high-strength steels. Heat control is especially important on modern body structures that combine several steel strengths in one assembly.
Honda’s September 2025 welding and sectioning guidance shows why generic welding advice is unsafe. Its approved methods change with steel tensile strength. MAG butt welding is approved there only through 780 MPa steel, while plug and spot-weld permissions have their own limits and model-specific conditions.
Welding also removes or damages protective coatings. The finished joint needs the exact post-weld primer, seam sealer, undercoating, and cavity protection required by the repair procedure.
Adhesive Bond Longevity
A properly designed adhesive joint can last for the remaining service life of a vehicle, but only if the correct product is applied to correctly prepared surfaces and allowed to cure under the specified conditions.
Do not use one universal cure-time rule. Work time, clamp time, handling strength, paint time, and full cure are different milestones. They also change by product and temperature.
For one product-specific example, 3M’s U.S. data for 08115 lists a 90-minute work time, four-hour clamp time, and 24-hour cure at 73°F. Those numbers do not apply to every panel adhesive.
Cold metal and cold adhesive can slow strength development and make the product harder to dispense. Excessive heat can shorten working time or damage nearby materials. Follow both the adhesive technical data and the vehicle repair procedure before removing clamps, grinding, painting, moving, or returning the vehicle to service.
When to Use Welding on Auto Body Panels
Use welding when the repair procedure requires a fused metal connection or identifies an approved welding process. Typical examples include:
- structural steel parts and reinforcements;
- brackets, mounts, tabs, and small high-load joints;
- plug welds used to replace specified factory spot welds;
- approved sectioning joints;
- areas that do not provide enough overlap for an adhesive bond;
- locations exposed to temperatures beyond an adhesive’s service limits.
The repair procedure must also identify where welding is prohibited. Ultra-high-strength steel may have strict limits on sectioning, straightening, heat, butt welding, and plug welding. Do not assume that a weld process approved for mild steel is acceptable on 980 or 1,500 MPa steel.
Weld Setup, Testing, and Inspection
A weld that looks smooth is not automatically strong. Before welding the vehicle, set up and test the equipment using material that matches the repair panel as closely as possible in metal type, coating, thickness, layer count, and joint design.
Depending on the procedure and equipment, quality control may include:
- checking welder power, grounding, gas flow, wire type, electrode condition, and arm pressure;
- making test welds on matching coupons;
- performing the required peel or destructive test;
- confirming resistance-spot-weld nugget size and separation behavior;
- checking plug-weld hole size, fill, fusion, and backside evidence where visible;
- inspecting for porosity, cracks, undercut, burn-through, excessive reinforcement, and missed welds;
- recording test results when required by the repair plan or certification program.
Visual inspection remains useful, but it is only one part of weld verification. A hidden spot weld or plug weld can look acceptable at the surface and still have poor fusion.
Pro Tip: Complete the test welds before the replacement panel blocks access. Changing an electrode, wire, gas, extension cord, machine setting, panel stack, or ground location may require another setup check.
When to Use Adhesive Bonding on Auto Body Panels
Use panel bonding adhesive only when the vehicle procedure and adhesive instructions allow it. Common approved applications may include:
- door skins and hem flanges;
- roof skins and selected roof flanges;
- outer quarter-panel flanges and approved partial-panel areas;
- box sides, van sides, and other large outer skins;
- thin sheet metal where welding heat would cause distortion;
- selected steel-to-aluminum or metal-to-composite joints;
- joints where a continuous adhesive layer also supports corrosion sealing.
Many panels still require welds or fasteners at selected edges, corners, structural intersections, belt lines, sail panels, or vertical seams. Approval to bond part of a panel does not mean the entire panel can be glued in place.
Panel-Bonding Workflow
The following sequence explains the main process controls. It does not replace the vehicle or adhesive instructions.
- Confirm the repair plan. Verify the vehicle, panel, substrate, adhesive, fasteners, weld locations, corrosion products, curing conditions, and safety steps.
- Check the product. Confirm the part number, expiration or best-before date, storage condition, cartridge condition, applicator, and correct mixing nozzle.
- Dry fit the panel. Check gaps, body lines, clamp access, rivet locations, weld access, and fixture points before opening the cartridge.
- Prepare only the specified surfaces. Remove paint, rust, sealer, or e-coat only where instructed. Use the required abrasive and avoid polishing the metal smooth.
- Clean correctly. Remove dust and contamination with the product-approved cleaner and method. Do not touch prepared bonding surfaces with bare hands.
- Equalize the cartridge. Dispense material without the nozzle until both components flow correctly, then install the approved mixer.
- Purge the mixer. Discard the amount required by the adhesive instructions so unmixed or poorly mixed material does not enter the joint.
- Wet out the prepared metal. Where instructed, spread a thin layer over all exposed bonding surfaces before adding the assembly bead.
- Apply the final bead. Use the specified bead size and location. Keep adhesive out of areas that must be welded unless the exact process permits welding through it.
- Assemble within the work time. Install the panel without wiping the bond line away. Add the specified rivets, screws, welds, or temporary fasteners.
- Clamp evenly. Use enough pressure to seat the panel without squeezing out so much adhesive that the joint becomes starved.
- Inspect the squeeze-out. A continuous witness bead helps show that the flange has adhesive coverage. Tool the exposed bead where the instructions use it to seal the edge.
- Observe the cure schedule. Record the shop and panel temperature when needed. Do not remove clamps, stress the panel, grind, paint, or return the vehicle to service early.
- Restore corrosion protection. Apply the required primer, seam sealer, cavity wax, undercoating, and backside protection after the joint reaches the required stage.
Pro Tip: Keep a small amount of properly mixed adhesive as a cure sample when the product or repair procedure allows it. The sample can help confirm that the material mixed and hardened, but it does not prove that hidden surfaces were clean or that the joint has the correct bond line.
Ease of Use: Is Adhesive Bonding Simpler?
Adhesive bonding may look simpler because there is no arc, shielding gas, filler wire, or visible heat input. In practice, the quality of the joint depends on a long chain of preparation and timing steps.
| Step | Why It Matters |
|---|---|
| Identify the correct adhesive | A panel adhesive, structural adhesive, seam sealer, and ordinary epoxy have different approved uses. |
| Clean and abrade as directed | Paint, rust, oil, wax, dust, fingerprints, and the wrong scratch pattern can weaken adhesion. |
| Equalize and purge the cartridge | Two-part products need the correct ratio and a uniform mix throughout the bead. |
| Control the bond line | Too little adhesive can starve the joint. Too much can prevent correct fit or interfere with other joining steps. |
| Clamp without moving the panel | Movement during early cure can disturb the hidden bond line. |
| Wait for the required cure stage | Work time, clamp time, handling strength, paint time, and full cure are not the same. |
For DIY work, adhesive bonding is most realistic on a clearly nonstructural cosmetic repair for which both the vehicle procedure and product instructions permit bonding. Many professional panel adhesives are labeled for industrial or occupational use and require trained selection, ventilation, PPE, and process control.
Aesthetic Quality: How Do the Finished Joints Compare?
A bonded outer panel can require less heat-straightening and grinding because there is no continuous weld bead along the bonded flange. That can help preserve the shape of a large, thin roof skin, door skin, or quarter panel.
A welded seam can also finish well when the technician controls heat, spaces welds correctly, allows cooling, planishes only where appropriate, and grinds without thinning the surrounding sheet metal.
Neither method guarantees a better paint finish. Poor panel fit, excess adhesive, a raised flange, over-ground welds, stretched metal, trapped corrosion, or missed seam sealer can show through the final repair.
Joint Appearance and Finish
Adhesive should remain within the intended flange except for the controlled squeeze-out used as a witness or edge seal. Cured adhesive smeared onto an exposed finish area can be difficult to remove without damaging the panel.
Weld grinding must be equally controlled. Grinding a plug weld completely flat can remove surrounding base metal and weaken the panel. Follow the finish level required by the repair procedure rather than grinding until all evidence of the weld disappears.
Surface Imperfections, Repairability, and Later Removal
Welded panels may be removed by drilling spot welds, cutting plug welds, or separating an approved sectioning joint. Bonded panels usually require mechanical separation and an OEM-approved removal method.
Some adhesives soften with controlled heat, but heat limits are product- and vehicle-specific. Unapproved heating can damage adjacent adhesive, paint, foam, wiring, SRS parts, high-strength steel, or high-voltage components. It can also create hazardous fumes.
Do not assume a bonded panel is easier or harder to replace in every case. Access, flange design, corrosion, fasteners, adhesive type, and nearby materials control the removal process.
Cost Comparison: Is Adhesive Bonding Cheaper Than Welding?
Adhesive bonding may reduce welding, grinding, and metal-finishing time on an approved outer panel. It may also prevent heat damage to nearby parts that would otherwise need removal.
Its costs can include:
- the approved adhesive cartridge;
- single-use mixing nozzles;
- the correct applicator;
- cleaners and abrasives;
- clamps, rivets, or temporary fasteners;
- temperature control and cure time;
- primer, seam sealer, cavity wax, and refinishing materials.
Welding costs can include:
- approved welding equipment and power supply;
- wire, electrodes, gas, tips, and consumables;
- test coupons and destructive testing;
- PPE, fume control, fire protection, and fire-watch labor;
- grinding and metal finishing;
- primer, seam sealer, cavity wax, and refinishing materials.
The least expensive acceptable method is the one that first satisfies the repair procedure. A cheaper joining method is not a valid substitute when it changes the crash behavior, corrosion protection, durability, or warranty position of the repair.
Shop Conditions: Temperature, Contamination, Fire, and Fumes
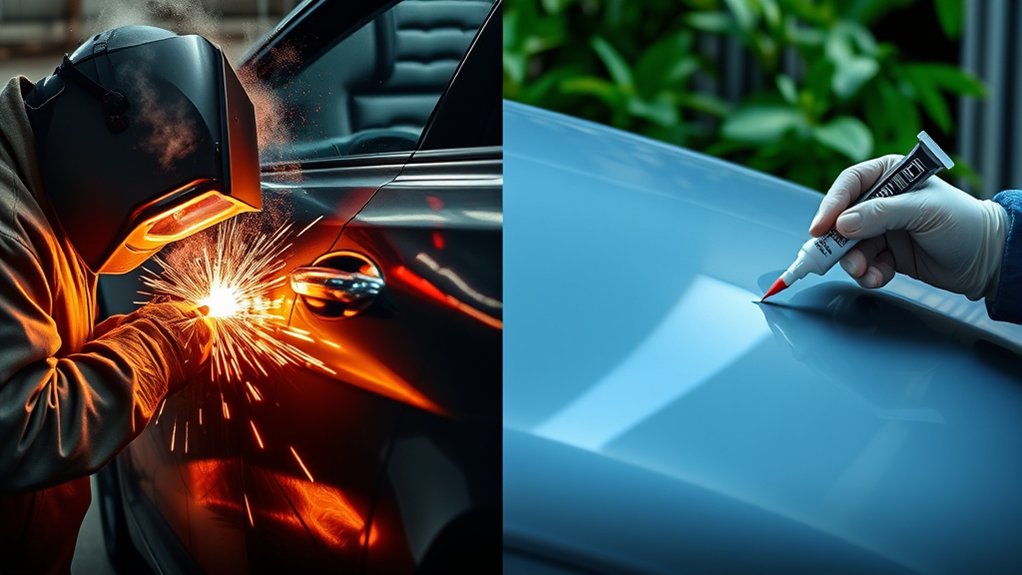
Shop conditions affect both processes. Welding can be disrupted by contamination, poor grounding, damaged electrodes, incorrect gas flow, wind, moisture, coatings, cramped access, and unstable power.
Adhesive bonding can be disrupted by cold materials, excessive heat, contamination, expired product, improper storage, a blocked mixer, incorrect purge, or panel movement before cure. Humidity may also matter for some chemistries, but the product data sheet—not a general rule—must define the acceptable conditions.
Sparks, hot metal, and conducted heat can ignite trim, carpet, foam, insulation, seam sealer, undercoating, sound deadener, fuel vapor, or combustible material on the opposite side of a panel.
OSHA 29 CFR 1910.252 addresses welding fire prevention, PPE, ventilation, fire extinguishing equipment, and fire watches. Where its fire-watch conditions apply, the watch must continue for at least 30 minutes after welding or cutting to detect a smoldering fire.
Warning: Inspect both sides of the repair and any enclosed cavity before, during, and after hot work. Heat can travel through sheet metal and ignite material that is hidden from the welder’s view.
Corrosion Protection After Welding or Bonding
Corrosion protection is a process, not one spray applied at the end. Factory e-coat, galvanized layers, seam sealer, undercoating, and cavity wax may be removed or damaged during panel replacement.
A repair plan should address:
- which factory coatings must remain intact;
- which surfaces must be taken to bare metal;
- how exposed bonding surfaces will be covered by adhesive;
- whether weld-through coating is required, optional, or prohibited;
- which primer belongs over completed welds and exposed metal;
- where seam sealer must be restored;
- how backsides, hem flanges, enclosed rails, and cavities will receive protection;
- when cavity wax can be applied without contaminating a later bonding or refinishing step.
Do not use weld-through primer as a universal step. The approved coating depends on the automaker and welding method. Honda’s current guidance, for example, calls for zinc-rich weld-through primer on specified bare mating surfaces used for squeeze-type resistance spot welding but says not to use it for MAG plug welding, MAG butt welding, or MIG brazing.
The adhesive manufacturer may also give process-specific directions. A procedure may require adhesive on surfaces that will be resistance spot welded through while keeping adhesive out of MIG/MAG weld areas. Follow the exact combination approved for the vehicle and product.
Note: Do not grind, prime, seal, or wax a joint in an order that contaminates the next operation. Write the corrosion-restoration sequence into the repair plan before the panel is installed and access is lost.
Training Needs: What Skills Are Required?
Welding requires equipment setup, joint preparation, material identification, wire and gas selection, heat control, travel speed, test welds, destructive testing, hot-work safety, and corrosion restoration.
Adhesive bonding requires product identification, technical-data reading, surface preparation, contamination control, cartridge equalization, correct mixing, bead placement, bond-line control, clamping, fastener installation, temperature control, cure verification, and corrosion restoration.
Both methods require accurate panel fit and measurement. Joining a replacement part onto a misaligned structure can lock the vehicle into the wrong dimensions, even when the welds or adhesive are individually sound.
Structural bonding is not a shortcut for someone who cannot weld. It is a separate professional process with its own hidden failure modes.
Best Practices: Which Method Is the Better Starting Point?
| Repair Situation | Better Starting Point | Reason |
|---|---|---|
| Outer door skin or hem flange | Panel adhesive, if approved | It can reduce heat distortion and seal the hem, but the intrusion beam and other attachments may need separate products or methods. |
| Frame rail, rocker reinforcement, or pillar reinforcement | Exact OEM method only | These parts can carry crash loads and may require specific welds, structural adhesive, rivets, or a validated combination. |
| Thin cosmetic patch panel | Depends on flange and location | Adhesive needs an approved overlap. A flush patch without a bonding flange may require a controlled welding process. |
| Small bracket or high-load tab | Welding or specified fastener | The small joint may not provide enough bonding area, and the load may be concentrated. |
| Steel-to-aluminum or metal-to-composite joint | OEM-specified adhesive and fasteners | Normal fusion welding is usually unsuitable, and the repair must also control galvanic corrosion and material movement. |
| Ultra-high-strength steel part | Model-specific procedure | Heat, straightening, sectioning, and welding restrictions vary by strength grade and location. |
Weld Bonding and Hybrid Joining
Some repairs combine adhesive with resistance spot welds, plug welds, self-piercing rivets, blind rivets, solid rivets, flow-form rivets, screws, or another mechanical attachment.
In weld bonding, adhesive is placed in the joint and approved welds are made at defined locations. The adhesive can provide a continuous bond and seal, while the welds or fasteners hold the assembly and carry specified loads.
Do not invent a hybrid repair. The adhesive must be compatible with the welding or fastening process, and its location must not contaminate a weld that requires bare metal. Rivet type, length, material, mandrel, installation force, orientation, and location can all be part of the validated repair.
Weld bonding does not mean that any adhesive may be placed between any two welded panels. Use the exact adhesive, weld locations, fasteners, tools, and curing sequence in the repair information.
Modern-Vehicle Safety Before Welding, Drilling, Heating, or Bonding
Body repairs can affect more than the visible panel. Wiring, airbag systems, pretensioners, sensors, cameras, radar brackets, fuel lines, refrigerant lines, high-voltage cables, battery structures, and electronic grounds may be behind or near the work area.
- Read the vehicle-specific 12-volt depowering and SRS procedure.
- Observe the required waiting time before working near airbags or pretensioners.
- Identify every SRS component and harness near the cut, drill, weld, heat, clamp, or rivet area.
- For an EV, hybrid, or fuel-cell vehicle, follow the exact high-voltage disabling procedure and test for the absence of voltage where required.
- Never assume that disconnecting the 12-volt battery makes the high-voltage system safe.
- Inspect orange high-voltage cables, battery enclosures, cooling lines, and nearby structures for damage.
- Protect fuel, brake, coolant, and air-conditioning refrigerant lines from sparks, heat, drilling, and fasteners.
- Identify radar, camera, blind-spot-monitor, and sensor mounting areas before changing panel shape or attachment.
- Determine whether the repair requires a pre-scan, post-scan, aiming procedure, calibration, or mounting-area measurement.
NHTSA advises that traction batteries and high-voltage components should not be serviced without proper training and specialized equipment. Review NHTSA’s electric- and hybrid-vehicle safety information.
Warning: Stop work if a high-voltage battery, orange cable, fuel component, refrigerant line, airbag part, or pretensioner is damaged or cannot be safely isolated. These systems require vehicle-specific procedures, training, PPE, and equipment.
Safety Checklist Before You Start
- Wear eye, face, hand, hearing, skin, foot, and respiratory protection suited to the process and products.
- Read the adhesive label, technical data sheet, and safety data sheet.
- Confirm local exhaust or other ventilation for welding fumes, grinding dust, cleaners, and adhesive vapors.
- Remove or shield combustible materials on both sides of the repair.
- Keep the correct fire extinguisher immediately available.
- Use a fire watch when required and continue the post-work watch for the required period.
- Inspect hidden cavities for foam, sound deadener, seam sealer, wiring, trim, and undercoating.
- Protect glass, painted surfaces, electronics, grounds, modules, and sensors from heat and welding current.
- Do not weld, grind, or heat near fuel vapor, an uncleaned container, a leaking battery, or uncontrolled combustible material.
- Keep welding heat and sparks away from uncured adhesive unless the approved procedure specifically combines the processes.
- Maintain the specified shop and panel temperature during adhesive application and cure.
Warning: Adhesive components, primers, cleaners, welding fumes, grinding dust, heated coatings, and burning sealers can cause serious health hazards. Stop if fire, fumes, dust, electrical energy, or chemical exposure cannot be controlled safely.
Final Quality Checks Before the Vehicle Is Released
A completed repair needs more than a finished paint surface. Verify and document the joining process before trim hides the work.
- Confirm that every required weld, rivet, fastener, and bonded flange is present.
- Review weld tests and inspect the vehicle welds for size, position, fusion indicators, porosity, burn-through, cracks, and missed locations.
- Confirm continuous adhesive coverage or witness squeeze-out where the procedure uses it as an inspection aid.
- Verify that the adhesive reached the required clamp, handling, paint, and return-to-service stages.
- Check that temporary screws or fasteners were removed or retained as directed.
- Inspect epoxy primer, seam sealer, undercoating, and cavity wax coverage before closing access holes.
- Check panel gaps, body lines, dimensions, latch operation, glass fit, and weatherstrip contact.
- Perform any required leak test.
- Complete the required post-scan, SRS check, high-voltage restoration, ADAS calibration, aiming, and road test.
- Record product lot information, cure conditions, weld-test results, measurements, scans, calibrations, and repair-procedure references when required.
Frequently Asked Questions
Is it better to weld or glue body panels?
It depends on the exact panel and repair procedure. Welding is commonly required for structural steel joints, brackets, and small high-load areas. Approved panel adhesive is often used on outer skins, hem flanges, wide overlaps, and selected mixed-material joints. The vehicle maker’s current procedure controls the choice.
What are the disadvantages of adhesive bonding?
The bond depends on correct product selection, clean and properly abraded surfaces, uniform mixing, controlled bond-line thickness, correct clamping, suitable temperature, and enough cure time. The bond line is hidden after assembly, so contamination, poor mixing, or a starved joint may not be visible.
Can panel bonding adhesive replace spot welds?
Only where the exact vehicle repair procedure allows it. Some joints require resistance spot welds, plug welds, rivets, adhesive, or a combination. Do not replace factory or repair welds with adhesive based only on convenience or advertised strength.
Is there a golden rule for auto body welding?
There is no single official golden rule. The safest principle is to follow the approved repair procedure, identify the metal, prepare the joint, test the welder on matching material, control heat, verify weld quality, and restore corrosion protection.
Can steel and aluminum be welded together in normal collision repair?
They are not normally fusion welded directly to each other during collision repair. Their different melting behavior and the brittle compounds that can form make ordinary fusion welding unsuitable. Vehicle makers usually specify adhesives, rivets, bolts, clinching, or another validated hybrid method.
How long does panel bonding adhesive take to cure?
It depends on the product and temperature. As one example, 3M’s U.S. data for 08115 lists a 90-minute work time, four-hour clamp time, and 24-hour cure at 73°F. Other products can be much faster or slower, so use the technical data for the exact adhesive.
Can panel adhesive be applied over paint or e-coat?
Only when the vehicle and adhesive instructions allow that surface. Some applications require bare, abraded metal, while others may permit approved factory e-coat. Do not assume that paint, primer, or replacement-panel coating is a suitable bonding surface.
Can you weld through panel bonding adhesive?
Only with an adhesive, weld process, and joint specifically approved for weld bonding. Some procedures permit resistance spot welding through uncured adhesive, while MIG or MAG weld areas may need to remain adhesive-free. Follow both the OEM procedure and adhesive instructions.
How can you tell whether panel adhesive cured correctly?
Confirm the product, mixing process, shop and panel temperature, elapsed cure time, clamp time, and any approved cure sample. A hard sample alone cannot prove that the hidden flange was clean, fully covered, or clamped correctly, so process documentation and witness squeeze-out are also important.
Conclusion
Welding and adhesive bonding both have valid roles in auto body repair, but neither is a universal replacement for the other. Welding is commonly required where a fused metal joint carries structural or concentrated loads. Panel adhesive is useful on approved outer panels, flanges, wide overlaps, and mixed-material assemblies where low heat and continuous sealing are advantages.
The safest decision comes from the current repair procedure for the exact vehicle and panel. Verify the material, joining method, product, fasteners, weld tests, cure conditions, corrosion steps, SRS and high-voltage precautions, and final calibration requirements before beginning the repair.
Sources
- 3M Panel Bonding Adhesive 08115, 38315, and 58115 Technical Data Sheet — approved uses, structural limitations, surface preparation, work time, clamp time, cure time, and weld-bonding directions.
- Honda Service Bulletin 18-134: Recommended Sealers and Adhesives for Collision and Body Repairs — current Honda adhesive categories, approved products, work times, and requirement to follow model-specific repair information.
- Honda Body Repair Manual Welding and Sectioning Guideline Revisions — welding limits by steel strength, welding-wire guidance, and process-specific weld-through-primer rules.
- Lincoln Position Statement: Use of OEM Structural Fasteners and Adhesives — exact fastener, adhesive, tool, and procedure requirements for structural and cosmetic repairs.
- OSHA 29 CFR 1910.252: Welding, Cutting, and Brazing — fire prevention, extinguishing equipment, fire watches, PPE, and ventilation requirements.
- NHTSA Electric and Hybrid Vehicle Safety — high-voltage battery hazards and the need for proper training and specialized equipment.




