A welder’s daily work goes far beyond just striking an arc. From the moment the torch fires up, every step matters — prepping joints, fitting metal, selecting the right filler rods, and deciding whether MIG, TIG, or stick is the best choice for the job. On stainless steel, for example, arc control and heat input can make or break the weld, while thicker plate often demands deep penetration techniques for strength and safety.
One of the most common questions I hear is, “What does a welder actually do all day?” The answer is a mix of precision, problem-solving, and hands-on skill that ensures weld quality, structural integrity, and cost efficiency. In this guide, we’ll break down the real daily routine of a welder — the kind of work that turns raw metal into something built to last.
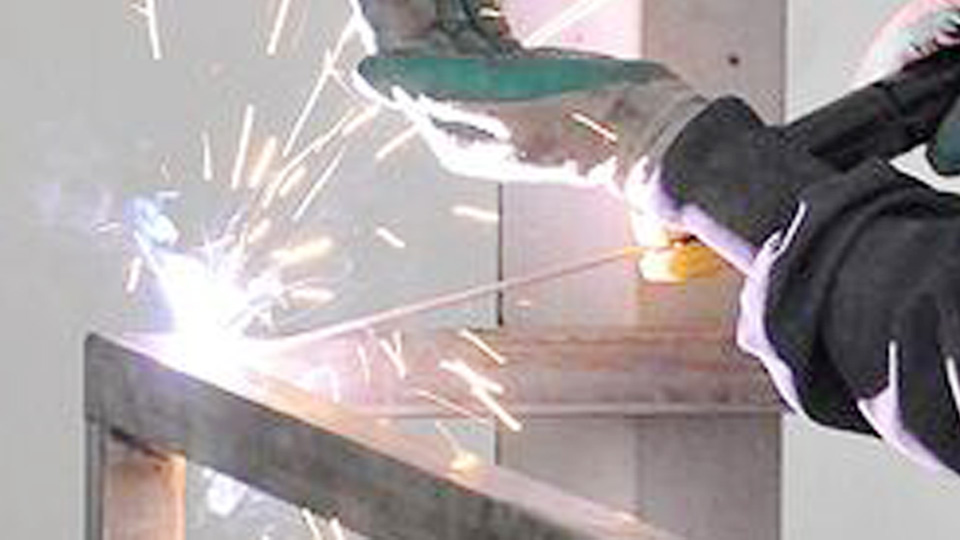
Image by workerscomp-buffalo
Starting Your Shift as a Welder
When I roll into the shop or job site, the first thing on my mind is getting set up right. Most welders kick off around 6 or 7 a.m., but shifts vary—I’ve pulled evenings in factories where it’s 10 hours straight, four days a week. You clock in, stash your lunch, and dive into the routine that keeps everything humming.
First off, suiting up in PPE is non-negotiable. I grab my flame-resistant jacket, leather gloves that fit snug but not tight, and a helmet with a fresh lens. Don’t forget earplugs if it’s a noisy fab shop or steel-toed boots for those heavy drops. I’ve learned the hard way that skipping a step here can lead to burns or worse—once, a newbie forgot his sleeves rolled down and ended up with a nasty spark scar.
Next, I run through equipment checks. Fire up the welder, test the gas flow if it’s MIG or TIG, and inspect cables for frays. It’s like pre-flight for a pilot; one loose ground clamp, and your arc’s unstable. This prep takes maybe 15-20 minutes but saves hours of troubleshooting later.
Reviewing Work Orders and Blueprints
Before touching metal, I hunker down with the day’s plans. Work orders spell out what needs doing—maybe fabricating brackets for a trailer or repairing farm equipment. Blueprints are your roadmap; they show joint types, dimensions, and tolerances.
I sketch quick notes if needed, calculating angles or material thicknesses. For example, on a recent gate build, the print called for 1/8-inch fillets on square tubing. Misread that, and you’re grinding it all out. Pros tip: Use a sharpie for marking cuts—it’s simple but keeps everything precise.
This step’s crucial for students or hobbyists too. If you’re DIY-ing a workbench, treat your rough drawing like a pro blueprint to avoid wonky legs. Common mistake? Ignoring scale—I’ve fixed plenty of pieces that were off by inches because someone eyeballed it.
Prepping Materials for Welding
Prep work is where the magic starts, but it’s gritty. I clean surfaces with a wire brush or grinder to remove rust, paint, or mill scale—anything that contaminates the weld pool. For aluminum, acetone wipes are my go-to for oils.
Then, joint prep: bevel edges for better penetration on thicker stock, say over 1/4-inch. I use a plasma cutter for clean edges or an angle grinder for bevels. Alignment’s key—clamp pieces square with C-clamps or magnets. A tip from my early days: Always double-check with a level; a crooked setup means distorted welds after cooling.
For hobbyists, this is where patience pays off. Rushing prep leads to porous welds that crack under load. I’ve had to redo a motorcycle frame because I skimped on cleaning—lesson learned, now I spend extra time here for rock-solid results.
Choosing the Right Welding Process
Picking your process depends on the job, materials, and setup. I’ve used them all, and each has its spot in a daily routine.
Stick welding (SMAW) is my old faithful for outdoor repairs—it’s forgiving on dirty steel and doesn’t need gas. But for clean shop work, MIG (GMAW) speeds things up with its wire feed.
TIG (GTAW) shines on thin metals or exotics like stainless—precise but slower. Flux-cored (FCAW) is great for windy sites since it self-shields.
Why choose one? Material compatibility and weld strength. For a pipeline gig, FCAW handles thick pipe fast. Mistake to avoid: Using MIG on rusty stuff without cleaning—it spits and spatters everywhere.
Here’s a quick comparison:
| Process | Pros | Cons | Best For |
|---|---|---|---|
| Stick (SMAW) | Portable, no gas needed, good for outdoors | Slower, more slag cleanup | Repairs, construction sites |
| MIG (GMAW) | Fast, easy for beginners, clean welds | Needs shielding gas, sensitive to wind | Shop fabrication, auto parts |
| TIG (GTAW) | High precision, no spatter, great for alloys | Slow, requires skill | Aerospace, thin metals |
| Flux-Cored (FCAW) | Deep penetration, works in wind | More smoke, slag removal | Heavy equipment, structural |
Integrate this into your day, and you’ll flow better—I’ve switched mid-shift for efficiency.
Selecting Welding Rods or Fillers
Rods and wires are your ammo, and choosing wrong tanks the job. For stick, E6010 digs deep for root passes on pipe, while E7018 gives smooth, strong fills with low hydrogen to prevent cracking.
In MIG, ER70S-6 wire is versatile for mild steel—good flow and minimal splatter. For stainless, go ER308L to match corrosion resistance.
When to use? Thick steel calls for low-hydrogen rods to avoid brittleness. Anecdote: On a bridge repair, I grabbed the wrong rod and got hydrogen cracks—had to grind out and reweld. Fix: Check labels and store rods dry.
Tips: Match rod diameter to material thickness—3/32-inch for lighter stuff, 1/8-inch for heavier. For DIYers, start with E7018; it’s user-friendly once you get the arc stable.
Setting Up Your Welding Machine
Machine setup is make-or-break. For MIG on 1/4-inch steel, I dial voltage to 18-20V, wire speed around 300 IPM, and gas at 20-25 CFH for argon/CO2 mix.
Stick? Amp it up—100-140A for 1/8-inch E7018. TIG needs lower amps, say 80-120 for aluminum, with pure argon.
Common error: Overamping, which burns through thin metal. Fix: Test on scrap first. I’ve scorched plenty early on—now, scrap tests are ritual.
Joint prep ties in: Bevel for full penetration, gap for root fill. For T-joints, 1/16-inch gap prevents bridging.
Performing the Weld: Step-by-Step Guide
Alright, let’s break down the actual welding like I’m right there with you.
Step 1: Strike the arc— for stick, tap and lift; MIG, pull trigger steady.
Step 2: Maintain angle—15-30 degrees from vertical, pushing or pulling based on process.
Step 3: Travel speed even—too fast, weak bead; too slow, excess heat warps.
Step 4: Weave if needed for wider joints, like a slight zigzag on fillets.
Step 5: End clean—backstep to fill craters, avoid cracks.
For a butt joint on mild steel with MIG: Clean edges, clamp flush, set machine, run root pass hot and fast, then fills slower. I’ve built countless racks this way—solid every time.
Hobbyists, practice on scrap to nail puddle control. Pro tip: Listen to the sizzle—a steady bacon fry means good settings.
Inspecting and Finishing Your Work
Post-weld, I inspect visually first—look for undercuts, porosity, or uneven beads. Then, dye penetrant or mag particle if codes require.
Clean slag with a chipping hammer, wire brush the bead. Grind smooth if aesthetics matter, like on furniture.
Mistake: Overgrinding weakens the joint. Fix: Light passes with 80-grit flap disc.
For integrity, tap test or bend samples. In my shop, every critical weld gets a once-over—saves callbacks.
Handling Common Challenges on the Job
Every day throws curveballs. Wind messing with gas shield? Switch to flux-cored.
Distortion from heat? Tack weld alternately, let cool between passes.
Anecdote: On a hot day, overheating machine shut down mid-job. Fix: Clean vents regularly, use duty cycle wisely—mine’s 60% at max amps.
For students, learn distortion control early—it’ll save material waste.
Wrapping Up the Shift
As the day winds down, I clean my station—coil cables, store rods, wipe down the machine. Clock out, maybe chat with the crew about tomorrow’s jobs.
Hydration’s key throughout—I’ve guzzled gallons in summer shops. End with a stretch; welding’s physical, so avoid strains.
Key Takeaways for Your Welding Journey
You’ve now got a solid peek into what a welder does on a daily basis—from gearing up and prepping to laying beads and inspecting. It’s hands-on work that builds real stuff, keeps you sharp on safety, and rewards smart choices in processes and materials.
Whether you’re a DIYer fixing your grill, a hobbyist fabricating art, or a pro on big projects, these routines boost your weld quality, cut costs, and prevent headaches.
You’re better prepped now to grab that helmet and strike an arc with confidence—knowing the why behind each step makes all the difference. Always weld a test bead on scrap before the real deal; it’s saved me more times than I can count. Get out there and make some sparks!
What are the main types of welding processes?
The big ones are stick (SMAW) for rugged outdoor work, MIG (GMAW) for quick shop jobs, TIG (GTAW) for precise alloys, and flux-cored (FCAW) for windy or heavy-duty sites. Each fits different materials and conditions, so match to your project.
How many hours do welders typically work?
Most pull 8-10 hour shifts, often 40-50 hours a week with overtime common in busy seasons. I’ve done four 10s for a three-day weekend—great for balance, but physically demanding.
What safety gear is essential for welders?
Helmet with auto-darkening lens, flame-resistant clothes, leather gloves, steel-toed boots, and respirators for fumes. Earplugs in noisy spots too—skip any, and you’re risking burns or long-term health issues.
What skills do you need to become a welder?
Steady hands, blueprint reading, math for measurements, and problem-solving for tweaks. Physical stamina helps, plus willingness to learn processes like MIG or TIG through practice or school.
Common mistakes beginners make in welding?
Rushing prep leads to dirty welds, wrong settings cause burn-through, and poor posture strains your back. Slow down, test setups, and focus on basics for cleaner results.