One of the biggest surprises I ran into early in my fabrication journey was realizing not every hole in metal needs to be fixed with a welder in hand. There were times I didn’t have my MIG setup ready, or the stainless sheet I was working on was too thin for stick or TIG without risking burn-through, and I needed another solution. If you’re searching for how to fill holes in metal without welding, you’re in the right place.
That’s when I learned how to fill holes in metal without welding — using methods like metal fillers, epoxy, brazing, or even riveted patches depending on the metal thickness and the job. A lot of welders and DIY enthusiasts struggle with this, wondering if a repair without filler rods and arc control can actually hold up.
The truth is, when done right, these alternatives can save time, cut costs, and still give you reliable strength and a clean finish for everything from automotive bodywork to shop repairs. Stick around, because I’m going to break down the exact methods I use to fill holes in metal without welding — and how to pick the right one for your project.
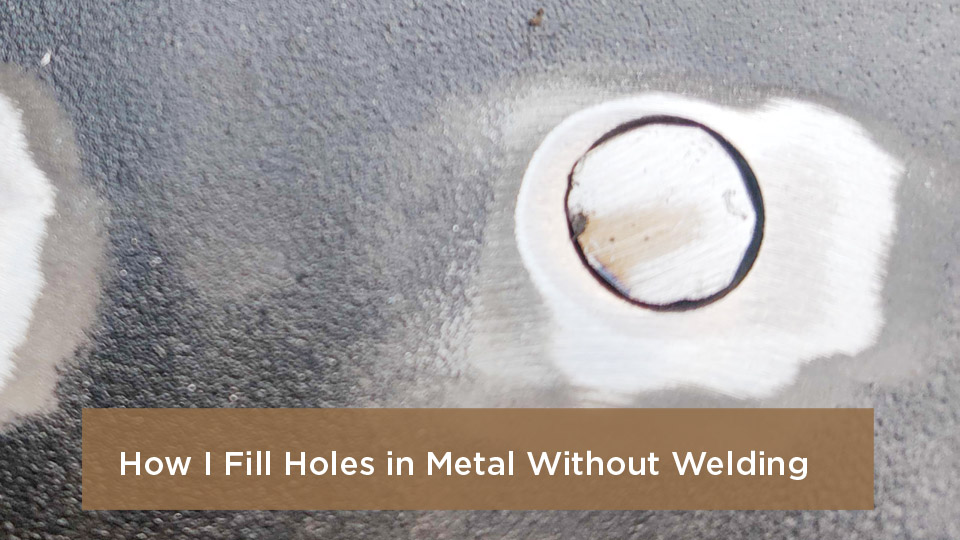
Image by reddit
What Causes Holes in Metal and Why Avoid Welding Sometimes
Holes show up uninvited—rust eating through from moisture exposure, drill slips during a mod, or just wear from years of hard use on trailers, gates, or car panels. In my first big job at a custom fab shop in Detroit, we had a rush of classic car restorations where rust holes dotted quarter panels like Swiss cheese.
Welding them shut? Sure, it’s gold standard for strength, but not always practical. Thin gauge steel warps like crazy under MIG heat, and if you’re dealing with galvanized stuff or alloys, fumes and compatibility issues turn it into a headache.
Opting out of welding keeps things simple for hobbyists without a beefy setup or pros needing quick field repairs. It’s about preserving integrity without the drama—think cost efficiency on a weekend warrior budget or safety on-site where ventilation’s iffy.
The key? Picking methods that bond strong, resist moisture, and blend seamlessly. No shortcuts that crumble later; we’re building trust in your fix.
Epoxy Fillers: Your Go-To for Quick, Strong Hole Patches
Epoxy fillers are like that reliable buddy who shows up with duct tape and a grin—versatile, tough, and forgiving for beginners. These two-part mixes, often loaded with metal powders for extra grit, harden into something damn near as solid as the surrounding steel. I’ve slathered them into rusted toolbox lids and forgotten about ’em for years.
How Epoxy Fillers Work and When to Grab One
At their core, epoxies are resins and hardeners that chemically bond when mixed, creating a waterproof seal that flexes just enough with metal movement. Use ’em for holes up to quarter-sized in non-structural spots like body panels or frames—not load-bearing beams, where they’d crack under torque. Why? They’re killer for cosmetic and light-duty repairs, especially if rust is the culprit. In humid Midwest shops, I’ve seen them halt corrosion cold.
Pick metal-reinforced types like JB Weld SteelStik or Devcon for ferrous metals; aluminum-filled for lighter alloys. They’re inexpensive—consumer epoxy putties typically run about $8–$20 per tube (example: J-B Weld SteelStik MSRP $7.99; source, retrieved 2025-10-14). For strength context, SteelStik lists compressive strength up to 4,000 PSI (J-B Weld), while panel epoxies like 3M’s 08115 show lap shear on steel around ~3,900 PSI at 73°F (3M TDS, 2021).
Step-by-Step Guide to Filling Holes with Epoxy
First, prep like your fix depends on it—because it does. Sand the hole edges with 80-grit to bare metal, wiping away grease with acetone. Common mistake? Skipping this; residue makes bonds weak, and your patch pops like a bad blister.
Mix equal parts resin and hardener—stir slow to avoid bubbles. For a dime-sized hole, glob in enough to mound slightly over. Press a scrap metal disc or mesh on the back if it’s thin sheet, then overfill from the front. Clamp lightly if possible, but don’t squeeze out all the goo.
Let it cure 24 hours in a warm spot—heat speeds it, but don’t bake it. Sand flush with 120-grit, then 220 for smoothness. Prime and paint to match. Pro tip from a botched trailer repair: Test cure time on scrap; cold garages stretch it to 48 hours.
I’ve filled antenna holes in truck cabs this way—holds through wash racks and winter salt without a whimper.
Pros, Cons, and Machine Settings? Wait, No Machines Here
No amps or volts to dial, but here’s the rub: Pros include zero heat, easy application, and vibration resistance better than straight Bondo. Cons? Not as strong as weld for high-stress (think engine mounts), and many epoxies can yellow under UV if not painted. For strength context, quality products list ~3,900–4,000 PSI depending on test (see 3M 08115 TDS; J-B Weld SteelStik).
| Aspect | Pros | Cons |
|---|---|---|
| Strength | Up to ~3,900–4,000 PSI (product & test dependent 3M TDS, 2021; J-B Weld) | Brittle under extreme torque |
| Ease | Mix and smear—no tools beyond sandpaper | Messy if over-mixed |
| Cost | About $8–$20 per tube (J-B Weld MSRP) | Needs full cure time |
| Durability | Waterproof, rust-resistant | Surface prep critical or fails |
Common fix: If it cracks later, it’s usually poor adhesion—double-sand next time.
Soldering Holes Shut: A Low-Heat Metal Bond for Sheet Work
Soldering’s my old-school favorite for clean, low-temp joins—think plumbing roots but for fab patches. It melts filler metal at a few hundred degrees Fahrenheit (e.g., 60/40 tin-lead flows ~361–376°F / 183–191°C; Aimtek TDS), way cooler than welding’s 2,000+, so no warping on your vintage fender.
Soldering Basics for Metal Repairs
It works by flux cleaning the surface, then low-melt alloy (like 60/40 tin-lead or silver-bearing) flowing into the hole via capillary action, bonding without fusing base metal. Ideal for small holes (under 1/4 inch) in copper, brass, or steel sheets—cosmetic auto work or tool repairs. Why use it? Safety—no arc flash—and it preserves panel shape. For steel and stainless, use an acid (zinc-chloride) flux rather than rosin; clean flux residue thoroughly because it’s corrosive (Harris Stay-Clean datasheet).
Grab a 40–60W electric iron or small torch, an appropriate liquid flux, and 1/16-inch solder. In a rainy Seattle job site, soldering saved a gate panel from total redo.
Hands-On Steps for Soldering a Hole
Prep’s king: Clean to shine with emery cloth, apply acid flux to hole and rod. Heat the metal, not the solder—touch iron to edges till flux activates. Feed solder in; it wicks right into the void. Overlap edges for a fillet if needed. Afterward, neutralize/clean flux residue to prevent corrosion (Harris datasheet).
Cool naturally—don’t quench. File excess, sand smooth. Mistake I made young: Overheating flux, creating voids. Fix? Short bursts, 5–10 seconds max.
For aluminum, use special flux and zinc-based rod—tricky but doable for bike frames.
Tips, Tricks, and Why It Beats Glue Sometimes
Settings? A tip temperature around ~600°F (~315°C) is a common starting point for tin-lead solder; follow your iron and solder specs (Weller W60 series tips: 600/700/800°F; melting range ref). Pros: Seamless look, conductive if electrical. Cons: Weaker shear strength vs. welding; flux cleanup is mandatory.
Personal yarn: Patched a leaky fuel tank brace—held 5 years till I upgraded.
| Soldering vs. Epoxy | Soldering | Epoxy |
|---|---|---|
| Heat Involved | Low (< ~700°F) | None |
| Bond Type | Metallurgical | Chemical |
| Best For | Thin sheets | Thicker fills |
| Skill Level | Medium | Beginner |
Adhesive Patches and Two-Part Glues: No-Mess Bonds for On-the-Go Fixes
Nothing beats adhesives for speed when you’re roadside or shop-deep in a deadline. Two-part panel adhesives or stick-on patches glue metal to metal like magic, flexing with vibration.
When and Why Adhesives Shine for Hole Filling
These urethanes or epoxies cure to durable bonds, sealing gaps while bonding in the thousands of PSI range. Perfect for rust holes in doors or frames—3M’s 08115 panel bonding adhesive is an OEM-recommended staple with typical lap shear on steel ≈3,900 PSI at 73°F (3M TDS, 2021). Use when welding’s out: No power, quick set, and they dampen noise in cabs.
For patches, UV-cure fiberglass repair patches harden in sun—often in ~5 minutes (RapidFix UV Patch).
Step-by-Step: Applying Adhesive Patches
Cut patch bigger than hole (galvanized steel sheet). Rough both sides, apply glue beads to edges and back. Press in, tape secure, clamp 30 minutes. Cure 24 hours, grind flush.
UV type? Slap on, expose to light—done in about 5–10. My fix on a barn door: Patched three holes, storm-proof now.
Common error: Wet weather—cure slows. Fix: Indoor dry time.
Pros, Cons, and Prep Insights
Pros: Invisible under paint, no distortion. Cons: Strength drops at elevated temps; check your TDS—e.g., 3M lists lower lap-shear values at 180°F vs. 73°F (3M 08115 TDS).
| Adhesive Type | Cure Time | Strength | Best Use |
|---|---|---|---|
| Two-Part Panel Epoxy | 4–24 hrs (full) | ~3,900 PSI lap shear on steel @73°F (3M) | Auto panels |
| UV Patch | ~5–10 mins sun/UV | Rigid, sandable (manufacturer-rated; RapidFix) | Quick rust stops |
| Acrylic Glue | ~10–60 mins | High impact/peel (see product TDS) | DIY tools |
Anecdote: Glued a trailer fender hole—towed 10k miles, zero issues.
Mechanical Fasteners: Bolts, Rivets, and Screws for Bulletproof Holds
Sometimes, you want mechanical muscle—rivets or bolts that clamp without chemistry. Great for higher-load areas where pull-out’s a risk. Follow OEM instructions and applicable codes for structural parts.
Rivets and Bolts: How They Secure Without Heat
Pop rivets expand to grip, no torch needed. Use for truck beds or gates—aluminum for light, steel for heavy. Bolts? Threaded fasteners with nuts for bigger voids.
Why? Removable, predictable strength, easy to inspect.
Installing Fasteners Step by Step
Drill to match (e.g., 1/8-inch for many pops). Insert rivet, squeeze gun—done. For bolts, back with a washer to spread load; torque per fastener size/grade spec.
Mistake: Wrong size—strips holes. Fix: Oversize drill, epoxy assist.
I’ve riveted toolbox dividers—holds tools like welded.
Comparison Table for Fastener Choices
| Fastener | Tool Needed | Strength | Install Time |
|---|---|---|---|
| Pop Rivet | $20 gun | ~295 lbf shear (example 1/8″ steel/steel open-end; Stanley POP data) | 30 sec |
| Bolt/Nut | Wrench | Varies by size/grade (e.g., Grade 5 proof load: 1/4-20 ≈ 2,700 lbf; 3/8-16 ≈ 6,600 lbf; Barnhart Bolt, 2024) | 2 mins |
| Rivnut | Inserter | Depends on size/substrate—check manufacturer specs | 1 min |
Pro insight: Seal with silicone for weather.
Body Fillers and Putty: Smoothing Out After the Patch
Once your hole’s backed or filled, body filler levels it pro. Bondo over epoxy? Seamless.
Mixing and Applying Body Filler for Flawless Finishes
Knead hardener into cream, spread thin over patch. Sand after 20 mins. For rust, use glazing putty.
Step: Spread, cure, 80-grit coarse, 400 wet-fine.
Yarn: Leveled a door dent—showroom ready.
Pros: Sands easy. Cons: Shrinks if thick.
| Filler Type | Shrinkage | Sandability | Cost |
|---|---|---|---|
| Polyester Bondo | Medium | Excellent | $15/qt |
| Glazing Putty | Low | Good | $20/tube |
Prep tip: 50°F min temp.
Safety Gear and Best Practices for Any No-Weld Repair
Gear up: Gloves, goggles, respirator—fumes from solders and fluxes can be hazardous, and adhesives off-gas while curing. Work ventilated; dust flies even without sparks.
Heating galvanized steel (even soldering or brazing) can release zinc oxide fumes linked to metal fume fever; ensure local exhaust ventilation and appropriate respiratory protection, or remove the zinc coating locally before heat work (OSHA; NIOSH Zinc Oxide).
Best practice: Test on scrap. Match material—aluminum epoxy for ally.
In shops, I mandate double-checks—saves rework.
When to Call in Welding Anyway
If it’s structural or huge, weld wins. For panels and non-structural repairs, these alternatives nail it—just follow manufacturer specs (e.g., 3M 08115 is for non-structural outer body panels; 3M TDS).
Conclusion: Pick Your Fix and Get Back to Building
We’ve covered the gamut—from epoxy’s easy bond to rivets’ grip—each with steps to make you unstoppable. You’re now geared to assess that hole: Size, spot, stress? Match the method, prep right, and it’ll outlast expectations.
No-weld doesn’t mean no-strength; it’s smart fab. Go patch that panel with confidence—you’ve got the know-how. Always over-prep the surface; a clean bond beats a quick one every time.
FAQs
Can I Use These Methods on Stainless Steel?
Yep—use stainless-compatible epoxies or silver-bearing soft solders with an appropriate acid flux, and clean flux residue thoroughly (Harris Stay-Clean).
What’s the Strongest No-Weld Option for Load-Bearing Metal?
Rivets or bolts for shear; epoxy/adhesive for sealing and load sharing. For frames, combine—patch with rivets or bolts, seal with panel adhesive per product TDS (e.g., 3M 08115 non-structural panels; 3M).
How Do I Prevent New Holes from Rust After Repair?
Prime with a zinc-rich coating for cathodic protection, then topcoat (see Rust-Oleum zinc-rich primer TDS), and seal edges. In salt belts, do annual checks.
Is Soldering Safe for Galvanized Metal?
Use caution. Even at lower temperatures, heating galvanized can release zinc oxide fumes; ensure strong ventilation and PPE, or mechanically remove the coating locally before heat work (OSHA; NIOSH).
Can These Fixes Hold Up in Outdoor Welding Projects?
Most do, with weatherproofing. Epoxies and rivets shine; avoid leaving fillers unpainted—UV topcoat helps. Check adhesive TDS for temperature limits (e.g., 3M lap-shear drops at 180°F vs. 73°F; 3M).