If you’ve ever tried to clean up a rusted piece of metal for a project, you know how stubborn that stuff can be. You scrub, sand, maybe even hit it with a grinder — and somehow, the rust still comes back.
That’s why learning how to use Rustoleum on rusted metal the right way is such a game changer. It’s not just about covering up rust; it’s about stopping it in its tracks and giving your work a clean, durable finish that actually lasts.
Whether you’re restoring an old trailer, touching up welded joints, or refinishing mild steel or stainless parts, proper prep and coating make all the difference. In this guide, I’ll walk you through the same steps I use in the shop to turn rusty, tired metal into something that looks great — and stays protected for the long haul.
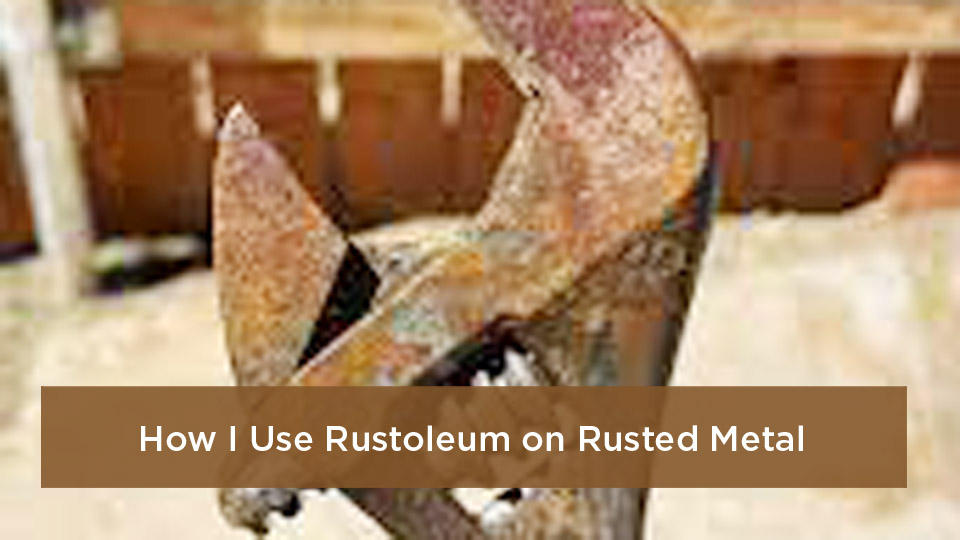
Image by tt
What Is Rust-Oleum and Why Does It Fit Right Into Your Welding Workflow?
Rust-Oleum isn’t some fancy lab concoction—it’s that trusty can or brush-on goop we’ve all grabbed from the hardware aisle for quick fixes. At its core, it’s a lineup of rust converters and primers designed to bond with oxidized metal, turning what would be a grinding nightmare into a workable surface. Think of it as a bridge between raw rust and your next weld or topcoat.
For us in the trades, the appeal hits hard during those long fab sessions. Say you’re piecing together a rusted gate from scrap angle iron—full rust removal could eat half your day with a wire wheel.
Instead, a quick Rust-Oleum application locks down the corrosion, letting you focus on the cut and tack. I’ve done this on a customer’s rotted-out workbench leg last summer; without it, the rust would have flaked right into my flux core wire, leaving pinholes everywhere.
It works through chemistry that’s straightforward: the formula reacts with iron oxide (that’s the rust) to form a stable, paintable layer. No magic, just a polymer shield that flexes with the metal under heat or vibration.
And compatibility? Spot on for mild steel, the bread-and-butter of most welding gigs. Just don’t expect it to miracle away structural pits—that’s still grinder territory.
When Should You Reach for Rust-Oleum on Rusted Metal in a Welding Project?
Not every rusty spot screams for a converter. I’ve learned the hard way: slapping it on thick corrosion without assessing first leads to more grief than gain. Start by eyeballing the damage. Light surface rust—like that dew-kissed patina on stored tubing? Rust-Oleum shines here, converting it fast without stripping down to bare metal.
Heavy pitting, though? That’s when you pause. Deep rust eats into the base material, weakening your weld pool before you even strike an arc. In those cases, Rust-Oleum acts as a temp stabilizer while you grind out the bad stuff.
I was prepping a junkyard I-beam for a shop overhead crane. The flanges were pitted like Swiss cheese. I hit the highs with converter, then flap-disc’d the lows—saved hours and kept the piece from crumbling under the torch.
Why bother in welding specifically? Time and integrity. AWS codes like D1.1 hammer home clean joints for fusion, but real-world rust fights back. Rust-Oleum buys you breathing room, especially on outdoor repairs where humidity turns clean metal rusty overnight. It’s cost-efficient too— a $10 can covers what a rental sandblaster would charge for an afternoon.
Spotting the Right Scenarios: Light Rust vs. Scale Buildup
Light rust shows as a powdery orange film, easy to thumb off. Here, Rust-Oleum prevents flash rust during downtime, ideal for tack welding sequences. Scale buildup, that chunky black layer from mill rolling? It laughs at converters—scrape first, then treat.
Pro tip from the field: Test a small area. Dab on the product, wait 24 hours, and see if it holds under a light grind. If it flakes, dig deeper. This saved me on a bridge repair gig; what looked like surface turned out mill scale underneath.
Step-by-Step Guide: Applying Rust-Oleum to Rusted Metal Like a Pro
This process mirrors shop prep for any fabrication run: methodical, no shortcuts. I’ve run it on everything from rebar trellises to engine stands, and it never lets me down when done right.
First, safety check. Gloves, goggles, respirator—rust dust and VOCs don’t play nice in enclosed spaces. Work in a ventilated spot, maybe under a shop fan. Lay down drop cloths; that overspray sticks like glue.
Step 1: Assess and clear the deck. Walk the piece, knocking off loose flakes with a plastic scraper or chisel. No metal tools yet—that scratches the good stuff. Wipe with a degreaser like mineral spirits to ditch oils or old paint. I once skipped this on a rusted muffler hanger; the residue bubbled the converter, wasting a whole coat.
Step 2: Rough up the surface if needed. For spray cans, a quick wire brush pass evens things out. Brush-on? Stir well—those pigments settle fast. Aim for temps between 50 and 90°F; colder, and it dries gummy.
Step 3: Apply the first coat. Hold the can 10-12 inches away, sweeping in even passes. Light mist first to avoid runs—think fogging a windshield. For brush-on, work in thin layers, feathering edges. Coverage? One can does about 10 square feet on moderate rust. Let it tack up for 20 minutes.
Step 4: Second coat and cure. Once dry to touch (hour or so), hit it again for full bond. Then, walk away—full cure takes 24-48 hours. Don’t rush; I’ve tack-welded too soon, and the heat softened the layer, contaminating my bead.
Post-application, that black, flat finish tells you it’s ready. Buff lightly if you’re topping with paint, but for welding, grind back to bare at joints.
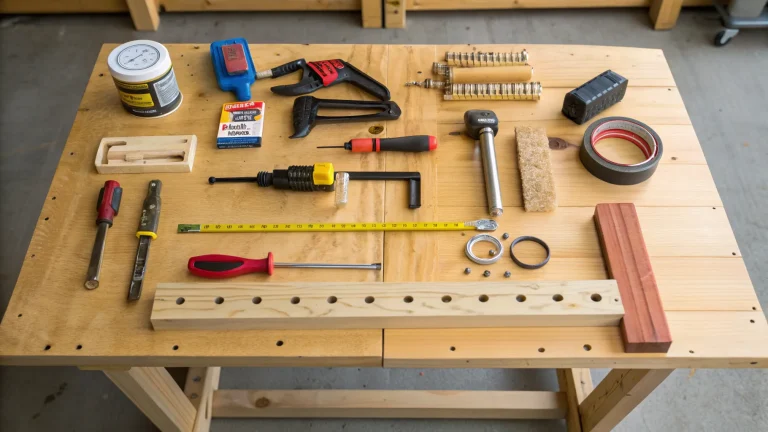
Tools You’ll Need for a Smooth Application
Keep it simple: spray can or quart brush-on, wire brush, rags, and a respirator. For bigger jobs, an airless sprayer levels up efficiency. Budget pick? The classic aerosol—portable and foolproof for DIYers.
Integrating Rust-Oleum into Rusted Metal Welding Prep
Treating rust is half the battle; the real win is welding over it without drama. Once Rust-Oleum has set, your goal shifts to exposing clean metal at the joint while protecting the rest. This hybrid approach is gold for pros juggling deadlines—stabilize the field, grind the zone.
Start by marking your weld lines with soapstone. Then, angle grinder with a 40-grit flap disc: feather the treated area, aiming for shiny base metal 1/4-inch wide on each side. Vacuum the dust—residue equals slag inclusions. Clamp up, tack, and run your bead. Flux-cored wire eats through any trace converter better than solid MIG.
I recall a fabrication shop meltdown: we converter-treated a rusted tank seam, but didn’t grind deep enough. The arc wandered, spitting porosity like fireworks. Lesson? Always bevel if over 1/8-inch thick—gets you to virgin steel.
For post-weld, reapply Rust-Oleum to heat-affected zones. It bonds fresh, sealing out moisture before your final enamel.
Choosing the Right Welding Process After Treatment
Stick welding? Go 6010 rods—they dig through light residue like a hot knife. MIG? ER70S-6 wire at 18-20 volts, 150 amps for 1/4-inch plate. Flux core’s my pick for field work on treated rust; that self-shielding flux neutralizes contaminants.
Top Rust-Oleum Products for Welders Tackling Rusted Metal
Rust-Oleum’s lineup packs options for every shop setup. Here’s a quick rundown in table form—I’ve tested ’em all on real builds.
| Product | Best For | Application Method | Dry Time | Pros | Cons |
|---|---|---|---|---|---|
| Rust Reformer | Converting light-medium rust before grinding | Spray or brush-on | 24 hours full cure | No sanding needed, direct bond to rust | Not for heavy pits, black finish only |
| Rusty Metal Primer | Self-etching on flaky surfaces, pre-weld protection | Spray | 1-2 hours to touch | Adheres to oily/dirty metal, fish oil base for flexibility | Strong odor, needs ventilation |
| Stops Rust Enamel | Post-weld topcoat over treated areas | Spray | 24 hours | Durable chip resistance, 12 color options | Thicker build-up, can run if over-applied |
| Automotive Rust Reformer | Trailer/vehicle frames with vibration | Brush-on | 48 hours | Bonds under flex, heat-resistant to 200°F | Pricier for large areas |
My go-to? Rusty Metal Primer for its grip on shop-grimed steel. Paired with a 7018 rod, it turned a rusted-out go-kart chassis into a screamer.
Common Mistakes with Rust-Oleum on Rusted Metal and How to Dodge Them
Early in my apprenticeship, I drowned a gate panel in Reformer, thinking more was better. Cured like tar, and grinding took forever. Fix? Thin coats, always.
Another trap: ignoring humidity. Applied in a muggy garage? Blisters galore. Solution: Dehumidify or wait for dry days. And skipping PPE? Those fumes hit like a hangover—respirator every time.
On the welding side, not feathering the edges leads to delamination under heat. Blend it smooth, or your bead cracks at the line. One job site story: a buddy’s crew treated a beam but welded green—fumes everywhere, halted the pour. Wait it out, folks.
Quick Fixes for Goofs
Runs? Sand lightly once cured. Poor adhesion? Scuff and recoat. Test welds on scrap to catch arc issues early.
Optimizing Your Welder Settings for Rust-Oleum Treated Joints
Treated metal behaves a tad different—slight resistance from the conversion layer. Dial in accordingly. For MIG on 3/16-inch treated mild steel: 19 volts, 180 amps, 75% argon/25% CO2 shield gas. Travel speed? 12-15 inches per minute to burn through without blow-through.
Stick? 1/8-inch 6011 at 100 amps, DCEP polarity—handles residue like a champ. Flux core self-shielded: 0.035 wire, 22 volts, no gas needed for outdoor rust jobs.
Joint prep tip: V-groove at 60 degrees for full pen. Filler? Match to base—ER70S for A36 steel. Run stringers first, then weaves to fill.
Safety Essentials When Mixing Rust-Oleum and Welding on Rusted Gear
Rust-Oleum’s solvents plus welding arcs? Volatile combo. Start with ventilation—shop exhaust or open bays. Respirator with organic cartridges for application; P100 for fumes during welds.
Heat can off-gas the coating, so grind slow to avoid burns. Eye pro mandatory—sparks love bouncing off treated surfaces. And grounding: clip direct to bare metal, not the coating.
OSHA nods to this: monitor air for particulates, especially in fab shops. I’ve seen metal fume fever sideline a whole crew—hydrate, rotate shifts.
In the field, like pipeline tie-ins, pair with fire watch. Safe habits build lasting work.
Wrapping It Up: Your New Edge on Rusted Metal Welding
From spotting rust types to dialing in that perfect MIG bead over a treated joint, using Rust-Oleum on rusted metal levels up your game without the hassle. Assess first, apply thin, grind smart, and always prioritize clean fusion for welds that last. You’re now geared to tackle that rusted relic in the corner, turning scrap into solid builds with confidence. No more second-guessing porosity or rework bills.
FAQs
Can I Weld Directly Over Rust-Oleum Without Grinding?
Short answer: No, not for structural work. Grind back to bare metal at the joint to avoid contamination and weak fusion. For non-critical tacks, light residue might slide with flux core, but test it.
Is Rust-Oleum Safe for Galvanized Steel in Welding Prep?
Yes, but strip the zinc first—fumes are toxic. Use Rusty Metal Primer on cleaned galvy for protection, then grind joints clean. Follow AWS D1.1 for coated metals.
How Long Does Rust-Oleum Last on Outdoor Welded Structures?
Up to 5-7 years in mild climates with topcoats, less in salt air. Reapply to heat zones post-weld for max hold. I’ve seen it shrug off winters on farm gates.
What’s the Difference Between Rust Reformer and Rusty Metal Primer?
Reformer converts active rust to a stable base; Primer etches and seals existing flakes. Use Reformer for fresh corrosion, Primer for pre-weld shielding.
Can Rust-Oleum Cause Weld Porosity?
Only if you don’t remove it at joints—residue traps gases. Proper grinding eliminates the risk, keeping your beads clean and strong.