If you’re wondering, “Can you stick weld brass?”, the careful answer is yes in selected cases, but many common brass alloys are poor candidates for shielded metal arc welding. The exact alloy, part thickness, service conditions, electrode data sheet, ventilation, and repair standard all matter.
For a decorative casting or a noncritical heavy repair, a copper-alloy covered electrode may be workable. For a thin sheet, plumbing valve, pressure fitting, fuel component, or unknown casting, brazing, GTAW under a qualified procedure, professional repair, or complete replacement is usually the safer choice.
Quick Answer
Yes, some brass parts can be stick welded with a copper-alloy covered electrode, but many common wrought brasses list coated-metal-arc welding as not recommended. Identify the exact alloy first, follow the electrode maker’s polarity and amperage, control fumes with local exhaust, and avoid DIY repairs on pressure, fuel, or potable-water parts.
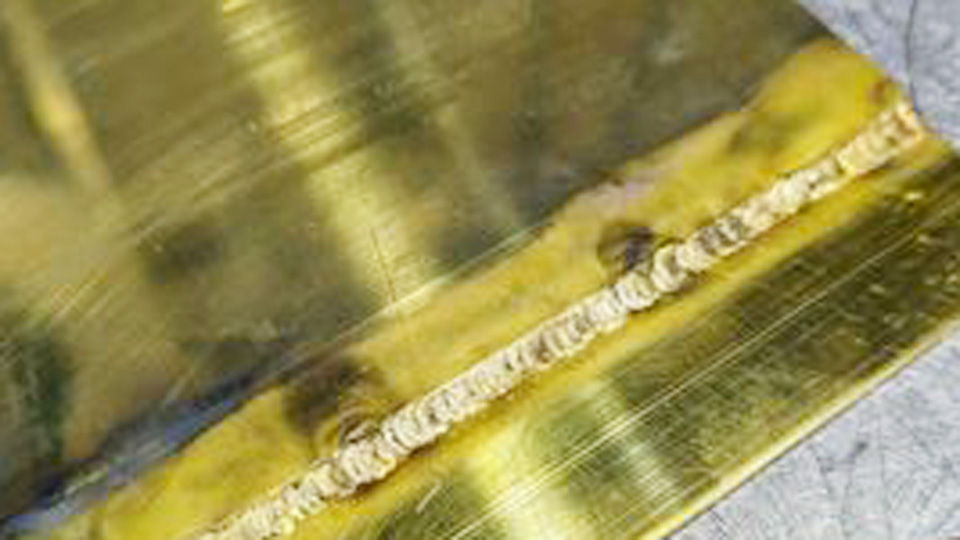
Photo by reddit
Key Takeaways
- Brass is a family of copper-zinc alloys, and its stick-weldability varies by exact alloy and product form.
- Many common wrought brasses are rated “Not Recommended” for coated-metal-arc welding, even though specialty copper-alloy electrodes can be used for selected repairs.
- Never assume DCEN, DCEP, AC, amperage, or preheat. Follow the instructions for the exact electrode you purchased.
- Local fume extraction is the primary control for zinc-bearing hot work. A respirator does not replace ventilation.
- Do not improvise repairs on pressure, fuel, gas, potable-water, oxygen, refrigerant, lifting, steering, or propulsion components.
At a Glance
| Time Required | About 1–3 hours for identification, preparation, test beads, welding, cooling, and inspection |
| Difficulty | Advanced; not a good first stick-welding project |
| Tools Needed | Compatible stick welder, alloy-matched covered electrode, local exhaust, welding PPE, clean dedicated brush, grinder or file, clamps, temperature indicator if preheat is specified, and inspection supplies |
| Cost | Low to moderate if you already own the equipment; specialty electrodes and effective fume control may cost more than replacing a small part |
Why Stick Welding Brass Is Different
Brass is mainly copper and zinc, but the percentages and added elements vary. Some brasses contain tin, silicon, aluminum, manganese, nickel, lead, or other elements. Those differences affect melting behavior, cracking risk, fume composition, corrosion resistance, and filler-metal compatibility.
The welding arc is much hotter than the temperature needed to melt brass. Zinc can leave the molten zone rapidly under that heat, which may create white fume, porosity, an unstable puddle, color changes, and a weld deposit that no longer matches the original alloy.
High thermal conductivity also pulls heat away from the joint. A welder may respond by raising the amperage, only to overheat the surface and increase zinc loss. That narrow working window is one reason brass is less forgiving than mild steel.
The first question is not simply “Can brass be stick welded?” It is “What exact alloy is this, and does its manufacturer or repair procedure permit coated-metal-arc welding?”
For example, the Copper Development Association lists coated-metal-arc welding as not recommended for common C26000 cartridge brass and C23000 red brass. By contrast, specialty electrode manufacturers publish covered copper-alloy electrodes for selected brass, bronze, cast-iron, steel, and overlay applications. Both facts can be true: an electrode may be capable of depositing metal on brass while a particular brass base alloy remains a poor candidate for that process.
Can You Stick Weld Brass? The Basics
You can use SMAW on some brass castings, heavy sections, overlays, and dissimilar-metal repairs when the base alloy, electrode, joint, and service conditions are compatible. However, the process is uncommon for thin wrought brass and should not be treated as a general replacement for brazing or a qualified gas-shielded process.
When to Stick Weld Brass
Stick welding may be reasonable when all of the following are true:
- The brass or copper alloy has been positively identified.
- The part is thick enough to tolerate the process.
- The exact electrode manufacturer approves the base-metal combination.
- The joint is noncritical or is covered by a qualified repair procedure.
- Effective source-capture ventilation is available.
- A test coupon made from matching material can be welded and inspected first.
Possible examples include a nonpressure decorative casting, a heavy machine component approved for repair, a wear overlay, or a controlled dissimilar-metal joint covered by a written procedure.
Why It’s Tricky
- Porosity: Zinc loss, contamination, moisture, and poor technique can trap gas in the deposit.
- Cracking: Some brass alloys and castings have limited hot ductility or contain elements that reduce weldability.
- Heat control: Brass conducts heat quickly but can also overheat locally.
- Color mismatch: A bronze weld deposit may remain visibly different from yellow brass after polishing.
- Fumes: Zinc oxide and any fumes from lead, cadmium, coatings, oil, or filler ingredients require effective control.
- Code acceptance: A sound-looking bead is not proof that a regulated or pressure-bearing repair is acceptable.
When You Should Not Stick Weld Brass
Warning: Do not make an improvised stick-weld repair on a fuel line, gas fitting, pressure vessel, compressed-gas component, potable-water fitting, oxygen part, refrigerant component, lifting device, steering part, propeller, shaft, brake part, or other life-safety component. Replace it or use a qualified repair facility and an approved procedure.
Skip SMAW and choose another method or replacement when:
- The alloy is unknown or cannot be verified from a drawing, material certificate, part specification, or reliable test.
- The part may contain lead, cadmium, beryllium, hazardous plating, paint, oil, or chemical residue.
- The brass is thin enough that burn-through or major distortion is likely.
- The component carries pressure, fuel, gas, potable water, oxygen, refrigerant, chemicals, or a suspended load.
- The part is a marine propulsion, steering, structural, or corrosion-critical component.
- The repair must match the original color with little finishing.
- The governing manufacturer, owner, engineer, or code prohibits the repair.
Identify the Brass Alloy and Surface Hazards
Do not identify brass by color alone. Yellow brass, red brass, manganese bronze, silicon bronze, aluminum bronze, and copper-nickel alloys can look similar after oxidation or polishing, but they do not use the same filler metals or procedures.
Look for a UNS or CDA alloy number, drawing, casting mark, material certificate, equipment manual, or manufacturer repair instruction. A handheld X-ray fluorescence analyzer can help identify alloying elements, but testing and interpretation should be performed by someone trained to use the instrument.
Pay special attention to valves, bushings, free-machining bar, plumbing goods, and old castings. Some contain lead. OSHA requires stronger controls for hot work involving lead- or cadmium-bearing materials, including local exhaust or specified respiratory protection depending on the work location and exposure conditions. Review OSHA’s welding, cutting, and brazing requirements before heating an unknown component.
Note: Many parts called “bronze” in marine and machinery work are not brass. Never select a filler solely from the part’s common name.
Choosing the Right Electrode for Stick Welding Brass
Do not use ordinary carbon-steel electrodes such as E6010, E6011, E6013, or E7018 as a generic brass filler. The weld deposit, dilution, thermal behavior, and joint properties will not match the brass.
Products Worth Considering

Nickel 55 ENiFe-CI Cast Iron Stick Electrodes

All position rod for all types of aluminum including tubes, sheet, cast, and wrought aluminum
Best Electrodes for Brass
ECuSn-C covered electrodes: Some manufacturers offer AWS A5.6 ECuSn-C copper-tin electrodes for joining selected copper-base alloys, overlays, and certain dissimilar-metal combinations. This classification is a reasonable starting point for research, but it is not automatic approval for every brass alloy.
Other copper-alloy covered electrodes: ECu, ECuAl-A2, ECuSi, ECuNi, and other classifications have specialized uses. They are not interchangeable. Select one only when the electrode manufacturer or qualified welding procedure names the actual base metal and service.
Steel electrodes: Do not substitute a steel rod because it is already in the shop. Even if an arc can be maintained, that does not make the resulting joint compatible, ductile, corrosion-resistant, or code-compliant.
A real manufacturer example is Washington Alloy Rainier 3A, an ECuSn-C product described for selected copper, brass, bronze, steel, and cast-iron applications. Its published data sheet specifies DC reverse polarity, meaning electrode positive, for that particular electrode.
Electrode Size and Amperage
Use the amperage range printed on the container or current manufacturer data sheet. Do not assume that every ECuSn-C electrode uses the same polarity or current range.
| Example product data | Published setting | How to use it |
|---|---|---|
| Washington Alloy Rainier 3A, ECuSn-C, 3/32 inch | 60–115 A, DCEP | Example for that named product only |
| Washington Alloy Rainier 3A, ECuSn-C, 1/8 inch | 100–150 A, DCEP | Start within the maker’s range and qualify the procedure on matching scrap |
| Another brand or classification | May differ | Read its current data sheet instead of copying this example |
Pro Tip: Record the alloy, electrode trade name, AWS classification, diameter, lot, polarity, amperage, position, preheat, interpass temperature, and test results. That information is far more useful than writing down only the amperage.
Step-by-Step Guide to Stick Welding Brass
This workflow is for a noncritical part whose alloy and repair method have already been approved. It is not a substitute for a welding procedure specification, engineering review, workplace exposure assessment, or equipment-manufacturer instructions.
Step 1: Prep the Workpiece
Confirm the material: Verify the alloy and check for lead, cadmium, plating, paint, chemical residue, oil, or unknown repairs.
Clean the joint: Remove oxidation and dirt with a clean, dedicated brush, file, abrasive, or other method approved for the material. Degrease only with a suitable nonchlorinated product and follow its safety data sheet.
Avoid chlorinated cleaners: Do not use chlorinated brake cleaner, trichloroethylene, perchloroethylene, or similar products in or near the hot-work area. OSHA requires chlorinated cleaning vapors to be kept away from welding atmospheres.
Let flammable cleaner evaporate: Move used rags and solvent containers out of the hot-work area before striking an arc.
Prepare the joint: Use the bevel, root opening, backing, and fit-up stated in the procedure or electrode instructions. A universal 30° or 45° bevel is not correct for every joint.
Step 2: Set Up Your Welder
Read the data sheet: Confirm that your power source provides the required AC, DCEN, or DCEP output and enough duty cycle for the job.
Set polarity first: Use the polarity specified for the exact electrode. Do not rely on a generic rule for all phosphor-bronze rods.
Set current within the labeled range: Begin with a test bead on matching scrap. Evaluate arc stability, bead shape, wetting, fume level, slag release, penetration, and visible porosity before touching the part.
Follow preheat instructions: Some heavy copper-alloy sections require preheat, while other alloys or procedures limit it. Measure temperature with an appropriate temperature indicator instead of estimating by color or touch.
Step 3: Safety Gear and Ventilation
Capture fume at the source: Position a local exhaust hood close enough to draw fume away without disturbing the arc. NIOSH recommends engineering controls such as local exhaust and fume-extraction equipment to reduce welding-fume exposure.
Keep your head out of the plume: Do not lean directly over the joint. Outdoor work can still expose you when the wind pushes fume through your breathing zone.
Use respiratory protection correctly: A properly selected particulate respirator may reduce exposure to metal fume, but it does not replace exhaust and may not address gases, vapors, or every alloying element. In a workplace, required respirator use falls under OSHA’s respiratory-protection standard, including medical evaluation, fit testing, training, and a written program.
Protect your eyes and skin: Wear safety glasses with side protection under the welding helmet, leather gloves, hearing protection when needed, and flame-resistant clothing. Select the lens shade by process and amperage using OSHA’s welding shade table. For SMAW at 60–160 A, OSHA lists a minimum shade of 8, while the ANSI/AWS recommendation shown in the table is shade 10.
Control fire and electrical hazards: Remove combustibles, screen the arc, inspect leads and the electrode holder, attach the work lead securely, keep the area dry, and maintain a suitable fire extinguisher and fire watch when required.
Step 4: Weld the Joint
Tack first: Use the approved sequence to hold alignment and limit movement. Inspect tacks before covering them.
Use the manufacturer’s electrode angle and arc length: A short arc is common with many covered electrodes, but some copper-alloy products specify a medium arc. Follow the instructions for the actual rod.
Deposit controlled beads: Use stringer beads or the limited weave specified by the procedure. Avoid unnecessary whipping or long pauses at the edges.
Limit heat buildup: Use short weld lengths and a planned sequence. Monitor preheat and interpass temperature if either is specified.
Watch for warning signs: Stop if the puddle becomes uncontrollable, the brass surface collapses, white fume rises sharply, the arc becomes erratic, or the deposit develops visible holes or cracks.
Clean between passes: Let the bead solidify, then remove slag with tools that will not contaminate or damage the alloy. Inspect each pass before adding another.
Step 5: Inspect and Clean
Cool as the procedure requires: Do not quench the part unless the approved procedure specifically calls for it. Sudden cooling can add stress or distortion.
Perform visual inspection: Look for cracks, crater defects, undercut, incomplete fusion, slag, pores, excessive reinforcement, burn-through, and distortion.
Use the correct examination method: Dye penetrant can reveal surface-breaking flaws on suitable nonporous material. Radiography, ultrasonic examination, pressure testing, or other methods may be required for a regulated component, but the applicable code, engineer, and examination procedure must select the method and acceptance criteria.
Do not rely on appearance alone: A polished bronze-colored bead may still have lack of fusion, porosity, dilution problems, or unsuitable mechanical properties.
Common Mistakes and How to Fix Them
| Problem | Likely causes | Corrective action |
|---|---|---|
| Heavy white fume | Excess heat, long dwell time, poor source capture, or high-zinc base metal | Stop, improve local exhaust, verify settings and alloy, and revise the procedure before continuing |
| Porosity | Zinc loss, dirt, oil, moisture, damp electrodes, long arc, or unsuitable filler | Remove the defect, clean thoroughly, store rods as directed, confirm polarity, and test again on scrap |
| Cracking | Poor alloy weldability, restrained joint, leaded material, wrong filler, excessive heat, or incorrect cooling | Stop the repair and reassess the alloy, joint design, filler, sequence, and approved process |
| Rod sticks or arc is unstable | Wrong polarity, low current, unsuitable power source, damp rod, or poor work connection | Check the data sheet, lead connections, output mode, electrode condition, and test range |
| Burn-through | Material too thin, excessive current, wide gap, or slow travel | Change to brazing or a qualified gas-shielded process, improve fit-up, or replace the part |
| Poor color match | Bronze filler differs from the yellow-brass base metal | Test appearance before repair and use a process/filler selected for cosmetic work |
| Slag inclusion | Poor cleaning, bad angle, excessive weave, or covering a defective pass | Remove the inclusion completely, clean each pass, and follow the specified bead technique |
Pros and Cons of Stick Welding Brass
| Pros | Cons |
|---|---|
| Portable equipment for selected field repairs | Many common wrought brasses are poor SMAW candidates |
| No external shielding-gas cylinder | Zinc-bearing fume requires strong exposure controls |
| Specialty covered electrodes can handle selected overlays and dissimilar joints | Electrode availability, polarity, and procedures vary by product |
| Can be useful on approved heavy cast sections | Poor choice for thin, cosmetic, pressure-bearing, or tightly controlled work |
| Existing SMAW equipment may reduce setup cost | Testing, ventilation, and specialty electrodes may exceed replacement cost |
Comparing Stick Welding to Other Methods for Brass
Products Worth Considering

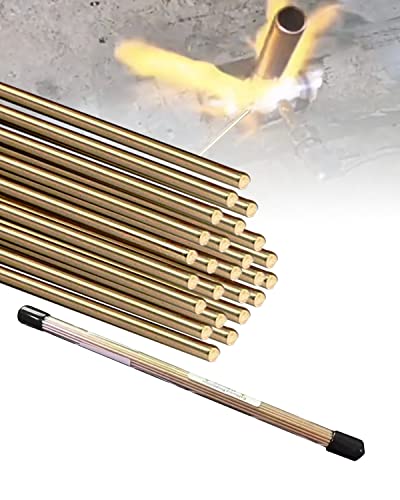
【APPLICATION】 Versatile and can be used for a variety of welding applications as well as DIY projects such as making whirligigs. Brass brazing rods is used for welding copper alloy, carbon steel and alloy steel. It can also be used as an inlaid carbide tool or DIY decorate. Note: Copper-zinc alloys are not suitable for argon arc welding.

Sufficient Quantity to Use: the package comes with 40 pieces of brass rods for knife handles, enough to satisfy your crafting or repairing demands, bringing you much convenience
Stick Welding vs. TIG Welding
GTAW offers more direct control over arc placement and filler addition, which can help on some copper-alloy joints. That does not make one GTAW setup suitable for every brass alloy. The filler metal, tungsten type, shielding gas, current mode, preheat, travel technique, and acceptance tests must come from an alloy-specific procedure.
Do not use ER70S-2 as a generic brass filler. It is a steel filler classification. Copper-tin, copper-silicon, aluminum-bronze, copper-nickel, or other filler families may be selected for particular copper alloys, but only after the base material and service have been verified.
Choose a qualified GTAW procedure when: The material is relatively thin, arc placement and appearance matter, or the manufacturer has published an approved gas-shielded repair method.
Choose SMAW when: The part is a compatible heavy section, portability matters, and a covered-electrode procedure has been approved and tested.
Stick Welding vs. Brazing
Brazing joins parts with a filler that melts below the base metal’s solidus temperature. Because the base metal is not intentionally melted, brazing can reduce burn-through and distortion on thin brass. Proper joint clearance and overlap are important because many brazed joints rely on capillary action and joint geometry.
Brazing is not automatically fume-free. Overheating brass or a zinc-bearing filler can still produce zinc oxide fume, and fluxes can add their own hazards. Use ventilation, follow the filler and flux safety data sheets, and control heat.
Choose brazing when: The part is thin, the joint can use an overlap or socket design, the service permits brazing, and base-metal melting is undesirable.
Choose replacement instead: The part is inexpensive, regulated, pressure-bearing, contaminated, badly cracked, dezincified, or impossible to identify.
Real-World Applications for Stick Welding Brass
Marine repairs: Verify the alloy before doing anything. Propellers and marine hardware may be manganese bronze, nickel-aluminum bronze, copper-nickel, or another alloy rather than ordinary brass. Propulsion and steering components should be repaired only by an approved marine repair facility using the specified procedure and inspection.
Plumbing fixes: Replacement is normally preferable for potable-water, fuel-gas, pressure, and code-regulated fittings. Brass valves may contain lead, and heating can damage seals, seats, plating, or nearby components.
Decorative work: A specialty covered electrode may work on a compatible heavy casting, but the bronze deposit may not match yellow brass. Make a polished test coupon first.
Industrial components: Bushings, housings, wear surfaces, and dissimilar-metal repairs may be candidates when the equipment owner, engineer, or manufacturer approves the procedure. Remove bearings, seals, lubricants, and heat-sensitive parts before welding when the repair plan permits it.
Machine Settings and Joint Prep Tips
Amperage: Use the range published for the exact electrode diameter, polarity, and position. Adjust only within the qualified range after testing on matching material.
Polarity: Confirm AC, DCEN, or DCEP from the rod container or current data sheet. ECuSn-C is a classification, not a guarantee that every brand runs on the same current.
Joint preparation: Match the bevel, root face, opening, backing, and weld size to the joint design and procedure. Tight fit-up is useful only when the design calls for it; some joints require a controlled root opening.
Preheat: Apply preheat only when the base-alloy procedure and electrode instructions require it. Thick copper alloys may need substantial preheat, while excessive heat can increase fuming and distortion.
Interpass temperature: Monitor it when specified. Letting a small part become progressively hotter can be as damaging as starting with excessive amperage.
Cooling: Follow the procedure. Natural slow cooling is common for many repairs, but it is not a universal metallurgical rule for every copper alloy.
Electrode storage: Keep rods dry and follow the manufacturer’s storage and reconditioning instructions. Do not invent a rebaking temperature.
Safety Considerations for Stick Welding Brass
Brass hot work combines the normal hazards of SMAW with metal-specific fume risks.
- Zinc oxide fume: Exposure can cause metal fume fever, often with delayed flu-like symptoms such as fever, chills, cough, weakness, muscle aches, headache, nausea, or chest discomfort.
- Lead and other metals: Leaded brass, old coatings, plating, and filler ingredients can create hazards beyond zinc. Identify them before grinding or heating.
- Ventilation: Use local exhaust to capture fume close to the arc. General shop airflow or an open door is not a reliable substitute.
- Respirators: Use only a correctly selected, NIOSH-approved respirator when the hazard assessment calls for it. A particulate filter does not protect against every gas or vapor.
- Eyes and face: Wear safety glasses under the helmet and select the filter shade according to amperage and process.
- Fire: Remove combustibles, solvents, oily rags, dust, and hidden materials that can ignite from sparks or hot metal.
- Electric shock: Inspect equipment, keep gloves and the work area dry, and do not weld in wet or confined conditions without the required controls.
- Confined spaces: Do not enter or weld in a confined space without a formal confined-space and ventilation program.
Warning: If you develop breathing difficulty, severe chest symptoms, confusion, fainting, or other serious symptoms after welding, leave the exposure area and seek emergency medical help. Flu-like symptoms after zinc-bearing hot work also deserve prompt medical advice and a clear explanation of the exposure.
Meeting US Welding Codes
No single US code automatically governs every brass repair. The applicable requirements come from the component’s construction code, manufacturer, owner specification, jurisdiction, contract, and service.
AWS D1.1: AWS D1.1/D1.1M:2025 is the Structural Welding Code—Steel. It is not a general brass welding code.
ASME Section IX: ASME BPVC Section IX—2025 provides rules for qualifying welding, brazing, and fusing procedures and personnel when another ASME construction code requires those qualifications. Section IX alone does not decide whether a particular repair is permitted.
AWS B2.1: AWS B2.1/B2.1M:2026 provides procedure and performance qualification requirements when it is invoked by a contract, specification, or other referencing document.
Code or engineered work may require a written WPS, supporting procedure qualification record, qualified welder, documented material traceability, controlled filler storage, calibrated equipment, preheat/interpass records, and specified nondestructive or destructive examination. Ask the responsible engineer, inspector, authority having jurisdiction, or equipment manufacturer which rules apply before beginning the repair.
Conclusion
Can you stick weld brass? Technically, yes, for selected alloys and approved repairs using a compatible copper-alloy covered electrode. In practice, many common wrought brasses are rated as poor candidates for coated-metal-arc welding, and thin or critical parts are usually better brazed, welded with an alloy-specific gas-shielded procedure, professionally repaired, or replaced.
The safest workflow is to identify the alloy, rule out lead and hazardous coatings, confirm that the repair is permitted, select the exact electrode from manufacturer data, test on matching material, capture fume at the source, and inspect the result to the required acceptance standard. Never copy a universal polarity, amperage, filler, or preheat value for a material as varied as brass.
Frequently Asked Questions
Can you stick weld brass to steel?
Some copper-alloy covered electrodes are sold for selected brass-to-steel or copper-alloy-to-steel joints and overlays. The result may function more like a braze-welded or dissimilar-metal deposit than a conventional matched fusion weld. Do not assume it is structural. Verify the brass alloy, electrode data sheet, joint design, dilution limits, service environment, and governing procedure.
What is the best welding process for brass?
There is no universal best process. Brazing is often practical for thin brass and socket or lap joints. GTAW may suit an alloy with a qualified gas-shielded procedure. SMAW is mainly a specialized option for compatible heavy sections, castings, overlays, or field repairs. Regulated or inexpensive parts are often better replaced.
How do I avoid zinc fumes when welding brass?
You cannot guarantee zero fume when arc welding zinc-bearing metal. Use local exhaust close to the arc, keep your head out of the plume, control heat, clean the part, and stop if fume increases sharply. Use respiratory protection only after selecting it for the actual contaminants and exposure conditions.
What electrode should I use for stick welding brass?
ECuSn-C is one covered copper-tin classification used by some manufacturers for selected brass, bronze, overlay, and dissimilar-metal work. It is not correct for every brass alloy. Use the exact trade-name electrode and settings approved by its manufacturer or the qualified welding procedure.
Can I stick weld thin brass sheets?
It is technically possible in limited situations, but thin brass is easy to burn through, distort, and overheat. Brazing or a qualified low-heat gas-shielded process is normally more controllable. Test the method on matching scrap before deciding whether the part is repairable.
Should ECuSn-C run on DCEN or DCEP?
Follow the exact electrode manufacturer’s instructions. Products sharing the ECuSn-C classification may publish different current options. For example, Washington Alloy Rainier 3A specifies DCEP. Do not apply that setting automatically to another brand.
Can I repair a brass plumbing or pressure fitting with a stick welder?
An improvised repair is not appropriate for potable-water, fuel-gas, pressure, oxygen, refrigerant, or other regulated service. The fitting may contain lead, internal seals, plating, or an alloy that is unsuitable for SMAW. Replace it or use a qualified repair provider working to the governing code and manufacturer requirements.
Sources
- OSHA 29 CFR 1910.252—Welding, Cutting, and Brazing — ventilation, zinc, lead, cadmium, cleaning compounds, and hot-work safety
- OSHA 29 CFR 1910.134—Respiratory Protection — respirator selection, medical evaluation, fit testing, and program requirements
- NIOSH—Welding Fumes and Fume Extraction — source-capture and engineering-control guidance
- Copper Development Association—C26000 Cartridge Brass — composition, melting range, and process-suitability data
- Washington Alloy Copper Technical Brochure — ECuSn-C applications, polarity, amperage, and procedure example
- AWS D1.1/D1.1M:2025 and ASME BPVC Section IX—2025 — current code scope and qualification context