Whether you’re repairing a trailer, building custom furniture, restoring machinery, or learning the trade, choosing the right base metal is the first step toward a sound weld. Different metals respond to heat in very different ways, so the material affects your welding process, filler metal, preparation, distortion control, safety precautions, and final joint strength.
I’ve learned that you can’t choose settings or filler by appearance alone. A piece that looks like ordinary steel may be hardened alloy steel, stainless, galvanized, or coated with something hazardous. The safest approach is to identify the material first, understand what the joint must do, and then follow the machine chart, filler-metal data sheet, drawing, or qualified welding procedure.
Quick Answer
The most common metals for welding are low-carbon steel, stainless steel, aluminum, cast iron, and copper alloys. Mild steel is usually the easiest for beginners. Stainless and aluminum need cleaner preparation and tighter heat control, while cast iron, coated metals, and specialty alloys require material-specific procedures and added safety precautions.
Key Takeaways
- Low-carbon steel is generally the most forgiving metal for learning MIG, TIG, stick, or flux-cored welding.
- The exact alloy matters. Filler that suits 304 stainless may not be right for 316, and aluminum fillers are not universally interchangeable.
- Amperage, voltage, wire speed, gas flow, and preheat must come from the machine chart, filler data sheet, WPS, and a test coupon—not a thickness-only rule.
- Galvanized, painted, plated, and unknown metals may produce hazardous fumes when heated.
- Structural, pressure, lifting, vehicle-safety, and other critical welds require the applicable drawing, code, qualified procedure, and inspection.
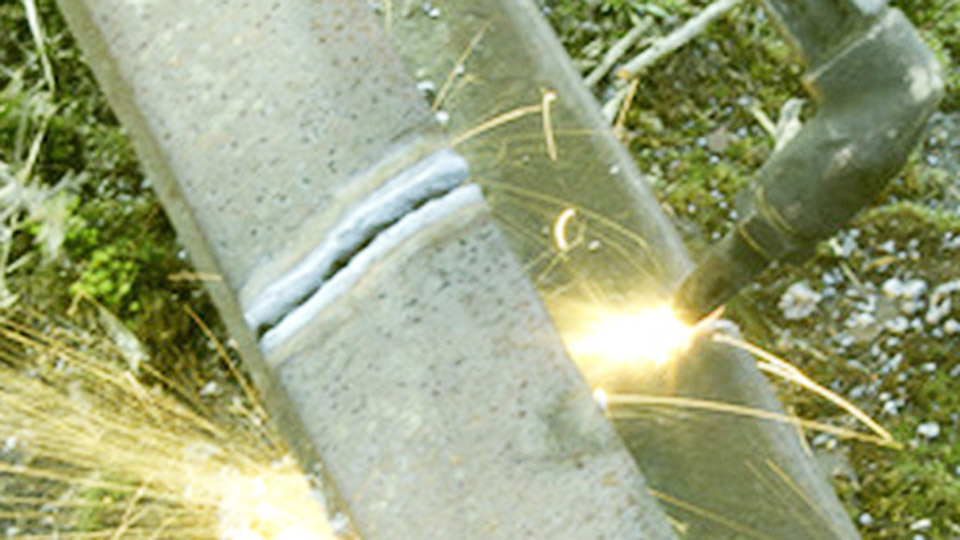
Image by Sciencing.
At a Glance
| Time Required | About 10–30 minutes to identify the material and plan the setup; actual welding time depends on the joint. |
| Difficulty | Beginner for clean low-carbon steel; intermediate to advanced for aluminum, stainless, cast iron, dissimilar metals, and specialty alloys. |
| Tools Needed | Material records or alloy markings, welder, compatible filler, shielding gas or flux, dedicated cleaning tools, clamps, measuring tools, PPE, and local fume extraction. |
| Cost | Low for basic carbon-steel practice; higher for stainless, aluminum feeding equipment, specialty filler, purging gas, preheat equipment, or professional material testing. |
Warning: Do not weld an unknown container, tank, wheel, pressure part, vehicle safety component, lifting device, or unidentified coated metal. Used containers may hold flammable residue, and coatings may contain zinc, lead, cadmium, chromium, or other hazardous materials. Critical work needs the correct procedure, ventilation, engineering approval, and inspection.
Why Choosing the Right Metal Matters
A good-looking bead does not prove that a joint is strong. Weld quality depends on the base-metal chemistry, filler compatibility, joint design, heat input, cooling rate, cleanliness, and service conditions. Choosing the wrong process or filler can cause cracking, porosity, loss of corrosion resistance, excessive softening, hard and brittle heat-affected zones, or early fatigue failure.
The metal also changes the equipment you need. Low-carbon steel can be welded with almost any common arc process. Aluminum often needs AC TIG or a MIG spool gun or push-pull system. Stainless may need back purging. Copper can demand more heat because it carries heat away from the joint. Cast iron may need a specialized repair procedure rather than a normal production weld.
The metal name alone is not enough. The exact grade, condition, coating, joint design, and service environment determine how the part should be welded.
How to Identify Metal Before Welding
Start with the most reliable information available. Check purchase records, drawings, mill certificates, alloy stamps, part numbers, repair manuals, and supplier documentation. For critical work, use positive material identification or laboratory testing rather than guessing from color, weight, or sparks.
- Magnet test: Useful as a quick clue, but not a final answer. Many carbon steels are magnetic, some stainless grades are weakly magnetic or become magnetic after forming, and several nonferrous metals are not magnetic.
- Spark test: Can help an experienced person compare uncoated ferrous alloys, but it is subjective and does not reliably identify every grade. Do not grind unknown coatings or contaminated metal.
- File or hardness test: May show that a part is harder than mild steel, but it does not identify the chemistry.
- Density and appearance: Aluminum is light and copper has a distinct color, but surface treatments and alloying can mislead you.
- PMI testing: X-ray fluorescence or other positive material identification methods are the better choice when alloy chemistry affects safety, corrosion, or code compliance.
Note: Never use a spark test on a sealed container, a part near fuel or flammable material, magnesium, or metal with an unknown coating. Identification testing must not create a fire, explosion, or fume hazard.
Common Types of Metals for Welding
The table below gives a practical starting point. It is not a welding procedure. Always verify the exact alloy and use the current machine chart, filler data sheet, drawing, and WPS when one applies.
| Metal | Typical Weldability | Common Processes | Common Filler Examples | Main Concern |
|---|---|---|---|---|
| Low-Carbon Steel | Good | MIG, TIG, Stick, Flux-Cored | ER70S-6, ER70S-2, E6010/E6011, E7018 | Rust, coating, hydrogen cracking in restrained or thicker joints |
| High-Carbon or Low-Alloy Steel | Fair to difficult | Process selected by procedure | Grade- and strength-matched filler | Hardening, hydrogen cracking, preheat and heat treatment |
| Stainless Steel | Good with control | TIG, MIG, Stick, Flux-Cored | 308L, 316L, 309L, or grade-specific filler | Contamination, distortion, heat tint, chromium-containing fumes |
| Aluminum | Good for suitable alloys | AC TIG, MIG | 4043, 4943, 5356, or alloy-specific filler | Oxide, cleanliness, feeding, hot cracking, HAZ softening |
| Cast Iron | Difficult | Stick, TIG, brazing, specialized repair | Nickel or nickel-iron filler where suitable | Cracking, contamination, casting type, heat control |
| Copper and Copper Alloys | Varies widely | TIG, MIG, brazing | ERCu or alloy-specific bronze filler | Rapid heat loss, zinc vapor from brass, alloy differences |
| Galvanized or Coated Steel | Base metal may weld well | Depends on steel and coating | Filler selected for the base steel | Toxic fumes, porosity, fire, coating damage |
| Titanium and Nickel Alloys | Good only with strict control | TIG and specialized processes | Exact alloy-matched filler | Contamination, shielding, heat input, cost |
| Magnesium | Specialized | AC TIG and specialized processes | Alloy-specific filler | Fire, oxidation, alloy identification |
Products Worth Considering

ER308L WIRE: A low-carbon stainless steel wire engineered to minimize intergranular carbide precipitation. This enhances corrosion resistance without the need for stabilizers, making it ideal for critical applications.

Premium Low Carbon Mig Wire: Achieve high-grade welding results with our ER308L stainless steel MIG wire. Featuring a low carbon content, it minimizes intergranular carbide precipitation, enhancing corrosion resistance without the need for stabilizers.

Enhanced Arc Stability: With an internal flux core, ARCCAPTAIN E308LFC-O Flux Cored Stainless Steel Welding Wire stabilizes the arc, enhancing operational performance and providing a protective barrier.
Low-Carbon and Mild Steel
Low-carbon steel is the shop workhorse and is usually the easiest metal for a beginner to weld. Common examples include A36 structural steel and 1018 bar stock. It is affordable, widely available, and compatible with MIG, TIG, stick, and flux-cored welding.
Why Use Mild Steel?
Mild steel is a practical choice for frames, brackets, gates, tables, trailers, and general fabrication. It is easier to form and weld than higher-carbon steels, and there are many common filler metals and established procedures available.
How to Weld Mild Steel
Process: Solid-wire MIG with ER70S-6 is a common choice for clean fabrication. TIG offers better control on thin or visible work. E6010 or E6011 electrodes provide a forceful arc for suitable applications, while properly stored E7018 electrodes are widely used where low-hydrogen weld metal and specified mechanical properties are required. Flux-cored wire works well on thicker steel and outdoor jobs when the selected wire is approved for the conditions.
Settings: Start with the chart inside the welder, the owner’s manual, and the filler manufacturer’s data sheet. Wire diameter, shielding gas, transfer mode, joint type, position, electrode extension, polarity, and fit-up all change the correct setting. Run a test joint on matching scrap before touching the finished part.
Preparation: Remove paint, oil, heavy rust, moisture, and loose mill scale from the weld zone. Keep the work clamp on clean metal. Even when using a process that tolerates surface scale better than TIG or solid-wire MIG, cleaner metal normally produces a more stable arc and fewer defects.
Pros and Cons of Mild Steel
| Pros | Cons |
|---|---|
| Affordable and widely available | Rusts without paint, plating, or another protective system |
| Compatible with many welding processes | Heavier than aluminum for the same part volume |
| Forgiving for practice and general fabrication | Unknown grades or hardened parts may not behave like ordinary mild steel |
Practical Tip
Do not preheat steel only because it is thicker than a certain number. Preheat may be required because of carbon equivalent, alloy content, hydrogen control, restraint, ambient temperature, or the governing procedure. For structural work, follow the WPS rather than a shop rule.
High-Carbon and Low-Alloy Steel
High-carbon steels, tool steels, wear plate, spring steel, and low-alloy grades such as 4130 or 4140 can harden rapidly beside the weld. That raises the risk of hydrogen-assisted cracking and brittle heat-affected zones. A filler that deposits a strong bead is not enough if the surrounding base metal becomes too hard or loses its heat treatment.
The correct procedure may specify preheat, a maximum interpass temperature, low-hydrogen consumables, controlled heat input, slow cooling, or post-weld heat treatment. Do not weld a suspension spring, axle, lifting hook, hardened shaft, firearm component, pressure part, or unknown wear plate based on a generic internet setting.
Pro Tip: When the steel grade is known, calculate or obtain its carbon equivalent and compare it with the applicable procedure. When the grade is unknown and failure matters, material testing or replacement is safer than guessing.
Stainless Steel
Stainless steel is chosen for corrosion resistance, cleanability, appearance, or high-temperature performance. Austenitic grades such as 304/304L and 316/316L are common, but ferritic, martensitic, precipitation-hardening, and duplex stainless steels need different procedures.
Why Use Stainless Steel?
Stainless works well for food equipment, exhaust systems, architectural parts, chemical-processing equipment, and marine service when the grade matches the environment. “Stainless” does not mean immune to corrosion. Chlorides, heat tint, contamination, rough weld profiles, and the wrong filler can all reduce performance.
How to Weld Stainless Steel
Process: TIG is common for clean, precise welds and thin tubing. MIG, flux-cored, and stick welding can be more productive on suitable joints. Use a grade-specific filler: 308L is commonly used with 304/304L, 316L with 316/316L, and 309L is commonly considered for certain stainless-to-carbon-steel joints. Always verify the base grades and service requirements.
Heat control: Stainless expands more and conducts heat less efficiently than carbon steel, so thin parts can distort quickly. Use good fit-up, short weld sequences, suitable travel speed, balanced tacking, and only the heat needed to achieve fusion. For full-penetration pipe or corrosion-critical roots, an inert-gas purge may be required to prevent heavy backside oxidation.
Preparation: Degrease with a suitable nonchlorinated cleaner, let it evaporate completely, and use abrasives and stainless brushes reserved for stainless work. Carbon-steel contamination can leave embedded iron that later rusts. After welding, remove heat tint and restore the required surface condition using the specified mechanical or chemical process.
Pros and Cons of Stainless Steel
| Pros | Cons |
|---|---|
| Good corrosion resistance when properly selected and finished | Higher material and filler cost |
| Strong, durable, and easy to clean | More prone to heat distortion than mild steel |
| Attractive finished appearance | Requires strict contamination and fume control |
Practical Tip
Keep a separate stainless brush, flap disc, grinding wheel, and work area when possible. For stainless pipe or sanitary work, also control the root purge and post-weld surface condition instead of judging quality only by the face of the bead.
Aluminum
Aluminum combines low weight with useful strength and natural corrosion resistance. Weldable grades such as many 5xxx and 6xxx alloys are common in boats, trailers, tanks, frames, and general fabrication. However, not every aluminum alloy is equally suitable for fusion welding.
Why Use Aluminum?
Aluminum is useful when weight matters, but it carries heat away from the arc quickly and gives little visual warning before melting. Heat-treatable alloys can also lose strength in the heat-affected zone. That loss must be considered when repairing a frame, wheel, pressure part, or other loaded component.
How to Weld Aluminum
Process: AC TIG provides excellent control for thin and detailed work. MIG is productive on thicker sections but normally needs a spool gun or push-pull system to feed soft aluminum wire reliably. Pure argon is common for many TIG and MIG applications, although helium-containing mixtures may be specified for some thick or high-heat jobs.
Filler: ER4043, ER4943, and ER5356 are common examples, but the right filler depends on both base alloys, joint strength, ductility, crack sensitivity, corrosion exposure, anodizing appearance, and service temperature. Use a current compatibility chart such as the Miller aluminum filler-metal guide.
Preparation: Remove oil first with a suitable nonchlorinated cleaner. After it has evaporated, break up the oxide layer with a clean stainless brush reserved for aluminum. Keep filler wire and rods clean and dry. Aluminum oxide melts at a much higher temperature than the underlying aluminum, so poor cleaning can hide the puddle and contaminate the weld.
Settings: Use the machine’s aluminum chart as the starting point. AC balance, AC frequency, tungsten type and size, joint design, alloy, thickness, torch cooling, wire size, and travel speed all matter. Set the available maximum current high enough for puddle initiation, then control actual TIG current with the pedal or remote where the machine allows it.
Pros and Cons of Aluminum
| Pros | Cons |
|---|---|
| Lightweight with good corrosion resistance | Oxide and contamination demand careful preparation |
| Good choice for transportation and marine fabrication | Soft wire can be difficult to feed through a standard MIG gun |
| Suitable alloys weld well with TIG or MIG | Some alloys are crack-sensitive or lose strength beside the weld |
Practical Tip
Use a short, consistent arc and a forehand torch or gun angle that keeps shielding gas over the puddle. Burn-through is controlled by fit-up, travel speed, arc length, filler addition, joint backing, and heat input—not by a simple “push instead of pull” rule.
Note: Many 2xxx and 7xxx aluminum alloys are difficult or unsuitable for conventional fusion welding because of cracking or loss of properties. Confirm the alloy and manufacturer repair guidance before welding a wheel, bicycle frame, aircraft part, or heat-treated structural component.
Cast Iron
Cast iron appears in engine blocks, manifolds, machine bases, cookware, housings, and older equipment. Gray iron, ductile iron, and malleable iron do not respond the same way, and oil-soaked or exhaust-service castings may hold contamination deep in the pores.
Why Is Cast Iron Difficult to Weld?
Cast iron contains much more carbon than mild steel. Rapid heating and cooling can create hard, brittle areas and high shrinkage stress. Existing cracks may also extend beyond the visible end, and previous repairs can introduce unknown filler or contamination.
How to Weld Cast Iron
Process and filler: Nickel and nickel-iron stick electrodes are common for repair work, and TIG with suitable nickel filler may be used for controlled applications. Brazing or metal stitching can be better than fusion welding for some castings. Products such as ESAB nickel-iron cast-iron electrodes are designed for specified cast-iron grades, but the product instructions still need to match the repair.
Preparation: Stop-drill crack ends when the approved repair method calls for it, remove the entire crack with a rounded groove, and clean out oil, carbon, paint, and previous weld metal. Confirm that the casting is worth repairing and that its failure will not create a safety hazard.
Heat control: Some hot-repair procedures preheat much or all of the casting and then cool it very slowly. Other controlled low-heat methods use short beads, low heat input, peening where permitted, and cooling pauses. Do not combine methods or choose a temperature from thickness alone.
Pros and Cons of Cast Iron
| Pros | Cons |
|---|---|
| Excellent damping and compressive strength in many cast parts | High cracking risk during poor repair procedures |
| Many valuable castings can be repaired | Casting type and contamination may be difficult to identify |
| Nickel-based repair consumables are available | Repair may require extensive preheat, slow cooling, or a non-welding method |
Practical Tip
Monitor temperature across the casting rather than heating only the visible crack. When the approved method calls for slow cooling, use an insulated enclosure or welding blanket suitable for the temperature and keep the hot casting away from combustible material.
Copper and Copper Alloys
Copper, brass, silicon bronze, aluminum bronze, and copper-nickel alloys are not one interchangeable group. They are used in electrical systems, plumbing, marine equipment, heat exchangers, sculpture, and repair work. Each alloy family needs its own filler and procedure.
Why Use Copper?
Copper carries electricity and heat extremely well and resists corrosion in many environments. Those same thermal properties make welding difficult because the workpiece can pull heat away from the weld zone faster than steel.
How to Weld Copper
Process: TIG and MIG can weld suitable copper alloys, while brazing is often the better choice for fittings, thin material, or alloys that are difficult to fusion weld. Deoxidized copper is generally easier to weld than oxygen-bearing grades.
Filler: ERCu and several bronze or copper-nickel fillers are available, but filler must match the actual alloy and service. Do not substitute ordinary copper electrical wire for classified welding filler.
Preparation and heat: Remove oxide, oil, and dirt with dedicated tools. Thick copper may require substantial machine capacity and procedure-controlled preheat. Use enough shielding coverage for the puddle, but troubleshoot porosity by checking cleanliness, gas leaks, drafts, flow rate, arc length, and filler condition rather than assuming a larger gas lens will solve every problem.
Pros and Cons of Copper
| Pros | Cons |
|---|---|
| Excellent electrical and thermal conductivity | Rapid heat loss can demand high current or preheat |
| Good corrosion resistance in suitable service | Material and classified filler can be expensive |
| Attractive for decorative work | Brass and other zinc-bearing alloys can produce hazardous zinc oxide fumes |
Practical Tip
Do not treat brass like pure copper. Brass contains zinc, which can vaporize under arc heat, disturb the puddle, and create metal-fume-fever risk. Brazing may provide a cleaner and more controllable joint for many brass parts.
Galvanized, Painted, Plated, and Coated Metals
The base steel beneath a coating may be easy to weld, but the coating changes both weld quality and safety. Galvanized steel produces zinc oxide when heated. Lead, cadmium, chromium, paint, grease, sealers, and unknown plating can release more dangerous fumes or gases.
OSHA identifies zinc oxide from galvanized steel as a common cause of metal fume fever and requires controls for hazardous welding fumes. Review the coating’s safety data, remove only as much coating as the approved procedure requires, capture dust and fumes at the source, and restore corrosion protection after the weld. See OSHA’s welding-fume hazard guidance.
Warning: Never assume that grinding off the visible coating makes a part safe. Coating can remain on the back, inside a tube, between layers, or in nearby paint and sealant. Do not weld cadmium-plated, lead-coated, or unknown-coated material without professional hazard controls.
Titanium, Nickel Alloys, and Magnesium
Titanium and nickel alloys can produce excellent welds, but they demand exact alloy identification, compatible filler, and strict shielding and cleanliness. Hot titanium absorbs oxygen, nitrogen, and hydrogen readily, so the torch, trailing shield, and root side may all need inert-gas protection until the metal cools below the procedure limit.
Nickel alloys are used for heat, corrosion, and chemical service. Their procedures may tightly control heat input, interpass temperature, bead shape, and filler chemistry. Magnesium is lightweight and weldable in suitable grades, but chips and grinding dust can ignite and burn intensely. Specialty-alloy work is not a safe place to guess from appearance.
Welding Dissimilar Metals
Dissimilar-metal welding joins two metals with different chemistry or properties. Common examples include stainless steel to carbon steel, cast iron to steel, or different aluminum alloys. These joints can fail because of dilution, brittle phases, different thermal expansion, corrosion, or a filler that matches one side but not the other.
Stainless-to-carbon-steel joints often use a higher-alloy stainless filler such as 309L, but that is not a universal answer. The correct choice depends on the exact grades, joint dilution, service temperature, corrosion exposure, required strength, and post-weld heat treatment. Hobart’s dissimilar-metal welding guidance emphasizes evaluating both metals and using the higher applicable preheat when the procedure requires it.
Also consider galvanic corrosion. Two different metals connected in a wet or salty environment can form an electrochemical cell. A sound weld may still create a durability problem unless the joint is isolated, coated, drained, and designed for the service environment.
Products Worth Considering

Product Type :Tools

Premium quality ER309L stainless steel TIG welding rods with available diameters 0.045", 1/16", 3/32" and 1/8"; 36" length. Package of 1-Lb, 5-Lb and 10-Lb.

ER308L: Most popular stainless rod for general-purpose applications where corrosion is moderate and applications at cryogenic temperatures.
Welding Processes for Different Metals
No single welding process is best for every metal. Match the process to the alloy, thickness, position, location, production rate, appearance requirement, and available procedure.
| Process | Best Fit | Important Limits |
|---|---|---|
| MIG / GMAW | Fast production on carbon steel, stainless, and suitable aluminum alloys | Needs the correct wire, polarity, gas, drive system, and transfer mode; wind can disturb shielding gas |
| TIG / GTAW | Precise welds on steel, stainless, aluminum, copper, titanium, nickel, and other alloys | Slow, cleanliness-sensitive, and dependent on excellent shielding and operator control |
| Stick / SMAW | Field work, repairs, carbon steel, low-alloy steel, and specialized cast-iron or stainless applications | Electrode classification, storage, polarity, position, and base-metal match are critical |
| Flux-Cored / FCAW | Productive steel fabrication and outdoor work with suitable self-shielded wire | Not all wires are self-shielded or all-position; slag removal and fume control are required |
| Brazing | Cast iron, brass, thin assemblies, dissimilar metals, and joints where lower base-metal heat is useful | Not equivalent to fusion welding; joint design, clearance, filler flow, and service temperature matter |
Choosing the Right Process
- Choose MIG when productivity matters and you have clean material, the right wire and gas, and protection from drafts.
- Choose TIG when control, appearance, thin material, or specialty-alloy shielding matters more than speed.
- Choose stick for field portability, suitable repair work, and applications covered by the electrode and procedure.
- Choose flux-cored for deposition rate, thicker steel, or outdoor work when the wire classification permits it.
- Consider brazing or a mechanical repair when fusion welding would create excessive cracking, distortion, or metallurgical damage.
How to Set Welding Parameters Safely
Thickness-only amperage rules are useful for understanding trends, but they are not finished settings. Use this order instead:
- Confirm the base-metal grade and thickness.
- Choose the approved process, filler classification, wire or electrode diameter, polarity, and shielding gas.
- Check the machine chart and filler-metal data sheet.
- Account for joint type, root opening, bevel, position, backing, and heat sink.
- Set gas flow for the torch, cup, nozzle, draft level, and manufacturer recommendation.
- Test on matching scrap in the same position.
- Break, bend, cut, etch, or otherwise evaluate the practice joint when appropriate.
- Record the successful settings instead of relying on memory.
Pro Tip: A test bead on flat scrap is not enough when the real weld is vertical, overhead, open-root, heavily restrained, or attached to a large heat sink. Build a coupon that copies the actual joint as closely as possible.
Safety Considerations for Welding Different Metals
Every arc-welding process produces ultraviolet radiation, hot metal, sparks, electrical hazards, and some level of fume or gas. The base metal, coating, filler, flux, shielding gas, and cleaning residue determine what is in the plume.
Ventilation: Position local exhaust close enough to capture the plume without pulling shielding gas away from the weld. Keep your head out of the plume. An open door or household fan is not a substitute for a proper exposure assessment. OSHA’s welding-fume fact sheet recommends source controls and warns that argon, helium, and carbon dioxide can displace oxygen.
Stainless and alloy steel: Welding chromium-containing metal can produce hexavalent chromium. OSHA identifies stainless and other chromium-containing alloy hot work as a major exposure source. Use local exhaust, assess exposure, and follow the required respiratory-protection program when respirators are necessary. See OSHA’s hexavalent chromium guidance.
Galvanized, brass, and coated metal: Zinc oxide can cause metal fume fever. Lead, cadmium, and some paint or plating systems create more severe hazards. Identify and control the coating before hot work.
Cleaning chemicals: Use a suitable nonchlorinated cleaner and allow it to evaporate fully. OSHA warns that ultraviolet radiation from inert-gas arc welding can decompose chlorinated solvents and release toxic gases. Keep chlorinated degreasers away from arc work and follow OSHA ventilation and solvent precautions.
Helmet shade: Select the filter shade by welding process, electrode size, and arc current—not by the metal name. Start with a shade that is too dark to see the weld clearly, then move lighter without going below the applicable minimum in the welder instructions and OSHA’s filter-lens table. Wear safety glasses with side protection beneath the helmet.
Respirators: In a workplace, respirator selection is part of a respiratory-protection program that includes hazard assessment, medical evaluation, fit testing, maintenance, and training. A dust mask chosen at random is not reliable protection from welding fumes.
Confined spaces and containers: Shielding gases can displace oxygen. Never weld inside a tank, pit, vessel, or other confined space without a compliant entry and ventilation program. Never weld a used drum, tank, wheel, or sealed section until it has been properly cleaned, tested, vented, and approved for hot work.
Warning: Never use oxygen for ventilation, cooling, or blowing dust from clothing. Keep gas cylinders secured, inspect leads and hoses, remove combustibles, use welding screens, and maintain a fire watch whenever sparks can reach hidden or delayed-ignition material.
Step-by-Step Guide to Welding Any Suitable Metal
This workflow applies to general planning, but it does not replace a code, drawing, repair manual, or qualified WPS.
1. Identify the Base Metal
Use alloy markings, records, mill certificates, supplier data, or positive material identification. Treat magnet, spark, and file tests only as screening tools.
2. Define What the Joint Must Do
Determine whether the joint carries a static load, repeated fatigue, pressure, impact, heat, food contact, corrosive fluid, or electrical current. Also confirm whether a welding code, vehicle repair procedure, or engineering drawing controls the work.
3. Choose the Process and Filler
Match the filler classification to the exact base metal and required properties. Check polarity, shielding gas, storage requirements, service-temperature limits, and whether the filler is approved for the welding position.
4. Remove Hazardous Contamination
Identify paint, plating, oil, oxide, sealant, moisture, and solvent residue before grinding or heating. Use local extraction and the approved removal method. Never weld until flammable cleaner has evaporated and chlorinated solvent is absent from the arc area.
5. Prepare and Fit the Joint
Cut or grind the specified bevel, root face, and root opening. Remove burrs and cracks, align the parts, and use enough tacks and clamps to control movement without creating excessive restraint.
6. Set the Welder and Test on Scrap
Use the machine chart, filler data sheet, and WPS. Test on matching metal with the same joint and welding position. Adjust one variable at a time so you know what fixed the problem.
7. Weld With Controlled Heat and Shielding
Maintain the specified work angle, travel angle, arc length, wire extension, travel speed, bead sequence, preheat, and interpass temperature. Do not weave, peen, backstep, push, or drag unless that technique suits the process and procedure.
8. Inspect and Finish the Weld
Clean slag and inspect for cracks, undercut, overlap, porosity, incomplete fill, poor profile, and arc strikes. Dye penetrant can reveal some surface-breaking flaws when the full cleaner, penetrant, dwell, removal, and developer procedure is followed, but it cannot prove penetration, internal fusion, strength, or code compliance.
Use qualified visual inspection, penetrant, magnetic-particle, ultrasonic, radiographic, pressure, proof-load, or destructive testing when the application requires it. Apply paint, passivation, pickling, galvanizing repair, or another specified post-weld treatment only after inspection is complete.
Common Mistakes and How to Fix Them
| Mistake | Why It Causes Trouble | Better Fix |
|---|---|---|
| Using the wrong filler | Can reduce strength, corrosion resistance, ductility, or crack resistance | Identify both base metals and use the manufacturer or WPS filler-selection table |
| Using one setting for every joint of the same thickness | Ignores position, fit-up, gas, wire size, joint design, heat sink, and machine differences | Start from the current chart and test a matching coupon |
| Poor cleaning | Oil, oxide, moisture, paint, and scale can cause porosity, inclusions, unstable arc, or fumes | Use the correct cleaner and dedicated preparation tools for that alloy |
| Excessive heat | Causes distortion, burn-through, sensitization, grain growth, HAZ softening, or coating damage | Improve fit-up and travel, use sequence control, and follow heat-input limits |
| Too little heat or poor joint access | Can cause lack of fusion or incomplete penetration | Correct the bevel, root opening, work angle, arc length, and procedure settings |
| Assuming every casting needs the same preheat | Can increase stress or conflict with a low-heat repair method | Identify the casting and follow one complete approved repair procedure |
| Welding through coatings | Creates porosity, contamination, fire risk, and hazardous fumes | Identify the coating, control removal, extract fumes, and restore protection afterward |
| Judging strength by bead appearance | A smooth bead can still lack fusion or contain internal defects | Use appropriate inspection or testing for the consequence of failure |
Matching Metals to Your Project
Choose material by engineering need first and weldability second. A metal that is easy to weld may be too heavy, too weak, too corrosion-prone, or unsuitable at the operating temperature.
- General frames, brackets, gates, and tables: Low-carbon steel is economical and easy to fabricate, but it needs corrosion protection.
- Food, chemical, architectural, or marine service: Select the exact stainless grade for the environment, then preserve its corrosion resistance through filler selection, shielding, cleanup, and finish.
- Boats, trailers, and weight-sensitive structures: Use a weldable aluminum alloy and account for heat-affected-zone strength.
- Existing machine castings: Identify the cast iron and evaluate welding, brazing, metal stitching, or replacement.
- Electrical or heat-transfer parts: Select the correct copper alloy and joint process rather than treating all copper alloys alike.
- High-strength, wear, or high-temperature parts: Use the specified alloy steel, nickel alloy, or specialty material with its engineered procedure.
For a basic DIY trailer frame, documented low-carbon structural steel is often easier to source, weld, inspect, and coat than an unknown alloy. For a decorative indoor sculpture, stainless, silicon bronze, brass, copper, or aluminum may offer the appearance you want, but the joint process still has to match the actual alloy.
Conclusion
Understanding the different types of metals for welding starts with one rule: identify the exact material before choosing filler or settings. Low-carbon steel is usually the easiest place to learn, while stainless, aluminum, cast iron, copper alloys, coated metals, and specialty alloys demand progressively tighter control over cleanliness, heat, shielding, filler compatibility, and safety.
Use the machine chart and filler data sheet as your starting point, test a matching coupon, and follow the drawing or WPS whenever one applies. For structural, pressure, vehicle-safety, lifting, or other critical work, have the procedure and finished joint approved by a qualified professional. That approach costs less than repairing a cracked part—and it produces welds that are safer and more dependable.
Frequently Asked Questions
What is the easiest metal to weld for beginners?
Clean low-carbon or mild steel is usually the easiest. It is compatible with MIG, TIG, stick, and flux-cored welding and does not require the oxide removal or feeding equipment associated with aluminum. Start with documented steel, a simple lap or tee joint, and the settings on your welder’s chart.
Can you weld aluminum with a MIG welder?
Yes. MIG is widely used on suitable aluminum alloys, especially thicker material. A spool gun or push-pull feeding system is normally used to prevent soft aluminum wire from tangling. Use the correct aluminum wire, compatible filler alloy, shielding gas, polarity, drive-roll setup, and machine chart.
How do I avoid cracking when welding cast iron?
First identify the casting and choose one complete repair method. Use compatible filler, remove the full crack and contamination, control bead length and heat input, and follow the procedure’s preheat, interpass, peening, and cooling instructions. Some repairs use broad preheat and slow cooling; others deliberately use a controlled low-heat method.
What is the best metal for corrosion-resistant welds?
There is no universal best metal. Stainless steel, aluminum, nickel alloys, titanium, and copper alloys resist different environments. For many food and general corrosion applications, 304L or 316L stainless may be suitable, but chlorides, acids, heat, cleaning chemicals, and service temperature determine the correct grade.
Why is surface preparation so important for welding?
Oil, moisture, oxide, paint, rust, plating, and embedded particles can disturb the arc, block fusion, trap gas, contaminate the weld, or release hazardous fumes. Preparation also exposes cracks and improves fit-up. Use cleaning products and tools that are safe for the alloy and keep chlorinated solvents away from arc welding.
Can two different metals be welded together?
Sometimes. Stainless steel can often be joined to carbon steel with a suitable high-alloy filler, and some different aluminum alloys can be joined with a compatible aluminum filler. Other combinations form brittle compounds or severe corrosion problems. Check both alloys, dilution, expansion, heat treatment, service environment, and filler guidance before welding.
Is galvanized steel safe to weld?
The underlying steel may be weldable, but heating the zinc coating produces zinc oxide fume that can cause metal fume fever. Identify all coatings, use effective local exhaust, follow workplace exposure requirements, remove coating only under an approved procedure, and restore corrosion protection after the weld.
Sources
- OSHA — Controlling Hazardous Fume and Gases During Welding — ventilation, welding-fume, shielding-gas, and coating hazards.
- OSHA — Hexavalent Chromium — chromium exposure from stainless and alloy-steel hot work.
- OSHA — Eye and Face Protection — process- and current-based welding filter-shade guidance.
- Miller — Aluminum Filler Metals and Systems — alloy-specific aluminum filler selection.
- Miller — Welding Stainless Steel Tube and Pipe — stainless filler matching, heat control, and corrosion performance.
- Hobart Brothers — Considerations for Welding Dissimilar Metals — filler, preheat, and property differences in dissimilar joints.