Yes, you can use Bondo over a weld on an auto body panel, but only after the weld is solid, clean, dry, and shaped correctly. Body filler is for leveling small surface flaws, not for hiding cracked welds, rust holes, pinholes, or weak metal. For the best repair, grind the weld carefully, clean the area, sand it with the right grit, choose the right filler, and seal the repair so moisture cannot get trapped under the finish.
Quick Answer
You can apply Bondo over a welded auto body repair if the weld is continuous, fully cooled, ground nearly flush, cleaned, and sanded with 40-80 grit. Do not use filler to cover pinholes, cracks, rust, or weak welds. Use reinforced filler for small weld voids, then skim with lightweight body filler.
Key Takeaways
- Bondo can go over a weld only after the weld is sound, clean, dry, and sanded.
- Body filler is not structural. Fix cracks, rust, gaps, and pinholes before spreading filler.
- Use fiber-reinforced filler for small weld seams or moisture-prone low spots, then finish with regular lightweight filler.
- Follow the filler and primer technical sheets when choosing direct-to-metal filler or filler over epoxy primer.
- Keep filler thin, let it cure fully, block sand it flat, then prime and seal the repair.
At a Glance
| Time Required | 1-3 hours for a small repair, plus primer and paint cure time |
| Difficulty | Moderate DIY bodywork |
| Tools Needed | Grinder or flap disc, 40-80 grit paper, sanding block, solvent cleaner, mixing board, spreaders, body filler, primer, PPE |
| Cost | Usually low to moderate, depending on filler, primer, abrasives, and safety gear already on hand |
Can You Use Bondo Over a Weld?
Yes, you can apply Bondo over a weld, but the repair will last only if the weld underneath is already right. The filler should level small surface lows after welding, grinding, and sanding. It should not be used to cover a weak bead, open seam, rust hole, or pinhole.
Think of body filler as the final shaping material. The metal work still has to do the real job. If the panel flexes, the weld cracks, or moisture gets behind the repair, the filler can lift, bubble, or crack later.
Use regular lightweight body filler for shallow skim work. Use a fiber-reinforced body filler for small weld seams, minor voids, or moisture-prone repair areas. Evercoat’s Fiber Tech technical sheet, for example, lists weld areas and panel bond seams as suitable uses for that type of reinforced filler.
Warning: Body filler is not a structural repair. Do not use Bondo to replace welding, bridge open holes, repair frame or suspension mounting points, or hide cracked metal. If the weld is not sound, fix the metal first.
Grind and Clean the Weld Before Filling
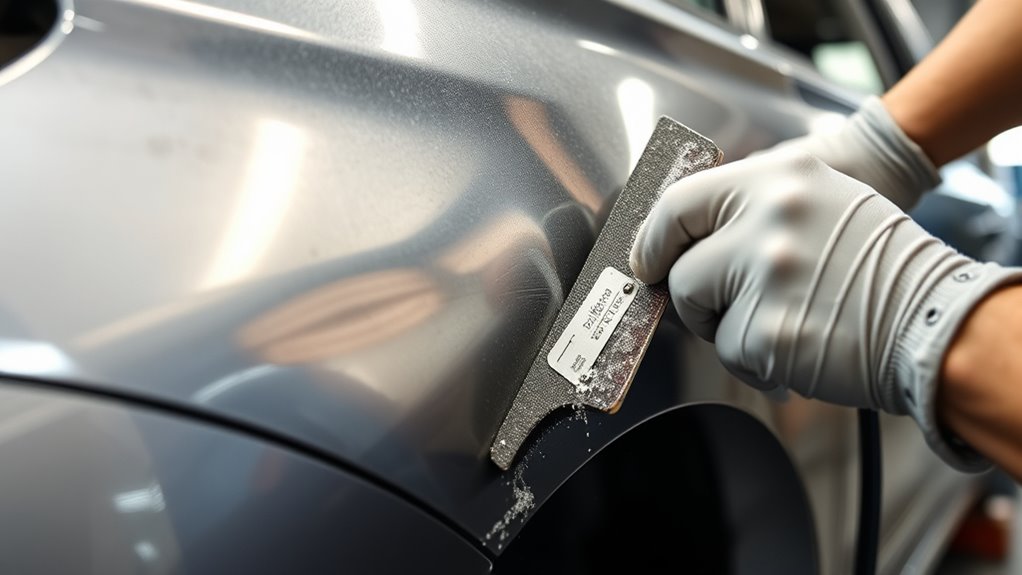
Before you spread any filler, let the weld cool completely. Then grind the weld smooth enough that the filler can sit in a thin, even layer. Use control instead of pressure. If you dig into the panel, you can thin the metal and create low spots that need even more filler.
After grinding, remove slag, scale, dust, and weld residue. Wash or wipe the area with the cleaner recommended for your paint system, then let the surface dry fully. Evercoat’s reinforced filler instructions call for a clean, degreased, thoroughly dry panel before repair and 40-80 grit preparation before applying material.
- Knock down high weld spots with a grinder or flap disc.
- Use 40-80 grit to remove paint around the repair and give the filler tooth.
- Blow or brush away dust after sanding.
- Clean grease, wax, and oil before mixing filler.
- Inspect the weld under strong light before covering it.
Do not spread filler over shiny metal, soot, rust, oily residue, or damp primer. Filler bonds best to a clean, dry, abraded surface.
Pro Tip: Stop grinding as soon as the weld is level enough for a thin skim. A perfectly flat-looking weld is not worth it if you grind away too much panel thickness.
When to Smooth the Weld Flat
Smooth the weld after it has fully cooled and after you are sure the weld is continuous. The goal is a repair that is strong, flat enough to finish, and not overheated or overground.
Weld Flush First
For most outer body panels, grind the weld close to flush with the surrounding metal before filler. A high bead forces you to use too much filler, which increases the chance of cracking or sanding waves.
Check the seam as you grind. If you find a skipped spot, crack, or hole, stop and repair the weld before moving on. Bondo should never be the first thing holding the seam together.
- Verify the weld is continuous.
- Remove slag and sharp edges.
- Keep enough weld and panel thickness for strength.
- Use a straightedge to check the contour.
Fill Minor Low Spots
Once the weld is ground and inspected, filler can level shallow lows and small surface marks. Use only enough material to restore the panel shape. If the low area is deep, go back to metal finishing before adding more filler.
For small weld voids, use a reinforced filler first, then sand it and apply a thin skim of lightweight body filler or finishing putty if needed.
Avoid Overgrinding
Do not chase every small ripple with the grinder. Overgrinding can thin the panel, weaken the bead, and make the repair harder to finish. A sanding block and thin filler layers give you more control than a grinder once the weld is close to level.
Choose the Best Filler for Weld Gaps

The best filler depends on the repair. Regular Bondo-style lightweight filler is best for shallow shaping. Fiber-reinforced filler is better for small weld seams, small voids, and areas where moisture resistance matters. Glazing putty is for tiny pinholes and sanding scratches after the main filler work is shaped.
- Regular lightweight filler: Best for thin skim coats and final shaping.
- Fiber-reinforced filler: Best for small weld seams, small voids, and moisture-prone repair edges.
- Glazing or finishing putty: Best for tiny pinholes, sanding marks, and final surface refinement.
- Seam sealer: Best for factory-style seams where water can enter from the back side or panel joint.
- Epoxy primer: Best for sealing properly prepared bare metal when the chosen product system allows it.
Do not use any filler as a shortcut for missing weld metal. If the gap is still open, weld it, patch it, or replace the metal before applying filler.
Use Fiberglass Filler Over Welds
Use fiberglass or fiber-reinforced filler over welded areas when you need more strength and water resistance than regular lightweight filler provides. Reinforced fillers contain short fibers that help bridge tiny surface flaws better than standard filler.
A manufacturer technical data sheet for Evercoat Fiber Tech reinforced repair compound says it is waterproof and suitable for weld areas, panel bond seams, and rust damage. It also calls for clean, dry prep and 40-80 grit sanding before application.
Apply reinforced filler in controlled layers with firm pressure. Do not pile it on all at once. Once it cures, sand it with 80 grit, then apply a light finishing filler or polyester putty if you need a smoother surface.
Note: Reinforced filler can help seal and level a small welded seam, but it does not turn a weak weld into a strong one. The weld and metal patch must be solid first.
Seal Bare Metal Before Applying Bondo
There are two common repair systems, and the right one depends on the filler and primer you use. Some body fillers are designed to go over clean, dry, sanded bare metal. Some epoxy primer systems allow filler over cured or properly scuffed epoxy primer. Always follow the technical sheet for both products.
Direct-to-Metal Filler
Many body fillers can be applied directly to properly sanded metal. In that system, the surface must be clean, dry, and abraded with the grit range recommended by the filler maker. After shaping the filler, you seal the repair with primer before paint.
Filler Over Epoxy Primer
Epoxy primer can help protect bare metal from moisture and corrosion, but only use filler over epoxy if the primer maker allows it. Usually, that means the epoxy must cure within a certain window or be scuffed before filler is applied.
Do not apply body filler over ordinary primer, old paint, self-etch primer, rust converter, or unknown coatings unless the product instructions say it is allowed. Poor compatibility can cause lifting, edge mapping, or adhesion failure.
Prevent Pinholes and Rust
Pinholes are one of the biggest reasons filler-over-weld repairs fail. A tiny hole can trap moisture behind the filler and lead to rust bubbles under the paint. Before filling, inspect the weld with bright light and a pick. If you see a hole, fix it before you spread filler.
- Repair pinholes with weld, not filler.
- Grind and sand only after the weld is complete.
- Seal the back side of the repair when you can reach it.
- Use seam sealer where the panel design needs it.
- Prime the repair before paint to protect the filler and exposed metal.
Also check the back side of the panel. If the rear of the weld is rusty, open, or unsealed, moisture can reach the repair even when the front looks perfect.
Apply Bondo in Thin Layers
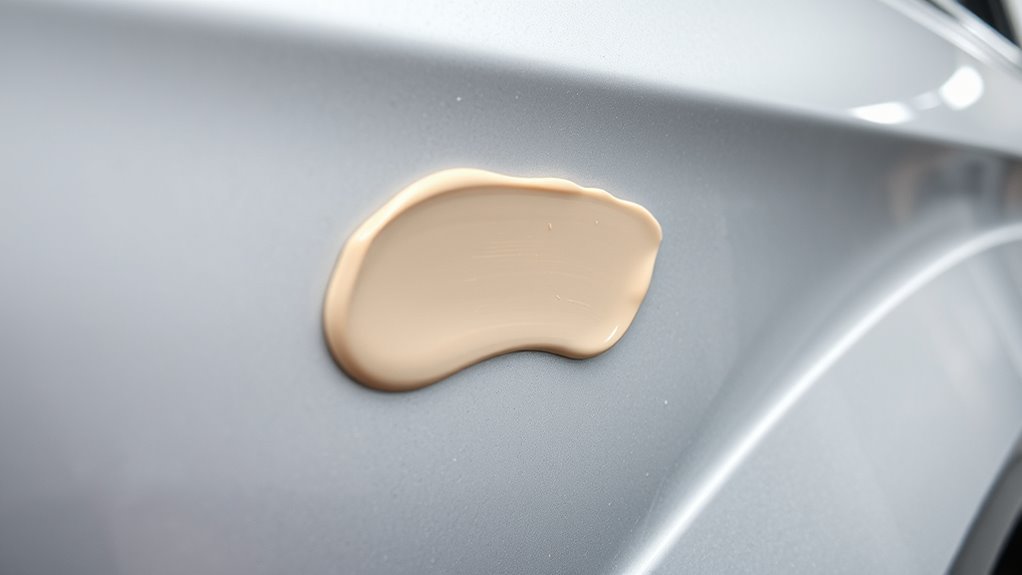
Once the weld is clean, dry, and ready, mix only the amount of filler you can spread during its working time. Use a clean mixing board and spreader. Mix until the color is even, but do not whip air into the filler.
Build the repair with thin layers. Heavy filler hides shape problems at first, but it is more likely to crack, shrink, or show sanding waves later.
Press the first layer firmly into the sanded surface so it wets the scratches and bonds well. Then add only enough filler to level the area. For regular skim filler, keep the finished thickness as thin as practical. For reinforced filler, follow the product’s maximum thickness. Evercoat Fiber Tech, for example, lists a maximum recommended sanded thickness of 1/4 inch.
Let each layer cure before sanding or adding more filler. Start shaping with 80 grit on a block, then refine with finer grits as the panel gets closer to final shape. Do not prime until the repair is fully cured, sanded, and cleaned.
Inspect the Repair Before Priming
Before primer, inspect the repair from several angles. Use your hand, a straightedge, and a guide coat if needed. Your hand often finds waves before your eye does.
- Look for pinholes, cracks, edge lift, and sanding scratches.
- Check that the filler feathers smoothly into the surrounding metal.
- Make sure the repair is dry and free of dust.
- Confirm the panel shape before moving to primer.
- Seal the back side of the welded area when possible.
If you find tiny pinholes in the cured filler surface, use glazing putty or finishing putty according to its instructions. If you find pinholes in the weld itself, stop and repair the weld before continuing.
Welding and Grinding Safety Before Body Filler
Welding and grinding are hot-work tasks. Remove flammable materials, protect nearby surfaces from sparks, and keep fire extinguishing equipment ready. OSHA’s welding, cutting, and brazing requirements include moving or guarding fire hazards, having suitable extinguishing equipment ready, and using fire watch when conditions require it.
Wear eye protection, gloves, hearing protection, and a respirator suitable for sanding dust and solvent exposure. Work with ventilation when using cleaners, primers, and fillers. Do not weld, grind, or use solvent near fuel vapors, aerosol cans, oily rags, or open containers of flammable liquid.
Frequently Asked Questions
What body filler is best for over welds?
For small weld seams or small voids, use a fiber-reinforced body filler first. After it cures and is sanded, use regular lightweight filler or finishing putty for the final skim. Do not use filler to replace missing metal or repair a weak weld.
What is stronger, epoxy or Bondo?
They do different jobs. Epoxy primer seals and protects properly prepared metal, while Bondo-style body filler shapes and levels the surface. Epoxy adhesive can be structural in some repair systems, but epoxy primer and body filler should not be treated as substitutes for welding or metal repair.
Can you put body filler directly over epoxy primer?
Yes, but only if the epoxy primer manufacturer allows it. The epoxy may need to be within its recoat window or fully cured and scuffed first. If the instructions are unclear, use the filler and primer as a matched system or contact the manufacturer.
When should you not use body filler over a weld?
Do not use body filler over rust, oily metal, damp primer, cracked welds, open pinholes, flexible seams, or structural areas. Also avoid filler over old paint or unknown coatings unless the product instructions specifically allow it.
Can Bondo cover weld pinholes?
No. Filler may cover the hole visually, but it will not fix the weld. Pinholes can trap moisture and cause rust bubbles later. Weld, grind, and inspect the pinholes first, then use filler only for surface leveling.
How thick can Bondo be over a weld?
Keep regular body filler as thin as possible after sanding. If the repair needs thick filler, the metal work is probably not finished. Reinforced fillers may allow more thickness, but the correct limit depends on the product technical data sheet.
Conclusion
You can use Bondo over a weld, but only when the weld is already clean, solid, and properly shaped. Grind the bead carefully, inspect for pinholes, sand the surface with the right grit, and choose the filler that matches the repair. Use fiber-reinforced filler for small weld seams or moisture-prone areas, then skim with regular filler only as needed. Seal and prime the repair correctly, and the finish has a much better chance of staying smooth, dry, and crack-free.
Sources
- Evercoat Fiber Tech Technical Data Sheet – reinforced filler substrates, weld-area use, preparation, application layers, sanding, and thickness guidance.
- Evercoat Fiber Tech Product Page – product description, reinforced filler category, and body panel repair uses.
- OSHA 1910.252 Welding, Cutting, and Brazing General Requirements – hot-work fire prevention, fire watch, and eye protection requirements.
- 3M Bondo Product Instructions – Bondo two-part filler workflow, surface cleaning, 80-grit sanding, thin initial layer, curing, and finishing guidance.


