A contact-start plasma cutter uses an internal arc-starting process to create a stream of ionized gas that melts conductive metal and blows the molten material out of the cut. The term can be confusing because it does not always mean that the exposed torch tip must strike the workpiece. On many modern machines, the important contact occurs inside the torch between the electrode and nozzle.
Quick Answer
A contact-start plasma cutter usually starts the pilot arc inside the torch, not by sparking directly against the workpiece. Gas pressure separates the electrode from the nozzle, forming a small arc that transfers to grounded metal. The exact sequence varies by model, so the owner’s manual controls setup, air pressure, and torch position.
Key Takeaways
- Modern contact or blowback starting normally happens inside the torch when compressed gas separates the electrode from the nozzle.
- Contact start, pilot arc, HF start, drag cutting, and torch-to-work touch starting are related terms, but they do not mean the same thing.
- Clean, dry air and the correct delivered CFM and pressure are more important than compressor tank size alone.
- A clean work-clamp connection, correct consumables, proper torch height, and steady travel speed have a major effect on arc transfer and cut quality.
- Plasma cutting involves severe electrical, light, fume, fire, noise, and burn hazards. Follow the cutter’s manual and recognized hot-work safety practices.
At a Glance
| Time Required | About 10–15 minutes for inspection and setup; cutting time depends on the job. |
| Difficulty | Beginner to intermediate, with hot-work safety training and practice required. |
| Tools Needed | Plasma cutter, compatible torch and consumables, suitable power circuit, clean dry air supply, work clamp, PPE, surface-cleaning tool, and fire extinguisher. |
| Cost | Varies by machine and compressor; allow for replacement consumables, filters, and air-drying equipment. |
Warning: Plasma cutters use hazardous open-circuit voltage and produce intense light, molten metal, sparks, fumes, and noise. Never operate one in wet conditions, touch torch parts while energized, or cut a sealed or formerly flammable container without an approved cleaning and hot-work procedure.
Understanding Contact-Start Plasma Cutters
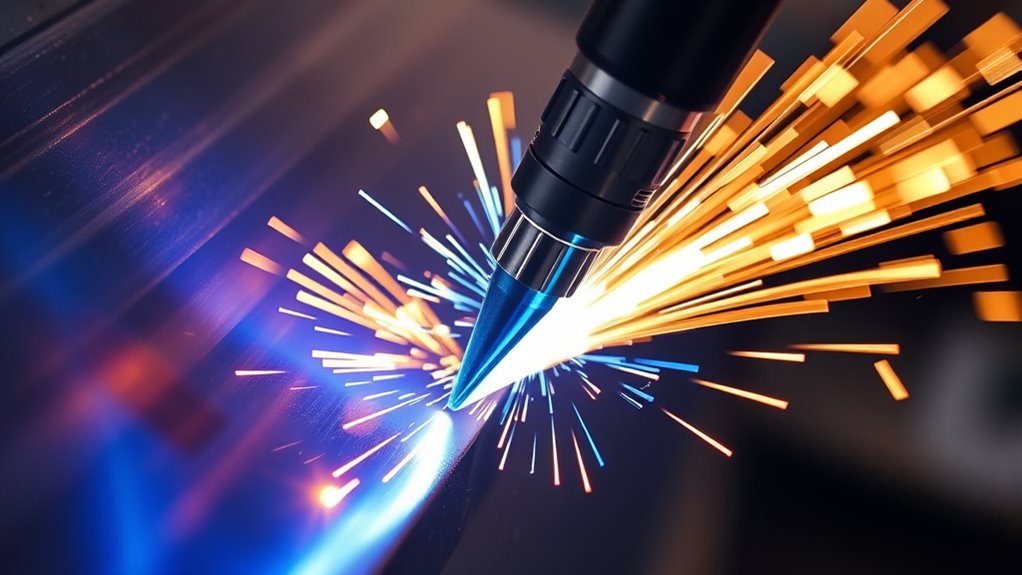
A modern contact-start plasma cutter commonly uses a moving-electrode or blowback-start torch. Before the torch fires, the electrode and nozzle are in contact inside the torch. When you press the trigger, the power supply applies open-circuit voltage and compressed gas begins flowing. Gas pressure separates the internal parts, and a small arc forms between them.
The gas passing through that arc becomes electrically conductive. This creates a pilot arc between the electrode and nozzle. When the pilot arc approaches a properly grounded workpiece, the current transfers to the metal and becomes the cutting arc.
This sequence is illustrated in Hypertherm’s contact-start plasma-cutting diagram.
Note: Manufacturers and sellers do not always use the terms consistently. A budget machine advertised as “contact start” may use internal blowback starting, may require the nozzle to touch the work for arc transfer, or may have no sustained pilot arc. Confirm the actual starting sequence in the owner’s manual.
Contact Start, Pilot Arc, HF Start, and Drag Cutting
These terms describe different parts of the process:
| Term | What It Describes | Key Point |
|---|---|---|
| Contact or blowback start | How the initial arc is created inside the torch. | The electrode and nozzle begin in contact and separate under gas pressure. |
| HF start | An alternative method that uses high-frequency electrical energy to initiate an arc. | It can create more electrical noise around CNC controls and other electronics. |
| Pilot arc | A lower-current arc between the electrode and nozzle before transfer. | A contact-start torch can also be a pilot-arc torch. |
| Touch-to-work start | A design that requires contact with conductive metal to establish or transfer the cutting arc. | Heavy coatings can make starting more difficult. |
| Drag cutting | A cutting technique in which an approved shield or tip rests on the work. | It is a torch-position method, not an arc-start category. |
| Standoff cutting | Holding the nozzle or shield a specified distance above the work. | Use only the distance and consumables specified by the manufacturer. |
Keeping these definitions separate prevents one of the most common plasma-cutter buying mistakes: assuming that “contact start” automatically means no pilot arc or that the bare nozzle must scrape the plate.
Operating Principles of Contact-Start Plasma Cutters

The full operating sequence happens in a fraction of a second, but several electrical, pneumatic, and mechanical events must occur in the correct order.
Arc Initiation Mechanism
- Trigger signal: Pressing the torch trigger sends a start command to the power supply.
- Pre-flow: Compressed gas begins moving through the torch. The exact pre-flow time and pressure depend on the machine.
- Internal separation: In a blowback/contact-start torch, gas pressure moves the electrode away from the nozzle.
- Initial arc: An arc forms across the small internal gap and ionizes the moving gas.
- Pilot arc: The conductive gas supports a pilot arc between the electrode and nozzle.
- Arc transfer: When the pilot arc approaches grounded, conductive metal, the main current transfers to the workpiece.
- Cutting: The constricted plasma jet melts a narrow path while high-velocity gas ejects molten metal from the kerf.
- Post-flow: After the trigger is released, air may continue flowing to cool the torch and consumables.
The cutting arc normally operates at a few hundred volts or less depending on the system, but the power supply can retain dangerous electrical energy. Never remove covers or touch internal components unless you are qualified and the manufacturer’s service procedure specifically authorizes the work.
Electrode-Nozzle Interaction
The electrode carries current from the power supply. The nozzle, sometimes called the cutting tip, has a precisely sized orifice that constricts and accelerates the plasma stream. A swirl ring directs the gas around the electrode and helps center the arc.
In a moving-electrode contact-start torch, the electrode and nozzle initially touch one another inside the torch. Gas pressure then forces them apart. The resulting arc is internal; it does not depend on the electrode physically striking the workpiece.
Once the cutting arc transfers, the workpiece becomes part of the electrical circuit through the work lead and clamp. Rust, paint, mill scale, oil, loose connections, or clamping to a separate piece can prevent reliable transfer.
Plasma Gas Dynamics
Most handheld shop plasma cutters use clean, dry compressed air. Specialized industrial systems may use nitrogen, argon mixtures, oxygen, or other gases for particular materials and processes, but you should never substitute a gas unless the manufacturer approves it.
The arc heats and ionizes the gas, allowing it to conduct electricity. Manufacturer descriptions commonly place the plasma stream at roughly 30,000°F or higher, depending on the equipment and measurement method. The narrow nozzle opening accelerates that gas into a concentrated jet that melts and expels metal.
Contact start describes how the arc is initiated inside many torches; pilot arc describes the arc that exists before the main current transfers to the workpiece.
What Materials Can a Contact-Start Plasma Cutter Cut?
A plasma cutter needs an electrically conductive path. Depending on its amperage and rated capacity, it can cut:
- Mild and carbon steel
- Stainless steel
- Aluminum
- Copper
- Brass
- Expanded metal and grating when the machine supports repeated pilot-arc operation
It cannot cut wood, glass, masonry, most plastics, or other electrically nonconductive materials by the normal plasma arc cutting process.
Paint, rust, powder coating, and mill scale do not make the underlying metal nonconductive, but they can interfere with the work-clamp connection and arc transfer. Coatings can also produce hazardous fumes. Clean the clamp point to bare metal and remove coatings from the hot-work area when required by the coating manufacturer, safety data sheet, applicable rules, or your hot-work procedure.
Key Components of a Contact-Start Plasma Cutter

A contact-start plasma system relies on more than the visible torch tip. Each component affects starting reliability, cut quality, and consumable life.
Products Worth Considering

[Achieve Precise Cuts] PT31 Plasma Cutting Consumables – Your Essential Tool for Efficient Cutting! Whether you're working with sheet metal, steel, or any other material, superior cutting performance ensure clean, accurate, and smooth cuts.

PACKAGE INCLUDED: 5 Pcs Cup-15 Pcs Electrodes-10 Pcs Ring-30 Pcs Tip(Standard)

Package Include: 10 Shield Cups, 50 Nozzles, 20 Swirl Baffle, and 30 Electrodes.
Torch Design Elements
- Electrode: Carries current and forms one side of the internal pilot-arc circuit. A worn electrode may develop a deep pit and produce unstable starting.
- Nozzle or cutting tip: Constricts and directs the arc. An enlarged, oval, or damaged orifice can cause bevel, a wide kerf, and poor cut quality.
- Swirl ring: Controls gas flow and helps center the arc. Cracks, dirt, or incorrect installation can disrupt starting.
- Retaining cap: Holds the consumables in position and may operate a safety interlock. Install it only as directed; forcing or over-tightening parts can damage the torch.
- Shield or drag shield: Protects the nozzle and may establish the correct cutting height. Not every consumable set is designed for dragging.
- Moving-electrode mechanism: Allows internal contact and separation during a blowback start. This mechanism is inside the torch and does not exist to press the outer tip against the plate.
- Trigger and safety lock: Control torch activation. Never defeat the trigger lock or retaining-cap interlock.
Power Supply, Air Supply, and Work Circuit
- Power supply: Converts incoming power into the controlled DC output required for the pilot and cutting arcs.
- Work lead and clamp: Complete the cutting circuit. The clamp should connect directly to clean metal on the workpiece whenever practical.
- Air compressor or gas supply: Must deliver the cutter’s required flow at its specified pressure while the torch is operating.
- Regulator and gauge: Control and display inlet or operating pressure. Check pressure with air flowing when the manual calls for a dynamic reading.
- Particulate and moisture filtration: Remove dirt, liquid water, and oil aerosols that can damage consumables and destabilize the arc.
- Input circuit: Must match the cutter’s voltage, phase, plug, breaker, and extension-cord requirements.
Maintenance Considerations
Contact-start torches contain precision consumables and, in many designs, moving internal parts. Routine inspection is important, but maintenance should remain within the limits stated in the owner’s manual.
- Turn off and unplug or otherwise isolate the power supply before removing consumables.
- Allow post-flow to finish before switching off the machine unless the manual says otherwise.
- Inspect the electrode for excessive pitting.
- Inspect the nozzle opening for enlargement, notches, or an oval shape.
- Check the swirl ring for cracks, blocked passages, and incorrect orientation.
- Replace consumables as a compatible set when the manufacturer requires it.
- Drain the compressor and service filters regularly.
- Keep torch threads and seating surfaces clean without using unapproved lubricants.
- Inspect the torch lead, work lead, trigger, air hose, fittings, and strain relief for damage.
- Do not open the power supply to adjust a spark gap or internal component unless the service manual calls for it and you are qualified to perform the procedure.
Pro Tip: Keep one known-good set of genuine or manufacturer-approved consumables in a clean container. Swapping in that set is a fast way to determine whether poor starting comes from worn consumables or from the air, power, clamp, or torch circuit.
Advantages of Using Contact-Start Plasma Cutters

Modern blowback/contact-start machines are popular in home shops, repair work, fabrication, and light CNC applications for several reasons.
- Lower electrical noise than many HF-start systems: Blowback starting generally produces less electromagnetic interference, which is helpful around computers and CNC controls when the equipment is properly installed.
- Visible pilot arc on many models: A pilot arc can make positioning easier and can help the cutting arc transfer across small gaps or irregular surfaces.
- No exposed ignition spark required at the workpiece: Internal contact starting does not necessarily require the bare nozzle to strike the plate.
- Simple handheld operation: Approved drag shields can help new users maintain a steady height on compatible machines.
- Wide metal range: Plasma cutting works on electrically conductive steel, stainless steel, aluminum, copper, and brass.
- Fast, narrow cutting: Compared with many saws, abrasive wheels, and oxy-fuel methods, an appropriately sized plasma cutter can make fast cuts with no preheat cycle.
- Availability: Contact or blowback starting is common in current handheld air-plasma equipment across several price levels.
These benefits come from the complete plasma system rather than the start method alone. Cutting capacity, duty cycle, air quality, torch design, consumables, and operator technique still determine actual performance.
Potential Drawbacks of Contact-Start Plasma Cutting

Contact-start systems also have limitations that buyers and operators should understand.
- Moving-part wear: A blowback torch relies on repeatable internal movement. Contamination, damaged consumables, or worn parts can prevent reliable separation and starting.
- Inconsistent product terminology: Two machines advertised as “contact start” may behave differently. One may have a sustained pilot arc, while another may require closer workpiece contact.
- Surface-transfer limitations: A thick nonconductive coating can stop the cutting arc from transferring even when a pilot arc is present.
- Air-quality sensitivity: Moisture, oil, dirt, low flow, and pressure drop can quickly shorten consumable life or cause sputtering.
- Consumable cost: Frequent starts, poor piercing technique, wrong pressure, incorrect torch height, and contaminated air all increase electrode and nozzle wear.
- Drag restrictions: Dragging an unshielded nozzle that was designed for a standoff can damage it and alter the arc.
- CNC limitations on some low-cost models: A cutter may use low-noise blowback starting but still lack a machine torch, CNC interface, sufficient duty cycle, divided arc voltage, or documentation for automated use.
Thin metal can also warp or show an oversized pierce mark, but this is mainly controlled by amperage, travel speed, pierce technique, torch height, and heat input rather than by contact starting itself.
Contact Start vs. HF Start and Pilot-Arc Operation
The clearest comparison separates how the arc starts from what the arc does before transfer.
| Feature | Contact/Blowback Start | HF Start | Pilot-Arc Capability |
|---|---|---|---|
| What it describes | Internal electrode and nozzle contact followed by separation. | High-frequency electrical energy used to initiate an arc. | Whether an arc exists in the torch before it transfers to the plate. |
| Electrical noise | Generally lower than HF starting. | Can interfere with nearby controls and electronics. | Depends on the start technology used to create it. |
| Workpiece contact | The internal parts contact; the outer tip may be dragged or held off the work depending on the torch. | The start arc may be created without touching the workpiece. | A pilot arc transfers when it reaches conductive, grounded metal. |
| CNC use | Often preferred for light CNC because of lower electrical noise, provided the model supports mechanized use. | May require industrial-grade shielding, grounding, and noise-resistant controls. | Useful for starts, holes, gaps, grating, and expanded metal when the system supports repeated pilot-arc operation. |
| Main maintenance concern | Moving torch parts, consumables, and clean dry air. | Manufacturer-specified HF components and electrical cleanliness. | Pilot-arc time and repeated starts can add consumable wear. |
For a light CNC table, do not rely on the words “non-HF” or “pilot arc” alone. Confirm that the cutter has an approved machine torch or mounting method, remote start interface, sufficient duty cycle, compatible arc-voltage output, proper grounding instructions, and manufacturer approval for mechanized operation. Hypertherm specifically recommends modern blowback starting rather than HF starting around consumer-style CNC controls because it produces less electrical noise.
Products Worth Considering

【Non-Touch Pilot Arc Function】The ARCCAPTAIN 55A plasma cutter features a pilot arc function. It utilizes a high-frequency non-touch arc starting mode. The torch head does not need to touch the metal plate, reducing energy consumption during non-cutting work, minimizing electrode burning, and extending service life. NOTE: Do not switch voltages until the screen turns off and the fan stops.

[Powerful Cutting Ability] Dual voltage 110/220V good for home, workshop and hardware shop use. Professional performance 1/2" clean cuts on Iron, Steel aluminum and copper with Inverter IGBT Technology. Very powerful for DIY and heavy duty project. The Maximum cutting thickness is recommended to 1/2" @35A 110V 50PSI; 2/3" @50A 220V 65PSI. Dry and compressed air is required. Power breaker up to 60A@110V 35A; Up to 50A@220V 50A.

【Non-Touch Pilot Arc Function】The plasma cutter features a high frequency non-touch arc starting mode. It allows for cutting steel surfaces with dirt, rust or coatings. The torch head does not need to touch the metal plate, reducing energy consumption, minimizing electrode burning, and extending service life. NOTE: DO NOT power on until the screen turns off and the fan stops working!
Best Practices for Contact-Start Plasma Cutting

A repeatable setup protects the operator, helps the arc transfer cleanly, and reduces unnecessary consumable wear.
How to Set Up and Use a Contact-Start Plasma Cutter
- Read the manual and machine label. Confirm the required input voltage, circuit size, air pressure, airflow, consumables, maximum cut thickness, and duty cycle.
- Inspect the work area. Remove combustible materials, check the other side of the cut, arrange ventilation, and keep an appropriate extinguisher nearby.
- Identify the metal and coating. Do not cut unknown material, sealed containers, pressurized parts, or metal contaminated with flammable or chlorinated products.
- Wear complete PPE. Use safety glasses with side protection under a suitable plasma-cutting helmet or face shield, flame-resistant clothing, gloves, hearing protection, and protective footwear.
- Inspect the torch while power is isolated. Check the electrode, nozzle, swirl ring, shield, retaining cap, trigger, and lead. Install the exact consumables specified for the amperage and process.
- Connect clean, dry air. Make sure the compressor’s delivered CFM at the required pressure meets the cutter specification. Drain the tank and filters, check for leaks, and use a suitable hose diameter.
- Set pressure under flow. Use the cutter’s air-test or purge mode when available. Do not assume that a static regulator reading equals the pressure available during a cut.
- Attach the work clamp. Connect it directly to clean bare metal on the workpiece and as close to the cut as practical. Do not depend on a rusty table hinge or painted fixture to carry the current.
- Select amperage. Use the manual’s cut chart when available. Full output is common for material near the machine’s rated capacity, while thin sheet may need lower current and faster movement.
- Choose an edge start or pierce. Starting from an edge is easier on consumables. When piercing, use the torch angle, height, and maximum pierce thickness specified by the manufacturer.
- Start and establish the arc. Hold an approved drag shield on the work or maintain the required standoff. Press the trigger and allow the pilot arc to transfer.
- Move at a steady speed. Hold the torch square to the material. Sparks should generally pass through the cut and exit from the bottom, trailing slightly behind the torch.
- Complete the cut. Slow slightly or angle toward the final edge only when the manual or cut conditions call for it. Release the trigger after the metal separates.
- Allow post-flow. Keep the torch clear while cooling air flows. Do not remove consumables until power is isolated and the torch has cooled.
Note: A shielded drag torch may be designed to slide directly on the workpiece. An unshielded nozzle may require a standoff. Dragging the wrong consumable can damage the orifice and change the cut angle.
Air Pressure and Compressor Sizing
Do not select a compressor by tank size alone. Compare the cutter’s required airflow with the compressor’s delivered CFM at the required working pressure. The advertised displacement or CFM at a lower pressure may not represent what reaches the plasma cutter.
Pressure should be checked while air is flowing if the manual specifies a dynamic setting. Long narrow hoses, restrictive fittings, clogged filters, leaks, and an undersized regulator can produce a large pressure drop between the compressor and cutter.
Cleanliness matters as much as pressure. Liquid water, oil aerosol, and fine particles can cause sputtering, shorten electrode life, damage the nozzle, and produce inconsistent cuts. ESAB recommends matching delivered CFM to the cutter, reading pressure under load, minimizing restrictive hose runs, and using staged filtration where needed.
Edge Starting vs. Piercing
An edge start lets the plasma stream pass immediately through open space, so less molten metal blows back toward the torch. It is usually the easiest method and often gives longer consumable life.
A pierce begins over solid plate. On thicker material, molten metal initially sprays upward. Hold the torch at the manufacturer’s recommended angle and pierce height, then rotate it upright after the arc breaks through. Never exceed the machine’s rated pierce capacity just because it can sever the same thickness from an edge.
Troubleshooting Common Issues in Contact-Start Plasma Cutting

Begin troubleshooting with the owner’s manual and fault indicators. Turn off and isolate the machine before inspecting consumables or electrical connections.
| Problem | Likely Causes | What to Check |
|---|---|---|
| No air and no arc | No input power, open breaker, loose retaining cap, torch interlock, trigger fault, or machine fault. | Verify the power source, indicator lights, cap installation, torch connection, and manual fault code. |
| Air flows but the pilot arc does not start | Worn or incorrectly assembled consumables, stuck moving electrode, low air flow, excessive pressure, or torch damage. | Isolate power, inspect the complete consumable stack, confirm part numbers and orientation, and set air to the manual specification. |
| Pilot arc starts but will not transfer | Poor work-clamp connection, thick paint or rust, excessive standoff, nonconductive material, or a loose work lead. | Clamp directly to bare metal, move closer to the cut, clean the start point, and use the specified torch height. |
| Arc sputters or cuts out | Moisture or oil in the air, pressure sag, compressor recovery failure, worn consumables, poor clamp connection, or excessive travel speed. | Check dynamic pressure, delivered CFM, filters, tank drainage, electrode, nozzle, and clamp. |
| Heavy bottom dross | Travel too slow, current too low, torch too high, worn nozzle, or material beyond the machine’s clean-cut capacity. | Increase speed gradually, verify amperage and cut height, and compare the thickness with the cut chart. |
| Cut does not go through | Travel too fast, low current, low air flow, excessive height, worn consumables, or metal too thick. | Slow down, check output and air under load, reduce height to specification, and install good consumables. |
| Excessive bevel or angled edge | Torch not square, wrong travel direction, cut height too high, damaged nozzle, or incorrect speed. | Square the torch, inspect the orifice, follow the specified cut direction, and correct height and speed. |
| Consumables fail quickly | Wet or oily air, piercing too thick while flat, wrong pressure, incorrect parts, excessive pilot-arc time, or shutting off before post-flow. | Improve filtration, use proper piercing technique, confirm part numbers, and let the cooling cycle finish. |
| Machine stops during a long cut | Duty-cycle limit, blocked cooling airflow, low input voltage, undersized extension cord, or thermal fault. | Let the machine cool while powered as directed, clear vents, and verify the input circuit and extension-cord requirements. |
A retaining cap should be seated as directed, not forced. Over-tightening can interfere with some torch mechanisms or damage components, while an under-tightened cap may leave a safety interlock open. Use hand pressure and the exact procedure in the manual.
Safety Tips for Contact-Start Plasma Cutter Users

Contact-start plasma cutters share the same major hazards as other plasma arc cutting equipment. Follow the machine’s manual, applicable workplace rules, and recognized guidance such as ANSI Z49.1:2021 and OSHA’s welding, cutting, and brazing resources.
Eye, Face, and Body Protection
- Wear safety glasses with side protection beneath the helmet or face shield to protect against chips and flying molten metal.
- Use a filter shade appropriate for plasma cutting and the machine’s amperage. OSHA lists minimum shade 8 for light plasma arc cutting below 300 amps; follow the manufacturer when it requires a darker shade.
- Wear flame-resistant gloves, long sleeves, full-length pants without open cuffs, and protective footwear.
- Avoid synthetic clothing that can melt against the skin.
- Use hearing protection when noise levels require it.
- Protect nearby people with suitable screens and eye protection.
Electrical Safety
- Keep gloves, clothing, the floor, and equipment dry.
- Do not cut while standing in water or touching grounded metal with your body.
- Do not touch the nozzle, electrode, workpiece, or exposed conductive parts while the torch is energized.
- Turn off, unplug, and isolate the cutter before changing consumables or inspecting the torch.
- Use the correct input circuit, plug, breaker, grounding arrangement, and extension cord.
- Replace damaged torch leads, work leads, plugs, and insulation before use.
- Grounding or attaching the work clamp does not remove the need for electrical precautions.
Fumes, Coatings, and Ventilation
Plasma cutting produces metal fumes and gases. Paint, primers, plating, oil, galvanizing, and other coatings can add lead, cadmium, zinc, chromium, or other hazardous substances. Identify the metal and coating before cutting, review the relevant safety data sheet, remove coatings where required, and use effective local exhaust ventilation.
Do not cut near chlorinated solvents or on metal contaminated with unknown chemicals. Ultraviolet energy and heat can contribute to highly hazardous decomposition products. Confined-space cutting requires a specific atmospheric, ventilation, rescue, and hot-work procedure.
Fire and Explosion Prevention
- Remove combustibles from the cutting area and inspect hidden spaces, wall cavities, floors, and the opposite side of the cut.
- Control the direction of sparks and falling molten metal.
- Keep a suitable fire extinguisher ready and use a fire watch when conditions require one.
- Never cut a sealed, pressurized, or closed container.
- Do not cut a tank, drum, pipe, or container that held fuel, solvent, gas, or combustible material unless it has been cleaned, tested, vented, and released under a qualified hot-work procedure.
- Keep compressed-gas cylinders, hoses, and the air compressor protected from sparks, heat, and physical damage.
Safe Air-System Practices
- Use hoses, fittings, filters, and regulators rated for the compressor pressure.
- Depressurize the line before repairing a fitting or filter.
- Drain the compressor according to its instructions.
- Never use oxygen as a substitute for compressed air unless the plasma system is specifically engineered and approved for oxygen cutting.
- Do not direct compressed air or the plasma torch toward yourself or another person.
Frequently Asked Questions
What is the difference between contact and non-contact plasma cutters?
The terms vary by manufacturer. In a modern contact or blowback-start torch, the initial contact is usually between the electrode and nozzle inside the torch. Gas pressure separates them and forms a pilot arc. “Non-contact” may refer to an HF-start system, a pilot-arc system that does not need the outer tip to touch the plate, or simply a standoff cutting technique. Check the actual start sequence in the manual rather than relying on the product label alone.
Will a 20-gallon air compressor run a plasma cutter?
It may, but tank size alone cannot answer the question. Compare the compressor’s delivered CFM at the cutter’s required working pressure with the machine specification. A 20-gallon unit may handle short cuts yet fall behind during long cuts if its pump cannot maintain airflow. Pressure sag, frequent cycling, moisture, and slow recovery indicate that the air supply is undersized or restricted.
How does a contact-start plasma cutter work step by step?
Pressing the trigger starts gas flow and applies open-circuit voltage. In a blowback torch, the gas separates the internal electrode and nozzle, creating a small arc that ionizes the air. This becomes a pilot arc. When it reaches grounded conductive metal, current transfers to the workpiece and forms the cutting arc. The plasma melts the metal, high-speed gas removes it, and post-flow cools the torch after the trigger is released.
What are common mistakes made with plasma cutting?
Common mistakes include using wet or oily air, clamping over paint or rust, installing the wrong consumables, dragging a nozzle that requires a standoff, moving too slowly, piercing material beyond the machine’s rating, ignoring duty cycle, and selecting a compressor by tank size instead of delivered CFM. Cutting unknown coatings without suitable fume controls is also a serious safety mistake.
Can a contact-start plasma cutter cut through paint or rust?
The arc may cut the metal after it transfers, but thick paint, powder coating, or rust can stop reliable transfer and can contaminate the cut. Clean the work-clamp point and start area to bare metal. Remove hazardous coatings from the hot-work zone and provide ventilation rather than treating pilot-arc capability as permission to burn through unknown paint.
Is a contact-start plasma cutter suitable for CNC use?
A blowback/contact-start system is often preferable to HF start around light CNC electronics because it produces less electrical noise. That does not make every contact-start cutter CNC-ready. Confirm that the manufacturer supports mechanized cutting and that the machine provides a suitable torch, remote-start interface, duty cycle, grounding instructions, and any arc-voltage signals required by the table and torch-height controller.
Conclusion
A contact-start plasma cutter does not necessarily begin by sparking its exposed tip against the workpiece. In a typical modern blowback torch, compressed gas separates the electrode and nozzle inside the torch, creating a pilot arc that transfers to grounded metal.
That distinction makes it easier to compare machines accurately. Contact or blowback start describes the internal ignition method, while pilot arc describes the arc available before transfer, and drag cutting describes how the torch is positioned during the cut.
For reliable results, follow the machine-specific manual, supply clean dry air at the required CFM and pressure, clamp to bare metal, install the correct consumables, and use the specified torch height and cutting technique. Treat the cutter as hazardous hot-work equipment every time you operate or service it.
Sources
- Hypertherm — What Is Plasma Cutting? — contact-start sequence, internal electrode movement, pilot-arc formation, and arc transfer.
- Miller — How to Select and Operate a Hand-Held Plasma Cutter — contact-start terminology, torch technique, work-clamp preparation, and plasma temperature.
- Hypertherm — Choosing an Entry-Level CNC Plasma Table — blowback-start benefits and HF electrical-noise concerns.
- ESAB — How Air Pressure Affects Plasma Cut Quality — delivered CFM, dynamic pressure, hose sizing, filtration, and troubleshooting.
- OSHA — Welding, Cutting, and Brazing Hazards and Solutions — fume, UV, burn, eye, and electrical hazards.
- American Welding Society — ANSI Z49.1:2021 — safety practices for welding, cutting, and allied processes.