Keeping your TIG torch consumables clean helps your arc start smoothly, your shielding gas flow evenly, and your weld puddle stay free from avoidable contamination. The key is simple: clean with the right solvent, dry every part fully, inspect each consumable before reuse, and replace anything that no longer seals, grips, shields, or holds a stable tungsten point.
Quick Answer
To clean TIG torch consumables, wipe oil and dust from the cup, collet, back cap, and tungsten with acetone or denatured alcohol, then let every part dry completely. Regrind contaminated tungsten lengthwise on a dedicated wheel. Replace cracked cups, clogged gas lenses, loose collets, damaged o-rings, and any part that hurts arc stability or shielding gas coverage.
Key Takeaways
- Use acetone or denatured alcohol only in a ventilated area, away from arcs, sparks, and hot metal.
- Inspect the tungsten, collet, gas cup, gas lens, back cap, and o-rings before putting the torch back in service.
- Replace consumables by condition, not by a fixed calendar date.
- Store clean TIG parts in sealed, labeled containers so dust, moisture, and shop grit do not reach the weld zone.
At a Glance
| Time Required | 5-15 minutes for routine cleaning; longer if tungsten must be reground or parts need replacement |
| Difficulty | Easy for routine cleaning; moderate if you need to diagnose gas-flow or arc issues |
| Tools Needed | Lint-free cloth, acetone or denatured alcohol, soft brush, clean dry air, dedicated tungsten grinder or diamond wheel, spare cups, collets, gas lenses, back caps, and o-rings |
| Cost | Usually $0-$25 for cleaning supplies; more if you replace cups, gas lenses, collets, or tungsten electrodes |
Warning: Acetone and many alcohol-based cleaners are flammable. Clean parts away from welding arcs, sparks, hot work, and open flame. Let every part dry fully before welding, and use proper ventilation, gloves, and eye protection. Avoid chlorinated brake cleaner or chlorinated solvents near welding heat because dangerous decomposition products can form.
How to Clean TIG Torch Consumables
Start with a cool torch. Disconnect power, shut off shielding gas, and let the torch head and cup cool before touching anything. TIG work depends on clean parts because oil, moisture, dust, and oxide can disturb the arc or let contamination reach the weld puddle.
Supplies Needed for Cleaning
- Lint-free cloths or clean shop wipes
- Acetone or denatured alcohol
- Soft nylon or brass brush
- Clean, dry compressed air
- Dedicated tungsten grinder or diamond wheel
- Sealed containers or labeled storage tubes
- Spare collets, cups, gas lenses, back caps, and o-rings
Step-by-Step Cleaning Process
- Disassemble the front end. Remove the back cap, tungsten electrode, collet, collet body or gas lens, and gas cup.
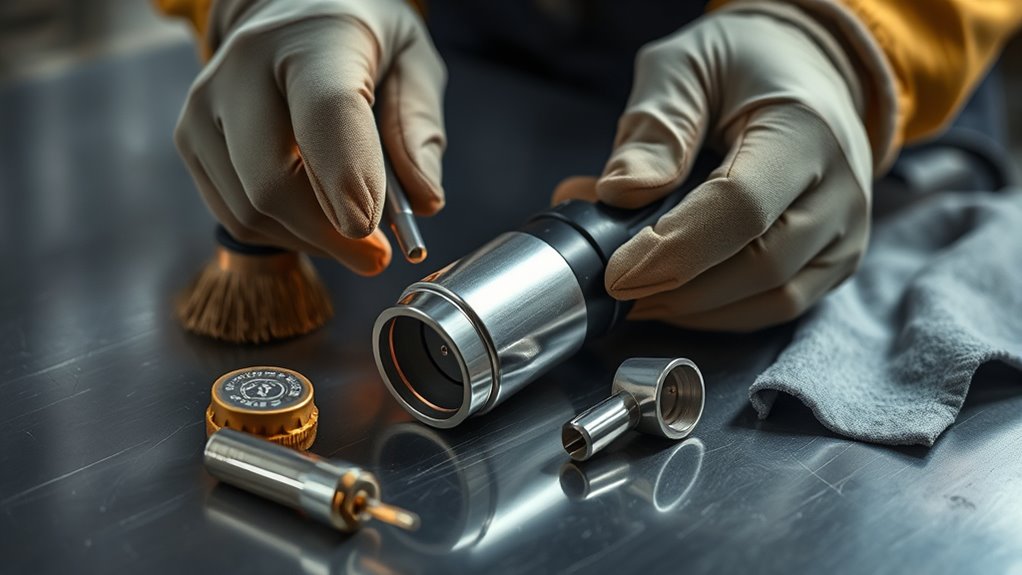
- Wipe each part. Dampen a lint-free cloth with acetone or denatured alcohol and wipe oil, dust, and fingerprints from the tungsten, cup, collet, and back cap.
- Brush gently. Use a soft brush to remove dry grit from cup threads, collet slots, and the torch head. Do not scrape ceramic cups with hard steel tools.
- Clean the gas lens carefully. Blow through the screen with clean, dry air. Do not dig into the mesh because a damaged screen can disturb shielding gas flow.
- Dry before reassembly. Let every part air-dry fully before it goes near the arc.
- Reassemble snugly. Tighten the back cap enough to hold the tungsten securely, but do not overtighten and crush the collet.
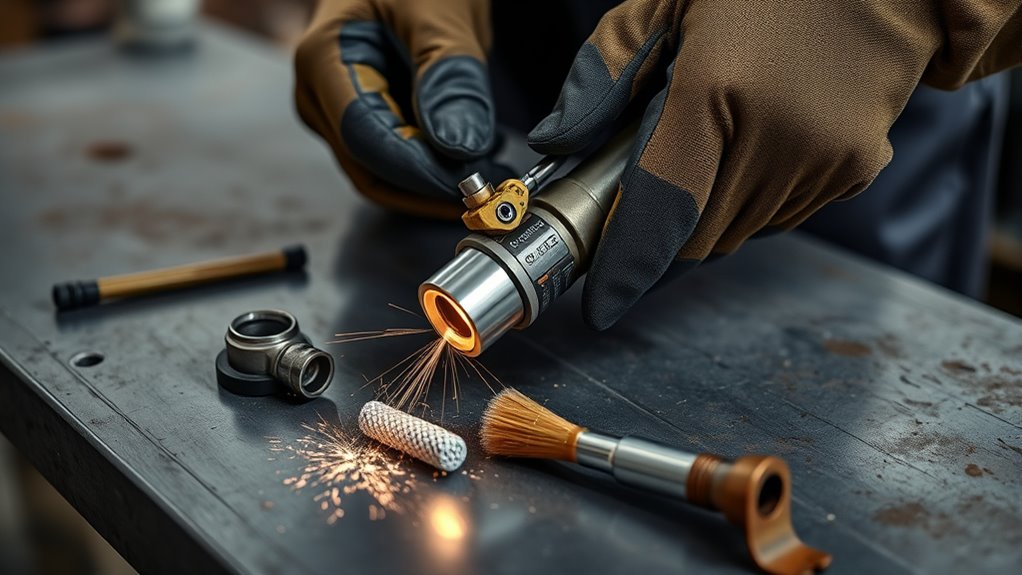
For the tungsten electrode, solvent cleaning removes surface oil and dust, but it will not fix a contaminated, balled, split, or dipped tip. If the tungsten touched the weld puddle or filler rod, cut or grind back to clean material and prepare the point again. A dedicated tungsten wheel helps prevent steel, aluminum, or grinding-wheel grit from embedding in the electrode.
Pro Tip: Grind tungsten lengthwise, not around the electrode. Lengthwise grind marks help the arc track toward the point, while circular scratches can encourage arc wandering.
Using high-quality 2% lanthanated tungsten can be a good choice for many AC and DC TIG jobs, but the best electrode still depends on your material, amperage, polarity, and machine settings. Match the tungsten type and diameter to the job instead of using one electrode for every weld.
Inspect TIG Torch Consumables for Wear
After cleaning your TIG torch consumables, inspect each part before you put the torch back into service. A part can look usable at a glance but still cause gas leaks, poor tungsten grip, arc wandering, or porosity.
Inspect the Tungsten Electrode
Look for a rounded point, split end, blackened tip, embedded filler metal, side scratches, or a melted ball that does not match your welding setup. These signs can make the arc unstable. If the tip is damaged, regrind it with the correct point shape for your material and current range.
For stainless and mild steel on DC, a clean tapered point is common. For AC aluminum, the best tip shape depends on your machine and electrode type. Modern inverter machines often run well with a tapered or slightly truncated point, while some older transformer setups may form a small ball. Follow your welder and tungsten manufacturer guidance, and avoid using a universal angle for every TIG setup. Proper TIG settings for stainless steel also help protect the tungsten from overheating and contamination.
Inspect the Collet and Collet Body
Check the collet for grooves, heat discoloration, cracks, or a weak grip. A worn collet can let the tungsten slip or sit off-center. Also inspect the collet body threads and gas holes. If threads are rough or gas holes are blocked, shielding coverage can suffer.
Inspect the Gas Cup and Gas Lens
Examine the gas cup for chips, cracks, burn marks, spatter, or an out-of-round opening. Even a small crack can disturb gas coverage. If you use a gas lens, inspect the screens for clogging, dents, heat damage, or trapped grit. A damaged gas lens may create turbulent gas flow instead of smooth coverage.
A steady TIG arc depends on clean tungsten, secure clamping, leak-free torch parts, and smooth shielding gas flow.
Inspect the Back Cap and O-Rings
Inspect the back cap for cracks, damaged threads, or a worn o-ring. A bad o-ring can leak shielding gas and pull air into the torch. Replace the o-ring if it is flattened, cut, dry, swollen, or missing.
Inspect Cables, Hoses, and Torch Body
Consumable care should include the torch body and leads. Look for loose fittings, kinked gas hoses, cracked insulation, hot spots, or coolant leaks on water-cooled torches. If gas flow sounds weak, uneven, or unusually loud, check the cup, gas lens, o-rings, torch head, and regulator before blaming the machine.
Note: A monthly inspection is fine for light shop use, but inspect before every critical weld, after any tungsten dip, after a torch drop, and whenever the arc or shielding suddenly changes.
When to Replace Torch Consumables
Replace TIG torch consumables when wear affects arc quality, tungsten grip, sealing, or shielding gas coverage. Do not rely only on a calendar schedule. Heat, amperage, material type, tungsten contamination, cup size, and how often you weld all change consumable life.
| Consumable | Replace When You See | Why It Matters |
|---|---|---|
| Tungsten electrode | Split tip, severe contamination, heavy balling, short length, or repeated arc wandering after regrinding | A damaged point can create unstable starts, wandering arc, or tungsten inclusions. |
| Gas cup | Cracks, chips, burns, blocked opening, or loose fit | The cup shapes shielding gas around the weld zone. |
| Gas lens | Clogged mesh, dented screens, heat damage, dirty threads, or uneven gas flow | A damaged lens can turn smooth gas flow into turbulent coverage. |
| Collet | Grooves, cracks, discoloration, weak grip, or tungsten slipping | A loose electrode changes arc position and control. |
| Back cap and o-ring | Cracked cap, damaged threads, flattened o-ring, cuts, or gas leak symptoms | Leaks waste gas and can pull air into the shielding path. |
Replace cracked gas cups, clogged gas lenses, and worn collets before they turn into porosity, arc wandering, or tungsten movement.
If you weld daily, check consumables at the start of each session and keep common sizes on hand. If you weld only occasionally, inspect parts before storage and again before the next job. This habit saves time because you can catch a worn collet, cracked cup, or missing o-ring before it ruins the first weld.
Troubleshoot TIG Weld Defects
When a TIG weld defect appears, start with the easiest checks: clean base metal, clean filler rod, clean tungsten, correct cup size, steady gas flow, and no drafts. Then inspect the torch consumables for wear or leaks.
| Defect | Likely Consumable or Setup Cause | Fix |
|---|---|---|
| Porosity | Dirty tungsten, cracked cup, leaking o-ring, clogged gas lens, drafts, or poor gas coverage | Clean and dry parts, replace cracked or leaking parts, check flow rate, and block drafts. |
| Arc wandering | Contaminated tungsten, wrong grind direction, loose collet, wrong tungsten size, or excessive stickout | Regrind tungsten lengthwise, shorten stickout, tighten or replace the collet, and match electrode size to amperage. |
| Black tungsten | Poor shielding, post-flow too short, dirty gas path, overheating, or tungsten touched the puddle | Check gas coverage, clean the front end, increase post-flow if needed, and regrind the tungsten. |
| Tungsten inclusions | Tungsten dipped into puddle, too much amperage for electrode size, or unstable arc | Stop, remove contamination from the weld if needed, regrind tungsten, and use the correct electrode diameter. |
| Undercut | Excess heat, fast travel, long arc, or poor filler control | Reduce heat input, tighten arc length, adjust travel speed, and add filler consistently. |
| Weak or dirty-looking bead | Contaminated base metal, dirty filler, wrong filler, or poor shielding | Clean base metal and filler, verify gas coverage, and match filler to the base metal. |
Choose the correct tungsten size and type for your material, then maintain and replace worn consumables before performance drops. Properly matching filler to base metal can also reduce cracking, poor bead shape, and weak joints.
Store TIG Torch Parts Properly
Store TIG torch parts in a clean, dry area to prevent contamination and corrosion. Do not toss clean tungsten electrodes, cups, collets, and gas lenses into the same open drawer where grinding dust and metal chips can reach them.
To store TIG torch parts properly, keep consumables dry and clean, sorted by size and type so you can find the right part quickly and avoid damage.
Keep TIG consumables dry, clean, and sorted by size and type for quick access and less damage.
- Tungsten electrodes: Store in labeled tubes or protective caps. Separate new, used, and contaminated electrodes.
- Gas cups: Keep ceramic cups in a padded bin or divided organizer so the edges do not chip.
- Gas lenses: Store away from dust and grinding grit. Protect the mesh from dents and debris.
- Collets and collet bodies: Sort by tungsten size so you do not clamp a small electrode in an oversized collet.
- Back caps and o-rings: Keep o-rings clean, lightly protected from dust, and away from sharp tools.
Do not mix worn pieces with usable ones. Inspect stored parts regularly for cracks, discoloration, blocked gas holes, thread wear, or damaged seals. When you protect your torch kit this way, you preserve fit, gas coverage, and arc stability, which helps you produce cleaner welds with fewer surprises.
Frequently Asked Questions
What is the Rule of 33 in TIG welding?
There is no universal, recognized “Rule of 33” for TIG welding consumable cleaning. A better rule is to clean until the base metal, filler rod, tungsten, cup, and gas path are free from oil, oxide, moisture, and shop dust. TIG is less forgiving than many welding processes, so clean parts matter more than a fixed time formula.
How do you clean a TIG welding torch?
Let the torch cool, disassemble the front end, wipe parts with acetone or denatured alcohol, brush threads gently, blow the gas lens with clean dry air, and let everything dry fully. Regrind contaminated tungsten on a dedicated wheel, then reassemble the torch and check that the tungsten is centered and secure.
Can you clean tungsten instead of regrinding it?
You can wipe clean tungsten with solvent if it only has oil, dust, or fingerprints on it. If the tip touched the puddle, picked up filler metal, turned black, split, or balled badly, cleaning is not enough. Cut or grind back to clean tungsten and prepare the point again.
Why does my tungsten turn black?
Tungsten often turns black because of poor shielding gas coverage, contamination, overheating, too little post-flow, drafts, a cracked cup, a clogged gas lens, or a leak at the back cap o-ring. Fix the shielding problem first, then regrind or replace the tungsten.
How often should TIG torch consumables be replaced?
Replace TIG consumables when they show damage or affect performance. A cracked cup, loose collet, clogged gas lens, damaged o-ring, or contaminated tungsten should be fixed before the next weld. Light users can inspect before each session; heavy users should inspect at the start of each work period and after any arc problem.
What is the hardest welding process to learn?
Many welders consider TIG one of the hardest common processes to learn because you control the torch, filler rod, arc length, travel speed, and heat at the same time. Clean consumables make learning easier because they remove avoidable problems like arc wandering and poor shielding.
Conclusion
By cleaning your TIG torch consumables, inspecting them for wear, and replacing damaged parts on time, you keep your arc steady and your welds consistent. Focus on the parts that control the arc and shielding gas: the tungsten, collet, gas cup, gas lens, back cap, and o-rings. If weld defects appear, troubleshoot the torch front end before changing every machine setting. Store clean parts in dry, sealed containers, and your torch will be ready for cleaner starts, better gas coverage, and fewer avoidable weld defects.
Sources
- Miller Electric: Selection and Preparation Guide for Tungsten Electrodes — tungsten type, selection, and preparation guidance.
- OSHA 29 CFR 1910.133: Eye and Face Protection — welding eye and face protection requirements.
- OSHA 29 CFR 1910.252: Welding, Cutting, and Brazing — ventilation, fire prevention, and hot-work safety precautions.
- CDC/NIOSH Pocket Guide: Acetone — acetone exposure and flammability safety information.
- Diamond Ground Products: Tungsten Electrode Guidebook — tungsten grinding and electrode preparation reference.


