How to Clean a MIG Welding Nozzle
What’s in This Article
- Why a Clean MIG Nozzle Matters
- What You’ll Need to Clean a MIG Nozzle
- How to Clean a MIG Welding Nozzle
- Clean the Contact Tip and Diffuser Too
- Remove Stubborn MIG Spatter Safely
- Anti-Spatter Tips to Prevent Buildup
- Signs Your MIG Nozzle Needs Replacing
- How to Keep Your MIG Nozzle Cleaner Longer
- Frequently Asked Questions
A dirty MIG nozzle can turn a smooth weld into a rough, spattery mess. Buildup can block shielding gas, disturb the arc, and leave defects in the bead. This guide shows you how to clean the nozzle, contact tip, and diffuser safely, so your MIG gun stays ready for steady work.
Quick Answer
To clean a MIG welding nozzle, turn off the welder and let the gun cool. Remove the nozzle, brush away spatter, clear the contact tip hole, inspect the diffuser, and wipe the parts clean. Finish with a light coat of anti-spatter spray to slow future buildup.
Key Takeaways
- Clean the nozzle only after you turn off the welder and let the gun cool.
- Brush the inside and outside of the nozzle to remove spatter and debris.
- Clear the contact tip hole gently so you do not enlarge or damage it.
- Inspect the diffuser because blocked gas flow can weaken weld quality.
- Use a light anti-spatter coat to help keep the nozzle cleaner longer.
Estimated time: Most nozzle cleanings take about 5 to 10 minutes when the gun has cooled.
Why a Clean MIG Nozzle Matters
A clean MIG nozzle keeps shielding gas moving around the weld puddle. That gas coverage helps you reduce porosity, inclusions, and weak weld spots.
Spatter and debris can narrow the nozzle opening and disturb gas coverage. When that happens, the arc may sound rough, the bead may look uneven, and you may see more spatter.
Regular cleaning helps you restore consistent shielding before small problems waste time. It also helps you reduce rework and protect your consumables.
Proper cleaning restores consistent shielding before small issues become costly failures, saving time, repairs, and resources.
You also extend equipment life because a maintained nozzle handles heat and buildup better. For you, that means fewer stops, more control, and more reliable results. A clean nozzle can also help prevent spatter issues that affect weld quality.
Make nozzle care part of your routine, and your MIG process will stay predictable and ready to perform.
What You’ll Need to Clean a MIG Nozzle
You’ll need a wire brush, a nozzle cleaning tool or small drill bit, rags or shop towels, and anti-spatter spray. Wear safety glasses before you start because spatter and debris can break loose during cleaning.
Keep these items ready so you can clean the nozzle body, contact tip, and diffuser without stopping. Regular cleaning can also help reduce issues like excessive spatter during welding.
Products Worth Considering

The blades cut away the built up spatter helping prolong the nozzle life, and reduces the chances of wire sticking.

Gel eliminates erratic operation with a film that will not clog orifices and threads on MIG nozzles and contact tips

Name: Welding Bead Processor Brush Head
Essential Cleaning Tools
Before you start, gather these basic cleaning tools:
- Wire brush: Scrubs spatter from the inside and outside of the nozzle.
- Nozzle cleaning tool: Clears buildup from tight areas without rough scraping.
- Small drill bit: Helps clear a blocked contact tip hole when used gently by hand.
- Rags or shop towels: Wipe loose residue from parts and the workbench.
- Anti-spatter spray: Helps reduce buildup before your next weld.
Use the wire brush first, then clear smaller openings with the nozzle tool. After cleaning, wipe each part so residue does not move back into the gas path.
Safety and Prep Gear
Start with the right safety and prep gear: safety glasses, a welding-rated wire brush, a nozzle cleaning tool, rags or shop towels, and anti-spatter spray. These items help you protect your eyes and work with control.
Before you clean, stage your bench so debris won’t scatter. Use this setup:
- Put on safety glasses to protect your eyes from loose spatter.
- Place the wire brush and nozzle tool within easy reach.
- Keep rags, shop towels, and anti-spatter spray near the gun.
A clean, prepared workspace helps you move faster and stay precise. Pack everything before you start, and each cleaning pass will feel more efficient.
Warning: Never clean a hot nozzle with bare hands because retained heat can burn skin fast.
How to Clean a MIG Welding Nozzle
Clean your MIG nozzle regularly because spatter and debris can restrict gas flow, weaken shielding, and reduce weld quality. The steps below help you clean the nozzle, contact tip, and gas path in a safe order.
Maintaining a clean nozzle also supports stable welding conditions, along with proper voltage and wire speed settings.
Products Worth Considering

Easy to Use: Cleans the hot MIG nozzle on the torch. Lightweight and compact, easy to carry and manoeuvre

Packege Include: 2x8cm aluminum boxed 13 different diameter Cleaning Wires with a small file + 2x12cm Aluminum boxed 13 different diameter Cleaning Wires with a small file can, 1x nylon tube brushes(5 brushes),1x Stainless Steel Cleaning Needle(10 Needles)

Welding Tip & Carburetor Cleaning Kit - This welding tip and carb cleaning kit included 13 different diameters of cleaning wires(0.4, 0.5, 0.6, 0.7, 0.8, 0.9, 1.0, 1.1, 1.2, 1.4, 1.5, 1.6, a flat file) perfect to clean all kinds of small items that get clogged. If the wire is too big they won't even go in and if too small will not do a good job cleaning, you need a wide variety of sizes, like this set. With our welding tip cleaning tool, you'll be back on the road in no time and have the engine running perfectly.
Why Nozzle Cleaning Matters
Keeping your MIG nozzle clean helps maintain proper shielding gas flow. That gas protects the weld puddle from contamination while the bead forms.
When the nozzle needs cleaning, spatter can choke the opening and disrupt coverage. With regular cleaning, you reduce porosity, inclusions, and unstable arcs.
Watch for these signs:
- Rough or popping arc sounds
- More spatter around the nozzle
- Uneven shielding or visible buildup
Use a wire brush and nozzle cleaning tool to remove debris before it hardens. A routine cleaning schedule keeps your equipment clear and supports efficient welding.
Step-by-Step Cleaning
- Shut off the MIG welder. Turn off power and let the gun cool completely before touching the nozzle.
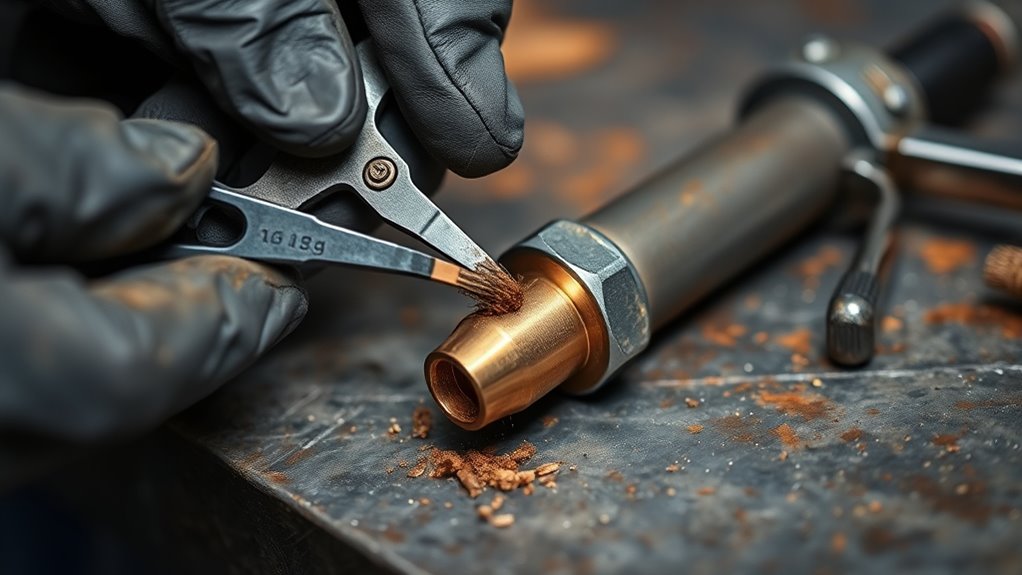
- Remove the nozzle. Gently unscrew the nozzle so you can reach the inside and outside surfaces.
- Brush away spatter. Scrub the nozzle with a wire brush until loose debris and hardened buildup come free.
- Clear the contact tip hole. Use a nozzle cleaning tool or small drill bit by hand, and avoid enlarging the opening.
- Wipe the parts clean. Use a rag or shop towel to remove loose residue from the nozzle and tip area.
- Inspect for damage. Check for cracks, dents, worn threads, heat damage, or blocked gas holes.
- Apply anti-spatter spray. Add a light coat before reinstalling the clean nozzle.
- Reinstall the nozzle. Tighten it securely, but do not force the threads.
When you clean a MIG welding nozzle this way, you reduce arc instability and improve shielding gas coverage. You also keep your setup ready for steady, controlled work.
Clean the Contact Tip and Diffuser Too
Don’t stop at the nozzle. You should also clear the contact tip and inspect the diffuser as part of your regular maintenance.
Use a nozzle cleaning tool or a small drill bit to clear the contact tip hole, then brush both parts with a soft wire brush. Keep your motions controlled so you don’t distort the metal or weaken electrical contact.
Use a nozzle cleaning tool or small drill bit to clear the contact tip hole, then brush gently with a soft wire brush.
- Remove the contact tip and check the bore for buildup.
- Inspect the diffuser for spatter or obstructions that could choke gas flow.
- Reinstall only after both parts look clean, aligned, and intact.
A clean diffuser helps preserve shielding gas coverage, which protects your weld from porosity. Keeping the gas path clear also supports better welding performance, just as clean air quality matters in cutting work.
Visually inspect the parts for wear, heat damage, or cracked threads. Replace damaged components promptly instead of forcing worn parts back into service.
When you keep the nozzle, contact tip, and diffuser clean, you support stable wire feed, steady arc performance, and cleaner welds.
Remove Stubborn MIG Spatter Safely
If stubborn spatter still clings to the nozzle, shut the welder off and let the nozzle cool first. That pause protects you from burns and helps prevent damage from rushed handling.
Use a welding wire brush to scrub the inside and outside surfaces. Apply firm, controlled pressure to break loose hardened spatter without crushing the nozzle.
If deposits resist, use a nozzle cleaning tool or a small drill bit to clear the contact tip hole carefully. Do not twist hard enough to enlarge the opening.
For heavy buildup, use only a solvent that suits your nozzle material and shop safety rules. After soaking, brush the nozzle again and wipe away all residue.
Work methodically until the metal looks clean and the gas path stays open. Then apply a light anti-spatter spray so future spatter releases more easily.
Regular MIG equipment care can help you maintain proper welder configurations and improve overall performance. This routine keeps your welding gun clean and ready for precise work.
Pro tip: Clean light spatter early because thin buildup comes off faster than hardened rings.
Anti-Spatter Tips to Prevent Buildup
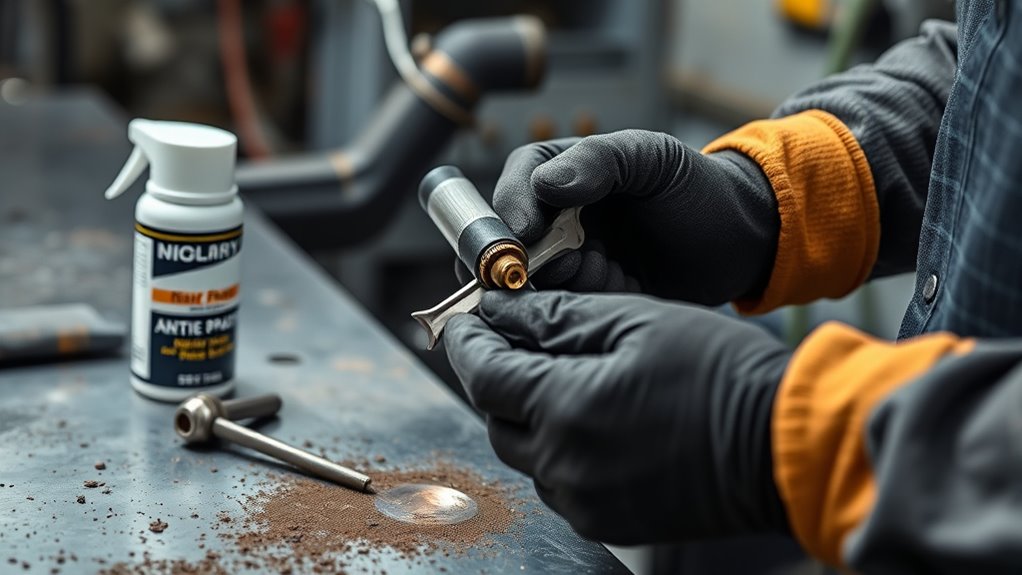
Applying anti-spatter spray before welding can reduce how much spatter sticks to the nozzle. That makes cleanup faster and helps you avoid frequent scraping.
Choose an anti-spatter product that matches your welding process and shop rules. Then coat the nozzle lightly and evenly so excess spray does not contaminate the weld area.
Pre-clean your workpiece before welding. Removing dust, oil, paint, and scale helps reduce buildup at the source.
- Spray the nozzle lightly before arc start.
- Reapply during long sessions when the protective layer wears thin.
- Use a non-stick nozzle when you need longer intervals between cleanings.
Inspect the nozzle during breaks and refresh the anti-spatter layer when needed. This habit protects your time and lets you focus on precise welds instead of scraping residue.
With the right anti-spatter routine, you keep the nozzle cleaner and control buildup across each welding session. You can also review flux core welding techniques if you want to understand how process choice affects cleanup needs.
Signs Your MIG Nozzle Needs Replacing
A worn MIG nozzle shows clear warning signs before it fails completely. If you clean it often and clogs return quickly, replace it because gas flow may no longer stay consistent.
Inspect the nozzle for cracks, dents, pitting, worn threads, or deformation. Any visible damage can reduce shielding coverage and affect weld quality.
Watch the arc and bead pattern too. A rough arc, uneven bead, or repeated porosity may point to poor gas coverage from a damaged nozzle.
If your welds stay inconsistent after you check settings and technique, the nozzle may be the source. Poor shielding can also increase contamination risk, and welding galvanized steel can create added fume hazards, including metal fume fever.
Swapping the nozzle early helps you avoid wasted time, poor welds, and extra strain on your welding equipment.
How to Keep Your MIG Nozzle Cleaner Longer
Keeping your MIG nozzle cleaner for longer starts before you strike an arc. Apply anti-spatter spray, prep the workpiece, and use settings that match your wire, metal, and joint.
This upfront discipline reduces nozzle fouling and keeps your weld path controlled. Understanding the maximum fillet weld size can also help you avoid excess heat input that may increase spatter.
Build a simple cleaning routine that fits your workflow. Don’t wait for heavy deposits to form.
- Spray the nozzle and contact area before welding.
- Wipe the joint and check for contaminants.
- Inspect the nozzle after each long pass.
During long sessions, pause to check for early spatter rings, worn threads, or heat discoloration. If weld quality changes, stop and clean the nozzle before you continue.
These habits cut downtime, protect consumables, and give you better control at the torch. Consistent care extends nozzle life and keeps your machine ready for precise work.
Frequently Asked Questions
How often should you clean a MIG nozzle?
You should inspect the MIG nozzle during breaks and clean it whenever spatter starts to narrow the opening. Heavy welding sessions may need several quick cleanings, while light work may need less frequent care.
Can you clean a MIG nozzle with a drill bit?
You can use a small drill bit by hand to clear buildup, but you should not use a powered drill. A powered drill can enlarge the opening, damage the contact tip, or leave rough edges.
What is the correct way to clean a clogged nozzle?
Power down the welder, let the gun cool, remove the nozzle, and brush away spatter. Then clear the contact tip hole gently, wipe the parts clean, inspect for damage, and apply a light anti-spatter coat.
How do you know when a MIG nozzle is bad?
A bad MIG nozzle may show cracks, dents, pitting, worn threads, or repeated clogging. You may also notice poor gas coverage, rough arc behavior, and inconsistent weld beads.
Should you use anti-spatter spray inside the nozzle?
You can use a light anti-spatter coat on the nozzle, but avoid soaking the parts. Too much spray can create residue and may affect the weld area if it reaches the joint.
Conclusion
A clean MIG nozzle helps you maintain shielding gas coverage, stable arc control, and better weld quality. Start by powering down, cooling the gun, removing buildup, and checking the contact tip and diffuser.
If you see cracks, pitting, worn threads, or repeated clogging, replace the nozzle instead of forcing it to work. Keep anti-spatter spray and a wire brush close, and you’ll spend less time fighting buildup.
With consistent maintenance, your torch will run smoother and your welds will stay more predictable.


