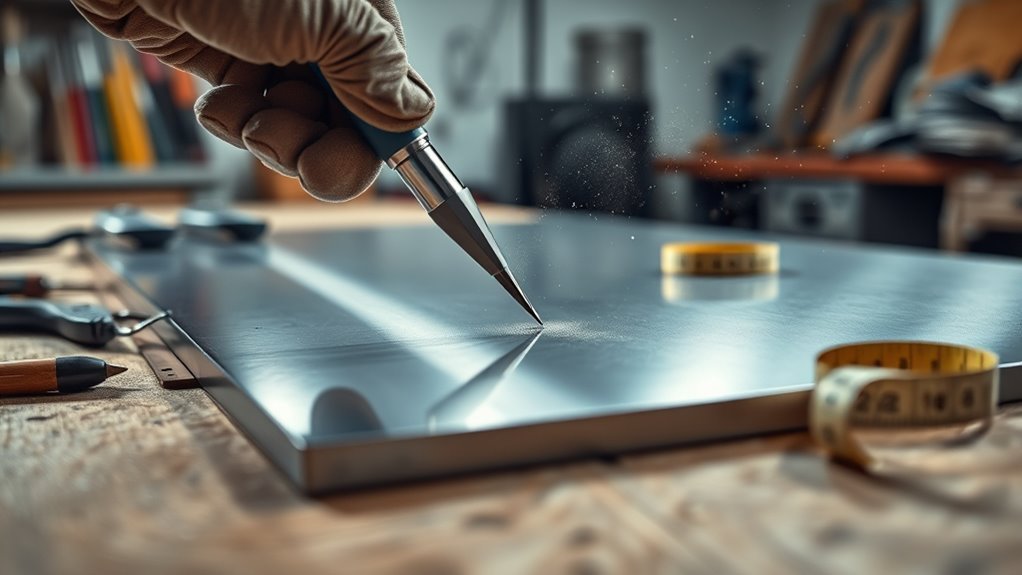
Cutting sheet metal for an auto body repair takes more than following a line with a power tool. You must identify the panel material, confirm the vehicle manufacturer’s repair method, protect everything behind the cut, and leave an edge that can be fitted without large gaps. Careful layout and controlled trimming reduce warping, wasted material, and extra welding work.
Quick Answer
To cut sheet metal for an auto body patch, confirm the panel material and OEM repair method, mark the opening, protect everything behind it, and clamp the metal. Use snips, shears, a nibbler, body saw, or guarded cut-off wheel within its rated capacity. Rough-cut slightly large, trim to fit, deburr, clean, and trial-fit before welding.
Key Takeaways
- Use the VIN, model year, body style, and panel location to find the correct OEM body-repair procedure before cutting.
- Do not section, heat, or weld structural high-strength steel unless the vehicle manufacturer specifically permits it.
- Choose the cutting tool by material, thickness, access, cut shape, and the tool’s rated capacity—not gauge alone.
- Inspect and protect both sides of the panel, including wiring, glass, trim, fuel or brake lines, airbags, and electronic modules.
- Rough-cut with a small trimming allowance, then sneak up on the final line for a tighter fit.
- Deburr, clean, trial-fit, and confirm access for corrosion protection before welding.
At a Glance
| Time Required | About 30–90 minutes for the layout, cutting, deburring, and trial fitting of a small patch; complex in-vehicle work takes longer. |
| Difficulty | Moderate for a detached cosmetic patch; advanced for structural, aluminum, mixed-material, hybrid, or EV repairs. |
| Tools Needed | OEM repair information, measuring and marking tools, clamps, a suitable sheet-metal cutter, eye and face protection, hearing protection, gloves, and deburring tools. |
| Cost | Low to moderate when the main tools are already available; consumables, PPE, replacement metal, and vehicle-specific information may add cost. |
What’s in This Article
- Check the Panel and OEM Repair Method
- Choosing the Right Tools to Cut Sheet Metal
- Understanding Sheet Metal Thickness
- Preparing Your Workspace for Safe Cutting
- Securing Your Sheet Metal for Cutting
- Step-by-Step Cutting Process
- Techniques for Clean Cuts
- Mistakes and Troubleshooting
- Final Checks Before Welding
- Frequently Asked Questions
- Conclusion
- Sources
Check the Panel and OEM Repair Method Before Cutting
Before choosing a cutting tool, identify exactly what you are repairing. A removable fender skin is not the same as a rocker reinforcement, pillar, roof rail, intrusion beam, floor reinforcement, or other part of the vehicle’s safety structure.
Use the vehicle identification number, model year, body style, production information, and panel location to find the correct body-repair procedure. The repair information should tell you the panel material, approved sectioning locations, joining method, weld type, adhesive requirements, and corrosion-protection steps.
Modern vehicles may use mild steel, galvanized steel, aluminum, high-strength steel, ultra-high-strength steel, or several materials in one body assembly. Some high-strength parts cannot be sectioned or conventionally MIG welded. Honda body-repair information, for example, states that certain 1,500 MPa ultra-high-strength steel parts must be replaced as complete parts and require specified equipment and procedures. See the manufacturer’s instructions summarized in this Honda Body Repair News document.
Warning: Do not cut, heat, section, or weld a structural panel, reinforcement, battery enclosure, airbag-related component, or ultra-high-strength steel part unless the vehicle manufacturer’s repair procedure specifically allows it. Hybrid and electric vehicle high-voltage systems must be made safe by a properly trained person using the exact OEM procedure.
If the original panel is available, measure its clean, undamaged edge with a micrometer or caliper. Do not identify thickness by appearance alone. A magnet may help distinguish some steel from aluminum, but it cannot identify steel strength, coating type, or whether sectioning is approved.
Choosing the Right Tools to Cut Sheet Metal
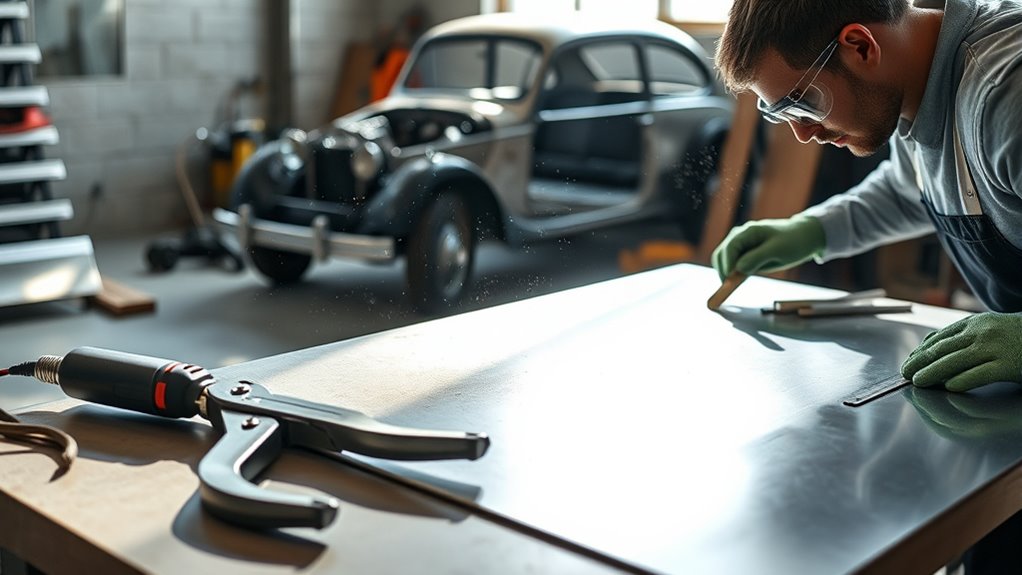
Select the tool by the panel material, measured thickness, cut shape, access, required edge quality, and the manufacturer’s rated cutting capacity. Tool ratings are not interchangeable: a tool’s mild-steel capacity may differ from its stainless-steel or aluminum capacity.
| Tool | Best Use | Main Limits |
|---|---|---|
| Aviation snips | Short straight cuts, curves, corners, and small detached patch panels | Can curl or distort the waste side; hand fatigue increases on long cuts |
| Electric or pneumatic shears | Long open cuts where a smooth edge and low heat are priorities | Need clearance and may not turn tightly; check the exact material rating |
| Power nibbler | Curves, irregular shapes, and internal openings | Leaves sharp metal chips that must be collected before they damage paint or tires |
| Pneumatic body saw or jigsaw | Tight access, controlled trimming, and internal cuts after drilling a start hole | Can chatter or bend thin sheet if the panel is poorly supported |
| Air cut-off tool or angle grinder | Fast rough cuts, weld removal, and areas with enough spark clearance | Creates heat, sparks, abrasive dust, and a wider risk area; less forgiving on final trim lines |
| Plasma cutter | Detached, suitable metal where the OEM procedure and equipment allow thermal cutting | Usually not the first choice for thin cosmetic body skins because of heat, kerf width, sparks, backside damage, and fire risk |
Aviation snips give good control around small corners. Color-coded sets commonly include snips intended for left curves, right curves, and straighter cuts. Take small bites and keep the handles from scraping the finished side of the patch.
Electric shears work like powered scissors and can produce a clean, low-heat edge on material within their rating. A power nibbler turns more easily and suits irregular openings, but its crescent-shaped chips are sharp and can become trapped in seams or interior trim.
An air cut-off tool or angle grinder is fast, but speed does not make it the best choice for every final edge. Use light pressure and keep the wheel moving so one area does not overheat. Follow the guidance in this article on how to use an angle grinder safely.
For a cut-off wheel, use a wheel designed for the tool, material, diameter, mounting system, and cutting operation. Its maximum operating speed must equal or exceed the tool speed. Inspect the wheel before use, install the correct guard, hold the tool with both hands, and never use the wheel’s flat side for grinding unless the wheel is specifically designed for that purpose. 3M states that its auto-body cut-off wheels must be used on compatible guarded tools. See the 3M cut-off wheel safety and application information.
The best cutting tool is not the most powerful one. It is the tool that makes the required shape without overheating, stretching, or damaging the panel and everything behind it.
Products Worth Considering

Straight-cut aviation tin snip with high-leverage design and serrated-edge blade for efficient cutting
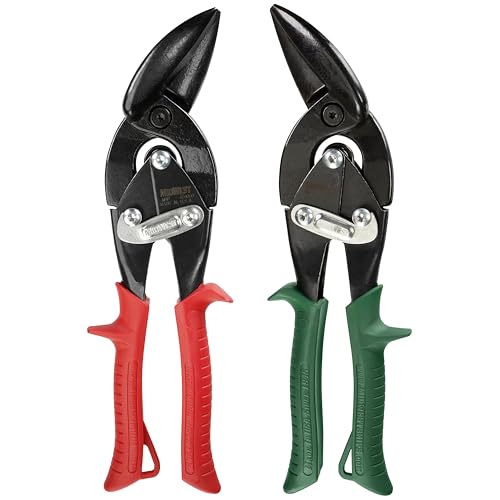
2 PIECE OFFSET SNIP SET - Includes left and right offset snips for straight cuts and tight curving left and right cuts. Offset model snips are best for making long cuts and trim cuts.

STRAIGHT CUT BULLDOG AVIATION SNIPS - Designed for straight cuts and wide curving left and right cuts. Bulldog model snips are best for making trim cuts in extra thick material.
Understanding Different Sheet Metal Thicknesses
Sheet metal thickness affects cutting effort, edge distortion, tool capacity, welding heat, and final panel fit. Measure the original panel where corrosion, grinding, and collision damage have not reduced its thickness.
Gauge numbers can be confusing because a higher number normally means thinner material within the same gauge system. Gauge is also material-specific. Twenty-gauge mild steel is not necessarily the same thickness as 20-gauge galvanized steel, stainless steel, or aluminum.
Common Nominal Sheet-Steel Thicknesses
| Sheet-Steel Gauge | Approximate Thickness | Approximate Metric Thickness |
|---|---|---|
| 16 | 0.0598 in | 1.52 mm |
| 18 | 0.0478 in | 1.21 mm |
| 20 | 0.0359 in | 0.91 mm |
| 22 | 0.0299 in | 0.76 mm |
These are common nominal values for sheet steel, not a promise about any specific vehicle panel. A current gauge reference from UniPunch shows that steel, stainless steel, and aluminum use different conversions.
How Thickness Affects the Later Weld
Thin panels burn through and distort more easily when there is too much heat or a wide, uneven joint gap. A clean, consistent edge makes it easier to clamp the replacement panel flush and use the exact joining process listed in the vehicle repair procedure.
Cold-cutting tools such as snips, shears, nibblers, and saws add less heat than abrasive or thermal cutting. They can still distort the edge if the panel is unsupported, the blade is dull, or the tool is forced.
Match the replacement panel’s material and thickness to the approved repair specification. A large thickness mismatch can make heat control difficult and may change how the repaired area performs.
Note: Gauge does not identify steel strength. Two panels with similar thickness can have very different metallurgical properties and repair restrictions.
Preparing Your Workspace for Safe Cutting
Clear and inspect the workspace before touching the cutting tool. You need enough light to see the layout line and enough room to control the tool without twisting your body or directing sparks toward another person.
Clear the Work Area and Control Fire Hazards
Remove paper, solvents, fuel containers, upholstery, dry insulation, aerosols, oily rags, and other combustible materials. OSHA’s hot-work rules require movable fire hazards to be removed or guarded and call for suitable extinguishing equipment to be immediately available. The standard also identifies combustible material within 35 feet as a concern in conditions where sparks or slag can reach it. Review OSHA 29 CFR 1910.252 before performing spark-producing cutting work.
Keep an appropriate, maintained fire extinguisher ready. Check adjoining spaces, cavities, the floor below, and the opposite side of the panel because sparks and hot fragments can travel through seams and openings.
After cutting or welding, continue checking the work area for heat, smoke, smoldering insulation, or hidden fire. A spark can remain trapped behind trim or seam sealer after the tool has stopped.
Wear Suitable Personal Protective Equipment
Wear safety glasses that meet the protection required for the task. Add a face shield for powered cutting or grinding where fragments can reach the face. OSHA requires suitable eye or face protection for hazards such as flying particles and molten metal. See OSHA 29 CFR 1910.133.
- Eye and face protection: Safety glasses and an appropriate face shield for flying chips, abrasive fragments, and sparks.
- Hearing protection: Earplugs or earmuffs suitable for the noise level and exposure time.
- Hand protection: Well-fitting cut-resistant gloves that allow safe tool control.
- Clothing: Nonflammable or flame-resistant work clothing without open cuffs that can trap sparks.
- Foot protection: Closed work footwear that resists sharp offcuts and hot fragments.
- Respiratory protection: Protection selected for the identified coating, dust, fume, ventilation, and applicable safety requirements.
Identify Coatings, Dust, and Fume Hazards
Do not grind, cut, or weld an unknown coating until you identify it. Paint, primer, galvanized coating, seam sealer, undercoating, lead-containing material, and other treatments can create hazardous dust or fumes.
NIOSH notes that welding zinc-bearing and other coated metals can create more hazardous fumes than welding plain mild steel. Use suitable source capture or local exhaust when needed, keep your head out of the fume path, and follow the coating manufacturer’s safety data. Review the NIOSH welding-fume control information.
Remove paint, rust, oil, undercoating, and other contamination from the immediate cut and weld areas using a method that does not thin or overheat the panel. For galvanized steel, follow proper guidance for removing zinc coating near a weld and restoring corrosion protection afterward.
Protect the Vehicle Before Cutting
When cutting on the vehicle, remove or shield interior trim, carpet, sound insulation, glass, paint, wiring, hoses, brake lines, fuel lines, air-conditioning lines, electronic modules, airbag components, and anything else behind or near the panel.
Follow the exact vehicle procedure for battery, restraint-system, and electronic-module protection. Ford guidance warns that disconnecting only the 12-volt battery may not protect every module during arc welding or plasma cutting and directs technicians to vehicle-specific disconnection instructions. See the Ford Body Builder Layout Book.
Warning: Never cut into a panel until you can inspect or reliably protect the space behind the entire cut line. A wheel or saw blade can penetrate farther than expected and damage a fuel line, wiring harness, glass edge, airbag component, battery enclosure, or high-voltage cable.
Securing Your Sheet Metal for Cutting
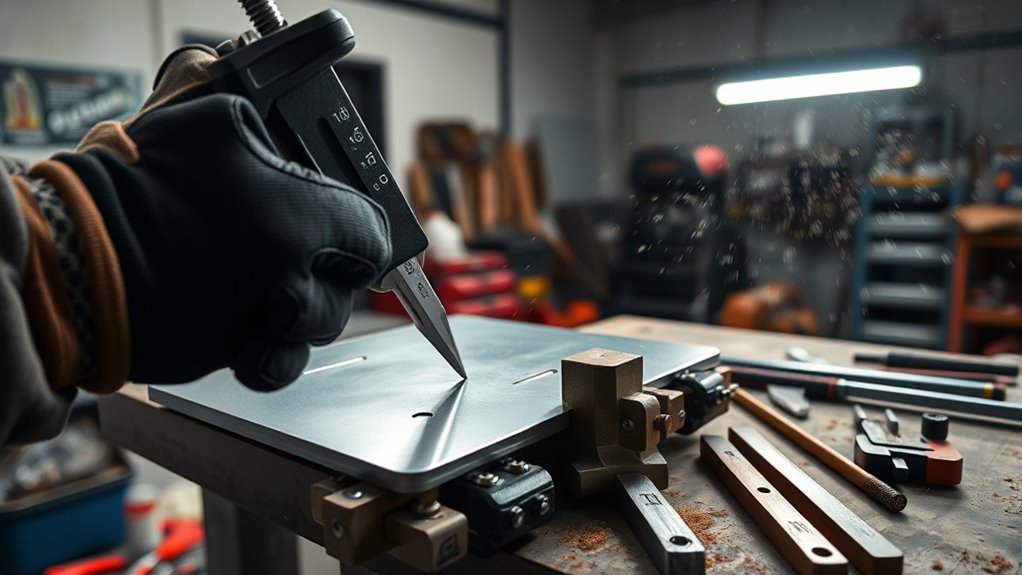
Secure the sheet metal before cutting. Movement causes crooked lines, chatter, rough edges, blade breakage, and poor patch fit.
Clamp detached sheet metal to a stable bench with enough support on both sides of the cut. Place the clamps where they do not interfere with the tool or force the sheet out of shape. Thin panels may need wood blocks, sheet-metal supports, or a sacrificial backing surface to reduce vibration.
Support the offcut so it cannot bend downward, pinch a saw blade, trap a cut-off wheel, or tear the last part of the edge. Reposition the clamps as the cut progresses rather than reaching across an unstable panel.
When cutting a panel on the vehicle, make sure the remaining structure is stable and that removing the marked area will not release stored tension or allow another panel to move. Use the OEM repair procedure for any required bracing or measurement checks.
Pro Tip: For a long straight cut on detached sheet, clamp a rigid guide beside the layout line when the selected tool can safely follow a guide. Test the setup on scrap first so the tool’s body, blade, or wheel does not offset the cut unexpectedly.
Step-by-Step: How to Cut an Auto Body Patch
Products Worth Considering

Reinforced mesh provides supportive backing to fill holes

Drag-Cut Control (HVAC/Thin Sheet/Art): Glide the torch directly on the workpiece for straight templates and smooth freehand lines; use LOTOS DC6309 drag consumables (sold separately) for best edges.

Package Dimension : 4.9 " L x 4.9 " W x 0.7 " H
1. Review the Repair Plan
Confirm the panel material, replacement method, sectioning location, joint type, welding or bonding process, and corrosion-protection requirements. Do not use a general online method when the OEM procedure specifies something different.
2. Make a Template and Mark the Cut
Use masking tape, poster board, thin cardboard, or another suitable template material to capture the repair shape. Transfer the outline to the replacement sheet and the damaged panel with a fine marker or scribe that remains visible during cutting.
Check reference lines, body contours, character lines, panel gaps, fastener locations, and access for clamps. Measure twice before committing to the opening.
3. Inspect and Protect the Backside
Remove or protect everything behind the cut. Confirm the blade or wheel’s maximum penetration, including any arbor, guard, shoe, or tool body that may contact the vehicle.
Complete all vehicle-specific battery, restraint, module, and high-voltage precautions before cutting. Place a metal shield or other suitable barrier behind the cut where the repair procedure permits it.
4. Clamp and Support the Metal
Clamp the work securely without pulling the sheet out of its natural shape. Support both the retained panel and the waste section. Confirm that the cut path remains clear after every clamp is tightened.
5. Rough-Cut Outside the Final Line
Leave a narrow trimming allowance instead of cutting directly to the final line. A small margin gives you room to correct the shape and fit the patch accurately. The proper allowance depends on the tool, panel shape, and repair plan.
Start on a straight, accessible area when possible. For an internal opening, drill a suitable start hole only where the repair procedure allows it, then insert the nibbler, saw, or other approved tool.
6. Trim to the Final Line
Make several light trimming passes rather than forcing one aggressive cut. Alternate between the patch and the opening as needed. Keep checking the fit so you remove metal only where required.
For curves, take smaller bites with snips or use a nibbler or body saw that can follow the radius. For long straight cuts, maintain a stable body position and keep the tool aligned with the guide or layout line.
7. Deburr and Dress the Edge
Remove burrs with a file, deburring tool, fine abrasive, or another appropriate method. Dress only enough to make the edge safe and consistent. Heavy grinding can thin the edge and create a gap that was not present after cutting.
Collect nibbler chips, abrasive fragments, and sharp offcuts immediately. Check seams, tires, trim, and cavities where metal chips can hide.
8. Clean and Trial-Fit the Patch
Remove rust, paint, oil, coating, and loose contamination from the areas required by the repair and joining procedures. Clamp the patch in its final position and inspect the entire seam for gap, flushness, contour, and access.
Do not begin welding merely because most of the edge fits. Correct high spots, low spots, and wide gaps first. Better fit-up reduces the temptation to bridge gaps with excess weld metal and heat.
Best Techniques for Making Clean Cuts in Sheet Metal
Straight Cuts
Use a clear line and support the sheet close to the cut. Electric shears work well on long open edges when the material is within the tool rating. Snips can handle shorter straight cuts, while a body saw or guarded cut-off wheel may be needed where access is limited.
Do not stare only at the blade or wheel. Look slightly ahead along the line so you can correct direction before the cut wanders.
Curved Cuts
Use the snip designed for the direction of the curve, and keep the waste side free to curl away. Tight curves require smaller bites. A nibbler or body saw may be easier when the radius is too small for shears.
Avoid forcing a tool into a tighter turn than it can make. Forcing the turn can stretch the edge, bend the panel, or break a blade.
Internal Openings
Mark the full opening and verify the backside before drilling a start hole. Use a bit large enough for the selected blade or cutter without extending beyond the waste area. Keep the start hole away from the final edge so it disappears during trimming.
Controlling Heat and Sparks
Use the least aggressive tool that will complete the cut safely. With an abrasive wheel, use light pressure and allow the wheel to cut at its designed rate. Stop if the panel becomes hot enough to soften paint far from the cut or distort the edge.
Direct sparks away from glass, painted surfaces, tires, wiring, upholstery, people, and combustible material. Never remove the guard merely to improve visibility.
Working With Aluminum
Confirm the OEM aluminum repair method before cutting. Use tools and abrasives approved for aluminum and keep them separate from tools contaminated with steel particles when required. Steel contamination can become embedded in aluminum and contribute to corrosion or finishing problems.
What Mistakes Should You Watch Out For When Cutting?
Most bad sheet-metal cuts come from poor planning, weak support, the wrong tool, excessive speed, or cutting directly to the finished line before checking the fit.
| Problem | Likely Cause | Correction |
|---|---|---|
| The cut wanders | Poor visibility, cutting too fast, dull blade, or no guide | Stop, remark the line, improve lighting, slow down, and replace or reposition the cutter |
| The panel chatters | Clamps are too far from the cut or the sheet lacks backing support | Move support closer, add a backing block, and reduce feed pressure |
| The edge curls or stretches | Wrong snip direction, too-large bites, or unsupported waste | Use the correct snips, take smaller bites, and allow the waste side to move freely |
| The cut-off wheel binds | The offcut is closing on the wheel, the tool is twisted, or the wheel is side-loaded | Release the trigger, let the wheel stop, support the offcut, and realign the tool before continuing |
| The panel overheats | Excessive pressure, long dwell time, dull abrasive, or unsuitable thermal cutting | Stop and let the area cool naturally, use a sharper or lower-heat tool, and make shorter passes |
| The patch is too small | Cutting directly to the final line or measuring only once | Make a new patch rather than trying to fill a large gap with weld metal |
| The edge has heavy burrs | Dull blade, incorrect wheel, excessive feed pressure, or poor tool angle | Correct the cutter setup, deburr lightly, and avoid thinning the edge |
Do not force an air cut-off wheel or grinder through thin metal. Excess pressure creates more heat, increases the chance of wheel damage, and makes the tool harder to control.
Do not remove burrs by aggressively grinding the entire edge. A smooth-looking edge can become too thin for a sound joint if too much material is removed.
Do not assume that surface rust is the only damaged area. Continue trimming until the remaining metal is sound and the repair location matches the approved procedure.
Final Checks Before Welding: What to Look For
Inspect the patch and opening carefully before striking an arc or applying adhesive. Correcting a cut now is easier than repairing distortion, contamination, or corrosion after the panel is joined.
- Approved repair location: Confirm that the cut and joint remain within the OEM-authorized area.
- Material and thickness: Verify that the replacement panel matches the specified material and thickness.
- Edge condition: Remove burrs without thinning, rounding, or overheating the joint edge.
- Fit-up: Check the full seam for an even joint, proper flushness, and the gap required by the approved joining method.
- Panel contour: Confirm that body lines, curves, door gaps, trim locations, and adjacent panel relationships are correct.
- Cleanliness: Remove rust, paint, oil, moisture, loose coating, and abrasive debris from the required work zone.
- Backside condition: Check for damaged wiring, hoses, insulation, glass, modules, paint, or other components.
- Clamp access: Make sure the patch can be held securely during joining without pulling it out of shape.
- Corrosion protection: Confirm that primers, seam sealers, cavity wax, and backside coatings can be restored according to the vehicle repair procedure.
- Fire safety: Recheck adjoining spaces and keep suitable fire equipment ready through the cutting and welding process.
If the panel is galvanized, follow the approved procedure for coating removal, joining, ventilation, and restoration. Additional guidance on the hazards and preparation involved in welding galvanized steel can help you plan the work, but the vehicle manufacturer’s instructions take priority.
Note: A patch that fits tightly in one spot but requires force to close the rest of the seam is not properly fitted. Correct the shape, contour, or edge before welding so the clamps do not store tension in the repair.
Frequently Asked Questions
What Is the Best Way to Weld Auto Body Panels?
The correct method is the joining process specified by the vehicle manufacturer for that exact panel and material. Solid-wire MIG often works well on repairable mild-steel outer panels when heat is controlled, but modern vehicles may require resistance spot welding, MIG brazing, pulsed welding, adhesive bonding, rivets, or complete part replacement. Use short, spaced welds only when the OEM procedure permits them.
What Is the Golden Rule in Welding?
There is no single official golden rule, but a useful shop principle is to start with the correct material, clean metal, accurate fit-up, and the approved procedure. Dirt, rust, oil, unapproved coatings, wide gaps, and the wrong joining process make heat control and weld quality harder.
What Are Common Sheet Metal Cutting Mistakes?
Common mistakes include cutting before checking the OEM procedure, failing to inspect behind the panel, measuring only once, cutting directly to the final line, using a tool outside its rating, weak clamping, unsupported offcuts, excessive grinder pressure, poor spark control, and aggressive edge grinding.
How Do You Prep Metal Before Welding?
Deburr the cut, correct the fit, and clean the required weld area of rust, oil, paint, moisture, loose coating, and abrasive debris. Follow the OEM procedure for galvanized coating, weld-through primer, adhesive, seam sealer, and corrosion protection. Clamp the panels in their final contour before welding.
Should You Cut Auto Body Sheet Metal With a Grinder?
A guarded grinder or air cut-off tool can make fast rough cuts when there is safe spark clearance and the wheel is correct for the tool and material. It is less forgiving than snips, shears, or a body saw for a final fit line because it produces heat, sparks, dust, and a risk of backside damage.
How Do You Know the Gauge of an Auto Body Panel?
Measure a clean, undamaged section with a micrometer or caliper and compare the reading with the correct chart for that material. Do not rely on appearance or a generic steel gauge chart. The OEM repair information may list the material, thickness, and tensile-strength category directly.
Can You Use a Plasma Cutter on Auto Body Sheet Metal?
A plasma cutter is usually not the first choice for thin cosmetic body panels because it creates heat, sparks, a wider kerf, and substantial backside risk. Use it only where the exact repair procedure, panel material, equipment, fire controls, and access make thermal cutting appropriate.
Is It Safe to Cut a Body Panel While It Is Still on the Vehicle?
It can be done only after confirming the approved repair location and inspecting or protecting everything behind the cut. Remove or shield wiring, fuel and brake lines, refrigerant lines, trim, glass, airbags, modules, insulation, and coatings. Complete the vehicle-specific electrical, restraint, and high-voltage procedures first.
Conclusion
Clean auto-body sheet-metal cuts begin with the repair information, not the power tool. Identify the vehicle and panel material, confirm that sectioning is allowed, protect both sides of the work area, and choose a cutter that matches the material, shape, access, and rated capacity.
Clamp and support the metal, rough-cut with a trimming allowance, and remove small amounts until the patch fits without force. Finish by deburring, cleaning, checking the backside, and confirming the seam, contour, and corrosion-protection plan. These steps reduce gaps, distortion, fire risk, and avoidable rework before welding begins.
Sources
- OSHA 29 CFR 1910.252: Welding, Cutting, and Brazing — fire prevention, combustible-material control, and hot-work precautions.
- OSHA 29 CFR 1910.133: Eye and Face Protection — protection from flying particles, molten metal, and related hazards.
- NIOSH: Welding Fumes and Fume Extraction Guns — coated-metal fume hazards and exposure-control information.
- 3M General Purpose Cut-Off Wheel — guarded-tool use and auto-body sheet-metal cutting applications.
- Miller: How to MIG and TIG Weld Auto Body Sheet Metal — thin-panel distortion, trimming, clamping, and fit-up practices.
- Honda Body Repair News: High-Strength and Ultra-High-Strength Steel — OEM restrictions on sectioning and welding modern body structures.