To feather and blend a weld on an auto body panel, start by deciding whether the panel can be welded safely. Then control fit-up, heat, weld height, and every sanding step. A grinder alone cannot create a lasting repair. The seam must be fully welded, metal-finished, protected from corrosion, and prepared with products that work together.
Quick Answer
Grind only the raised weld bead in short, cool passes, then switch to a body file or sanding block before you cut into the parent metal. Repair every pinhole, level highs and lows, apply compatible primer and thin filler as required, and refine the repair through the product maker’s grit sequence until guide coat sands away evenly.
Key Takeaways
- Check the OEM repair procedure first. Structural steel, aluminum, high-voltage areas, and safety-system zones may require a different joining method or professional repair.
- A smooth weld blend starts with clean metal, accurate fit-up, test welds, and short welds that spread heat around the seam.
- Do not use body filler or seam sealer to hide through-pinholes. Re-weld openings before coating the repair.
- Use abrasives only to remove weld height and scratches. Do not thin the surrounding sheet metal.
- Match filler, primer, sealer, and sanding grits to their technical data sheets, then restore corrosion protection on the backside.
At a Glance
| Time Required | About 2 to 6 hours of hands-on work for a small nonstructural steel patch, plus product cure and paint time |
| Difficulty | Intermediate to advanced; thin sheet metal and modern vehicle construction require precise heat control and repair planning |
| Tools Needed | OEM repair information, MIG or TIG welder, test coupons, clamps, grinder with guard, weld-grinding discs, body file, sanding blocks, hammer and dolly, guide coat, compatible primer and filler, PPE |
| Cost | Roughly $40 to $150 for abrasives, filler, primer, and safety consumables when welding and grinding tools are already available |
Warning: Welding and grinding can start hidden fires, release hazardous fumes, damage electronics, and weaken a structural repair when the wrong process is used. Remove or shield nearby trim, glass, wiring, fuel-system parts, insulation, and interior materials. Follow the vehicle maker’s welding, battery-disconnection, high-voltage disable, and corrosion-protection procedures. Keep suitable extinguishing equipment ready, provide ventilation, and use eye, hand, hearing, body, and respiratory protection appropriate to the hazard.
Confirm the Panel Is Safe to Weld
Before cutting or grinding, identify the panel, the metal type, and the repair area. This guide fits a small cosmetic patch in ordinary steel sheet metal. It does not override a vehicle-specific body repair manual.
Stop and use the OEM procedure when the repair involves a rail, pillar, rocker reinforcement, apron, suspension mounting area, roof structure, restraint mounting point, high-strength or ultra-high-strength steel, aluminum, a battery enclosure, or a high-voltage vehicle. The approved repair may call for full replacement, a specific sectioning location, squeeze-type resistance spot welding, MIG brazing, rivets, adhesive bonding, or a combination of methods instead of a simple butt-welded patch.
Note: “Feathering a weld” means leveling the metal repair and refining its sanding scratches. It is different from blending basecoat or clearcoat into an adjacent paint panel.
Prepare the Panel Edges for Welding
Start by cleaning the panel edges until both the original panel and the patch panel are free of paint, rust, undercoating, seam sealer, oil, and loose metal. Bright, clean metal gives the weld a better chance to fuse properly and keeps contamination out of the seam.
For thin auto body sheet metal, avoid cutting a deep V-groove unless the panel thickness or the OEM repair procedure calls for it. Most cosmetic patch repairs need a clean, square edge with burrs removed, not a heavy bevel that thins the metal and encourages burn-through. A light edge dressing is enough when the panels fit tightly.
The cleaner and tighter the seam is before welding, the less grinding, filler, and rework you will need after welding.
Mark your cut lines with a metal scribe or fine marker so the patch follows the opening accurately. If you are making an invisible butt repair, do not leave a final overlap at the seam. Overlapped or flanged joints can work when the repair procedure calls for them, but they need proper corrosion protection because hidden joining surfaces can become rust traps. I-CAR notes that weld-through primer is used on clean bare mating surfaces that cannot be protected after assembly, and excess coating should be removed from the GMA weld zone to reduce porosity risk.
If the work involves structural parts, a late-model vehicle, aluminum, boron-alloyed steel, advanced high-strength steel, or any hybrid or electric vehicle area, check the OEM body repair information before cutting. I-CAR’s Repairability Technical Support portal provides OEM search tools, but the vehicle maker’s current procedure remains the final authority.
Gather the Tools and Safety Gear
Set up the job before you strike an arc. You should have enough light to see the seam, enough air movement to control fumes, and enough space to keep sparks away from trim, glass, wiring, fuel lines, insulation, and interior materials.
- Welding tools: MIG or TIG welder, correct wire or filler rod, shielding gas, ground clamp, welding clamps, panel clamps, or welders magnets.
- Metal finishing tools: angle grinder, 36- to 50-grit grinding disc, 60- to 80-grit flap disc, body file, sanding blocks, hammer and dolly, and guide coat.
- Surface materials: wax and grease remover, epoxy primer or approved bare-metal primer, body filler or glaze, seam sealer, cavity wax, and compatible topcoat products.
- PPE: welding helmet, safety glasses, gloves, hearing protection, long sleeves, respirator suitable for dust and fumes, and a fire-resistant jacket or sleeves.
Keep a fire extinguisher close. OSHA requires suitable fire extinguishing equipment to be ready for welding and cutting work, and a fire watch may be needed when combustibles are nearby. Also use ventilation or respiratory protection when fumes, coatings, galvanized metal, or confined spaces create exposure risk; OSHA addresses ventilation and eye protection requirements for welding, cutting, and heating.
Protect the Vehicle and Test the Welder
Follow the vehicle maker’s procedure for battery disconnection, retained-power wait times, high-voltage disable, memory settings, and post-repair checks. Move sensitive modules, harnesses, hoses, trim, sound deadener, and glass away from heat and sparks when the procedure requires it. Place the welding return clamp on clean bare metal as close to the repair as practical so current does not take a long path through bearings, hinges, wiring, or modules.
Set the welder on scrap cut from the patch material or on a coupon of the same alloy and thickness. Test the wire or filler, shielding gas, polarity, torch angle, travel speed, and trigger time until the weld is flat and fully fused without burn-through. Keep GMAW electrode extension consistent because changes alter resistance and amperage; Miller explains how inconsistent extension can cause excess heat or poor penetration.
Pro Tip: Make at least one destructive test on a spare coupon. Bend or break it after welding. A bead that looks smooth on top can still have poor fusion underneath.
Cut and Test-Fit the Patch Panel
Cut out the damaged metal with clean, controlled edges, then use the opening as your guide for the patch. Trim conservatively at first. You can always remove more material, but you cannot put a stretched or overcut edge back without extra work.
Use metal of the same type and similar thickness whenever possible. That helps the weld respond evenly and keeps the patch from standing proud or sinking below the surrounding panel.
Test-fit the patch several times with clamps or magnets in place. The goal is a patch that follows the original body line and sits flush before welding. If the patch does not fit while it is cold, it will not magically fit after heat starts moving the metal.
Cut Damaged Metal
Use a cutoff wheel, air saw, body saw, or grinder to remove the damaged metal. Keep the cut steady and avoid overheating the panel edge. If the metal is rusty, thin, cracked, oil-canned, or stretched beyond correction, cut back to sound metal before you shape the patch.
- Trim slightly inside your final line, then refine the edge.
- Remove burrs so the patch can sit flat against the opening.
- Check the surrounding panel with a straightedge, your hand, and a light reflection before welding.
Do not rush this step. A careful cut gives you a more predictable weld, a flatter seam, and less grinding later.
Test-Fit Patch Panel
Trace the opening onto the new patch panel, cut the patch slightly large, and sneak up on the final fit. Use clamps, magnets, or panel clamps to hold the patch in its real welding position while you check the seam.
For a butt-welded patch, keep the gap small and consistent enough for reliable fusion without forcing the patch into the opening. Do not treat wire diameter as a universal gap specification. Panel thickness, joint design, welding process, machine settings, and the OEM procedure all matter. Make test welds on scrap of the same metal and thickness before welding the vehicle.
Check the patch from several angles. The edges should sit flush, the crown should match the panel, and the body line should continue across the repair. If one edge sits high, trim or gently shape the patch before you tack it in place.
Pro Tip: Hold a small light behind the seam if the backside is open. Uneven light gaps show where the patch needs more trimming before welding.
Tack Weld the Patch in Place
Align the patch tightly to the base panel and place small tack welds to lock it without loading the panel with heat. For MIG welding, keep your contact-tip distance and wire extension consistent. MillerWelds explains that changes in stickout and contact-tip-to-work distance can change amperage and weld quality, so consistency matters more than chasing one universal number.
Start with a few tacks at opposite sides of the patch, then add more tacks between them. This spreads shrinkage instead of pulling the patch in one direction.
Align Patch Tight
Before you tack weld, hold the patch panel against the surrounding metal so the seam stays even. Use welders magnets, panel clamps, or small locking clamps to keep the panel from shifting.
Check the corners first. Then check the middle of each side. If the panel moves when you clamp it, adjust the clamp pressure or reshape the patch until it stays flush without force.
- Verify alignment at the corners and body lines.
- Recheck the fit after every adjustment.
- Confirm the seam is even before adding more tacks.
Place Tack Welds Evenly
Place the first tack welds at widely separated points around the patch. About 1 inch apart can be a starting point on a nonstructural steel practice panel, but the correct spacing depends on fit, thickness, and heat response. Each tack should be small, flat, and fully fused. If it sits like a tall lump, correct the settings, gap, torch angle, or trigger time before continuing.
After several tacks, inspect the joint for flush fit. If one area pulls down, use light hammer and dolly work before the seam is fully locked. Correcting movement early is easier than grinding a distorted panel later.
Let the panel cool between tack groups and keep moving to a distant part of the seam. Do not judge temperature by pressing a gloved hand onto the work because gloves can hide heat and the weld can still burn you. Pause until heat has spread away and the panel is close to its starting temperature before adding another group of welds.
Check Fit Before Welding
With the patch held in place, check that it follows the original panel’s contours. Use your hand, a flexible sanding block, or a straightedge to feel for highs and lows. Light reflection across the panel can reveal a mismatch before the weld is complete.
- Check fit at every edge and correct high spots before adding more heat.
- Confirm the seam stays flush after the first tack sequence.
- Remove clamps only after the patch is stable, then recheck the panel shape.
When you control the fit before welding, you control how much metal finishing the repair will need after welding.
Stitch Weld to Limit Heat Distortion
Stitch welding helps you control heat input and limit distortion in thin auto body panels. Instead of running one long bead, make short welds and move around the seam. MillerWelds notes that auto body sheet metal is prone to distortion because metal in and around the weld shrinks as it cools.
Move from one side of the seam to another. Fill open spaces between previous tacks only after the metal cools. The goal is to connect the seam without letting one area get hot enough to warp, oil-can, or sink.
Alternate stitch locations and let the panel cool so weld shrinkage is spread across the seam instead of concentrated in one spot.
If heat starts building, pause and let it dissipate naturally. Gentle shop air may speed cooling when the OEM procedure allows it, but avoid concentrated cold blasts, water, or other sudden cooling that can move or harden the metal. A slower weld sequence is safer than trying to correct an overheated panel afterward.
Keep the weld low, but do not undercut the edges. A flat, sound weld is easier to feather than a tall bead, a cold tack, or a porous seam.
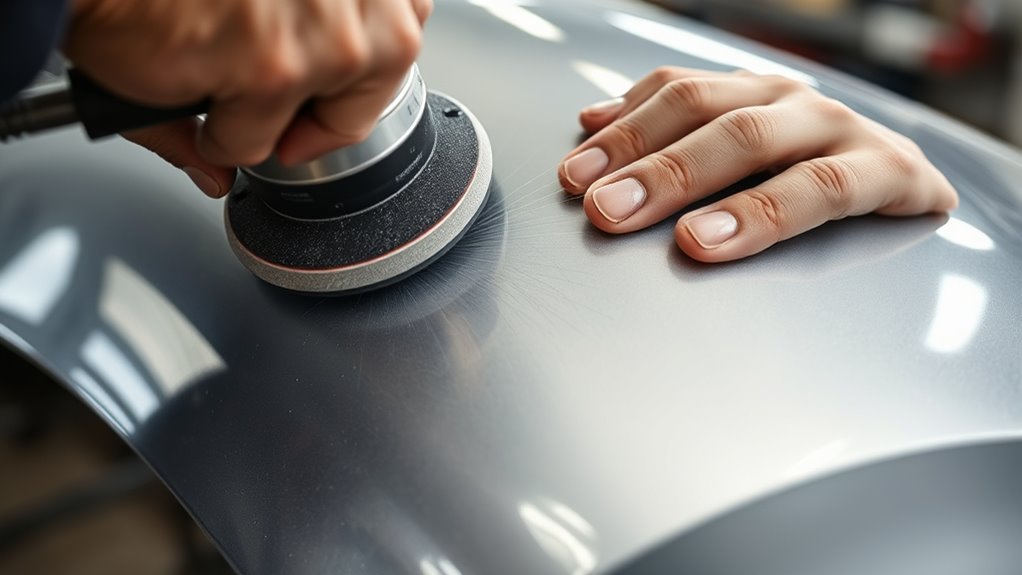
Grind Welds Flush Without Warping the Panel
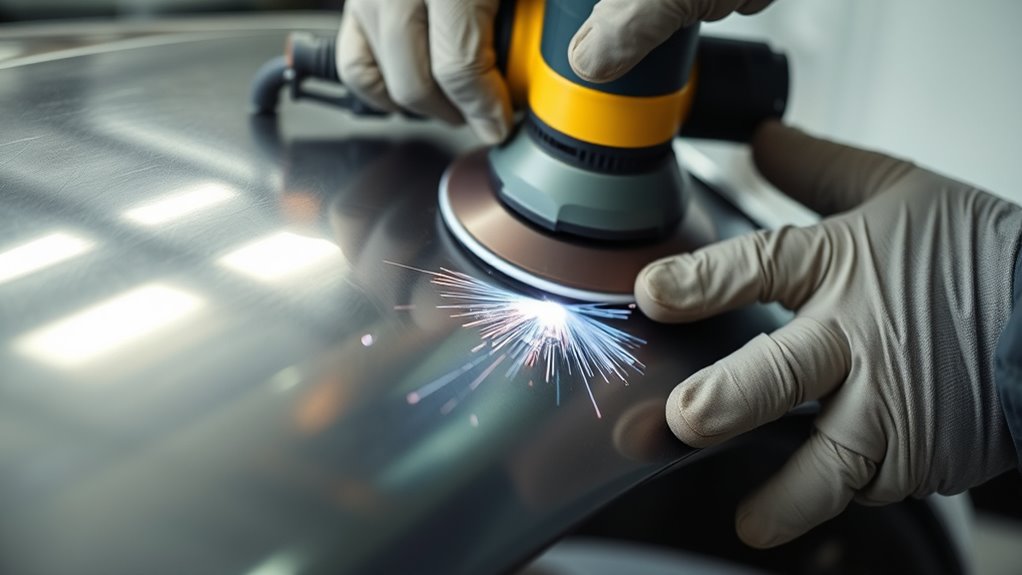
Bring the weld down slowly with a purpose-made weld-grinding disc, a guarded disc grinder, or a flap disc rated for the tool’s speed. Keep the abrasive as flat as the panel shape allows and use light pressure. Remove the weld crown, not the surrounding parent metal.
Work in short back-and-forth passes instead of staying in one spot. Heat from grinding can warp thin sheet metal just like heat from welding can. Check the panel often with your hand near the repair area. If it is getting warm, stop and let it cool.
Caution: Use the grinder guard and handle, confirm the disc’s maximum speed meets or exceeds the grinder speed, inspect the abrasive for damage, and wear safety glasses under a face shield. Never side-load a cutoff wheel or use an unguarded wheel as a sanding disc.
- Knock the weld bead down until it is close to flush, but leave enough metal for final leveling.
- Switch to a flap disc, body file, or sanding block as the bead gets lower.
- Use hammer and dolly work to correct small lows before you reach for filler.
Do not chase every low spot with the grinder. If the surrounding panel is lower than the weld, metal finish it first. Grinding the high weld into a low panel can create a wide depression that needs too much filler.
Note: If you can see blue heat marks spreading far beyond the seam, you are adding too much heat. Slow down, use lighter pressure, and let the panel cool between passes.
Inspect for Pinholes and Low Spots
Before you feather and fill, inspect the weld seam. Clean the surface, then look closely under strong light. If the backside is accessible, shine a light from behind the seam. Any light showing through the weld means the seam still has an opening.
Do not cover through-pinholes with body filler. Filler is for shallow surface imperfections, not for sealing holes in the weld. Re-weld small openings with quick, controlled tacks, then cool and level the area again.
Use a hammer and dolly to correct minor lows while the weld is still visible. Tap carefully. The goal is to level the metal, not stretch it into a high crown.
Feather and Blend the Weld Seam
Feather the weld seam with a body file, flap disc, or sanding block, tapering the edges gradually so the repair blends into the surrounding metal instead of ending in a hard ridge.
Start with a coarse grit only where you need cutting power. A 50- to 80-grit abrasive can shape a weld or rough filler, but it leaves scratches that must be refined. Move through finer grits instead of jumping straight to primer.
Keep a steady sanding angle so you do not dig low spots or flatten the panel profile. Use a block sander to spread pressure evenly across the surface. Your hand alone can follow waves and make them worse, while a block shows highs and lows more clearly.
Use guide coat once the repair is close. Sand lightly with a block. Dark spots that remain are lows, and bright spots that break through too quickly are highs. Correct the metal as much as practical before adding filler.
Your goal is a feathered connection that disappears into the panel and leaves a uniform surface you can trust. If you spot minor scratches after the metal is even, a thin glaze or filler coat can correct them before final sanding.
Prime, Fill, and Sand the Repair
Once the weld is sound, clean, and feathered, follow one compatible product system from metal preparation through primer and paint. Do not assume every filler belongs on bare steel. Current 3M directions for several collision-repair fillers require epoxy primer over cold-rolled steel, while other glazes and products may allow different substrates. Read the exact filler, primer, seam sealer, and paint technical data sheets before application.
For corrosion resistance, many current collision-repair systems use epoxy primer over prepared cold-rolled steel before filler. Product rules differ for galvanized steel, aluminum, bare metal, and existing coatings, so the technical data sheet controls. Protect hidden flanges, lap joints, and closed cavities as well as the visible face. 3M’s corrosion-protection guidance covers non-visible areas such as rocker panels, pillars, and closed cavities.
Follow a Product-Specific Sanding Sequence
The exact grit progression depends on the filler, primer, paint line, tool, and surface shape. The following sequence is a practical map, not a substitute for the product sheets:
| Task | Typical abrasive range | Goal |
| Lower the weld crown | Purpose-made 36- to 50-grit weld disc, then 60- to 80-grit only where needed | Remove weld height without thinning parent metal |
| Shape body filler | Often P80 to P120, then P150 to P180 | Level the repair and remove coarse scratches |
| Feather the repair edge | Commonly P180 to P320 | Remove the previous scratch profile and soften the transition |
| Block primer surfacer | Often P320, followed by P400 or finer as the paint system requires | Remove guide coat, texture, and directional scratches |
- Clean the repair with the approved cleaner and clean, lint-free towels.
- Apply epoxy primer or another approved bare-metal primer when the product system requires it.
- Spread filler in thin, tight coats. Keep it within the properly prepared repair area and below the product’s maximum thickness.
- Shape with a rigid or semi-rigid block that matches the panel contour. Use guide coat to reveal highs, lows, and missed scratches.
- Refine each scratch pattern before moving to a finer grade. Do not jump from a coarse weld or filler scratch directly to primer.
- Apply and cure primer surfacer according to its technical data sheet, block it with guide coat, then finish to the paint maker’s required grit.
3M’s current panel-repair process map uses P80–P120 for filler shaping, P150–P180 for scratch refinement, P320 at the repair featheredge, and P320 followed by P400–P500 during primer finishing. Another 3M feather-prime-block procedure calls for P180 featheredging, P320 final sanding, P320 block sanding, and P400 DA sanding. Follow the procedure that matches your exact products.
Inspect the panel under strong light, then apply primer surfacer if the repair still shows texture, scratches, or edge marks. Block sand again with guide coat until the transition disappears.
Seal and Protect the Backside
A weld that looks smooth from the outside can still rust from the back. If you can reach the backside, remove heat scale and contamination without thinning the panel, then apply the primer, seam sealer, undercoating, or cavity protection specified by the OEM and coating maker.
Use seam sealer only where the original design or OEM procedure calls for it, and apply it over the substrate approved by the product maker. 3M’s seam-sealer guidance stresses current OEM procedures, proper surface preparation, and product-specific rules for primed or bare-metal application. Use cavity wax in enclosed sections that cannot be fully painted after assembly.
Do not apply seam sealer over dirty metal, uncured primer, or active rust. Build the repair in layers: clean metal, weld, grind, primer, seam sealer where needed, then coating or cavity protection.
Perform a Final Quality Check
Do not judge the repair only by shine or by how it feels with fingertips. Use several checks before paint:
- Seam integrity: Inspect both sides where possible and use backlighting to find pinholes.
- Panel contour: Check with your palm, a contour gauge, a straightedge where appropriate, and reflected light across the panel.
- Guide coat: Block until the guide coat disappears evenly without immediate primer breakthrough on high spots.
- Scratch removal: Confirm that no coarse grinding or filler scratches remain outside the next product’s approved range.
- Corrosion protection: Verify primer, seam sealer, undercoating, and cavity wax are restored where the OEM procedure calls for them.
- Vehicle systems: Reconnect or re-enable systems in the OEM sequence, inspect nearby wiring and hoses, and complete any required scans, calibrations, or post-repair checks.
A repair is ready for paint only when the weld is closed, the panel shape is correct, the scratch pattern matches the coating system, and corrosion protection has been restored.
Troubleshooting Common Blending Problems
If the weld seam still shows after sanding, do not keep grinding blindly. Find the cause first.
- High weld bead: Use short, controlled grinding passes, then finish with a file or flap disc.
- Low seam: Use hammer and dolly work if the metal can be corrected. Use thin filler only after the weld is sound.
- Pinholes: Clean and re-weld the openings. Do not bridge them with filler.
- Warped panel: Stop adding heat. Recheck the panel with a straightedge and correct slowly with metal-finishing tools.
- Deep sanding scratches: Step through finer grits instead of trying to bury coarse scratches under primer.
- Filler edge showing through primer: Feather the edge wider and use guide coat to confirm the transition is smooth.
Pro Tip: Use your palm and a clean cloth to feel the repair. Your fingertips can miss shallow waves, but your palm will catch changes in contour before primer makes them obvious.
Frequently Asked Questions
What should you use to grind down an auto body weld?
Use a grinder with a 36- to 50-grit weld grinding disc for the high bead, then switch to a flap disc, body file, or sanding block as the weld gets close to flush. Use light pressure and short passes so you do not overheat or thin the panel.
How do you feather a weld seam without making low spots?
Keep the grinder or sanding block flat to the panel shape, remove only the weld height, and switch to a block or file before you cut into the parent metal. Use guide coat and your hand to find highs and lows before applying filler.
Should body filler go over bare metal or primer?
Follow the exact filler and primer technical data sheets. Some products permit properly prepared bare metal, while current directions for several 3M collision-repair fillers require epoxy primer over cold-rolled steel. Galvanized steel, aluminum, existing coatings, and glazes may have different rules.
Is MIG or TIG better for welding body panels?
MIG is usually faster and more accessible for steel patch panels. TIG gives an experienced operator precise control of the arc and added filler, but slow travel can put too much heat into thin metal. Use the process, filler, and joint design approved for the panel and confirm settings on same-thickness test coupons.
Can you fill weld pinholes with body filler?
No. Through-pinholes should be welded or repaired before filler. Filler can smooth shallow scratches and tiny surface imperfections, but it should not be used as a structural or moisture seal for holes in the weld seam.
How flush should an auto body weld be before filler?
Lower the weld until it follows the panel contour without a sharp crown, but stop before you thin the surrounding sheet metal. Final leveling should come from a body file, block sanding, and careful hammer-and-dolly work. Filler should correct small remaining surface variation, not replace missing metal.
What grit should you use after grinding an auto body weld?
After a purpose-made weld disc removes the high bead, refine only the affected area with roughly P60 to P80 as needed, then follow the filler and primer technical data sheets. Many current collision-repair processes use P80–P120 for shaping, P150–P180 for refinement, and P320 or finer before primer finishing.
Should you grind the backside of a body-panel weld?
Only when access, joint design, and the OEM procedure allow it. Remove sharp protrusions or contamination that would prevent coating, but do not thin the joint for appearance. The backside’s main priorities are a sound seam and restored corrosion protection.
How can you tell whether a welded patch is warped?
Sight across the panel under reflected light, feel it with your palm, and check it with a suitable straightedge, flexible block, or contour gauge. Guide coat will confirm highs and lows during sanding. Correct panel shape before adding more filler or grinding deeper.
Sources
- OSHA 1910.252: Welding, Cutting, and Brazing — fire prevention, ventilation, and welding-hazard controls.
- MillerWelds: MIG and TIG Welding Auto Body Sheet Metal — thin-sheet heat control and weld-shrinkage basics.
- MillerWelds: Stickout, Electrode Extension, and Contact-Tip-to-Work Distance — why consistent GMAW distance affects amperage and weld quality.
- I-CAR: How to Use Weld-Through Primer — mating-surface protection and removal of primer from the GMA weld zone.
- 3M Panel Repair and Paint Prep — current filler, featheredge, primer-blocking, and scratch-refinement ranges.
- 3M Collision Repair Corrosion Protection — backside coating, cavity wax, and hidden-area protection.
Conclusion
When you feather and blend an auto body weld seam, the goal is not to hide metalwork under filler. The goal is a fully closed weld, a correct panel contour, a refined scratch pattern, and restored corrosion protection. Verify the repair method first, test settings on matching scrap, weld and grind in cool stages, repair pinholes, and follow one compatible coating system. When guide coat sands evenly and the backside is protected, the patch is ready for primer and paint.


