One of the first times I worked with stainless steel outside of the shop, I ran into a funny but common problem — the customer wanted to stick magnets on their stainless steel fridge, but nothing would hold. Most folks assume stainless is always magnetic, but anyone who’s spent time doing stainless welding, running TIG beads, or working with different filler rods knows that it really depends on the metal’s grade, thickness, and structure. Austenitic stainless (like 304) is non-magnetic, while ferritic or martensitic grades can attract a magnet after the right heat treatment or fabrication process.
The confusion leaves a lot of DIYers and even welders wondering how to make stainless steel magnetic without damaging its finish or strength. And while this may not sound like a critical fabrication issue, it actually ties back to the same principles of joint prep, heat control, and microstructure we focus on for weld quality and durability. I’ll break down why stainless fridges resist magnets and the practical tricks you can use to make them magnetic without compromising the metal.
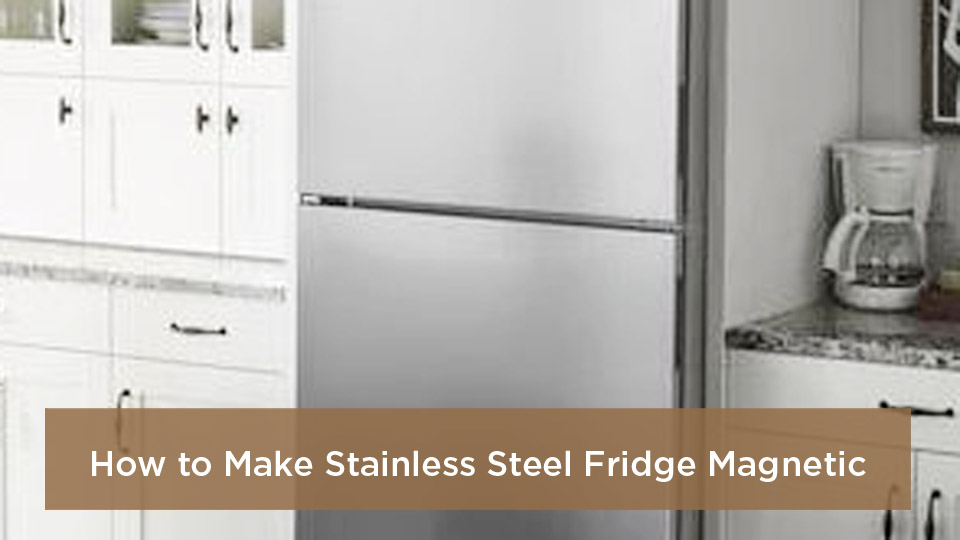
Photo by bestapplianceskins
Why Isn’t My Stainless Steel Fridge Magnetic?
Stainless steel fridges look sleek, but that shine comes from alloys designed for rust resistance over magnetic pull. Most doors use 300-series stainless, like 304 or 316, which are austenitic—fancy term for a crystal structure that laughs off magnets. It’s the nickel and chromium mix that does it, making the steel non-ferromagnetic. I’ve seen guys in the shop scratch their heads over this, thinking it’s a dud finish, but nope—it’s metallurgy at play.
In contrast, ferritic stainless like 430 pulls magnets like a champ because of its body-centered cubic structure. Why does your fridge maker choose the non-magnetic stuff? Durability in humid kitchens and that premium, fingerprint-hiding polish. But for us DIY types or pros customizing appliances, it’s a roadblock. The good news? You can bridge that gap by welding on a magnetic layer or swapping panels without turning your kitchen into a war zone.
From my experience tweaking shop fridges for break room upgrades, ignoring this mismatch leads to weak bonds or corrosion down the line. Always test your base metal with a rare-earth magnet first— if it sticks weakly on the sides (often thinner gauge or different alloy), you’ve got options there too. Safety note: Before any cutting or welding near appliances, unplug and vent the space. No one wants a spark near refrigerant lines.
Can I Weld Magnetic Stainless Steel onto My Fridge Door?
Absolutely, and it’s one of those satisfying projects that flexes your skills without needing a full fab setup. The key is cladding or overlaying a thin ferritic sheet—like 430 stainless—onto the existing door. This keeps the outer aesthetic while adding magnetic real estate underneath. I’ve done this for a buddy’s man-cave bar fridge, turning it into a magnetic billboard for beer labels. It held up through parties and spills, no warping.
Why weld instead of glue? Adhesives fail under heat or moisture, but a proper weld ensures molecular fusion for longevity. We’re talking TIG or MIG here, depending on your setup—more on that soon. Material compatibility is crucial: Match your filler to avoid cracking from thermal expansion differences. Use 308L rod for austenitic bases, but switch to 410 or 430 filler for the magnetic layer to maintain properties.
Practical know-how: Start with 22-24 gauge sheets for lightness—thicker, and you’re adding unnecessary weight to the door hinges. Prep is king: Clean both surfaces with acetone, then bevel edges for better penetration. Common mistake? Rushing the preheat—stainless hates thermal shock, so aim for 200-300°F on thicker pieces to dodge distortion.
Pros of this approach: Seamless integration, full customization (cut to fit vents or handles), and it boosts weld integrity for future mods. Cons: Requires precision to avoid piercing the insulation, and it’s not reversible without rework. If you’re a student or hobbyist, practice on scrap first—your first pass might look like modern art, but that’s how we learn.
Best Welding Processes for Creating a Magnetic Fridge Panel
Picking the right process is like choosing your daily driver—each has its sweet spot. For fridge work, where precision trumps speed, TIG welding shines. It’s my go-to for stainless because of the control over heat input, minimizing spatter that could gum up your kitchen. MIG works if you’re faster-paced, but watch the shielding gas—100% argon for TIG, or a 75/25 argon/CO2 mix for MIG to keep the arc stable on thin stock.
When to use TIG: For clean, low-heat joints on 430 overlays. Why? It lets you puddle filler without burning through the door’s skin. Practical tip: Use a 1/16-inch tungsten, sharpened to a point, and dial your amperage to 60-80A on DCEN for stainless. I’ve botched a few by going too hot—result? A warped panel that wouldn’t seal flush.
MIG for hobbyists: Faster for longer seams, but feather your trigger to avoid blow-through. Settings: 0.030-inch wire at 18-22 volts, 100-150 IPM feed. Pro insight: Pulse mode if your machine has it—reduces heat and gives that stack-of-dimes look without practice.
Stick welding? Skip it here—too sloppy for thin gauge, and slag cleanup near food zones is a hassle. Always prioritize safety: Leather gloves, auto-darkening helmet, and a fire blanket under the fridge. In US shops, follow AWS D1.6/D1.6M:2017 for stainless guidelines to keep codes happy.
| Welding Process | Best For | Pros | Cons | Recommended Settings for 22-Gauge Stainless |
|---|---|---|---|---|
| TIG (GTAW) | Precision overlays, thin sheets | Excellent control, clean beads, minimal distortion | Slower, requires skill | 60-80A DCEN, 1/16″ tungsten, 15-20 CFH argon |
| MIG (GMAW) | Quick seams, hobby setups | Faster, easier for beginners | More spatter, higher heat | 18-22V, 0.030″ wire, 100-150 IPM, 75/25 gas mix |
| Stick (SMAW) | Not ideal—avoid for this | Simple equipment | Slag, rough finish, burn-through risk | N/A |
This table’s saved me time on quotes—pick based on your rig and patience.
Choosing the Right Filler Rods and Materials for Magnetic Stainless Welding
Filler selection can make or break your project’s integrity—get it wrong, and you’re fighting hot cracking or loss of magnetism. For overlaying 430 on 304, go with ER430 or ER308L rods. ER430 keeps the ferritic magnetic punch, while 308L offers ductility for the base. I’ve welded countless duplex setups, and matching chromium levels (around 16-18%) prevents corrosion at the joint.
How it works: The rod melts into the puddle, alloying with the base for compatibility. Use when prepping joints on curved fridge doors—ER430’s higher carbon aids penetration without brittleness. Why? Cost efficiency: A pound of 308L runs $22-28, versus pricier exotics.
Practical tips: Store rods in a dry box—moisture turns stainless into a porosity nightmare. Common fix: If your bead’s too convex, thin your slice angle to 10-15 degrees for flatter passes. Anecdote time: Early in my apprenticeship, I cheaped out on mismatched filler for a tank repair—cracks everywhere after a week. Lesson learned: Always cross-check with the mill cert.
For materials, source 430 sheet from McMaster-Carr or local suppliers—0.025-inch thick, 24×36 inches covers most doors. Joint prep: Grind a 30-degree bevel, back purge with argon to shield the root. Safety first: Stainless fumes are no joke—use a respirator with P100 filters per OSHA guidelines for welding fume control.
Pros of ER430: Retains magnetism, good flow. Cons: Slightly less corrosion resistance than 308L—fine for kitchens, though. Here’s a quick comparison:
| Filler Rod | Alloy Match | Magnetic Retention | Corrosion Resistance | Cost per lb | Best Use Case |
|---|---|---|---|---|---|
| ER308L | Austenitic base | Low (non-magnetic) | High | $22-28 | Base door attachment |
| ER430 | Ferritic overlay | High | Medium | $26-32 | Magnetic surface build |
| ER316L | Marine-grade alt | Low | Very High | $32-38 | Humid environments |
Step-by-Step Guide to Welding a Custom Magnetic Panel for Your Fridge
Let’s get hands-on—this is where the magic happens. I’ll walk you through fabricating and attaching a magnetic panel, assuming a standard 30-inch door. Total time: 4-6 hours, plus cooldown. Tools: TIG rig, angle grinder, clamps, measuring tape, and a buddy for moral support.
Preparing Your Fridge Door for Welding
First things first: Unplug the fridge, empty it, and prop the door open in a well-vented garage—fumes and sparks don’t mix with indoor air. Measure your door, subtracting 1/4-inch for expansion gaps around handles and seals. Trace the outline on your 430 sheet with soapstone.
Prep the door: Remove any trim screws (Phillips head usually), then scuff the surface with 80-grit for bite. Clean with isopropyl—oily residue from fingerprints kills adhesion. Tip: Tape off the gasket to protect it; I’ve reheated seals before and spent hours scraping goo.
Common mistake: Forgetting to mask vents—sparks love sneaking in. Fix: Use high-temp Kapton tape.
Cutting and Forming the Magnetic Sheet
Grab your sheet shear or plasma cutter—plasma’s faster for curves, set to 40A with air shield. Cut your panel slightly oversized, then file edges burr-free. If your door’s curved, form the sheet gently over a sandbag with a rubber mallet—don’t hammer; stainless work-hardens quick.
Why form? Flush fit prevents snags on magnets later. Pro know-how: Preheat to 150°F if forming cold; avoids micro-cracks. Safety: Eye pro and gloves—flying chips are sneaky.
Tack Welding the Overlay for Secure Fit
Lay the panel over the door, aligning edges. Clamp every 6 inches—quick-grips work best. Tack at corners and midpoints with TIG at 50A, 1-inch spacing. Check for flatness with a straightedge; shim if needed.
When to tack: Immediately after fit-up—warping sneaks up fast. Anecdote: On a rush job for a client’s food truck fridge, I skipped half the tacks—panel bowed like a banana. Walked it back with heat sinks next time.
Running Full Weld Beads on Your Magnetic Panel
Now the fun: Weave or stringer beads along seams, starting at the bottom to catch drips. Use 1/16-inch ER430, dipping every 2 seconds. Keep travel speed 6-8 IPM—too slow, and you melt through.
Machine settings: 70A, foot pedal for control. Back-purge the door side if possible to prevent sugar oxidation (that rainbow discoloration). Passes: 2-3 for full penetration on thin stock.
Tip: Feather gas lens for better visibility in tight spots. Mistake fix: If porosity pops, crank gas to 20 CFH and grind out the pit.
Finishing and Testing Your Welded Magnetic Surface
Grind beads flush with a 120-grit flap disc—feather into the base for invisibility. Polish with a stainless wheel to match the factory sheen; use Flitz compound for that mirror pop.
Test: Slap on a stack of magnets—should hold 5-10 without slip. Cycle the door 50 times; check for seal gaps. If it binds, trim high spots.
Safety wrap: Let cool 2 hours before reinstalling—hot doors burn counters. Cost efficiency: This beats $200 pro panels, clocking in at $50 in materials.
Common Mistakes When Welding Stainless for Appliance Mods and How to Avoid Them
We’ve all got war stories—mine include a fridge door that turned into a pretzel from uneven cooling. Top blunder: Overheating thin stainless, leading to distortion. Fix: Use copper chills or weld in short bursts, quenching with air between passes.
Another: Poor shielding, causing oxidation. Pro tip: Trail your torch 1/2-inch behind the puddle. For students, always back-purge—it’s a game-changer for root integrity.
Material mismatch bites too—welding carbon steel filler on stainless invites galvanic corrosion. Stick to certified rods, and always do a bend test on scraps. In humid US shops, store everything in low-humidity cabinets.
From job sites, ignoring fit-up leads to leaks or gaps—measure thrice, cut once. And safety? Skipping ground clamps sparks fires. I’ve seen one singe a shop towel—lesson: Clamp close, inspect leads.
Safety Considerations for Welding Near Kitchen Appliances
Welding’s rewarding, but near fridges? Double down on precautions. First, relocate if possible—garage beats kitchen counters. Unplug and cap lines; Freon leaks are toxic.
Gear up: FR jacket, face shield, and ventilation—stainless hex chrome fumes hit lungs hard. Per OSHA welding fume guidelines, aim for adequate exhaust ventilation. Fire watch: Have a CO2 extinguisher handy; water arcs stainless.
Post-weld: Inspect for cracks with dye penetrant—early catch saves rework. For pros, log per ASME Section IX (2025 edition). Hobbyists, just vent well and wash hands—chromium’s cumulative.
Real talk: I once welded too close to a running unit; vaporized gasket in seconds. Now, I always isolate and test.
Machine Settings and Joint Prep Tips for Flawless Stainless Welds
Your welder’s your partner—tune it right, and stainless flows like butter. For TIG on 430: Polarity DCEN, balance 60/40 for cleaning action. Amps match thickness—40A per 0.001-inch.
Joint prep: V-groove for butt joints, 60-degree included angle. Clean to bare metal; acetone, then alcohol wipe. Tip: For fridge curves, use edge prep with a die grinder—better fusion.
Settings table for quick ref:
| Thickness (Gauge) | Process | Amps | Voltage | Gas Flow (CFH) | Filler Size |
|---|---|---|---|---|---|
| 24 (0.025″) | TIG | 50-70 | 10-12 | 15-20 | 1/16″ |
| 22 (0.030″) | MIG | 80-100 | 18-20 | 20-25 | 0.028″ |
Anecdote: Dialed too high on a demo once—burned a 1/4-inch hole. Now, I start low, creep up.
Real-World Applications: Welding Magnetic Panels in Shops and Homes
Beyond fridges, this technique shines for custom cabinets or tool boards. In my fab shop, we welded magnetic backs on stainless workbenches—tools stick, no hunting. For DIYers, it’s perfect for garage fridges holding weld rod inventories.
US practices: Follow UL 250 standards for household refrigerator modifications to keep insurance happy. Students, it’s a portfolio builder; pros, upsell as “appliance armor.”
Examples: A welder pal retro’d a restaurant cooler door—held menus magnetically, cut reprint costs. Cost: $100 labor, paid off in a month.
Pros and Cons of Welding vs. Other Methods to Magnetize Your Fridge
Welding wins for permanence, but let’s compare. Adhesive sheets? Quick, no heat—but peels in humidity. Magnetic paint? Easy apply, weak hold.
| Method | Durability | Skill Level | Cost | Reversibility | Weld Integrity |
|---|---|---|---|---|---|
| Welding Overlay | High | Advanced | $50-100 | Low | Excellent |
| Adhesive Sheet | Medium | Beginner | $20-40 | High | N/A |
| Magnetic Paint | Low | Beginner | $15-30 | Medium | N/A |
| Suction Board | Medium | Beginner | $30-50 | High | N/A |
Welding’s edge: Tailored fit, but demands respect.
Advanced Techniques: Cladding and Heat Treating for Enhanced Magnetism
For pros, cladding multiple layers boosts pull strength—weld 0.010-inch 430 shims under the panel. Heat treat post-weld at 1900°F for stress relief, quench in air.
Why? Enhances ferrite content. Tip: Use a controlled oven; shop torches vary. Common pit: Over-annealing kills magnetism—test post-process.
In industry, this mirrors pressure vessel cladding—scale it down for home wins.
Wrapping Up
With the right process like TIG and fillers like ER430, you’re not just making your stainless steel fridge magnetic—you’re crafting a tougher, more versatile beast that stands up to daily abuse. You’re now equipped to tackle this or any fab twist with confidence, knowing weld integrity trumps quick fixes every time.
Go fire up that torch, slap some magnets on your masterpiece, and enjoy the stick. After polishing, hit it with a Scotch-Brite pad for that lived-in sheen—magnets grip better on satin finishes.
FAQs
Can I Use MIG Instead of TIG for This Fridge Project?
Sure, if you’re comfy with it—MIG’s forgiving for longer runs, but dial heat low (80A max) to avoid warping. Just clean your gun liner after; stainless wire loves gumming up.
What If My Fridge Door Warps During Welding?
Happenstance of thin metal—clamp it to a flat plate as a heat sink, and weld in 4-inch segments with air cools between. Pre-bend slightly opposite the curve to compensate.
Is 430 Stainless Safe for Food Contact After Welding?
Yep, once passivated—grind, then apply nitric acid dip (10% solution, 30 min) per ASTM A967/A967M-25. Rinses clean, restores corrosion shield.
How Do I Test Magnetism After the Weld?
Grab neodymium discs—stack five; if they hold without slip, you’re golden. Weak? Add another 430 layer for ferrite boost.
What’s the Cheapest Way to Start This Project?
Scrap 430 from auto salvage (muffler scraps work), $10-20. Pair with your existing TIG setup—total under $30 if you’re resourceful.


