How to MIG Weld an Exhaust Pipe Without Burn-Through
What’s in This Article
- Why Use MIG Welding for Exhaust Pipes?
- Choosing the Right MIG Welder for Exhaust Work
- Essential Tools and Safety Gear
- Preparing the Exhaust Pipe
- Setting Up Your MIG Welder
- Step-by-Step MIG Welding Process
- Filler Wire and Material Compatibility
- MIG vs Other Welding Methods for Exhaust
- Common Mistakes and How to Fix Them
- Testing Your Weld for Leaks
- Advanced Tips for Pro Welders
- Maintaining Your Welded Exhaust
- Frequently Asked Questions
Thin exhaust tubing can burn through fast when your heat, travel speed, or fit-up feels even a little off. A clean MIG weld takes more than pulling the trigger because exhaust pipe work demands steady prep, correct wire, good gas coverage, and tight control.
You may also wonder whether MIG or TIG makes more sense, or how stainless steel differs from mild steel. This guide shows you how to set up, prepare, weld, test, and protect an exhaust repair with less guesswork.
Quick Answer
To MIG weld an exhaust pipe, clean the metal first, use low heat, choose small wire, and weld in short bursts. Tack the joint in several places, stitch around the pipe, and let the metal cool between beads. Test the finished weld with soapy water or smoke before you call the job done.
Key Takeaways
- Clean the exhaust pipe before welding so rust, grease, and coatings don’t weaken the bead.
- Use low heat, small wire, and short stitch welds to reduce burn-through.
- Match your filler wire to the pipe material, especially when welding stainless steel.
- Test every exhaust weld for leaks because a good-looking bead can still fail.
- Protect the finished weld from rust and vibration so the repair lasts longer.

Image by best10
Why Use MIG Welding for Exhaust Pipes?
MIG welding, or metal inert gas welding, works well for many exhaust jobs because it’s fast, easy to control, and friendly for beginners. It uses a continuous wire electrode through a gun, along with shielding gas that protects the weld from contamination.
Exhaust systems often use mild steel or stainless steel tubing. Many pipes use thin metal, so your settings matter. MIG welding gives you enough control to make strong welds without adding too much heat.
Compared to TIG welding, MIG usually feels easier for home garage repairs. Stick welding often runs too hot for thin exhaust tubing, and flux-core welding can create more spatter. MIG gives you a useful balance of speed, control, and cleaner results.
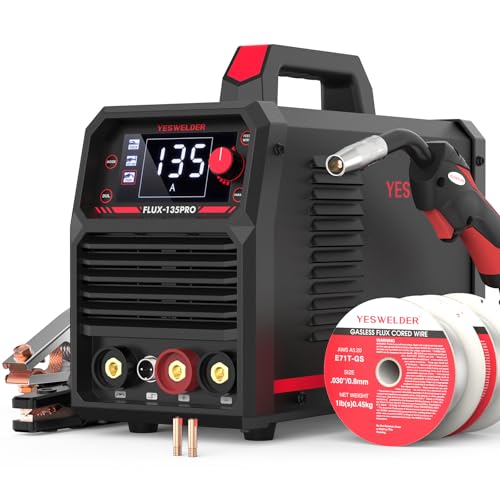
Choosing the Right MIG Welder for Exhaust Work
Pick a MIG welder that can run low enough for thin metal. You don’t need the most costly machine, but you do need stable controls for voltage and wire feed speed.
Look for a welder with about 30 to 140 amps, adjustable voltage, and wire feed speed control. These features help you tune the arc for thin exhaust pipe instead of forcing one hot setting on every joint.
Some machines include synergic settings that adjust voltage and wire speed together. These settings can help beginners, but you should still test on scrap metal before welding the real pipe.
A basic 110V MIG welder can handle many small exhaust repairs when you prep the pipe well. Gas-shielded MIG usually gives cleaner results than gasless flux-core on thin exhaust metal.
If you weld under a car, portability matters. A lighter machine, longer leads, and a stable work light can make awkward angles easier to manage.
Products Worth Considering
MULTI PROCESS: Experience the convenience of a high-quality, budget-friendly 3-in-1 welding machine that masterfully handles Gasless Flux Core MIG/Stick/Lift TIG(additional 10-25 lift TIG torch required). This unit caters to a wide range of welding applications and meets your various welding needs.

MULTIFUNCTIONAL: A 4-in-1 welder, capable of Flux Core MIG/Gas MIG/ Stick/Lift TIG (need to purchase extra tig lift torch). This unit caters to a wide range of welding applications and meets your various welding needs.

Synergic Control: Bestarc mig welder adopt IGBT Inverter and Synergic technology to automatically match the recommended voltage and wire feed speed (current). At the same time, users can also adjust the welding current,you can fine tune the voltage between -3V~3V. Ideal for both beginners and seasoned professionals.
Essential Tools and Safety Gear
Gather your tools before you strike an arc. Good prep saves time and lowers the risk of leaks, porosity, and burn-through.
- MIG welder: Use a machine with low-amp control and adjustable settings.
- Welding wire: Use ER70S-6 in 0.023 inch or 0.030 inch for mild steel, and use 308L or 309L for stainless steel.
- Shielding gas: Use 75% argon and 25% carbon dioxide for mild steel. Use a stainless gas mix when welding stainless steel.
- Wire brush and grinder: Remove rust, grime, coatings, and old weld material.
- Clamps and hangers: Hold the pipe steady and aligned while you tack it.
- Degreaser or acetone: Wipe off grease before welding.
- Safety gear: Wear an auto-darkening welding helmet, gloves, long sleeves, closed-toe boots, and hearing protection when grinding.
- Fire protection: Keep a welding blanket and fire extinguisher near your work area.
Warning: Welding creates sparks, fumes, ultraviolet light, and fire risk, so use ventilation and proper protective gear.
If you work under a car, support the vehicle with proper jack stands on stable ground. Disconnect the negative battery terminal before welding near vehicle electronics. Move fuel, oil, upholstery, and plastic trim away from sparks when possible.
Products Worth Considering

0.1ms Ultra-Fast Auto-Darkening Technology: Equipped with premium auto-darkening filter (ADF), the welding lens instantly darkens in just 0.1 millisecond when arc is struck, providing real-time eye protection against harmful UV/IR rays. No manual adjustment needed, ensuring seamless, uninterrupted welding operations and eliminating eye strain from sudden light exposure

Wide Application Range: Shade 3.5/9-13 supports TIG, MIG, MMA/ARC and Grind, and the helmet accommodates magnifying lenses for close-up and detailed work.

❤True Color View & Better Clarity: TRQWH auto darkening welding helmet has top 1/1/1/2 optical clarity lenses with advanced true color technology, which improves visibility by reducing the traditional lime green color in the helmet view screen, allowing a true view of the weld seam and work area while reducing eye fatigue. In addition our this welding helmet is equipped with a USB port on top of the rechargeable LED light, even in the dark environment can also be easily welding.
Preparing the Exhaust Pipe
Prep work decides how strong and clean your weld will be. Exhaust pipes often carry rust, grease, carbon buildup, or aluminized coatings that can hurt weld quality.
- Clean the pipe: Use a wire brush or grinder to remove rust, dirt, and coatings. Wipe greasy spots with degreaser or acetone.
- Cut the pipe square: Mark the pipe and use a hacksaw, cut-off wheel, or chain pipe cutter. Straight cuts make fit-up easier.
- Fit and clamp the joint: Align the pipe sections tightly. A small gap can work, but a wide gap raises the burn-through risk.
- Check the inside: Brush carbon or rust from the inner edge when you can reach it. Dirty edges can contaminate the weld.
Don’t treat rusty metal as good enough. A dirty pipe can make a weld look rough, leak under pressure, or fail after vibration and heat cycles.
Setting Up Your MIG Welder
Your welder settings must match the pipe thickness and material. Too much heat burns holes, while too little heat leaves a weak bead with poor fusion.
For mild steel exhaust tubing around 1.6 to 2 mm thick, use these settings as a starting point. Always adjust after a test weld on scrap metal of the same thickness.
- Polarity: Set direct current electrode positive (DCEP) for solid wire with shielding gas.
- Amperage: Start around 30 to 50 amps for 0.023 inch wire, or 40 to 60 amps for 0.030 inch wire.
- Voltage: Start around 15 to 18 volts for thin pipe, then adjust after test welds.
- Wire feed speed: Start around 150 to 200 inches per minute. Tune it until the arc sounds steady.
- Gas flow: Use about 20 to 25 cubic feet per hour for C25 gas. Check the hose for leaks.
- Stick-out: Keep about 1/4 inch to 3/8 inch of wire outside the contact tip.
For stainless steel, use a matching stainless wire such as 308L or 309L. Lower the heat when the pipe starts to discolor, warp, or burn at the edge.
Pro tip: Keep a small scrap piece from the old exhaust so you can test settings before welding the real joint.
Don’t raise the heat just to work faster. Thin pipe needs patience, short welds, and enough cooling time between passes.
Step-by-Step MIG Welding Process
Estimated time: Plan on about 45 to 90 minutes for a small exhaust repair, depending on access, rust, and fit-up.
Once you clean the pipe and test your settings, weld in short controlled steps. The goal is a sealed joint, not one long overheated bead.
- Tack the joint: Add 3 to 5 small tack welds around the pipe. Keep each tack short so the pipe stays aligned.
- Stitch the weld: Weld short beads around 1/2 inch to 3/4 inch long. Pause between beads so the pipe can cool.
- Hold a steady torch angle: Keep the gun about 10 to 15 degrees from vertical. Push the weld pool slightly for better control.
- Connect the tacks: Work around the pipe and join the short beads. Rotate the pipe when possible so you can weld in a comfortable position.
- Inspect the bead: Let the weld cool in air. Brush off spatter and check for cracks, holes, or porous spots.
- Repair weak areas: Grind out bad sections, clean the metal again, and re-weld only the problem spots.
If you struggle to see the weld pool, add more light to your workspace. A cheater lens inside your helmet can also help if the joint looks blurry.
Filler Wire and Material Compatibility
Choose filler wire that matches the pipe material. For mild steel pipes, ER70S-6 in 0.023 inch or 0.030 inch works well for many exhaust repairs.
For stainless steel exhausts, use a stainless wire such as 308L or 309L. Match the wire as closely as you can to the stainless grade and the repair type.
Match wire diameter to pipe thickness:
- 0.023 inch: Use this for thinner pipe around 1 to 1.6 mm. It lowers heat input and burn-through risk.
- 0.030 inch: Use this for slightly thicker pipe around 1.6 to 2 mm, or when you need more filler.
Don’t use aluminum wire on steel pipe, and don’t use mild steel wire when corrosion resistance matters on stainless pipe. A mismatched filler can create a weak or brittle joint.
MIG vs Other Welding Methods for Exhaust
MIG isn’t the only way to weld exhaust pipes. Use this quick comparison to choose the best method for your repair.
| Method | Pros | Cons | Best For |
|---|---|---|---|
| MIG | Fast, beginner-friendly, good for thin metal, clean with gas | Needs shielding gas, can spatter with poor settings | Mild steel, stainless repairs, DIY exhaust work |
| TIG | Precise, clean, strong control on stainless | Slower, harder to learn, higher setup cost | Show-quality stainless exhausts and pro work |
| Stick | No gas needed, works on some dirty metal | Hot arc, hard to control on thin pipe | Thicker pipe and rough outdoor repairs |
| Flux-core | No gas tank, works better in wind | More spatter, hotter arc, more cleanup | Quick fixes when gas-shielded MIG is not practical |
Choose MIG for most home exhaust repairs when you want a practical balance of speed and control. Choose TIG when appearance, stainless finish, and fine control matter more than speed.
Common Mistakes and How to Fix Them
Even skilled welders make mistakes on thin exhaust tubing. Most problems come from heat, dirty metal, poor fit-up, or weak gas coverage.
- Burn-through: Lower the voltage, use smaller wire, increase travel speed, and weld shorter beads.
- Poor penetration: Raise amperage slightly, improve fit-up, and check the backside for fusion when you can.
- Heavy spatter: Adjust wire speed, clean the nozzle, check gas flow, and remove dirt from the joint.
- Warping: Use stitch welding, add more tack welds, and let the pipe cool between short beads.
- Leaks: Grind out weak spots, clean the metal, re-weld the joint, and test again before reinstalling parts.
Rushing usually creates more work. Take extra time on tacks, fit-up, and leak testing before you move to final cleanup.
Testing Your Weld for Leaks
A weld can look smooth and still leak. Exhaust leaks can let fumes enter the cabin, so test the joint before you finish the job.
- Inspect the weld: Look for cracks, pinholes, gaps, or uneven sections.
- Use soapy water: Mix dish soap and water, apply it to the weld, and blow low-pressure air through the pipe. Bubbles show leaks.
- Use a smoke test: Run a smoke machine through the exhaust when you have access to one. Smoke escaping from the weld shows a leak.
If you find a leak, grind out the weak area and clean it again. Re-weld the spot, let it cool, and test it one more time.
Advanced Tips for Pro Welders
If you already have good control on thin pipe, use small upgrades to improve consistency. These habits help when you weld stainless tubing or custom exhaust sections.
- Use pulse MIG when available: Pulse settings can reduce heat input while helping the weld tie in.
- Weld downhill on thin pipe when it suits the joint: Downhill travel can reduce heat buildup and help limit burn-through.
- Improve fit-up with slip joints: A pipe expander can help create stronger, easier-to-weld joints in some repairs.
- Keep a settings log: Write down wire size, gas, voltage, wire feed speed, and pipe thickness after each good weld.
Maintaining Your Welded Exhaust
A strong weld still needs protection after the repair. Heat, water, road salt, and vibration can shorten the life of the joint.
- Coat the weld: Apply high-temp paint or anti-corrosion spray after the weld cools and the surface is clean.
- Check the hangers: Make sure the exhaust sits securely so vibration does not stress the weld.
- Inspect the repair: Look for cracks, rust, or soot marks every few months, especially in salty climates.
Small maintenance steps can extend the life of the repair. Paint the weld, support the exhaust, and fix new leaks before they grow.
Frequently Asked Questions
What’s the best MIG wire for welding exhaust pipes?
For mild steel exhausts, use ER70S-6 wire in 0.023 inch or 0.030 inch. For stainless steel, use 308L or 309L wire based on the pipe grade and repair type.
Can you MIG weld an exhaust pipe without gas?
Yes, you can use flux-core wire, but it often creates more spatter and heat. Gas-shielded MIG usually gives cleaner welds and better control on thin exhaust pipe.
How do you avoid burning through thin exhaust pipes?
Use low amperage, small wire, short stitch welds, and steady travel speed. Let the pipe cool between beads, and test your settings on scrap metal first.


