After welding stainless steel, you need to clean the weld and heat-affected zone before you depend on the surface for corrosion resistance. Welding can leave heat tint, oxide scale, spatter, free iron, grinding dust, oil, and shop contamination. The correct order is to inspect the weld, clean the surface, remove damaging oxide, apply the required passivation treatment, rinse thoroughly, dry completely, protect the part from recontamination, and perform the specified test.
Quick Answer
To passivate stainless steel after welding, first degrease the part and remove spatter, scale, heat tint, and embedded iron. Use pickling or electrochemical cleaning when oxide remains, then apply the citric, nitric, or electrochemical passivation procedure required for the grade and job. Rinse, dry, protect from recontamination, and perform the specified acceptance test.
Key Takeaways
- Passivation must be performed on a clean stainless surface. Oil, heat tint, scale, free iron, and abrasive residue can prevent an even treatment.
- Pickling removes weld oxide and scale. Passivation removes contaminant iron and enhances passive-film formation. They are related but separate operations.
- Citric passivation is often a lower-hazard option than nitric or hydrofluoric-acid products, but it does not reliably remove heavy weld heat tint.
- Use only stainless-dedicated brushes, pads, clamps, and abrasives. Tools that touched carbon steel can embed iron and cause rust spots.
- Pickling paste may contain hydrofluoric and nitric acids. It should be handled only by trained workers with chemical-rated PPE, ventilation, emergency procedures, and an approved waste plan.
- A bright weld is not proof of successful passivation. Use the cleanliness or passivation-effectiveness test required by the job specification.
At a Glance
| Time Required | Procedure-dependent. Cleaning, oxide removal, treatment dwell time, rinsing, drying, inspection, and testing may take from under an hour for a small weld to several hours for larger or controlled work. |
| Difficulty | Moderate for a written citric-passivation procedure; advanced and high-hazard for nitric-acid treatment, HF-containing pickling products, internal systems, or certified work |
| Tools Needed | Written procedure, stainless-dedicated brush or nonwoven pad, compatible cleaner, specified passivation product, suitable applicator or container, rinse water, chemical-rated PPE, drying supplies, and the required test kit |
| Cost | Low to moderate for localized cleaning and citric treatment; higher for electrochemical equipment, controlled testing, regulated waste handling, internal-system treatment, or certified professional service |
Warning: Do not treat nitric acid, hydrofluoric acid, pickling paste, or stainless welding fumes casually. Read the product SDS and written procedure before work begins. Use chemical-rated PPE, effective ventilation, eyewash and emergency supplies, spill controls, and a legal waste-disposal method. HF-containing products are for trained users only. Stainless welding can also generate hazardous fumes, including hexavalent chromium, so use local exhaust ventilation and respiratory protection when an exposure assessment or workplace program requires it.
Why Stainless Steel Welds Need Passivation
Stainless steel resists corrosion because chromium in the alloy reacts with oxygen to form a very thin protective oxide film. The film forms naturally on a clean stainless surface and can reform after minor damage when the alloy and surrounding environment are suitable.
Welding can disturb the surface around the weld bead and heat-affected zone. Heat tint, oxide scale, embedded iron, grinding dust, spatter, and shop residue can reduce local corrosion resistance or interfere with the formation of a uniform passive surface.
Passivation is a controlled chemical or electrochemical treatment performed on clean stainless steel. It removes contaminant iron and other foreign matter and enhances the formation of the protective passive film. It does not replace degreasing, descaling, heat-tint removal, sound welding, correct alloy selection, or proper joint design.
Post-weld cleaning and passivation are particularly important for wet, outdoor, marine, food-processing, pharmaceutical, potable-water, chemical, and chloride-exposed service. However, even a correctly passivated surface can pit or stain if the stainless grade is unsuitable for the environment or if salts and deposits remain trapped in crevices.
For controlled work, follow the current edition required by the contract or customer. The active references at the time of this review are ASTM A967/A967M-25 for chemical passivation treatments and ASTM A380/A380M-25 for cleaning, descaling, pickling, and passivation practices. Customer, industry, code, or sanitary requirements may be stricter than a general shop procedure.
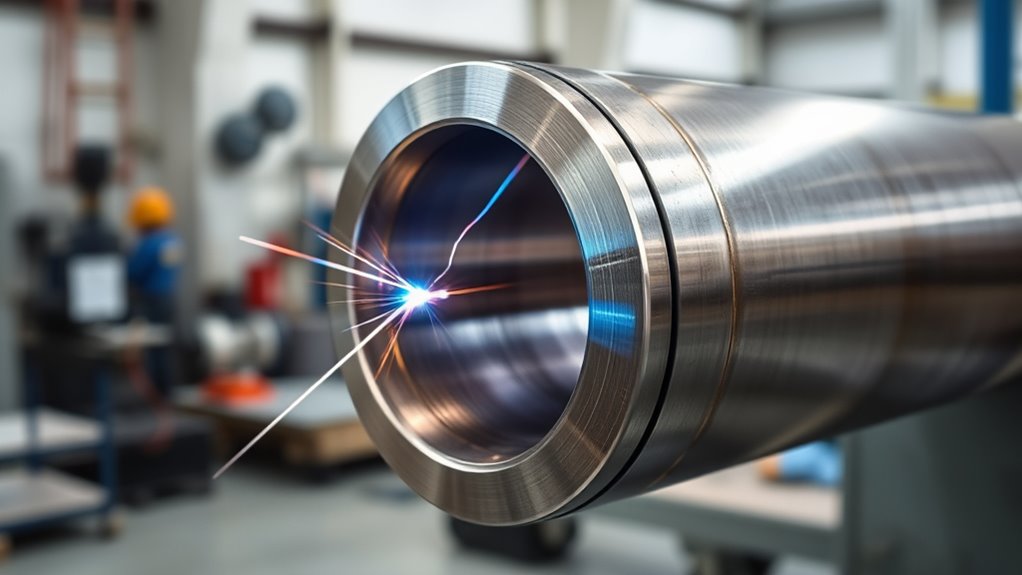
How Welding Damages the Passive Layer
Welding exposes stainless steel to enough heat to create colored oxide beside and over the weld. This discoloration is commonly called heat tint. Straw, gold, blue, purple, gray, and black colors can indicate increasing oxidation, but color alone is not a precise measurement. The appearance also depends on the alloy, shielding, surface finish, heat input, lighting, and viewing angle.
Heavy heat tint is a warning that the surface oxide has changed and that the metal directly beneath it may have reduced local chromium availability. Removing only the visible color with polishing may improve appearance without fully removing the affected oxide or embedded contamination.
The weld area can also pick up free iron from carbon steel brushes, clamps, benches, grinding wheels, blasting media, or airborne steel dust. These particles can rust on top of the stainless and make it appear that the stainless alloy itself is failing.
Backside oxidation, often called sugaring, is another problem on pipe, tubing, tanks, and sanitary welds. Poor root-side shielding can create a rough, heavily oxidized surface that traps soil and process residue. Passivation cannot smooth a rough root, repair lost metal, or correct a severely oxidized weld. The joint may need grinding, rewelding, replacement, or professional internal treatment.
Note: Passivation is not a weld repair. Cracks, porosity, undercut, lack of fusion, heavy sugaring, unsuitable filler metal, or an incorrect stainless grade must be addressed before surface treatment.
Before You Start: Identify the Job Requirements
Do not select a chemical only by looking at the weld color. First identify the material, service conditions, surface finish, and required acceptance test. A method that is acceptable for a decorative 304 stainless bracket may not be suitable for duplex pipe, a sanitary tank, a medical component, or equipment exposed to warm chlorides.
- Confirm the stainless grade: Determine whether the part is austenitic, ferritic, martensitic, duplex, or precipitation-hardening stainless. Do not assume every stainless grade accepts the same chemistry or test.
- Identify the surface finish: Brushed, polished, bead-blasted, pickled, and electropolished surfaces can respond differently to localized treatment.
- Define the service environment: Consider moisture, temperature, chlorides, cleaning chemicals, food contact, high purity, and whether deposits can collect in crevices.
- Check access: Confirm whether you can clean and rinse the weld root, internal tubing, threads, seams, and enclosed cavities.
- Review the written requirement: Identify the required standard edition, treatment route, chemical concentration, temperature, dwell time, rinse quality, test, acceptance criteria, and documentation.
- Plan waste handling: Determine how used chemicals, neutralizer, dissolved metals, contaminated wipes, and rinse water will be collected and disposed of.
If the alloy cannot be confirmed or the work is customer-controlled, stop and obtain the material record or written procedure. Guessing can etch the finish, cause staining, damage the alloy, or invalidate the job documentation.
What to Clean Before Passivation
Before passivation, remove everything that can prevent the treatment from reaching clean stainless steel. Contaminants can include oil, grease, coolant, fingerprints, layout dye, adhesive residue, weld spatter, slag, oxide scale, heat tint, free iron, zinc, carbon steel dust, polishing compound, and abrasive particles.
Remove Weld Contaminants
Start with degreasing. Wash the weld and nearby surface with a compatible alkaline cleaner or detergent that removes oil without leaving a film. Rinse until the cleaner and loosened soil are gone. A water-break check can help reveal remaining oil because a clean surface should wet evenly instead of forming separated beads or dry islands.
If you use a solvent, verify that it is compatible with the alloy, product, and workplace procedure. Keep chlorinated solvents away from welding and other heat sources. Make sure any permitted solvent has fully evaporated before hot work resumes.
Use stainless-dedicated tools for mechanical cleanup. A clean stainless wire brush, nonwoven abrasive pad, carbide scraper approved for the finish, or dedicated abrasive can remove loose deposits. Do not use steel wool, a carbon steel brush, or an abrasive that has touched mild steel.
Mechanical cleaning should not gouge the base metal or change the required finish. Deep scratches, sharp grinding grooves, and smeared metal can trap moisture, chlorides, cleaning residue, or product soil.
Strip Heat Tint
Remove heat tint when the weld needs dependable corrosion resistance. Light surface color may sometimes be removed with a qualified stainless-dedicated mechanical process, but visual improvement alone does not prove that all affected oxide or contaminant iron is gone.
Citric passivation should not be relied on as the primary remover for visible weld oxide. If tint remains after cleaning, use a qualified mechanical, pickling, electrochemical, or professional process that is compatible with the alloy and finish. Heavy blue, purple, gray, or black oxide normally requires more than a basic passivation bath.
After the oxide is removed, clean the surface again if the removal process leaves abrasive residue, polishing compound, electrolyte, neutralizer, or dissolved metal salts. The passivation stage must contact clean stainless steel rather than a layer of process residue.
Standards and Specifications to Know
For general shop work, follow the current product instructions and SDS. For commercial, sanitary, medical, aerospace, pressure, high-purity, or customer-controlled work, follow the specified written procedure and edition. Do not substitute a blog procedure for the contract requirement.
| Reference | What it helps control |
|---|---|
| ASTM A967/A967M-25 | Nitric, citric, and electrochemical passivation treatments plus qualitative tests used to confirm treatment effectiveness |
| ASTM A380/A380M-25 | Cleaning, degreasing, descaling, pickling, passivation, contamination control, rinsing, cleanliness inspection, and handling practices |
| Customer or industry specification | The required grade-specific treatment, surface finish, concentration, temperature, dwell time, acceptance test, records, and traceability |
| Product instructions and SDS | Application limits, PPE, incompatibilities, first-aid information, neutralization, rinsing, storage, spill response, and disposal requirements |
Do not guess on controlled work. If the part is intended for food contact, potable water, pharmaceutical processing, medical equipment, pressure service, chemical service, high-purity gas, or customer inspection, confirm the approved procedure before treatment begins.
Pickling, Passivation, and Electrochemical Cleaning
Cleaning, pickling, passivation, and electropolishing solve different surface problems. A complete post-weld process may use more than one operation, but they should not be treated as interchangeable.
- Cleaning removes oil, dirt, polishing compound, loose particles, and process residue.
- Descaling or pickling removes heavier oxide scale and weld heat tint by dissolving or loosening the affected surface layer.
- Passivation treats a chemically clean stainless surface to remove contaminant iron and enhance passive-film formation.
- Electrochemical weld cleaning uses current and an electrolyte to remove localized oxide and may include a passivation stage when the equipment procedure specifies it.
- Electropolishing removes a controlled microscopic layer from the entire surface to smooth peaks and improve cleanability. It is commonly performed by a specialist.
| Method | Best use | Main limitation or caution |
|---|---|---|
| Citric acid passivation | Contaminant-iron removal and passivation after the surface has been cleaned and descaled | Does not reliably remove heavy heat tint or weld scale |
| Nitric acid passivation | Specified industrial passivation where an approved nitric treatment is required | Higher handling, ventilation, compatibility, and disposal burden than many citric processes |
| Pickling paste or solution | Localized removal of heavy heat tint and oxide scale before final cleaning or passivation | May contain hydrofluoric and nitric acids; trained and properly equipped users only |
| Electrochemical weld cleaning | Localized cleaning of weld beads and heat tint while preserving more of the surrounding finish | Requires compatible electrolyte, equipment settings, brush material, neutralization, rinsing, and operator training |
| Electropolishing | High-purity, sanitary, medical, pharmaceutical, or cleanability-focused surfaces | Normally requires specialist equipment, bath control, fixturing, testing, and waste treatment |
Pro Tip: Use the least aggressive qualified process that removes the actual contamination and meets the service requirement. Extra grinding or stronger acid does not automatically create a better surface and may damage the finish.
Choose a Method by Weld Condition
| Surface condition | Typical response | Do not assume |
|---|---|---|
| Clean weld with no visible tint | Degrease, inspect, apply the specified passivation treatment, rinse, dry, and test | A clean appearance proves there is no free iron |
| Light visible heat tint | Use an approved stainless-dedicated mechanical or electrochemical oxide-removal method, then clean and passivate as required | Citric passivation alone will remove the oxide |
| Blue, purple, gray, or black oxide | Use qualified pickling, electrochemical cleaning, controlled mechanical treatment, or professional service | Polishing the color away restores the required corrosion resistance |
| Known or suspected carbon steel contamination | Reclean with dedicated tools, apply the specified passivation treatment, and perform an approved contaminant-iron test | A normal visual inspection can detect every embedded iron particle |
| Heavy backside sugaring | Inspect for repair, rework, replacement, or qualified internal treatment | External passivation can repair an inaccessible rough root |
| Sanitary or high-purity surface | Follow the approved procedure for finish restoration, internal access, rinse-water quality, testing, records, and clean handling | A general shop treatment meets sanitary acceptance criteria |
Step-by-Step Stainless Steel Passivation
Use this workflow as a planning guide for general stainless weld passivation. The chemical label, SDS, alloy-specific instructions, customer specification, and local safety and environmental rules take priority whenever they are more specific.
1. Inspect the Weld
Check the weld bead, heat-affected zone, and root side when accessible. Look for heat tint, scale, sugaring, porosity, cracks, undercut, spatter, rough grinding marks, and carbon steel contamination. Confirm the alloy and required finish. Repair weld defects before chemical treatment.
2. Degrease and Wash
Remove oil, fingerprints, coolant, layout dye, adhesive, polishing compound, and shop residue with a compatible cleaner. Keep the entire treatment area wet long enough for the cleaner to work, then rinse until no cleaner or loosened soil remains.
Perform a water-break check when the procedure uses one. If the rinse water pulls away into beads or islands, repeat the cleaning step. Remember that even wetting shows cleanliness, not complete passivation.
3. Remove Spatter and Loose Oxide
Use stainless-dedicated tools only. Light brushing, scraping, or nonwoven abrasion can remove loose deposits without embedding carbon steel. Avoid deep scratches and excessive grinding, especially on sanitary, polished, or cosmetic surfaces.
After mechanical work, remove all abrasive particles and dust. Clean the surface again before chemical treatment.
4. Remove Heat Tint and Scale
Choose a qualified method that removes the oxide without damaging the alloy or required finish. Localized electrochemical cleaning may suit many TIG or MIG welds. Heavy scale may require controlled pickling or professional treatment. A dedicated mechanical method may be acceptable when the written procedure permits it and the affected surface layer is fully removed.
Do not continue to the passivation stage while visible oxide, scale, electrolyte residue, or pickling residue remains.
5. Apply the Specified Passivation Treatment
Apply the approved citric, nitric, or electrochemical passivation process according to the written procedure. Control the chemical identity, concentration, temperature, contact time, coverage, agitation, and surface wetting. Do not invent a stronger mixture or extend dwell time because the surface looks difficult.
Keep the treatment in contact with the entire required area. Do not let gels, acids, or electrolytes dry on the part unless the manufacturer and written procedure specifically permit it.
6. Rinse Thoroughly
Rinse promptly and thoroughly using the water quality required by the treatment procedure. Rinsing stops the chemical action and removes acid, dissolved iron, salts, loosened oxide, and cleaning residue.
A final deionized or reverse osmosis rinse is useful when required for sanitary, high-purity, cosmetic, low-residue, or chloride-sensitive work. It is not a substitute for complete rinsing, and it is not automatically required for every general shop application.
7. Neutralize if Required
Use a neutralizer only when the product instructions or written procedure requires one. Apply the specified product in the correct order, then complete the required rinse. Do not mix acids, alkalis, bleach, solvents, or other shop chemicals casually.
Collect used chemicals and metal-bearing rinse water as required. Neutral pH alone does not automatically make a waste stream legal to discharge.
8. Dry and Protect the Surface
Dry the part with clean air, a lint-free cloth, or the method specified for the job. Remove water from seams, threads, sockets, crevices, and lap joints. Once the surface is clean and exposed to oxygen, the protective passive film can form and stabilize.
Keep the treated part away from carbon steel grinding dust, dirty gloves, steel racks, contaminated slings, and chloride-containing cleaners while it dries and awaits inspection.
9. Inspect, Test, and Document
Perform the test required by the job. The procedure may call for visual inspection, water-break testing, a contaminant-iron test, water immersion, high humidity, salt spray, damp cloth, boiling-water immersion, copper sulfate, or another approved method.
Use only a test that is permitted for the alloy and surface condition. Record the part identification, alloy, treatment product, batch or lot, concentration when required, temperature, contact time, rinse method, operator, date, test method, acceptance criteria, and result.
Electrochemical Cleaning for Stainless Steel Welds
Electrochemical weld cleaning uses electric current, a conductive electrolyte, and a brush or pad to remove oxide from stainless welds. It can be faster and more localized than manual pickling, especially along TIG and MIG weld beads.
Electrochemical Cleaning Basics
A weld-cleaning machine passes current through the brush and electrolyte while the tool contacts the stainless surface. The electrochemical reaction loosens and removes weld oxide and contamination. Some qualified systems provide separate cleaning and passivation modes or a combined documented process.
Use the electrolyte, brush material, waveform, current range, and contact technique specified by the equipment manufacturer. Do not substitute a household acid, improvised power supply, or unknown cleaning fluid.
After treatment, complete the specified neutralization and rinsing steps. Residual electrolyte or neutralizer can leave white deposits, brown stains, or an uneven surface.
Restoring Weld Passivity
Electrochemical cleaning targets the weld and heat-affected zone without the broad material removal caused by aggressive grinding. This can help preserve a brushed or polished finish while removing oxide that would reduce local corrosion performance.
Too little treatment can leave oxide behind. Excessive dwell, pressure, heat, or current can mark the finish, spread residue, or create an uneven appearance. Inspect the surface under consistent lighting before rinsing and again after it is fully dry.
How to Remove Heat Tint and Discoloration
Heat tint is more than a cosmetic color. It is an oxide layer formed during welding. Darker or heavier discoloration generally calls for closer inspection and a more capable oxide-removal process, but color should not be used as the only acceptance criterion.
A polished weld can look bright while still carrying embedded iron, residual oxide, polishing compound, or chemical residue. Appearance is an inspection step, not proof of passivation.
For light straw discoloration, an approved stainless-only mechanical or electrochemical process may be sufficient before final cleaning and passivation. For blue, purple, gray, or black oxide, use qualified electrochemical cleaning, pickling, controlled mechanical treatment, or professional service.
If the root side of a pipe or tube is heavily sugared, treating only the outside will not restore the rough internal surface. Repair, replacement, internal mechanical treatment, or a qualified circulation process may be required.
The best solution is prevention. Use clean fit-up, suitable shielding-gas coverage, controlled heat input, correct travel speed, and back purging where the welding procedure requires it. Less oxidation during welding means less aggressive surface treatment afterward.
Cleanliness and Passivation Verification Tests
You cannot confirm a passivated surface by shine alone. Select the test from the applicable standard, customer requirement, product procedure, or approved quality plan. Different tests answer different questions.
| Test | What it checks | Important limit |
|---|---|---|
| Visual inspection | Visible scale, rust, staining, residue, etching, pitting, frosting, and finish damage | Cannot detect every thin oil film or embedded iron particle |
| Water-break test | Whether the cleaned surface wets evenly without oil-related breaks | Checks cleanliness, not full corrosion resistance by itself |
| Approved contaminant-iron test | Iron contamination that may rust after treatment | The reagent, procedure, surface preparation, and acceptance criteria must be specified |
| Copper sulfate test | Contaminant iron on stainless grades and surfaces for which the method is permitted | Not appropriate for every alloy, heat treatment, or surface condition |
| Water immersion or high-humidity test | Whether treated parts develop early rust under a defined wet exposure | Requires the specified exposure time, conditions, and acceptance criteria |
| Salt spray test | Performance under a defined aggressive salt-fog exposure when specified | Not a quick substitute for the acceptance test named by the job |
If the test fails, do not conceal the result with polish, oil, wax, or coating. Identify the likely cause, reclean the part, remove remaining contamination or oxide, repeat the specified treatment, rinse, dry, and retest.
Common Stainless Steel Passivation Mistakes
Most failures begin before the passivation treatment. If the weld area is oily, oxidized, or contaminated, the treatment cannot reach the stainless surface evenly.
- Using a carbon steel brush, steel wool, contaminated clamp, or shared abrasive on stainless.
- Skipping degreasing before oxide removal or passivation.
- Treating pickling and passivation as the same operation.
- Trying to passivate over visible weld scale or heavy heat tint.
- Assuming citric passivation will remove every type of discoloration.
- Using an unknown acid concentration, temperature, or dwell time.
- Letting pickling paste, passivation gel, electrolyte, or neutralizer dry on the part.
- Rinsing with dirty, recycled, or chloride-contaminated water when the procedure does not permit it.
- Leaving water or treatment residue in crevices, threads, seams, cavities, or lap joints.
- Using copper sulfate or another reagent on an alloy where the method is not approved.
- Handling the clean part with dirty gloves or placing it on a carbon steel bench after treatment.
- Ignoring the customer specification, required records, or acceptance test.
Note: Chlorides can promote pitting and staining on susceptible stainless surfaces. Avoid bleach, chloride-containing cleaners, salty residue, and contaminated rinse water unless the material, concentration, temperature, and exposure are specifically approved.
Troubleshooting Stains After Passivation
| Problem | Likely causes | Corrective action |
|---|---|---|
| Brown rust spots | Embedded carbon steel, contaminated tools, dirty handling equipment, or incomplete contaminant-iron removal | Remove the source of contamination, reclean, repeat the approved treatment, and perform the specified iron test |
| White chalky residue | Dried electrolyte, neutralizer, hard-water minerals, or incomplete rinsing | Rewash and rinse using the required water quality, then dry without leaving pooled water |
| Uneven or cloudy finish | Uneven cleaning, dried chemical, excessive dwell, incompatible chemistry, or inconsistent mechanical work | Stop treatment, inspect for etching, and use the approved finish-restoration procedure |
| Heat color remains | The passivation step was used without adequate oxide removal | Return to the qualified heat-tint removal stage, clean again, and repeat passivation if required |
| Failed water-break test | Remaining oil, polishing compound, cleaner film, fingerprints, or other organic residue | Repeat degreasing and rinsing before continuing |
| Rust appears only in seams or crevices | Trapped chemicals, retained water, chlorides, poor drainage, or an unsuitable joint design | Flush and dry the area, inspect the design and alloy suitability, and obtain engineering review when corrosion continues |
How to Maintain Passivated Welds
Once the weld is passivated, keep the surface clean and protect it from abrasive damage and carbon steel contamination. Inspect for rust spots, brown staining, white residue, renewed heat discoloration, or deposits. Early staining often points to contamination, poor rinsing, chloride exposure, retained moisture, or damage to the finish.
| Action | Purpose |
|---|---|
| Inspect for stains and deposits | Catch contamination, retained residue, or local corrosion early |
| Clean gently | Remove soil without scratching the finish or embedding iron |
| Control chloride exposure | Reduce staining and pitting risk where the alloy is susceptible |
| Keep carbon steel work separate | Prevent iron dust, scale, and tool contamination |
| Reclean and repassivate after repair | Restore the specified surface condition after grinding, welding, engraving, or blasting |
Use mild detergent, suitable water, and a soft cloth for routine cleaning unless the equipment procedure requires another method. Avoid bleach, chloride cleaners, steel wool, carbon steel scrapers, and shared abrasive pads.
If a weld is ground, repaired, engraved, blasted, machined, or exposed to carbon steel dust, treat the affected area as a new surface. Clean it, remove oxide or contamination, passivate it when required, and repeat the specified inspection or test.
Prevent Recontamination After Passivation
A successfully treated part can be contaminated again within minutes if it is placed on a dirty bench or handled with gloves used for carbon steel work. Create a clean route from final rinse through drying, inspection, packaging, storage, and installation.
- Use clean gloves that have not handled mild steel, oily tools, or grinding debris.
- Place parts on clean stainless, plastic, or other approved noncontaminating supports.
- Keep treated parts away from carbon steel cutting, blasting, and grinding areas.
- Use clean slings, racks, hooks, carts, and packaging materials.
- Do not mark the finished surface with an unapproved marker, crayon, or adhesive label.
- Cover openings after internal tubing or equipment has been cleaned and dried.
- Store parts where rainwater, road salt, shop dust, and condensation cannot collect.
- Preserve treatment records with the part or job traveler when traceability is required.
When to Hire a Professional
Hire a qualified passivation, pickling, electropolishing, or stainless-fabrication service when the part has heavy heat tint, inaccessible internal weld roots, sanitary tubing, high-purity service, pressure service, food or beverage contact, medical use, chemical exposure, customer inspection, or a documented acceptance test.
Professional treatment is also appropriate when the alloy is uncertain, the surface finish must remain uniform, the component is too large to rinse safely, or the waste stream requires controlled collection and treatment.
Avoid DIY pickling paste if you do not have chemical training, acid-rated PPE, effective ventilation, eyewash and emergency supplies, spill controls, exposure procedures, and a legal disposal route. Professional treatment usually costs less than replacing a damaged component, failing an inspection, or responding to a serious chemical exposure.
Frequently Asked Questions
Do you need to passivate stainless steel after welding?
You often need to passivate welded stainless when corrosion resistance, cleanliness, or a customer specification requires it. At minimum, remove oil, scale, heat tint, spatter, and contaminant iron. Some jobs then require a documented citric, nitric, or electrochemical passivation treatment and acceptance test.
Does heat tint have to be removed before passivation?
Yes, visible heat tint should be removed when the weld needs dependable corrosion resistance. Passivation is performed on a clean stainless surface and should not be relied on to remove heavy weld oxide. Use an approved mechanical, electrochemical, pickling, or professional oxide-removal process first.
How do you protect stainless steel after welding?
Inspect the weld, remove heat tint, spatter, oil, free iron, and abrasive residue, then apply the treatment required for the alloy and service. Rinse thoroughly, dry all crevices, test the surface when required, and keep the part away from chloride residue and carbon steel contamination.
What can you use to passivate stainless steel?
Recognized options include controlled citric-acid, nitric-acid, and electrochemical passivation treatments. The correct option depends on the stainless grade, surface condition, finish, service environment, written specification, and required test. Heavy weld oxide may need a separate pickling or electrochemical cleaning step first.
Is citric acid enough to passivate welded stainless steel?
Citric acid can be suitable for contaminant-iron removal and passivation after the weld has been degreased and all damaging oxide has been removed. It should not be assumed to remove blue, purple, gray, or black heat tint. Remove the oxide first, then use the specified passivation procedure.
Can you passivate stainless steel with vinegar?
Vinegar is not a controlled passivation method for welded stainless steel. It may loosen light mineral residue or staining, but it does not replace a specified citric, nitric, pickling, or electrochemical procedure when corrosion resistance must be restored and verified.
How soon after welding should stainless steel be passivated?
Begin post-weld cleaning after the part has cooled enough for safe handling and the weld has passed inspection or required rework. Complete the treatment before the surface enters service or becomes contaminated by shop dust, oil, handling equipment, chlorides, or carbon steel work.
Are fumes from welding stainless steel toxic?
Yes. Stainless welding fumes can contain chromium, nickel, and other hazardous metals, and welding can generate hexavalent chromium. Use effective local exhaust ventilation, keep your breathing zone out of the plume, and use respiratory protection when required by the exposure assessment and workplace respiratory-protection program.
Conclusion
After welding, stainless steel needs more than a quick wipe if corrosion resistance matters. Inspect and repair the weld first. Remove oil, spatter, heat tint, oxide scale, free iron, and shop contamination. Then apply the citric, nitric, or electrochemical passivation process required for the alloy and job.
Rinse according to the written procedure, dry seams and crevices, protect the clean surface from recontamination, and perform the specified test. A controlled process helps the weld and heat-affected zone resist staining and premature corrosion, but it cannot correct a defective weld, unsuitable alloy, poor joint design, or an environment that exceeds the material’s limits.
Sources
- ASTM A967/A967M-25 — current chemical and electrochemical passivation treatments and qualitative verification practices for stainless steel parts.
- ASTM A380/A380M-25 — current cleaning, descaling, pickling, passivation, rinsing, inspection, and contamination-control practices.
- OSHA Hexavalent Chromium — health hazards and worker exposure during stainless steel welding and other hot work.
- OSHA: Controlling Hazardous Fume and Gases During Welding — welding-fume contents, health effects, ventilation, work practices, and respiratory-protection guidance.
- NIOSH Pocket Guide: Hydrogen Fluoride — hydrofluoric-acid exposure routes, health effects, protective measures, and first-aid guidance.


