After welding auto body panels, you need to protect the exposed metal, close every moisture path, and build a smooth surface that supports the paint system. Let the repair cool, check both sides for heat or smoldering material, inspect the weld for defects, and confirm the panel material and OEM procedure. Then grind only what is necessary, clean and featheredge the repair, apply compatible corrosion protection, seal the joints, level minor imperfections, block sand, and paint.
Quick Answer
After welding an auto body panel, let it cool and inspect for fire, pinholes, cracks, and distortion. Clean and dress the weld without thinning the panel, apply an OEM-approved and paint-system-compatible primer, seal overlaps, protect both sides, fill minor lows, block sand primer-surfacer, and paint only after every layer is clean, dry, cured, and compatible.
Key Takeaways
- Inspect hidden areas for heat or smoldering material before using flammable cleaners, primer, seam sealer, or paint.
- Do not hide pinholes, cracks, active rust, loose weld-through coating, or weak metal under filler or seam sealer.
- Epoxy primer is a common corrosion-resistant option for steel, but the OEM procedure and complete refinish system control the correct primer and layer order.
- Protect the backside and closed cavities because welding heat removes factory corrosion protection from hidden surfaces.
- Use each product’s technical data sheet for substrate preparation, mix ratio, sanding grit, flash time, recoat window, cure time, and required safety equipment.
At a Glance
| Time Required | Several hours of hands-on work, usually spread over 1–3 days or longer because primer, filler, seam sealer, and paint cure windows vary |
| Difficulty | Intermediate; structural repairs, aluminum, advanced high-strength steel, and professional spray finishing require additional training and equipment |
| Tools Needed | Fire extinguisher, PPE, inspection light, grinder or file belt, sanding block, DA sander, clean dry air or vacuum, approved cleaner, lint-free wipes, primer, seam sealer, filler, guide coat, and compatible paint system |
| Cost | Varies widely with panel size, coating brand, color blending, PPE, spray equipment, booth access, and whether a professional refinisher completes the paintwork |
Warning: Welding fumes, grinding dust, solvents, and automotive coatings can damage your lungs, eyes, skin, and nervous system and can create serious fire hazards. OSHA’s autobody guidance identifies welding fumes, sanding dust, volatile organics, and isocyanates among common hazards. Use local exhaust ventilation, eye and hearing protection, gloves, protective clothing, and respiratory protection selected for the evaluated hazard. Do not assume a dust mask or general-purpose cartridge respirator is adequate for 2K spraying. Mechanical spray-area ventilation must operate during spraying and long enough afterward to remove vapors and mist. If you lack a compliant spray area and the protection required by the SDS and hazard assessment, have a qualified refinisher apply the catalyzed coatings.
Recommended Order of Operations
- Let the panel cool and inspect both sides for heat, smoke, or smoldering material.
- Confirm the panel material, repair classification, OEM joining method, and coating instructions.
- Inspect the weld for pinholes, cracks, missed edges, porosity, and distortion.
- Complete any required rewelding and repeat the fire check.
- Straighten the metal and dress the weld without thinning the panel.
- Strip contamination and featheredge the surrounding stable finish.
- Clean the repair with products approved by the refinish system.
- Apply the approved primer and restore backside corrosion protection.
- Seal joints and overlaps with a compatible seam sealer.
- Apply filler or glaze only where the product system allows it.
- Apply primer-surfacer, guide coat, and block sand the panel.
- Complete the final cleanliness and compatibility checks before paint.
- After refinishing, apply final cavity protection where required and reinstall liners, plugs, and trim without blocking drains.
Check OEM Repair Instructions and Identify the Metal
Before you grind, seal, or paint the welded area, check the vehicle maker’s repair procedure and the technical data sheet for every product you plan to use. This matters most on structural panels, galvanized steel, advanced high-strength steel, aluminum, and late-model vehicles with specific joining, corrosion-protection, or refinishing requirements.
Identify whether the repair is cosmetic or structural. Some exterior cosmetic welds can be dressed close to flush. Structural welds may need to retain a specified profile and should not be thinned, overheated, or ground flush unless the OEM procedure permits it. If the repair involves a frame rail, rocker reinforcement, pillar, suspension mount, roof rail, or crash structure, confirm the exact procedure before shaping the weld.
Also identify the substrate. Bare steel, galvanized steel, aluminum, OEM e-coat, existing paint, body filler, and weld-through coatings may require different cleaners, abrasives, primers, and isolation steps. Do not apply a steel-only etch or corrosion product to aluminum unless its instructions specifically approve that substrate.
The same rule applies to the coating stack. Epoxy primer, wash or self-etching primer, direct-to-metal primer, polyester filler, seam sealer, urethane surfacer, basecoat, and clearcoat do not work in every possible order. The OEM procedure and each product sheet control surface preparation, mix ratio, flash time, sanding grit, recoat window, and cure time.
Complete a Post-Weld Fire Check
Do not reach for solvent or paint as soon as the arc stops. Auto bodies contain insulation, sound-deadening pads, carpet, adhesives, seam sealer, wiring, foam, undercoating, and cavity coatings that can smolder out of sight.
- Turn off and secure the welding equipment.
- Inspect the front and backside of the panel with a bright light.
- Check adjacent trim, wiring, insulation, seam sealer, carpet, and closed cavities for smoke, odor, discoloration, or heat.
- Keep a suitable fire extinguisher ready and continue monitoring the repair area.
- Do not use flammable cleaner, seam sealer, primer, or paint until the panel and surrounding materials are cool and no fire hazard remains.
In workplaces where hot-work conditions require a fire watch, OSHA requires the watch to continue for at least 30 minutes after welding or cutting so hidden smoldering fires can be detected. A home-garage repair should receive the same careful inspection of concealed areas even when the regulation does not directly govern the work.
If you reweld a pinhole later, repeat the hot-work precautions and post-weld inspection before returning to solvents or coatings.
Prepare and Inspect the Welded Area
Strip and Featheredge the Welded Area
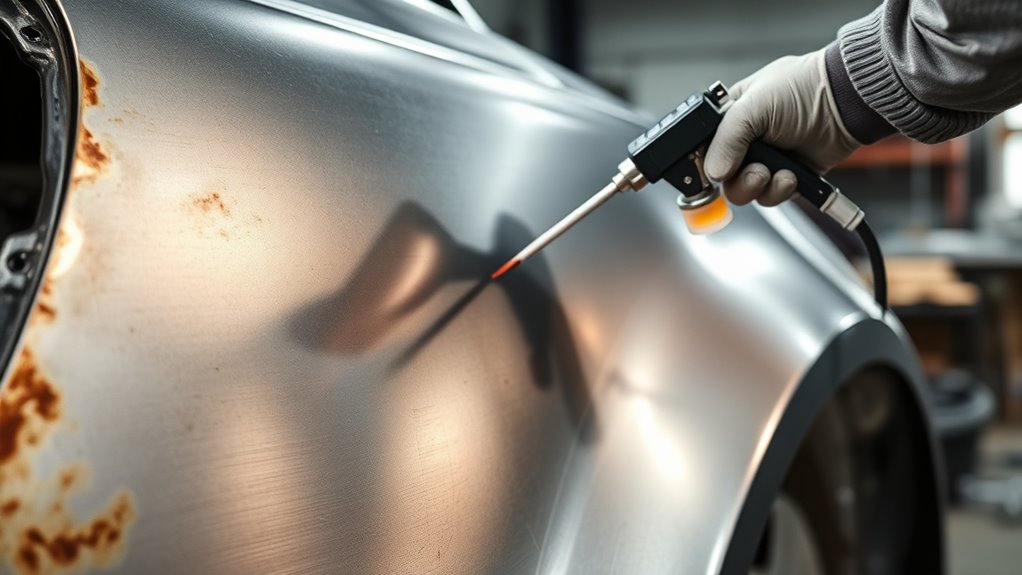
Strip the welded area of burned paint, unstable primer, rust, undercoating, welding soot, adhesive residue, and loose contamination. New coatings must bond to clean, stable material rather than scorched paint edges or grinding residue.
Expose clean metal around the weld with a grinder, DA sander, hand sanding block, or panel-safe paint-removal method. Do not gouge the sheet metal or enlarge the bare-metal area more than needed. Keep filler and glaze within the properly prepared repair map instead of spreading them over weak featheredges.
Featheredge the surrounding sound paint so there is no sharp ledge between the existing finish and the repair. If the old finish lifts, cracks, softens, or continues to chip as you sand, remove it until you reach a stable edge.
Mask or shield glass, wiring, interior trim, suspension parts, openings, and nearby painted surfaces from sparks, abrasive debris, and overspray. Avoid chemical stripper near seams, plastics, adhesives, or closed cavities unless the product and OEM procedure allow it.
Remove loose dust with a vacuum or clean, dry, oil-free compressed air while wearing eye protection. Then use the cleaner recommended by the coating system on clean lint-free wipes. Apply the cleaner with one wipe and dry it with a second clean wipe before the solvent evaporates and leaves contamination behind. Change wipes often.
If you find rust scale, pitting, delamination, or paper-thin metal, remove or repair it before primer. Primer cannot restore the strength of rusted metal or create a durable bond over loose corrosion.
Note: Weld-through primer is normally used before welding on approved mating flanges. It is not a universal final primer. After welding, remove loose, burned, powdery, or contaminated residue and prepare the visible repair area for the primer specified by the OEM and paint system.
Inspect and Repair Pinholes
Inspect both sides of the seam before filler, primer, or seam sealer hides defects. A pinhole can allow moisture to enter the repair and may later cause corrosion, bubbling, staining, or a visible seam line.
Shine a bright light behind the panel when the backside is accessible. Move slowly along the full weld and mark light leaks, cracks, missed edges, porous areas, excessive undercut, and incomplete fusion. When the backside is closed, inspect the front under strong angled light and use a clean vacuum or clean dry air to remove dust from the seam.
- Mark every pinhole and suspect area.
- Remove contamination and coating around the defect.
- Confirm that hidden combustibles are protected before restarting hot work.
- Reweld only the defective spot with controlled tacks that limit heat input.
- Allow natural cooling between tacks and do not chase the weld continuously across thin sheet metal.
- Repeat the fire inspection and then inspect the weld again.
Do not cover a welding defect with body filler, fiberglass filler, glaze, seam sealer, or primer. Repair the metal first.
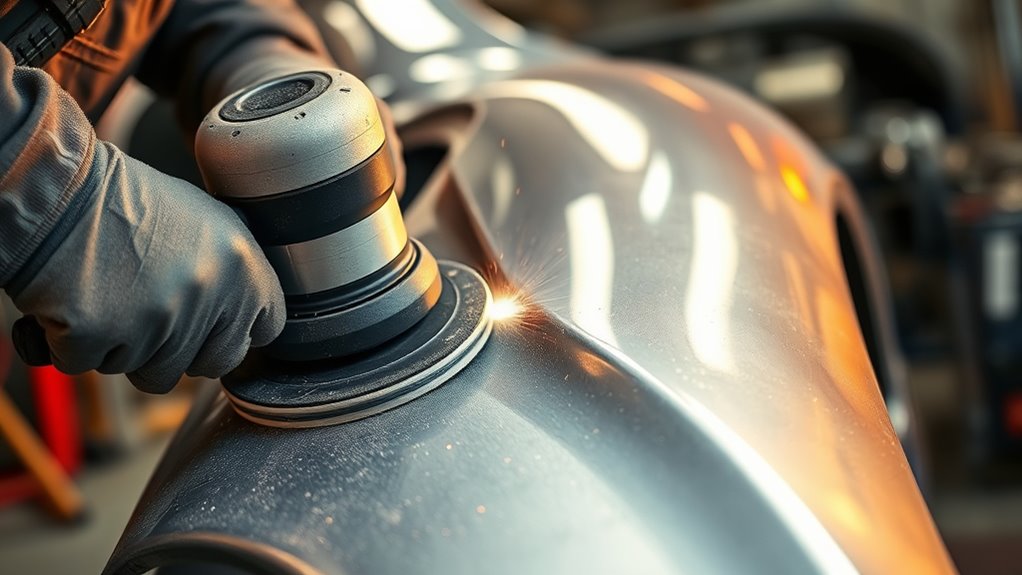
Straighten and Grind the Weld Without Thinning the Panel
Check the panel shape before grinding the weld completely flat. A raised or low area may need careful hammer-and-dolly work, planishing, or another OEM-approved metal-finishing method. Grinding a distorted panel flat can remove too much surrounding steel without correcting the shape.
Use a flap disc, small grinding wheel, file belt, or body file with light pressure. Work in short passes, keep the tool moving, and pause frequently before heat builds in one area. Do not use a gloved-hand touch test as the only heat gauge because glove thickness and heat resistance vary.
For exterior cosmetic panels, dress the weld only as far as necessary to support final shaping and filler. Stop if the surrounding sheet metal begins to become thin, blue from heat, deeply scratched, or dished. Structural welds must retain the profile required by the OEM procedure.
| Check | What to Do | Why It Matters |
| Panel shape | Check with a straightedge, contour gauge, or gloved hand before heavy grinding | Separates distortion from excess weld height |
| Heat | Grind in short, separated passes and pause frequently | Reduces warping, shrinking, and heat damage |
| Panel thickness | Stop before the surrounding metal becomes thin or dished | Preserves strength and reduces the amount of filler required |
| Structural weld | Use the OEM-approved finishing procedure | Avoids removing required weld material |
Remove Weld-Through Primer Residue
If weld-through primer was applied before welding, inspect the exposed material after the weld is complete. Weld-through coatings are intended to help protect approved mating surfaces during joining. Burned or powdery residue on a visible refinish area may not provide the correct foundation for surfacer and paint.
Sand or scuff the area as required by the final coating system. Remove loose, scorched, contaminated, or poorly bonded material. When the weld-through coating instructions require complete removal from visible refinish areas, remove it before applying primer.
After sanding, clean the surface with an approved cleaner and let it dry fully. Do not trap cleaner in a lap joint or seam because retained solvent can contribute to lifting, soft coatings, bubbling, or poor adhesion.
Build the Corrosion Protection and Surface Layers
Choose the Right Primer System
For many properly prepared steel repairs, a compatible two-part epoxy primer provides adhesion, moisture resistance, and corrosion protection. However, it is a common option rather than a universal first step. The vehicle maker or refinish system may instead specify another approved bare-metal primer, a wash or self-etching product, or a direct-to-metal primer.
Self-etching and wash primers contain acidic components and may not be compatible with every polyester filler, epoxy product, seam sealer, or urethane surfacer. Do not apply body filler over self-etching primer unless the exact filler and primer instructions approve that combination.
Aluminum, galvanized steel, OEM e-coat, and mixed-substrate repairs may require different preparation and primer products. Keep the primer, activator, reducer, surfacer, sealer, basecoat, and clearcoat within one documented refinish system when possible. Mixing unrelated products increases the risk of lifting, wrinkling, slow curing, poor adhesion, solvent sensitivity, and early corrosion.
Before spraying, record the product name, batch or mix components, ratio, induction time if required, flash interval, sanding window, and topcoat window.
Pro Tip: Write the product name, mix ratio, flash time, recoat window, and sanding grit on masking tape near the repair. Remove the note before spraying. This simple step prevents guesswork when several activated products have different timing requirements.
Protect the Backside of the Weld
The backside of the weld is where many repairs begin to corrode. Welding heat can burn away factory e-coat, seam sealer, primer, undercoating, or cavity protection, while the hidden side may collect condensation, road splash, dirt, or salt.
When you can reach the backside, remove loose residue and contamination without damaging sound factory coating. Apply the corrosion-protection material specified for that location. Depending on the panel and repair stage, this may include epoxy or another approved primer, seam sealer, an underbody or anti-chip coating, and final cavity wax.
3M’s collision-repair corrosion guidance recommends evaluating the vehicle, part, OEM instructions, substrate, and product application before selecting the process. Do not treat primer, seam sealer, undercoating, and cavity wax as interchangeable. Each protects a different surface or moisture path.
Use cavity wax in closed cavities such as rocker panels, pillars, frame sections, overlap areas, and the interiors of quarter panels when the OEM and product directions require it. Final cavity wax is commonly applied after exterior refinishing so paint contamination and adhesion problems are avoided. Use the specified wand or nozzle to coat the hidden seam rather than spraying only around the access hole.
Seal the Joints and Overlaps
Seal lap joints, plug-weld areas, overlaps, flanges, and specified seams so water cannot remain inside the repair. Seam sealing is especially important around wheel openings, rocker panels, floor patches, lower quarter panels, trunk floors, and areas exposed to road splash.
Clean and dry the joint before applying seam sealer. Some products are approved for properly prepared bare metal, while others require epoxy primer or another specified coating. Follow the seam-sealer manufacturer’s substrate and preparation instructions rather than assuming every product is direct-to-metal.
- Repair all pinholes and welding defects first.
- Remove dust, oil, loose coating, and trapped abrasive from the joint.
- Prime the seam first when the product system requires it.
- Mask both sides when a clean factory-style edge is needed.
- Push the sealer into the joint instead of laying a hollow bead over the top.
- Tool or texture the bead before it skins over.
- Keep drain holes, fastener holes, and designed water paths open.
- Allow the sealer to flash or cure before applying the next coating.
Do not use seam sealer to bridge large gaps, rebuild missing metal, or hide porosity. It seals a sound joint; it does not replace welding or panel fitting.
Sand the Repair for Primer
After the weld, metal finishing, and seam checks are complete, create the scratch profile required by the primer. Coarse abrasive is useful for leveling a weld, but deep grinder marks should be refined before primer-surfacer.
The ranges below are general starting points, not universal specifications. The exact grit depends on the substrate, abrasive type, filler, primer, surfacer, color system, and manufacturer instructions.
| Stage | Typical Starting Range | Purpose |
| Weld cleanup | 36–80 grit | Levels weld height and rough high spots without treating the abrasive as the final primer scratch |
| Filler shaping | 80–180 grit | Shapes filler and refines scratches before surfacer |
| Primer-surfacer preparation | 180–320 grit | Refines repaired surfaces before high-build primer when the product permits the selected grit |
| Final paint preparation | 400–600 grit or as specified | Creates the final surface for sealer, basecoat, or single-stage paint |
Fill Minor Imperfections
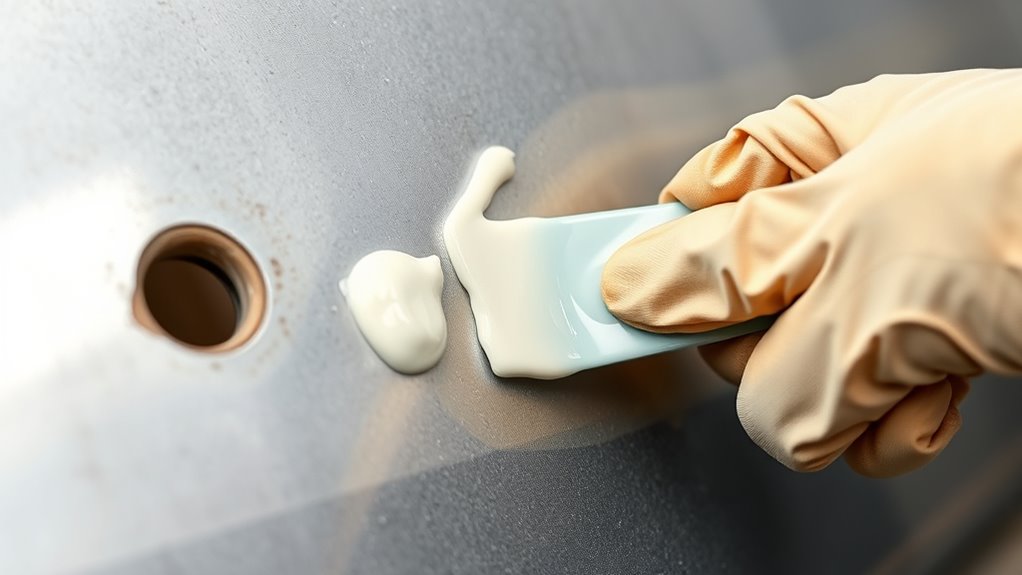
Inspect the repaired panel for shallow lows, small grinder marks, and minor surface flaws. Body filler is a shaping material. It should not cover active rust, open pinholes, cracks, unstable paint, thin metal, or a poorly fitted patch.
Apply filler only to a clean, dry, properly sanded substrate approved by the filler manufacturer. Some fillers are designed for prepared bare metal. Others can bond to cured and sanded epoxy or urethane primer. For example, certain 3M collision fillers are approved for cured primer substrates, but that does not make every filler compatible with every epoxy. Confirm approval from both product systems.
Do not apply polyester filler over self-etching primer unless the exact technical data sheets allow it. Acidic primer chemistry can interfere with some polyester products.
Mix filler on a clean, nonabsorbent board using the specified hardener ratio. Spread thin, controlled coats rather than one thick mass. Keep filler within the prepared repair area and avoid extending it over weak paint edges.
Let the filler cure for the stated time and dry sand it through the required grit sequence. Do not wet sand ordinary polyester filler before it is sealed unless the manufacturer specifically permits it. Use finishing glaze only for small pinholes, shallow scratches, and minor surface imperfections after the underlying repair is sound.
Build Up High-Build Primer
High-build primer, also called primer-surfacer, helps level refined sanding scratches and small surface waves after the metal and filler work are complete. It cannot correct a weak weld, thick filler edge, major low spot, or badly distorted panel.
Vacuum or blow the panel with clean, dry air, wipe it with the cleaner specified by the paint system, and allow it to dry. Mask the surrounding vehicle carefully so overspray does not enter cavities, coat wiring, or settle on finished panels.
Mix and strain activated primer according to its instructions. Apply the specified number of medium coats and allow the required flash time between them. One excessively heavy coat can trap solvent, sag, shrink later, or produce texture that requires unnecessary sanding.
Temperature, humidity, activator speed, airflow, and film thickness affect the sanding and recoat time. Use the technical data sheet rather than a fixed clock time from a general guide.
Block Sand the Panel Smooth
Block sanding turns a coated repair into a straight panel. Apply a compatible guide coat so highs, lows, pinholes, and sanding scratches remain visible as the surface is leveled.
- Start with the primer-surfacer grit specified by the product system.
- Select a rigid, flexible, or contoured block that matches the panel shape.
- Sand in crossed strokes instead of following one groove repeatedly.
- Clean the panel and block between grit changes.
- Repair remaining lows rather than sanding the surrounding panel excessively.
- Stop when you break through to bare metal and restore the approved primer before continuing.
- Refine the surface to the final grit required for sealer or color.
If coarse scratches remain after the panel is straight, apply more compatible surfacer or continue through the approved grit sequence. Paint and clearcoat can magnify rather than hide a poor scratch pattern.
A sound weld, complete backside protection, sealed moisture paths, and a straight block-sanded surface matter more than getting color onto the panel quickly.
Complete the Final Pre-Paint Checks
Final Pre-Paint Checklist
Before mixing color, inspect the entire repair under bright overhead and angled light. Run a clean gloved hand over the surface and confirm each item below.
- The panel is cool, dry, and free of smoke, heat, or hidden fire risk.
- The weld has no visible pinholes, cracks, porosity, missed edges, or unstable metal.
- The repair follows the OEM procedure for the panel material and structural classification.
- No rust, welding soot, grinding dust, silicone, oil, wax, or loose coating remains.
- All bare-metal sand-throughs have received the approved primer.
- Body filler and glaze are fully cured, sealed, and within the product system’s thickness and substrate limits.
- Seam sealer is continuous, properly tooled, and cured or flashed as required.
- Drain holes, bolt holes, clips, electrical grounds, and designed water paths remain open.
- The primer-surfacer is straight, fully sanded, and free of coarse scratches or guide coat.
- The next coat will be applied within the allowed recoat window.
- The spray area, ventilation, PPE, and respiratory protection match the coating hazards.
Troubleshoot Common Problems Before Paint
Most visible paint failures begin below the color. Correct defects now while the repair is still accessible.
| Problem | Likely Cause | Fix Before Painting |
| Tiny bubbles or staining later | Pinholes, trapped moisture, or an open seam | Remove the affected coating, reweld actual metal defects, dry the repair, and restore seam and backside protection |
| Primer lifting or wrinkling | Incompatible products, missed recoat window, contamination, or trapped solvent | Remove the failed material to a stable edge and rebuild the area with a documented compatible system |
| Visible sanding scratches | Coarse scratches were not refined or surfacer film was too thin | Reapply compatible surfacer if needed and block sand through the approved grit sequence |
| Rust at a seam edge | Unsealed overlap, thin coating at the sealer edge, or unprotected backside | Remove corrosion, repair the metal, prime, reseal the joint, and restore backside and cavity protection |
| Repair outline shows through | Unstable featheredge, thick filler transition, trapped solvent, or insufficient cure | Open the repair to a stable edge, refine the transition, allow full cure, and rebuild the surfacer correctly |
| Fish-eyes or poor wetting | Silicone, oil, dirty air, wax, or contaminated wipes | Stop, remove the affected coating as required, clean the air supply and surface, and use fresh lint-free materials |
Paint the Panel
Paint only after the repair is structurally sound, corrosion-protected, sealed, straight, clean, dry, and sanded to the grit required by the paint system. Spot-prime or seal any bare-metal breakthrough before color.
Use a complete automotive basecoat and clearcoat system or an approved single-stage system that is compatible with the primer and sealer below it. Aerosol products may be suitable for some small, noncritical repairs when the complete system approves them, but they should not be assumed to match the chemical resistance, corrosion protection, film build, or spray control of a professional catalyzed refinish process.
Many two-component urethane primers, sealers, paints, and clearcoats can expose you to isocyanates. Read the SDS before opening or mixing the product. Use a properly designed and operating spray area, protect exposed skin and eyes, and select respiratory protection under the applicable hazard assessment and respiratory-protection requirements. Do not spray a catalyzed coating in an occupied house, attached living space, or poorly ventilated garage.
Before spraying, clean the panel with the approved final cleaner, allow it to dry, and use a tack cloth only as the paint system directs. Keep gun distance, overlap, pressure, temperature, and coat thickness within the product recommendations. Let every coat flash for the required time. Do not rush clearcoat, force-dry against the instructions, or apply the next layer over solvent that has not escaped.
Apply Final Cavity Protection and Reassemble
After the exterior paint system has reached the stage permitted by its instructions, restore final protection inside closed cavities. Apply cavity wax or the OEM-specified internal coating through the correct access points and use a wand that reaches the full seam, overlap, or reinforcement.
Do not flood electrical connectors, sensors, drainage channels, seat-belt components, brake parts, exhaust components, or surfaces that the product excludes. Remove excess material from drain holes and threaded fasteners.
Reinstall splash shields, wheel liners, plugs, trim, clips, sound-deadening material, and weather protection only after the coatings have cured enough to resist damage. Confirm that:
- All factory drain and ventilation openings remain clear.
- Wheelhouse and underbody coatings cover the repaired area without blocking service points.
- Cavity wax reaches the welded seam rather than only the access opening.
- Fasteners and clips do not scrape through fresh corrosion protection.
- No overspray remains on glass, wiring, brakes, exhaust parts, weather seals, or adjacent finished surfaces.
Inspect the repair again after the first wash and periodically afterward, especially around wheel openings, rockers, lower quarter panels, floors, and seams exposed to road salt or standing water.
Frequently Asked Questions
Can I paint over weld-through primer?
Do not assume weld-through primer is the final paint foundation. Remove loose, burned, contaminated, or powdery residue and follow the exact weld-through coating and refinish-system instructions. Most visible repair areas still need a compatible bare-metal primer, sealer, or primer-surfacer before color.
What body filler is best over welds?
Use a quality automotive polyester filler or an approved reinforced filler only after the weld is sound, the metal is stable, and every pinhole is repaired. Choose a filler approved for your substrate and primer system. Reinforced filler should not be used to bridge a weak weld, open gap, or missing metal.
Should body filler go over bare metal or epoxy primer?
Either sequence may be correct for a specific product system. Some fillers are designed for properly prepared bare metal, while others are approved over cured and sanded epoxy primer. Confirm compatibility, preparation, and recoat timing with both manufacturers. Do not place filler over self-etching primer unless the instructions clearly allow it.
Can you paint directly over a weld?
No, not for a durable automotive repair. Inspect and repair the weld, remove contamination and corrosion, dress it without thinning the panel, apply approved corrosion protection, seal required seams, and create the specified sanded surface before paint.
What paint should I use after welding auto body panels?
Use a complete automotive refinish system approved for the substrate and compatible with every primer, filler, seam sealer, surfacer, and sealer below it. Most exterior repairs finish with basecoat and clearcoat or an approved single-stage system. Follow the system’s color-blending and safety instructions.
Should seam sealer go on bare metal or primer?
It depends on the seam sealer. Some products are direct-to-metal, while others require epoxy primer or another approved coating. Follow the sealer’s technical data sheet and the OEM repair procedure. Repair pinholes first and keep drain holes open.
How soon should I prime after welding?
Prime as soon as the panel has cooled, the fire inspection is complete, welding defects are repaired, the metal is properly sanded, and the surface is clean and dry. Bare steel can develop flash rust quickly in humid conditions, so do not leave a prepared repair exposed longer than necessary.
How long after welding can I paint the panel?
There is no single waiting time measured from the final weld. The panel must be cool and fire-safe, and every primer, filler, seam sealer, surfacer, sealer, and paint layer must meet its own flash, sanding, curing, and recoat requirements. The full process commonly extends across more than one day.
Conclusion
After welding auto body panels, do not rush directly to filler or paint. Let the panel cool, inspect hidden areas for fire, confirm the OEM procedure and substrate, repair pinholes, straighten and grind the weld carefully, and remove every unstable coating or contaminant. Then rebuild corrosion protection on both sides, seal moisture paths, apply compatible filler and surfacer, and block sand the panel straight.
The repair will last longer when every layer has a specific job and each product is used within its documented substrate, flash, cure, and recoat limits. Paint only after the panel is structurally sound, clean, sealed, smooth, and supported by a complete compatible automotive refinish system. Finish by restoring cavity protection and checking that drains, liners, plugs, and hidden seams remain protected.
Sources
- 3M Collision Repair Corrosion Protection — weld-through coating context, seam protection, backside coatings, cavity wax, and OEM-guideline considerations.
- 3M General Seam Sealer SOP — seam preparation, cleaning, substrate considerations, application, and OEM-style sealing.
- OSHA 29 CFR 1910.107: Spray Finishing — spray-area ventilation, ignition control, and flammable coating requirements.
- OSHA Welding, Cutting, and Brazing — welding hazards, controls, standards, and fire-safety references.
- CDC/NIOSH Welding Fumes and Manganese — welding-fume composition and respiratory and neurological health risks.
- NIOSH Control of Paint Overspray in Autobody Repair Shops — spray-booth ventilation, coating hazards, respiratory protection, and worker controls.


