You sand welds before primer by removing slag and contamination, grinding only the excess weld metal, refining the surface with progressively finer abrasives, cleaning it with the coating maker’s approved cleaner, and applying a compatible primer before rust develops. The target is a flat, even surface with the exact scratch profile required by your primer, not polished bare metal.
Quick Answer
Remove slag, spatter, oil, and excess weld metal without thinning the parent metal. Refine the area through progressively finer grits, then finish at the grit specified by your primer’s current technical data sheet. Clean with the approved surface cleaner, let the metal dry, and prime it promptly.
Key Takeaways
- Confirm that the weld is safe to grind. Structural, pressure-holding, frame, suspension, cage, and code-regulated welds should only be blended when the drawing, OEM procedure, or qualified repair procedure permits it.
- Use a grinding wheel, flap disc, fiber disc, file, carbide burr, or mini belt tool designed for the job. Never side-grind with a thin cut-off wheel.
- Keep coarse abrasives on the raised weld bead and stop as soon as the weld reaches the parent-metal surface. Over-grinding can reduce weld size, thin the panel, and create low spots.
- Grit recommendations vary by primer and substrate. Coarse grits remove excess weld metal, while the final grit must match the coating manufacturer’s technical data sheet.
- Clean before sanding and again before primer. Use the cleaner approved by the coating system rather than assuming acetone or another general solvent is compatible.
- Protect both sides of the repair when possible. The visible face can look perfect while the back of a seam or lap joint starts rusting.
At a Glance
| Time Required | About 30 to 90 minutes for a small cosmetic repair, plus the primer’s required flash and cure time |
| Difficulty | Moderate; the main challenge is leveling the weld without thinning, overheating, or gouging the surrounding metal |
| Tools Needed | Guarded angle grinder, suitable grinding or flap discs, sanding discs or DA sander, sanding block, file or small finishing tool, clean brush or dry oil-free air, lint-free towels, approved cleaner, and compatible primer |
| Cost | Varies with the abrasives, cleaner, towels, primer, metal type, and whether you already own the required tools and protective equipment |
Safety Check Before Grinding Welds
Set up the work area before the abrasive touches the weld. Grinding produces sparks, hot particles, metal dust, noise, and fragments from damaged accessories. Wear safety glasses under a face shield, hearing protection, gloves, nonflammable work clothing, and closed footwear. Use source capture or local exhaust where practical, especially on coated, galvanized, stainless, or contaminated metal.
Choose respiratory protection from the metal, coating, abrasive, and cleaner hazards listed in their safety data sheets. In a workplace, respirator selection, medical evaluation, fit testing, training, and use may fall under OSHA 1910.134. A disposable dust mask is not a universal solution for metal dust, fumes, solvent vapors, or sprayed coatings.
Warning: Keep the grinder guard installed and positioned between you and the wheel. Inspect the accessory before use, confirm that its maximum operating speed meets or exceeds the grinder’s rated speed, and use the correct flange and guard. Never use the side of a thin cut-off wheel for surface grinding because side loading can break the wheel.
OSHA 1910.243 requires guarding, wheel inspection, and speed checks for covered portable abrasive-wheel operations. A 3M cut-off wheel tool manual also states that a cut-off wheel tool must not be used for side grinding.
Treat spark-producing grinding as hot work. Move paper, solvents, fuel, oily rags, sawdust, dry vegetation, insulation, and other combustibles away from the spark path. Shield anything that cannot be moved with a suitable noncombustible barrier, check where sparks can travel, and keep the correct fire extinguisher ready. OSHA’s hot-work guidance includes grinding among spark-producing operations, while OSHA 1910.252 describes fire-prevention controls for welding and cutting.
Clamp the part so it cannot chatter, rotate, or shift. If the weld is on a vehicle, trailer, cabinet, tank, wall, or hollow section, inspect both sides for wiring, fuel lines, trim, insulation, undercoating, seam sealer, trapped debris, or another combustible material before you grind.
Warning: Do not spray a two-component urethane, polyurethane, or other isocyanate-containing product with only a dust mask or ordinary garage ventilation. Check the product label and SDS and use the manufacturer-specified spray booth, ventilation, skin protection, and respiratory protection. OSHA identifies painting and polyurethane coatings as possible sources of isocyanate exposure.
How to Sand Welds Before Primer Step by Step
- Let the weld cool and inspect it. Look for cracks, pinholes, porosity, undercut, incomplete fusion, trapped slag, and missing weld metal. Repair defects before trying to hide them under primer.
- Confirm that grinding is permitted. Follow the drawing, OEM repair manual, weld procedure, or governing code for structural, pressure-containing, safety-critical, or certified work.
- Remove loose slag and heavy spatter. Chip, brush, scrape, or lightly grind residue before surface sanding so it does not contaminate the abrasives.
- Pre-clean the area. Use the cleaner specified by the coating system to remove oil, fingerprints, anti-spatter compound, silicone, wax, and shop dirt. Let the surface dry as directed.
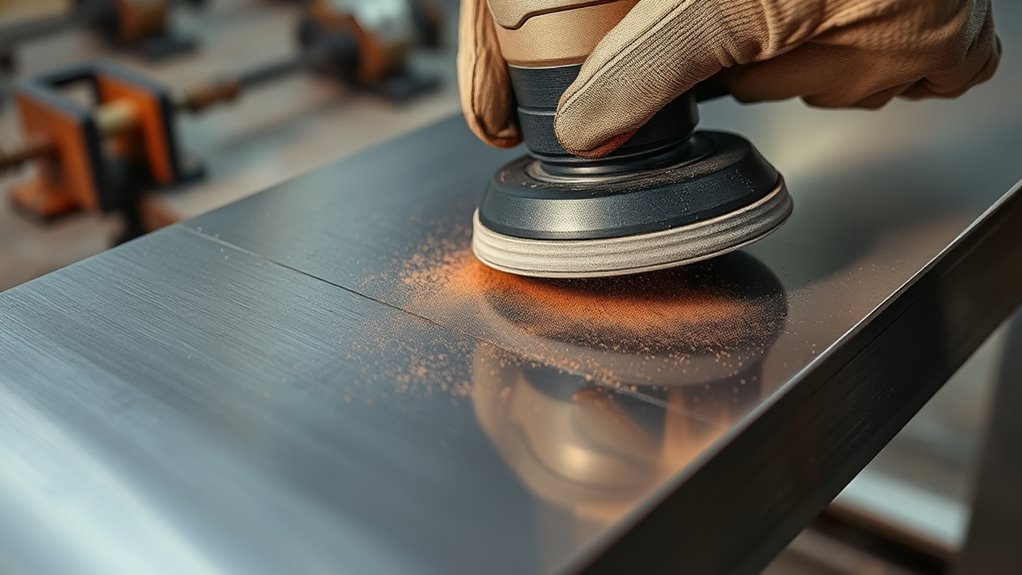
- Level only the raised weld metal. Use the correct grinding wheel, flap disc, file, or small finishing tool. Work in short passes and keep the abrasive moving.
- Refine the shape. Change to a more controllable abrasive, commonly around P80 for cosmetic steel repairs, and remove the heavy grinding marks without widening the damaged area.
- Progress through the intermediate grits. Use each grit long enough to remove the scratch pattern from the previous one.
- Finish at the primer’s required grit. Do not assume one final grit works for every epoxy, self-etching, direct-to-metal, or primer-surfacer product.
- Remove all dust. Use a clean brush, vacuum, or clean, dry, oil-free air. Do not direct dust toward your face, skin, another person, or an ignition source.
- Clean again and inspect. Use clean lint-free towels and the approved surface cleaner. Check for rust, shiny low spots, deep grooves, black specks, and residue.
- Prime promptly. Apply the compatible primer within the temperature, humidity, flash-time, and recoat limits stated in its technical data sheet.
Remove Slag, Spatter, and Residue Before Sanding
Different welding processes leave different residues. Stick and self-shielded flux-core welds can leave slag that must be removed before grinding or coating. Gas-shielded MIG welds may leave spatter, soot, and anti-spatter compound. TIG welds can leave oxide and heat discoloration, especially on stainless steel and aluminum.
Remove loose slag with a chipping tool and a suitable wire brush, then inspect the weld underneath. Do not sand over slag and assume primer will seal it. Trapped slag, porosity, and incomplete fusion are weld defects, not surface imperfections.
If you used an anti-spatter product, identify whether it is water-based, oil-based, silicone-containing, or paint-compatible. Remove it with the cleaner recommended by the anti-spatter and coating manufacturers. Silicone or oily residue can contribute to fisheyes and adhesion failure.
How to Grind Welds Flush Without Damaging Steel?
Inspect the weld before removing any metal. Look for undercut, pinholes, cracks, incomplete fusion, high tacks, and areas where the bead stands above the parent metal. If the weld is structural, pressure-holding, part of a frame, or otherwise safety-critical, do not grind it flush unless the applicable repair procedure permits it. Weld reinforcement, fillet size, throat thickness, and contour may be part of the required joint design.
For a cosmetic mild-steel repair, use a proper grinding wheel or a coarse flap disc to lower the highest weld metal. A 36- to 60-grit abrasive can remove material quickly, so keep it centered on the bead. Hold the tool at the angle intended for that accessory and use light, controlled pressure.
Work in short passes. At every inspection point, lift the accessory from the work, switch the grinder off, and wait until the wheel stops completely. Let the metal cool before checking the contour with a gloved hand, straightedge, sanding block, or body file. Do not touch a moving accessory or freshly heated metal.
Heat discoloration is a warning that you are concentrating too much energy in one area. Thin sheet can distort long before thick plate does. Reduce pressure, shorten each pass, move to a sharper abrasive, or pause for natural cooling. Do not quench a hot body panel unless the repair procedure specifically calls for it because sudden cooling can create distortion.
As the weld approaches the parent-metal surface, change to a finer or more flexible abrasive. A flap disc or fiber disc can offer better control than a hard wheel during final blending, but it can still thin the panel if you keep it in one place. For corners, plug welds, and narrow seams, use a hand file, carbide burr, mini belt sander, or 2- to 3-inch finishing tool instead of forcing a full-size grinder into the joint.
Pro Tip: Apply a light guide coat or dark marker across the repair before the final shaping passes. High spots lose the guide first, while low areas keep it. Stop and reassess if the guide disappears from a wide band of parent metal around the weld.
When Not to Sand a Weld Completely Flush
Do not assume that every weld should disappear under paint. Cosmetic butt welds on patch panels and some noncritical sheet-metal repairs are often blended smooth. Fillet welds, roll-cage joints, trailer frames, suspension mounts, lifting points, pressure vessels, pipes, brackets carrying significant loads, and certified repairs may require a defined weld size or visible reinforcement.
Follow the drawing, weld symbol, welding procedure specification, engineering instruction, code, or OEM repair method. Grinding can reduce the weld throat, expose porosity, remove required reinforcement, or cut into the parent metal.
If grinding reveals a crack, deep porosity, slag inclusion, lack of fusion, severe undercut, or a section that has become too thin, stop. Remove and repair the defect using an approved method before applying filler, primer, seam sealer, or paint.
Match the Preparation Method to the Metal
Mild Steel
Remove rust, loose mill scale, weld oxide, oil, and coating residue from the repair area. Keep coarse grinding on the weld bead, then refine the surrounding steel only enough to create the profile required by the primer. Prime both faces when they remain accessible.
Galvanized Steel
Grinding galvanized metal can create zinc-containing dust, and welding or heating it can create hazardous fumes. Use effective ventilation or local exhaust, follow the material SDS, and keep unnecessary people away from the work area. The CDC/NIOSH welding-fume guidance explains that exposure varies with the wire, rod, flux, base metal, and work environment.
Do not strip more zinc coating than the repair requires. After finishing the weld, restore corrosion protection with the primer or zinc-repair system approved for the part and topcoat. A general-purpose aerosol primer may not replace the original galvanizing protection.
Aluminum
Use abrasives and tools that are clean and suitable for aluminum. Avoid transferring carbon-steel particles onto the surface because embedded contamination can create corrosion and coating defects. Aluminum oxide forms quickly after sanding, so clean and coat it within the product’s stated preparation window.
Use only cleaners approved for aluminum and the intended primer. Strong alkaline cleaners, unknown solvents, and contaminated steel wire brushes can damage or contaminate the surface.
Stainless Steel
Use abrasives intended for stainless steel and keep them separate from abrasives used on carbon steel. Low-contamination abrasives help reduce the chance of embedding free iron that later rusts. Control heat because stainless steel can discolor and distort when grinding is concentrated in one area.
If the stainless surface will remain unpainted or must retain a specified corrosion-resistant finish, the job may require additional oxide removal, finishing, cleaning, or passivation beyond ordinary paint preparation. Follow the fabrication specification rather than treating it like mild steel.
What Grits to Use Before Priming?
Use coarse grits only for excess weld metal, medium grits to refine the contour, and the coating manufacturer’s specified grit for final preparation. The numbers below are practical starting ranges for cosmetic repairs, not universal coating specifications.
| Stage | Typical Starting Range | Purpose |
|---|---|---|
| Heavy weld leveling | 36 to 60 grit | Cuts raised weld metal quickly; keep it off thin parent metal whenever possible |
| Controlled shaping | Around 80 grit | Levels the repair and removes the deepest grinding marks with better control |
| Scratch refinement | 120 to 180 grit | Removes coarse scratches and evens the transition around the weld |
| Primer-ready finish | Use the primer data sheet; common instructions range from coarse bare-metal profiles to 180–320 grit | Creates the specific mechanical profile required by the selected primer |
For example, the SEM High-Build Primer Surfacer technical data sheet instructs users to prepare metal and aluminum with 180–320 grit and clean the surface again before application. Another primer, epoxy, seam sealer, or industrial coating may require a different profile.
Coarse Grit Start
Begin with 36 to 80 grit only where significant weld height must be removed. Coarse abrasives save time but leave deep grooves that later grits must remove. Keep the abrasive over the bead and avoid leaning it onto the panel beside the weld.
Use lighter pressure and shorter passes on thin body steel. Let a sharp abrasive do the cutting. Extra pressure increases heat, chatter, wheel wear, and the chance of a low spot without guaranteeing a faster or flatter repair.
Refine the Scratch Pattern
Once the weld is level, move through the intermediate grit or grits needed to remove the coarse scratches. A common cosmetic sequence may progress from P80 to P120 and then P180, but the number of steps depends on the depth of the previous scratches, the metal, the tool, and the primer specification.
Use a firm sanding block on flat areas to prevent finger grooves. A DA sander can produce an even pattern on open panels, while a soft interface pad can follow gentle curves. Do not use a soft pad where it will round a sharp body line or edge.
Final Prep Before Primer
Stop at the grit required by the actual primer you will apply. Some primer surfacers accept a finer preparation than certain epoxy or direct-to-metal products. Bare metal that is polished beyond the product specification may have too little mechanical profile, while excessively deep scratches can remain visible or require unnecessary film build.
The final surface should appear even, dull, and clean. It should not contain isolated grinding grooves, polished patches, rust stains, black contamination, oily smears, or blue heat-damaged areas.
How to Clean Welds Before Paint?
Clean the repair before sanding and again immediately before primer. The first cleaning removes oil, fingerprints, silicone, wax, anti-spatter residue, and shop contamination that could otherwise be ground into the metal. The final cleaning removes sanding dust and fresh contamination.
Use the surface cleaner specified by the primer or coating manufacturer. Apply it with a clean lint-free towel and remove the loosened contamination with a second clean towel according to the product directions. Replace towels as they become dirty rather than spreading residue over a larger area.
Do not assume acetone, lacquer thinner, brake cleaner, mineral spirits, alcohol, or another shop solvent is suitable. Acetone may be acceptable for a specific clean bare-metal process, but it is flammable, flashes quickly, and may be incompatible with some coatings, sealers, plastics, residues, or manufacturer warranties.
Remove dust with a vacuum, clean brush, or clean, dry, oil-free air. Compressor moisture and oil can contaminate the surface. Avoid blowing dust into seams, pinholes, your clothing, or another person’s breathing zone.
Note: The coating system controls the cleaner, final grit, flash time, and recoat window. When a primer technical data sheet specifies a named cleaner or preparation process, follow it instead of substituting a familiar shop solvent.
Weld Cleaning Steps
- Let the welded area cool fully.
- Inspect the weld and repair any structural or visible defects.
- Remove loose slag, spatter, soot, and scale.
- Pre-clean the area with the coating system’s approved cleaner.
- Grind only the excess weld metal permitted by the repair procedure.
- Sand through the required grit sequence until the contour and scratch pattern are even.
- Remove dust with a vacuum, clean brush, or clean, dry, oil-free air.
- Wipe the surface again with clean towels and the approved cleaner.
- Allow the metal to dry for the time specified by the cleaner or primer manufacturer.
- Inspect both sides of the repair and apply compatible primer promptly.
Surface Prep for Paint
Paint adhesion depends on a clean surface, the right mechanical profile, and compatible products. Metal that is smoother than the primer specification may reduce mechanical grip. Metal that is too rough can require excess primer build and may allow scratches to remain visible through the finish.
Inspect the repair under bright light from several angles. A straightedge or sanding block can reveal a low spot beside the weld. A guide coat can expose deep scratches and uneven areas. Black specks, pinholes, rust, or embedded slag must be corrected rather than covered.
Best Tools for Tight Weld Areas
Choose the smallest tool that provides control and accepts an accessory designed for the required operation. A full-size angle grinder is useful for open welds but can be too aggressive near edges, corners, thin sheet, and plug welds.
- Hard grinding wheel: Useful for heavy stock removal on raised weld metal when the wheel and guard are suitable for the grinder.
- Flap disc: Combines cutting and blending and follows mild contours better than a hard wheel, but it can still thin the panel.
- Fiber or sanding disc: Useful for controlled leveling and scratch refinement on open surfaces.
- DA sander: Produces an even scratch pattern across flat and gently curved areas after the heavy weld metal has been removed.
- Mini belt sander: Reaches inside corners, narrow seams, and plug-weld areas.
- Hand file or body file: Gives excellent feedback and control near the final contour.
- Carbide burr: Removes a small high tack or reaches a confined area, but it can cut deeply with little warning.
- Small 2- or 3-inch angle tool: Offers better access and control than a large grinder around brackets and curved panels.
If a tool begins bouncing or chattering, stop. Check the accessory condition, angle, backing pad, speed, pressure, and tool size. Long heavy passes rarely correct chatter and usually create deeper marks.
How to Leave the Right Scratch Pattern for Paint

A paint-ready weld repair has a consistent scratch pattern across the weld and the small feathered area around it. The primer should not have to bridge isolated grinder trenches, polished metal, rust pits, or jagged transitions.
Each abrasive must remove the scratches left by the previous one. Jumping directly from 36 grit to a very fine paper can polish the tops of the coarse scratches while leaving their valleys behind.
- Remove only the high weld metal with the correct coarse abrasive.
- Refine the contour with a more controllable grit, commonly around P80 for a cosmetic steel repair.
- Progress through the intermediate grit or grits needed to erase the coarse pattern.
- Finish at the exact grit required by the primer technical data sheet.
- Remove dust, clean the surface, and inspect it under strong light.
On a visible panel, use a light guide coat during the final sanding stage. The remaining guide coat reveals low areas and deeper scratches before primer makes them harder to correct.
Protect the Back Side, Seams, and Lap Joints
A weld can look smooth on the visible face while moisture attacks the back of the joint. Inspect the reverse side of a patch panel, plug weld, flange, lap joint, tube, or bracket whenever access allows.
Remove loose oxide and contamination from the back, then apply the primer or corrosion-protection system approved for that location. Coat exposed edges and pinholes rather than stopping the primer exactly at the visible repair line.
Use seam sealer only over the substrate and primer allowed by its technical data sheet. Let primer cure for the required time before sealing a joint. For enclosed vehicle cavities, cavity wax may be applied after the coating system has cured and only where the product and OEM procedure permit it. Do not trap moisture, solvent, or uncured coating inside a seam.
How to Choose Primer and Paint for Welds
Choose the coating system from the substrate, environment, repair type, and required topcoat. The word “primer” does not guarantee that two products are compatible. Check the technical data sheets for the bare-metal preparation, cleaner, mixing ratio, induction time, flash time, film build, recoat window, and topcoat limitations.
Epoxy primer is commonly selected for clean bare steel when corrosion resistance and sealing are priorities. Self-etching primer may be appropriate when the complete coating system calls for an acid-etch layer, but it is not automatically compatible under every epoxy, filler, seam sealer, surfacer, or urethane product.
Direct-to-metal primer can reduce steps when its data sheet permits direct application to the prepared substrate. Primer surfacer is useful for filling minor sanding marks, but it should not be used to conceal weld defects, severe grinding grooves, or contamination.
| Product | Common Use | Watch For |
|---|---|---|
| Epoxy primer | Prepared bare steel, corrosion protection, and sealing repairs | Required surface profile, mix ratio, induction time, film build, and recoat window |
| Self-etching primer | Bare metal when the complete system specifies an acid-etching layer | Possible incompatibility with certain fillers, epoxies, seam sealers, and surfacers |
| Direct-to-metal primer | Small repairs and production work when the product approves the prepared substrate | Substrate limits, surface profile, corrosion rating, and required film thickness |
| Primer surfacer | Filling minor sanding marks and preparing a smooth topcoat surface | May require an epoxy, etch, or DTM primer underneath; not a substitute for weld repair |
| Enamel paint | General equipment, trailers, tools, brackets, and shop projects | Cure time, chemical resistance, UV durability, and compatibility with the primer |
| Two-component urethane finish | Automotive and high-durability topcoats | Isocyanate exposure, professional ventilation, respiratory protection, mix ratio, and cure conditions |
Do not assume body filler can be applied over every primer. Some fillers are approved over properly cured and sanded epoxy, while other systems call for filler on prepared bare metal. Acid-based self-etching primer may be prohibited under certain fillers and seam sealers. Follow both manufacturers’ instructions when products from different systems are combined.
How to Prevent Rust After Grinding Welds
Bare steel can develop flash rust in humid air, after contact with water, or after handling with bare fingers. Once the metal is clean and sanded, avoid unnecessary delays. Keep it dry, minimize handling, perform the final cleaning, and apply the approved primer within its preparation window.
If rust appears, remove it before coating. Sand it back to clean metal or use a rust-removal product only when its instructions confirm compatibility with the planned primer. Some chemical rust removers require rinsing, neutralizing, or extended drying, and residue trapped in seams can contribute to blistering or adhesion loss.
- Remove fresh oxidation with sanding, an appropriate abrasive pad, or an approved rust-removal process.
- Inspect pits, pinholes, seams, and the back of the repair.
- Clean the surface with the product specified by the coating manufacturer.
- Dry the metal completely.
- Apply compatible primer within the required time, temperature, and humidity limits.
- Keep the part clean and protected while the coating flashes and cures.
Freshly ground steel is most vulnerable between final cleaning and primer. A clean, dry, correctly profiled surface gives the coating its best chance to bond and protect the repair.
Troubleshooting Weld Prep Problems Before Primer
| Problem | Likely Cause | Fix Before Primer |
|---|---|---|
| Deep grinder grooves | Too much pressure, excessive wheel angle, a dull abrasive, or staying in one place | Return to a grit coarse enough to level the grooves, then progress through the intermediate grits |
| Low spot beside the weld | Parent metal was removed while chasing the weld bead | Stop grinding and correct the area with approved metal finishing, rewelding, or compatible filler as the repair requires |
| Pinholes or black specks | Porosity, slag, oxide, or contamination inside the weld | Remove the defect and repair the weld before coating |
| Blue or distorted sheet metal | Excessive pressure, long passes, a dull abrasive, or concentrated heat | Stop, allow natural cooling, inspect for distortion, and resume with shorter passes and a sharper or more suitable abrasive |
| Flash rust | Humidity, water, fingerprints, contaminated air, or a long delay before primer | Sand back to clean metal, clean with the approved product, dry fully, and prime promptly |
| Fisheyes or peeling | Oil, silicone, wax, compressor contamination, solvent residue, or incompatible products | Remove the failed coating, identify the contaminant, clean correctly, and restart with compatible products |
| Coarse scratches return after primer | The grit sequence was skipped or the primer film shrank into deep scratches | Allow the coating to cure, sand it as directed, correct the underlying scratches, and rebuild the approved coating system |
| Rust returns at the seam | The back side, edge, pinhole, or lap joint was left unprotected or contained moisture | Remove the corrosion, dry the joint, coat accessible surfaces, and apply approved seam or cavity protection after the primer cures |
Frequently Asked Questions
What do you wipe down metal with before painting?
Use the wax and grease remover or surface cleaner specified by the primer or paint manufacturer. Apply and remove it with clean lint-free towels according to the product directions. Do not substitute acetone, lacquer thinner, brake cleaner, mineral spirits, or another solvent unless the coating data sheet allows it.
How do you clean welds for painting?
Let the weld cool, inspect it, remove slag and spatter, pre-clean the area, grind only the permitted excess weld metal, sand through the required grits, remove the dust, and clean again with the coating system’s approved cleaner. Let the surface dry for the specified time before primer.
Do you need to sand bare metal before primer?
Usually, yes. Most primers require a clean mechanical profile or another specified preparation such as abrasive blasting. Use the grit, blasting profile, cleaner, and application window stated in the primer’s current technical data sheet.
What should you do before applying primer to a welded pipe surface?
Inspect the weld, remove slag and spatter, grind only what the specification permits, and prepare the pipe to the coating system’s required cleanliness and surface profile. Remove dust and oil and confirm that the surface is dry. For pressure-rated or code work, follow the approved welding and coating procedure rather than a cosmetic repair method.
Should welds be perfectly smooth before primer?
Cosmetic welds may be blended level when the repair procedure allows it, but the metal should not be polished beyond the primer specification. Structural welds should retain the size and contour required by the drawing, code, OEM method, or welding procedure.
Is epoxy primer or self-etching primer better over welds?
Epoxy primer is commonly used on prepared bare steel when corrosion protection and sealing are priorities. Self-etching primer is appropriate only in systems that call for it. Compatibility with filler, seam sealer, surfacer, epoxy, and topcoat must be confirmed before application.
Can bare metal sit overnight before primer?
Leaving freshly prepared steel overnight increases the chance of fingerprints, dust, moisture, and flash rust, especially in humid conditions. Prime it as soon as the coating procedure allows. If work pauses, keep the part clean and dry, then inspect, re-sand if needed, and repeat the final cleaning.
Can you use a flap disc instead of sandpaper?
A flap disc can level and blend a weld, but it does not replace every sanding stage. It may remove metal too quickly near the final contour and may not leave the exact scratch profile required by the primer. Use it for the task it suits, then finish with the specified sanding process.
Can you wet-sand bare steel before primer?
Dry sanding is usually safer for ordinary bare-steel preparation because water can enter seams and start flash rust. Wet-sand bare metal only when the coating manufacturer’s procedure calls for it, then remove all residue and dry the surface, seams, and pinholes completely before primer.
What grit should you use before epoxy primer?
Use the grit stated in the epoxy primer’s technical data sheet. Epoxy products do not all require the same preparation, and instructions may differ for steel, aluminum, galvanized metal, old paint, filler, and blasted surfaces.
Can body filler go over epoxy or self-etching primer?
Some body fillers are approved over cured and properly sanded epoxy primer, while other systems require prepared bare metal. Many products restrict application over acid-based self-etching primer. Follow the technical data sheets for both the filler and primer rather than using one rule for every brand.
Conclusion
When you sand welds before primer, remove contamination and only the excess weld metal, preserve the required weld size, control heat, and refine the area until it has the surface profile specified by the coating manufacturer. Clean before sanding and again before primer, protect the reverse side and seams where possible, and apply a compatible coating before corrosion begins. That sequence produces a smoother repair without sacrificing metal thickness, weld integrity, or paint adhesion.
Sources
- OSHA 1910.243 — Guarding of Portable Powered Tools — supports grinder guarding, wheel inspection, and maximum-speed checks.
- OSHA 1910.252 — Welding, Cutting, and Brazing General Requirements and OSHA Hot Work Guidance — support combustible control, shielding, extinguishing equipment, and treating grinding as hot work.
- OSHA 1910.134 — Respiratory Protection and OSHA Isocyanates — support respirator-program and two-component polyurethane safety guidance.
- CDC/NIOSH — Welding Fumes and Manganese — supports metal-fume, base-metal, and confined-space exposure cautions.
- SEM High-Build Primer Surfacer Technical Data Sheet — demonstrates product-specific cleaning and 180–320 grit metal-preparation instructions.
- 3M Cut-Off Wheel Tool Instructions — supports the warning against side grinding with a cut-off wheel.


