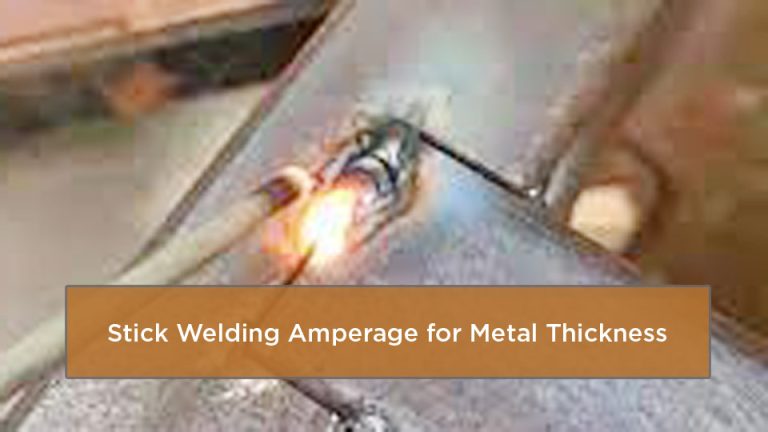
Stick welding thin sheet metal is possible, but it leaves little room for error. The safest approach is to use the smallest E6013 electrode your machine and electrode manufacturer support, keep the arc tight, and build the joint with brief tacks or stitches instead of one continuous bead. Practice on matching scrap before touching the part.
Quick Answer
To stick weld thin sheet metal, use a small E6013 rod, follow its listed polarity and amperage range, keep a very short arc, and make spaced tacks or short stitches. Clamp a copper or aluminum backer behind the joint, test every setting on matching scrap, and remove paint, zinc, oil, and solvent residue before welding.
Last updated: July 20, 2026.
Key Takeaways
- Use the smallest approved E6013: Low-current control matters more than the welder’s maximum output.
- Do not use one universal amp setting: Current ranges vary widely by electrode diameter, brand, position, and polarity.
- Control heat mechanically and with technique: Tight fit-up, a backing bar, short tacks, a skip pattern, and full cooling pauses reduce burn-through and distortion.
- Follow the electrode label: DCEN can reduce penetration with some rods, but it is not the correct polarity for every E6011 or E6013 product.
- Remove hazardous coatings: Do not treat flux as permission to weld through galvanizing, paint, oil, or unknown coatings.
At a Glance
| Time Required | Varies by joint length, fit-up, practice time, and cooling pauses. Do not rush the sequence. |
| Difficulty | Intermediate to advanced because thin sheet overheats quickly |
| Tools Needed | Low-current stick welder, small E6013 electrodes, clamps, clean work lead connection, copper or aluminum backer, wire brush or grinder, matching scrap, helmet, safety glasses, gloves, and protective clothing |
| Cost | Variable. Electrodes and abrasives are consumables, while the welder, ventilation, and PPE account for most of the equipment cost. |
Can You Stick Weld Thin Sheet Metal?
Yes, but stick welding, also called shielded metal arc welding or SMAW, becomes harder as the sheet gets thinner. The metal has little mass to absorb heat, so a small change in arc length, amperage, or travel speed can open a hole. Clean 16- to 20-gauge mild steel is a more realistic range for practice than very thin 22- or 24-gauge sheet.
Stick makes sense when portability, wind resistance, or access matters and a MIG or TIG machine is not available. MIG or TIG is usually easier for cosmetic auto-body work and very thin sheet because those processes give you finer heat and filler control.
When Stick Welding Is the Wrong Choice
- Do not use an unqualified thin-sheet stick procedure for safety-critical frames, suspension mounts, pressure vessels, roll cages, lifting points, or code work.
- Do not weld unknown coated metal until you identify and remove the coating safely.
- Do not attempt aluminum or stainless sheet with mild-steel E6013 or E6011 electrodes.
- Choose MIG, TIG, brazing, adhesive bonding, or mechanical fastening when the part is too thin to tolerate the arc heat.
Equipment You Need for Thin-Sheet Stick Welding
A smooth, constant-current welder with stable low-amperage output is more useful than a high maximum amp rating. AC can work with an AC-rated rod, while DC gives you more polarity choices. The machine must be able to hold a steady arc at the lower end of the exact electrode’s operating range.
Thin-Metal Equipment Checklist
- Stick welder: AC, DC, or AC/DC, with stable low-current control.
- Electrodes: The smallest E6013 diameter supported by both the welder and electrode manufacturer.
- Work lead: Clean clamp jaws and sound cable insulation.
- Fit-up tools: Locking pliers, sheet-metal clamps, magnets used away from the arc, or a rigid strongback.
- Backing bar: Clean copper or aluminum that contacts the back of the seam without becoming part of the joint.
- Preparation tools: Wire brush, flap disc, scraper, and a welding-safe cleaner that fully evaporates before welding.
- Practice coupons: Scrap with the same alloy, thickness, coating condition, and joint design as the repair.
- PPE and fume control: Helmet, safety glasses, gloves, flame-resistant clothing, hearing protection for grinding, and suitable ventilation or local exhaust.
Choosing the Right Welder
A 180- to 225-amp machine can be versatile, but that top-end number does not make it better for sheet metal. Check the minimum output, arc stability, open-circuit requirements, polarity options, and whether the manufacturer lists the small electrode you plan to use. Keep the work lead connection close to the joint on clean metal, but position the cable where sparks cannot damage it.
Best Stick Welding Rods for Thin Sheet Metal
For clean mild steel, E6013 is the most practical starting point. It produces a soft, steady arc and is sold in products intended for low-amperage sheet-metal work. Use the smallest diameter your machine can run reliably, and follow the operating range printed on that product’s data sheet or package.
| Rod | Best Use | Advantages | Limits on Thin Sheet |
|---|---|---|---|
| E6013 | Clean mild steel, short repairs, ducts, guards, and light fabrication | Smooth arc, low spatter, easy restarts, and shallow-to-moderate penetration depending on product and polarity | The common 3/32-inch size may still be too hot for very thin sheet. Smaller diameters are easier to control when available. |
| E6011 | Mild steel with minor remaining scale or less-than-perfect outdoor repair conditions after proper cleaning | Easy starting and a forceful arc; some products are designed for low-amperage sheet-metal use | It can dig aggressively and increase burn-through. Use only the polarity listed for the exact product. It is not a substitute for removing zinc, paint, oil, or hazardous coatings. |
| E7014 | Clean mild steel where a smooth bead and low penetration are useful | Smooth transfer, good wetting, low penetration, and good deposition rates on products such as Lincoln Murex 7014 | Its higher deposition can build a puddle faster than you can control on very thin sheet. It is not the first rod to learn with here. |
| E6010 | Open-root and deep-penetration work on suitable DC equipment | Strong digging arc and reliable root penetration | Usually DCEP and too aggressive for very thin sheet. Avoid it unless a qualified procedure specifically calls for it. |
Note: The AWS electrode class does not give you one universal amperage range. Two E6013 brands in the same diameter can list different current ranges and preferred polarities. The package or manufacturer data sheet for your exact rod controls.
Products Worth Considering
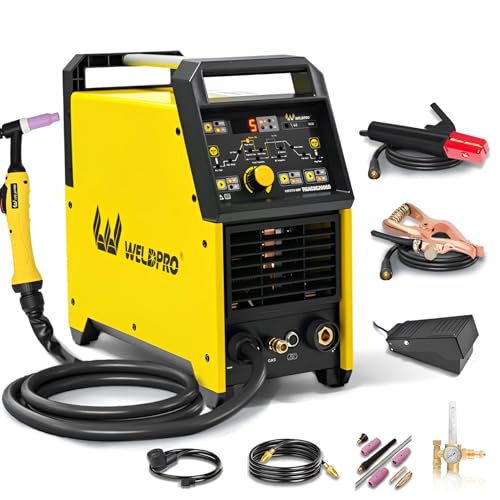
200A AC/DC TIG WELDER & 5 IN 1 MULTIPROCESS WELDING MACHINE: This versatile high frequency welder combines 5 welding modes in one portable design: High-Frequency AC TIG, DC TIG, AC Pulse TIG, DC Pulse TIG, and Stick MMA welding. Perfect for welders of all skill levels, from hobbyists doing home DIY projects to professional fabricators, this ac dc tig stick welder handles all your welding needs with consistent, reliable performance

Start TIG Welding Without Overcomplicating It: the S7 200A welder is made for people who want a simple way to get into DC TIG and Stick welding. HF non-touch start helps you strike a cleaner TIG arc without scratching the tungsten across the metal, making it easier to practice on stainless steel, mild steel and carbon steel.
The product is LB 3/32 6013 Weld Rod
Prepare the Sheet Metal and Joint
Thin metal rewards careful fit-up. A gap that looks minor on plate can become a burn-through path on sheet. Prepare a matching practice coupon first so you can adjust the rod, polarity, amperage, and tack timing without damaging the real part.
- Identify the base metal and coatings. Confirm that the part is weldable mild steel. Check both sides for zinc, paint, undercoating, plating, oil, and sealant.
- Remove contamination. Grind or mechanically strip the weld zone to bright metal. Clean beyond the bead area because the heat-affected zone can reach nearby coating.
- Let cleaners evaporate. Never strike an arc over wet solvent or near open solvent containers. Avoid unknown or chlorinated cleaners.
- Choose a forgiving joint. A lap joint or flanged edge is easier than an open butt joint because it gives you more metal under the arc.
- Close the gap. Clamp the parts tightly and correct high spots before welding. Do not try to bridge a wide gap with extra arc time.
- Add a backing bar. Clamp clean copper or aluminum tightly behind the seam when access allows.
- Brace the panel. Use a straightedge, angle iron, or strongback to resist movement, while keeping clamps clear of the electrode path.
- Connect the work lead. Attach it to clean bare metal near the weld so the current path is reliable.
Warning: Welding galvanized steel creates zinc oxide fume that can cause metal fume fever. Remove the zinc coating from the heated area, use effective local exhaust or other required ventilation, keep your head out of the plume, and follow workplace respiratory-protection rules. Outdoor work alone does not guarantee safe exposure.
Products Worth Considering

Product Introduction: E6013 welding rod is suitable for both AC and DC applications and can be used for all position welding

【 GENERAL‑PURPOSE E6013 FOR SHEET METAL 】 Smooth, forgiving welds-mild steel, sheet metal, thin gauge steel, ductwork, brackets, and repairs. Runs clean on 110V stick welders and basic welding tools.

Product Introduction: E6013 welding rod is suitable for both AC and DC applications and can be used for all position welding
Polarity and Amperage Settings for Thin Metal
Choose Polarity From the Rod Specification
In SMAW, DCEP generally produces more penetration. DCEN can reduce penetration with an electrode approved for both polarities, which may help on thin sheet. However, do not select DCEN automatically. Some E6011 products are AC-only or specify DCEP, and even E6013 products can list a preferred polarity. Follow the exact package or data sheet.
Start Within the Manufacturer’s Range
Set current at the low end of the approved range, then make several test tacks on matching scrap. Increase only enough to maintain a stable arc and wet the tack into both pieces. If the rod repeatedly sticks, first check arc length, work-clamp contact, electrode condition, and technique before raising amperage.
| Diameter | AC | DC, Either Polarity | How to Use the Example |
|---|---|---|---|
| 5/64 in (2.0 mm) | 50 to 80 A | 45 to 75 A | Begin near the low end on matching scrap, then adjust for stable tacks without burn-through. |
| 3/32 in (2.4 mm) | 75 to 115 A | 70 to 105 A | This common size has a higher listed range and gives less margin on very thin sheet. |
These figures are examples for one product, not universal settings for every E6013. Do not run below a rod’s approved range just to force it onto thinner sheet. Select a smaller approved electrode or use a process better suited to the material.
Arc Length, Angle, and Travel
- Arc length: Keep it as short as you can without sticking, generally no longer than the electrode’s core diameter and often shorter on sheet.
- Angle: Use a slight drag angle unless the electrode maker directs otherwise.
- Motion: Use straight stringer tacks or tiny stitches. Avoid wide weaving.
- Travel: Move promptly and break the arc before the puddle grows wider than the joint needs.
- Sequence: Skip around the joint so adjacent areas can cool before you return.
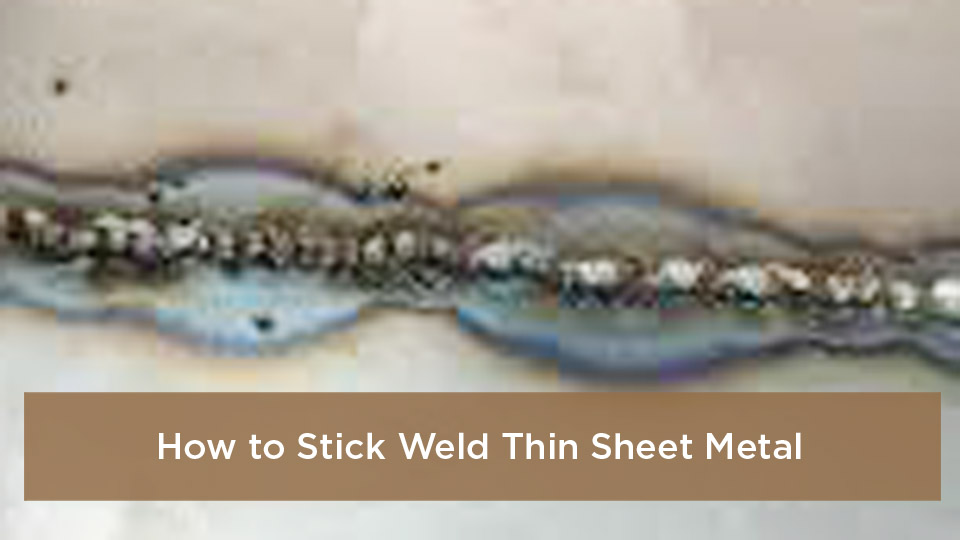
Pro Tip: Tune the setup by tack behavior, not by chasing a long bead. A good test tack starts cleanly, fuses both edges, stays narrow, and does not leave a glowing, sagging area on the back of the coupon.
Step-by-Step: Stick Weld a 20-Gauge Lap Joint
- Make a matching test joint. Cut two scraps of the same 20-gauge mild steel and arrange the same overlap, orientation, and access as the real repair.
- Clean both sides. Remove rust, mill scale, paint, zinc, oil, and residue from the weld zone and the work-clamp point.
- Clamp the overlap flat. Eliminate gaps and add a copper or aluminum backer behind the tack area if you can reach it.
- Select the rod and polarity. Start with the smallest approved E6013. Set AC or DC polarity exactly as the product allows. If both DC polarities are approved, compare them on scrap rather than assuming one is best.
- Set the current. Begin at the low end of the exact rod’s listed range. Confirm that the machine can hold a stable arc there.
- Strike and release quickly. Make a brief tack, then break the arc before the puddle spreads. Keep the arc tight from start to finish.
- Tack the joint in a skip pattern. Place small tacks several inches apart, alternating ends and sides. Let each area cool before placing a nearby tack.
- Fill between the first tacks. Add more tacks or very short stitches between cooled welds. Do not chase a continuous seam while the panel is hot.
- Clean and inspect. Chip and brush away slag after the tack cools enough to handle safely. Look for fusion at both edges, pinholes, undercut, cracks, and distortion.
- Repair one defect at a time. Reclean the spot, support it with the backer, and add one quick tack. Let the area cool before grinding.
- Finish lightly. Grind only proud metal. Do not thin the surrounding sheet or erase evidence of poor fusion.
On thin sheet, the winning sequence is tack, move, cool, inspect, and return. A long bead usually adds more distortion than strength.
Common Mistakes and How to Fix Them
- Burn-through: The current is too high for the rod and joint, the arc is too long, the gap is too wide, or the tack lasts too long. Stop, support the hole with a clean backer, correct the fit-up, and retune on scrap.
- Rod sticking: The current may be too low, but a long pause at contact, poor work-clamp connection, damp or damaged electrodes, and an unstable machine can cause the same symptom.
- Cold lap or slag trapped at the toe: The puddle did not wet into both pieces, the joint was dirty, or the electrode angle pushed slag ahead of the arc. Reclean, shorten the arc, and make a smaller controlled tack.
- Porosity: Remove coatings, moisture, oil, and slag before rewelding. Do not weld over an uncleaned tack.
- Undercut: Reduce arc length and time on the edge. Keep the tack centered on the overlap rather than dwelling on the exposed sheet edge.
- Warping: Stop welding and let the panel cool naturally. Improve clamping, shorten each tack, and increase the distance between consecutive welds.
- Arc blow on DC: Reposition the work lead, shorten the arc, reduce current if still within the rod’s range, or use AC with an AC-rated electrode.
How to Prevent Burn-Through and Warping
- Use a backing bar: Copper or aluminum supports the puddle and draws heat away without normally fusing to mild steel.
- Favor lap or flanged joints: Extra material under the arc gives you more margin than an open butt seam.
- Keep fit-up tight: Fix gaps with cutting, forming, or a patch that fits. Do not hold the arc longer to bridge empty space.
- Use a skip sequence: Move from one end of the panel to the other rather than placing adjacent hot tacks.
- Clamp a strongback: Angle iron or a rigid straightedge helps the panel resist shrinkage while the tacks cool.
- Let the weld cool naturally: Do not quench the hot weld with water. If you cool a removable copper backer for reuse, do it away from the joint before reclamping it.
- Stop before the panel glows broadly: A growing heat halo means the next tack should be placed somewhere else after a cooling pause.
Safety Essentials
Welding exposes you to ultraviolet radiation, hot metal, slag, electrical current, fire hazards, and fumes. Inspect the welder, holder, leads, and work clamp before use. Keep gloves and clothing dry, cover exposed skin, remove combustibles, protect nearby people with screens, and keep an appropriate fire extinguisher within reach.
Eye and Face Protection
OSHA lists a minimum shade 7 for SMAW below 60 amps and shade 8 for 60 to 160 amps. Select the darkest shade that still lets you see the work clearly, never go below the applicable minimum, and wear safety glasses with side protection under the helmet for slag and grinding hazards.
Fume and Coating Hazards
OSHA recommends cleaning coatings that can create toxic exposure, positioning your head away from the plume, and using ventilation or local exhaust close to the fume source. Respiratory protection may be required when ventilation and work practices do not control exposure. Do not weld in a confined or enclosed space without the controls, training, testing, and rescue provisions required for that environment.
Warning: Stop work and move to fresh air if anyone develops eye, nose, or throat irritation, dizziness, nausea, cough, chest tightness, fever, or flu-like symptoms after welding. Seek medical attention as appropriate and report workplace exposure through the required safety process.
Real-World Applications
With the right fit-up and a tested procedure, small-electrode SMAW can handle light brackets, farm or field repairs, guards, HVAC flashing, thin-wall mild-steel tubing, and noncritical sheet patches. The method is especially useful when wind or portability makes gas-shielded welding inconvenient.
Automotive body patches are possible, but MIG or TIG usually gives a cleaner, easier-to-finish result. Before welding on a vehicle, protect fuel and brake lines, interior trim, glass, wiring, modules, batteries, and nearby electronics according to the vehicle and equipment manufacturer’s service instructions.
Note: A visually neat tack is not proof that a repair is structurally adequate. Critical joints need the correct filler classification, joint design, weld size, inspection, and qualified procedure.
Frequently Asked Questions
What’s the best rod for stick welding thin sheet metal?
A small E6013 is usually the best starting point for clean mild steel because it offers a smooth arc and sheet-metal products are available. Choose the smallest diameter your welder and electrode maker support, then use the listed current and polarity. Use E6011 only when its more forceful arc is truly needed and the exact product suits the machine.
Can I use AC for thin sheet?
Yes. Many E6013 products and some E6011 products are designed for AC, including low-open-circuit-voltage machines. Use an AC-rated electrode, begin at the low end of its listed range, and verify the setup on matching scrap.
How do I avoid warping a sheet-metal panel?
Clamp the panel flat, use a lap or flanged joint when suitable, add small tacks in a wide skip pattern, and let each area cool before welding nearby. A copper or aluminum backer and a rigid strongback also help. Do not run a continuous bead or quench the hot weld with water.
Is welding galvanized sheet safe?
Galvanized steel requires strict fume control. Remove the zinc coating from the heated zone, use effective ventilation or local exhaust, keep your head out of the plume, and follow applicable respiratory-protection and workplace rules. Zinc oxide fume can cause metal fume fever, and working outdoors does not automatically make exposure safe.
What amperage should I start with for 18-gauge steel?
There is no safe universal number based only on sheet gauge. Start at the low end of the exact electrode manufacturer’s range and test on an 18-gauge coupon with the same joint. For example, Lincoln lists 45 to 75 amps DC for its 5/64-inch Fleetweld 37 E6013, but its 3/32-inch version starts higher at 70 amps DC.
Is DCEN always best for thin sheet?
No. DCEN can reduce penetration when the electrode is approved for it, but polarity is product-specific. Some rods prefer DCEP, some run either DC polarity, and some are intended for AC. The electrode package or data sheet takes priority over a general thin-metal rule.
Can I stick weld 22- or 24-gauge sheet?
It is possible with specialized small electrodes, excellent fit-up, backing, and brief tacks, but the burn-through risk is high. MIG, TIG, resistance spot welding, brazing, adhesive bonding, or mechanical fastening is often more practical at those thicknesses.
Can I use E7018 on thin sheet metal?
E7018 can make high-quality welds in suitable applications, but common diameters and current ranges are usually less forgiving on very thin sheet. Its storage requirements also matter. For a basic thin-sheet repair, a small E6013 is normally easier unless the joint specification requires a low-hydrogen electrode and a qualified procedure.
Sources
- Lincoln Electric Fleetweld 37 – E6013 sheet-metal suitability, available diameters, polarities, and operating ranges.
- Lincoln Electric Fleetweld 180 – E6011 use on sheet metal and AC operation for this specific product.
- Lincoln Electric Murex 7014 – E7014 transfer, wetting, penetration, and deposition characteristics.
- Lincoln Electric: Variables That Affect Weld Penetration – general effect of polarity on SMAW penetration.
- OSHA: Controlling Hazardous Fume and Gases During Welding – coating removal, ventilation, fume positioning, confined-space, and respiratory-protection guidance.
- OSHA: Eye Protection During Welding and Cutting – minimum SMAW lens shades and eye-protection requirements.
Related Articles