How to TIG Weld Thin Aluminum Automotive Parts
TIG welding thin aluminum automotive parts takes clean metal, tight heat control, and steady filler timing. Aluminum moves heat fast, so too much amperage can burn through the panel before the puddle settles. This guide shows you how to prepare the surface, set up your AC/DC TIG welder, control the puddle, add filler metal, and avoid common weld defects.
Quick Answer
To TIG weld thin aluminum automotive parts, use an AC/DC TIG welder, 100% argon shielding gas, clean aluminum, and controlled amperage. Start around 1 amp per 0.001 inch of thickness, then adjust with your foot pedal as the panel heats up. Keep a short arc, use a slight torch angle, and dab filler at the front edge of the puddle.
Key Takeaways
- Use an AC/DC TIG welder because aluminum needs AC cleaning action.
- Clean the aluminum right before welding to reduce porosity and weak beads.
- Control heat with a foot pedal, short arc, and steady travel speed.
- Choose filler rods such as ER4043 or ER5356 based on the base metal and repair needs.
- Practice on scrap aluminum before you weld a visible automotive panel.
Warning: Wear proper eye, hand, skin, and respiratory protection, and weld only in a safe, well-ventilated work area.
Estimated Time and Before You Begin
Plan for 30 to 60 minutes of setup and practice before you weld the actual automotive part. Thin aluminum needs care, so don’t rush the cleaning, fit-up, or test welds.
Before you begin, match your filler rod to the aluminum alloy when you can. Test your settings on scrap material with the same thickness before you work on the final part.
Key Equipment Needed for Successful TIG Welding of Aluminum
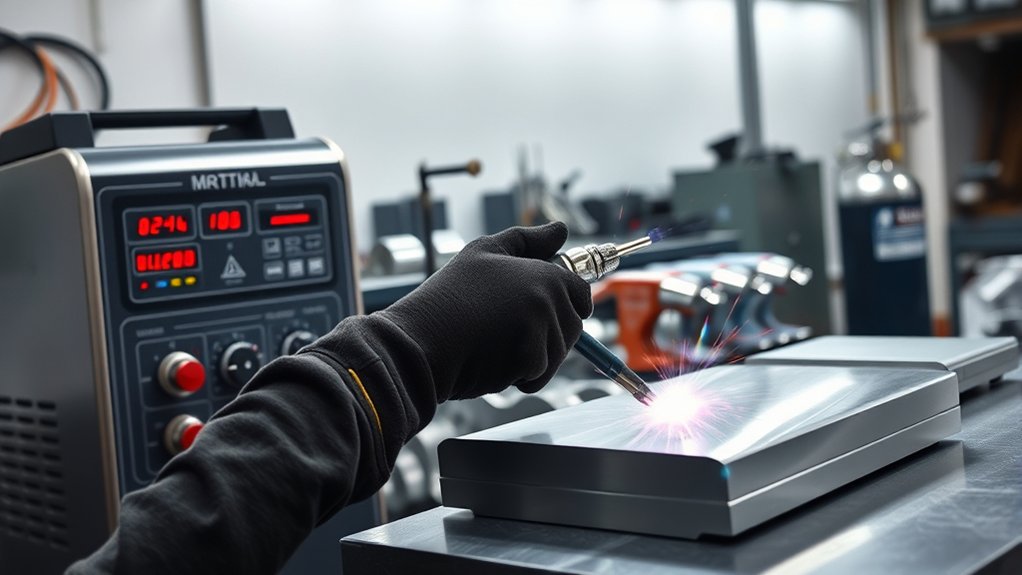
To TIG weld aluminum well, you need equipment that helps you control heat and arc stability. Use a high-quality TIG welder with AC/DC output because thin aluminum needs AC for oxide cleaning and stable puddle control. Use 100% argon shielding gas to protect the weld area from contamination and oxidation.
Select the right tungsten electrode, such as ceriated or lanthanated tungsten, for a stable arc. Many welders also use thoriated tungsten, but you must handle and grind it with care because it contains thorium. A foot pedal helps you adjust amperage while you weld, which reduces burn-through on thin automotive parts.
Keep aluminum filler rods such as ER4043 or ER5356 on hand. Match the filler rod to your base metal and the repair goal when possible. The right setup helps you make clean welds, especially when you use proven TIG welding techniques for thin materials.
Products Worth Considering

Large LED Display: Features a large LED screen for enhanced visibility and a clear display of welding parameters and settings. Its intuitive interface ensures effortless operation, enabling precise welding of diverse metals
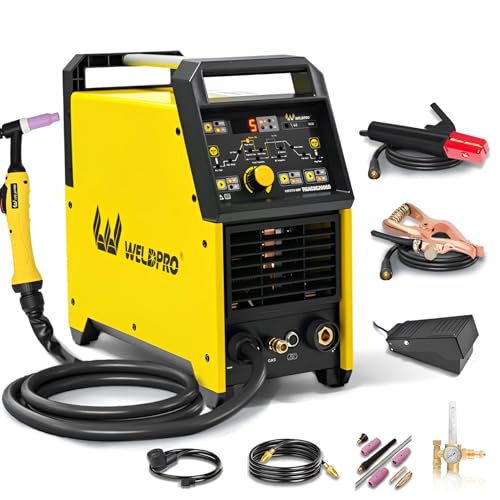
200A AC/DC TIG WELDER & 5 IN 1 MULTIPROCESS WELDING MACHINE: This versatile high frequency welder combines 5 welding modes in one portable design: High-Frequency AC TIG, DC TIG, AC Pulse TIG, DC Pulse TIG, and Stick MMA welding. Perfect for welders of all skill levels, from hobbyists doing home DIY projects to professional fabricators, this ac dc tig stick welder handles all your welding needs with consistent, reliable performance

Large LED Display: Features a large LED screen for enhanced visibility and a clear display of welding parameters and settings. Its intuitive interface ensures effortless operation, enabling precise welding of diverse metals
What You’ll Need
- AC/DC TIG welder with foot pedal control
- 100% argon shielding gas and a clean gas hose setup
- Suitable tungsten electrode, often 1/16 inch for thin work
- ER4043 or ER5356 aluminum filler rod
- Dedicated stainless steel brush or aluminum-only scotch-brite pad
- Acetone or an approved aluminum cleaner
- Clean gloves, eye protection, welding helmet, and protective clothing
- Scrap aluminum with the same thickness for test welds
Products Worth Considering

6-in-1 Welding Modes: The TOOLIOM TL-200TP ACDC PRO welder features six versatile welding modes: AC TIG, DC TIG, AC Pulsed TIG, DC Pulsed TIG, Stick, and TIG Spot Welding, making it suitable for a wide range of welding applications and conditions.

6-in-1 Welding Modes: AC DC TIG welder 200Amp integrates 6 welding modes, including MMA STICK/TIG/AC TIG/DC TIG/AC Pulse TIG/DC Pulse TlG. Whether high-precision DC welding or complex workpiece AC pulse welding, this welding machine meets your needs

6-IN-1 MULTIPROCESS WELDING:MMA, DC HF/Pulse TIG, AC HF/Pulse TIG, and AC Pulse TIG Square – perfect for aluminum, stainless steel, carbon steel, iron, copper, magnesium, and titanium alloys, delivering smooth, precise welds with minimal spatter and warping for both ferrous and non-ferrous metals
How to Prepare Your Aluminum Surface for TIG Welding
Good surface preparation has a direct effect on weld quality. Start by cleaning the aluminum surface to remove oil, grease, dirt, and oxide. These contaminants can cause porosity, weak fusion, and a rough bead.
Use an approved aluminum cleaner, acetone, or a suitable alkaline cleaner, then rinse and dry the part if the cleaner requires it. Avoid nitric acid unless you have proper training, safety controls, and handling equipment. Use a stainless steel brush or scotch-brite pad made only for aluminum so you don’t add steel contamination.
Check the edges of the aluminum parts for burrs and sharp spots. Smooth edges help you get better joint fit-up and more even weld penetration. Clean the surface with acetone right before welding to reduce re-oxidation and contamination, as explained in this related guide on how to clean surfaces with acetone.
Steps to TIG Weld Thin Aluminum Automotive Parts
- Clean the aluminum. Remove grease, dirt, and oxide from the weld area before you strike an arc.
- Fit the joint tightly. Keep gaps small because thin aluminum can melt back fast.
- Set up AC TIG mode. Use 100% argon and set your amperage near the thickness-based starting point.
- Start on scrap metal. Test your arc, puddle size, travel speed, and filler timing before welding the part.
- Hold a short arc. Keep the tungsten close to the workpiece without touching the puddle.
- Control the puddle. Use your foot pedal to reduce heat as the part warms up.
- Add filler steadily. Dab filler into the front edge of the puddle and keep a steady rhythm.
- Let the weld cool naturally. Avoid forcing the part to cool unless your repair procedure calls for it.
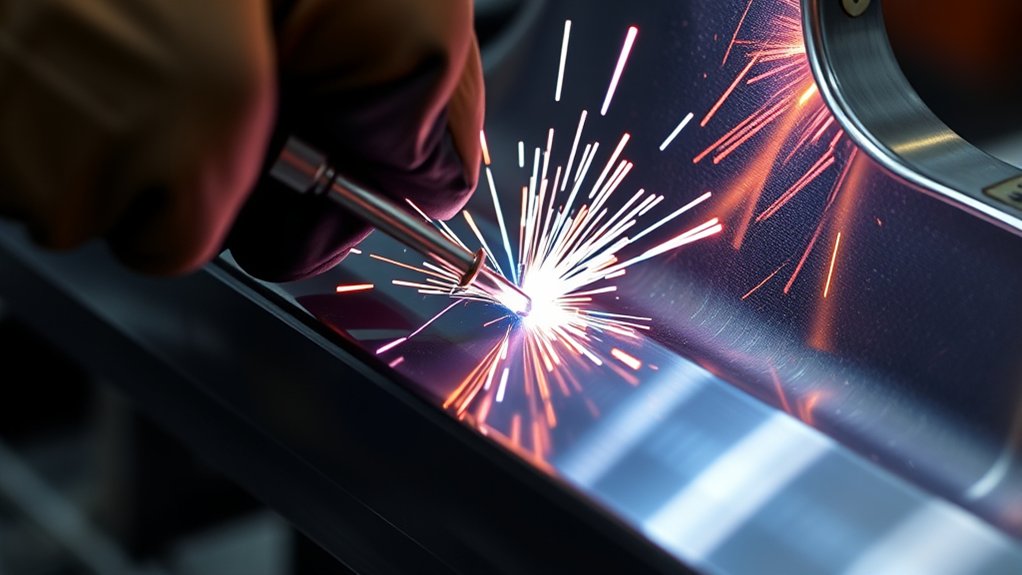
How to Control Heat and the Weld Puddle
Effective heat control helps you TIG weld aluminum without burn-through. Start near 1 amp per 0.001 inch of thickness, then fine-tune the setting with your foot pedal. Thin aluminum heats quickly, so reduce amperage as the part warms up.
Build a stable puddle that matches the joint size, not a large puddle that spreads across the panel. Tilt your TIG torch slightly backward, around 5 to 15 degrees, so you can see the puddle and keep control. Keep the tungsten within about 1/4 inch of the workpiece to maintain a tight arc.
Use a steady travel speed and watch the puddle edges. Dab the filler metal at the puddle’s front edge while you keep about a 90-degree relationship between the filler rod and torch. You can also use a filler rod selection guide to choose the right material for your base metal.
Pro tip: If the puddle starts to widen too fast, back off the foot pedal before you add more filler.
Steps to Effectively Introduce Filler Metal
Introducing filler metal at the right time helps you make strong, even welds. Hold the filler wire near the edge of the weld puddle, not far ahead of the arc. This placement helps the filler melt into the puddle instead of balling up on the surface.
Keep the filler rod at about a 90-degree angle to the torch. Use small, controlled dabs and avoid large hand movements. Too much filler or too much torch movement can cool the puddle, widen the bead, or overheat the panel.
Coordinate your torch movement, foot pedal pressure, and filler dabs. Aluminum heats fast, so you may need less amperage after the weld starts. For comparison with another heat-control process, this guide on pulsed MIG welding explains how pulse control can help on thin materials.
How to Fix Common TIG Welding Problems on Thin Aluminum
Thin aluminum can burn through, form porosity, or lose puddle control if your setup or technique slips. Start with heat management. Use lower amperage, work in short sections when needed, and let the part cool between welds if the panel gets too hot.
Keep a consistent shielding gas flow with 100% argon. Poor gas coverage can cause contamination and porosity. Also check your cup size, torch angle, and gas hose connections if the weld looks dirty or sooty.
Clean the surface again if you see black soot, popping, or small holes in the bead. Use a smaller tungsten electrode, such as 1/16 inch, when you need a focused arc on thin stock. Keep your torch angle near 5 to 15 degrees and use a steady hand to control the weld pool.
These habits help you create cleaner welds and safer repairs. You can also review more TIG welding aluminum tips and tricks to improve your consistency on automotive parts.
Common Mistakes to Avoid
- Starting the weld before you remove oxide and grease
- Using too much amperage at the start of the weld
- Holding the tungsten too far from the workpiece
- Moving too slowly and overheating the panel
- Adding filler outside the puddle instead of at the leading edge
- Using a steel brush that has touched carbon steel
Frequently Asked Questions
Can You TIG Weld Thin Aluminum?
Yes, you can TIG weld thin aluminum with the right setup and technique. Use AC TIG, clean the joint well, control heat with a foot pedal, and choose a filler rod that suits the base metal.
What Is the Thinnest You Can TIG Weld?
Many skilled welders can TIG weld aluminum around 0.020 inches thick. Work this thin only after practice because small changes in heat, arc length, or travel speed can burn through the metal.
How Many Amps Do You Need to Weld 2mm Aluminum?
For 2mm aluminum, start around 80 to 100 amps and adjust as the part heats up. Use your foot pedal, watch the puddle, and reduce heat if the bead spreads too wide.
What Is the Rule of 33 in TIG Welding?
The Rule of 33 gives you a rough amperage guide for aluminum, often stated as about 33 amps per 1/8 inch. Use it only as a starting point because joint type, alloy, tungsten size, and travel speed also affect heat.
Why Does My Aluminum TIG Weld Look Black or Sooty?
Black or sooty aluminum welds often point to contamination, poor gas coverage, or too much torch angle. Clean the metal again, check the argon flow, and keep the arc short and stable.
Safety Disclaimer: This article is for informational purposes only and does not replace professional welding training, repair standards, or safety guidance. Always follow your welder manual, use proper personal protective equipment, and consult a qualified welding professional for structural or safety-critical automotive repairs.
Conclusion
Strong TIG welds on thin aluminum automotive parts come from clean metal, steady heat control, and careful filler timing. Start with scrap practice, then move to the actual part after your puddle and bead stay consistent. Keep your torch angle small, your arc short, and your filler dabs controlled. With patient practice, you can build cleaner welds and handle thin aluminum repairs with more confidence.


