Fresh welds do not stay protected on their own. As soon as the metal is cool enough to handle, you need to remove slag, spatter, mill scale, rust, grease, fingerprints, and dust, then seal the bare steel with the right coating system before moisture reaches it.
The safest long-term approach is simple: clean the weld area, dry it fully, prime exposed steel with epoxy primer, use weld-through primer only on mating faces before assembly, and protect hidden seams with cavity wax after welding. Always follow the primer, filler, sealer, and topcoat technical data sheets for mix ratio, grit, flash time, recoat window, and cure time.
Quick Answer
To protect bare metal after welding, let the weld cool, remove slag and spatter, grind or wire-brush to clean steel, degrease, dry the area, then apply epoxy primer as soon as possible. Use weld-through primer on hidden mating faces before welding and cavity wax inside enclosed seams after the repair is coated.
Key Takeaways
- Clean welded steel quickly because moisture, salts, and bare metal can start corrosion fast.
- Epoxy primer is usually the best first sealing coat for clean bare steel after welding.
- Weld-through primer belongs on mating faces before welding, not as the final corrosion barrier.
- Cavity wax protects boxed sections, seams, and hidden voids that primer and topcoat cannot reach.
- Body filler, surfacer, sealer, and topcoat must follow the product maker’s recoat and cure windows.
At a Glance
| Time Required | 30 minutes to 2 hours for cleanup and primer, plus product-specific cure and recoat time |
| Difficulty | Moderate, because surface prep and timing affect rust protection |
| Tools Needed | Wire brush, grinder or abrasive disc, clean lint-free wipes, degreaser, PPE, spray gun or brush, wax injection wand for cavities |
| Cost | Usually $25 to $150, depending on primer, abrasives, cavity wax, and whether you already own spray equipment |
Warning: Welding, grinding, solvents, and spray coatings can create fire, eye, skin, and breathing hazards. Remove or shield combustibles, keep a suitable extinguisher ready, use eye and hand protection, ventilate the area, and follow the SDS and technical data sheet for every cleaner, primer, filler, sealer, and topcoat. OSHA’s welding rules include fire prevention, guarding, and eye protection requirements, and NIOSH notes that welding fumes are made of metals and may contain manganese.
Clean the Weld Area First
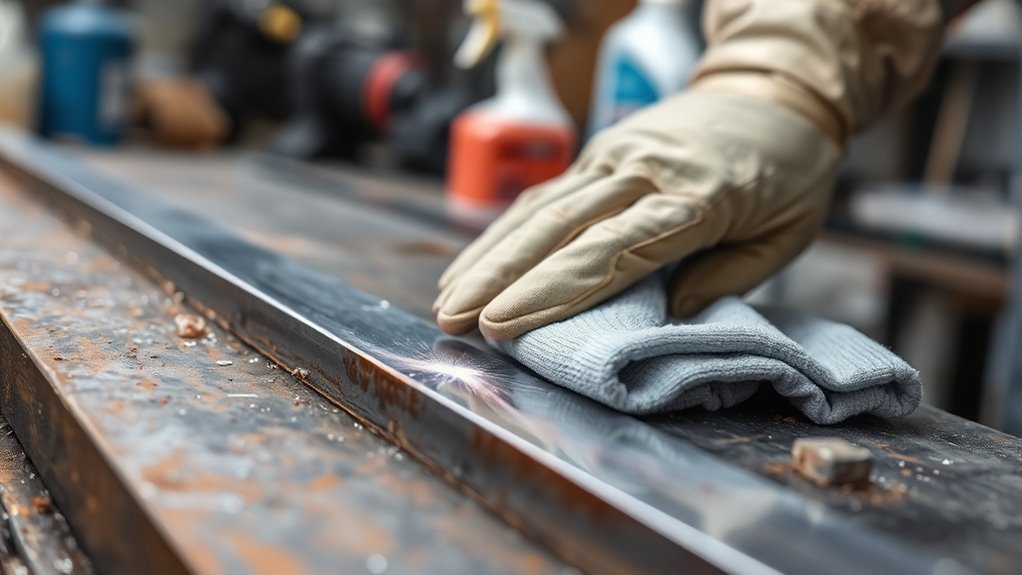
Start as soon as the weld has cooled enough to work safely. Do not coat hot metal, and do not trap slag, soot, or grinding dust under primer.
Use a chipping hammer, wire brush, wire wheel, abrasive pad, or grinder to remove slag, spatter, oxide, and loose scale from the weld bead and heat-affected zone. Your goal is clean, dry steel with no glossy residue, no loose contamination, and no sharp edges that can cause thin paint coverage.
Good coating work starts before the primer. If residue stays on the weld, primer may stick to the residue instead of the metal.
After mechanical cleanup, wipe the repair with a compatible wax and grease remover, acetone, or another cleaner approved for your coating system. Use two clean wipes: one damp wipe to lift contamination and one dry wipe to remove it before it flashes back onto the panel.
Pro Tip: Change wipes often. A dirty rag can smear oil, silicone, and grinding residue across the repair and cause fisheyes or peeling later.
Remove Rust, Mill Scale, Slag, and Grease
Rust, mill scale, slag, grease, and fingerprints all weaken coating adhesion. Use a wire wheel, abrasive disc, sanding disc, or small grinder to remove corrosion and scale until the surface is solid and uniform.
Pay close attention to corners, plug welds, lap seams, and the heat-affected zone beside the weld. These areas often hold dust and residue. If the repair has deep pitting, clean the pits as thoroughly as possible before you prime. Do not rely on primer to bury loose rust.
If a metal prep or acid-based cleaner is part of your chosen system, use it only as the product maker directs. Some primers require a specific metal condition, and residue from the wrong cleaner can hurt adhesion. When in doubt, clean with a compatible solvent, let the surface dry, and follow the primer technical data sheet.
If flash rust appears before you prime, remove it again with a clean abrasive or approved prep product. Do not spray epoxy primer over fresh orange rust and expect it to lock the problem away.
Pick the Best Primer for Bare Metal
For most welded bare steel repairs, epoxy primer is the strongest first coating choice because it bonds well to properly prepared metal and creates a durable moisture barrier. Corrosion is a natural reaction between a material and its environment, and AMPP lists protective coatings as one of the key methods used to control corrosion.
Use the primer that matches the job. A hidden flange that still needs welding has different needs than an exposed panel that is ready for bodywork and paint.
Epoxy Primer vs Etch Primer
Epoxy primer is usually the better long-term base on clean bare steel. It seals moisture out, resists corrosion better than many single-part primers, and gives later filler, surfacer, sealer, or topcoat a stable base when used inside the proper recoat window.
Etch primer can be useful in some coating systems, especially when a paint maker specifies it for bare metal. It is not automatically better after welding, and it is not always compatible under every epoxy, filler, or sealer. Check the product sheet before stacking coatings.
Self-etching aerosol primer is not the same as a complete epoxy primer system. It may work for small temporary protection, but it should not be treated as the final corrosion barrier on a welded repair exposed to water, road salt, or weather.
When to Use Weld-Through Primer
Use weld-through primer on clean mating faces before welding panels together, such as lap joints, plug-weld flanges, and boxed seams. It is designed to leave some corrosion-resistant material between surfaces that will be hard to reach after assembly.
Keep weld-through primer thin. Heavy coats can contaminate the weld, increase spatter, or reduce weld quality. Coat only the mating faces that need protection, let the product flash as directed, then weld.
Do not use weld-through primer as your final outside coating. After welding, clean the exposed weld and cover the repair with epoxy primer, then build the rest of the finish system over it.
Use Weld-Through Primer on Mating Joints
Use weld-through primer before assembly anywhere two pieces of bare steel overlap and will be difficult to coat later. Common examples include rocker-panel seams, patch-panel flanges, plug-weld areas, braces, brackets, and enclosed body sections.
Prepare the mating faces first. Remove rust, paint, e-coat where the weld must penetrate, mill scale, and grease. Spray or brush a thin, even coat over the hidden contact area, not over the entire visible repair.
After welding, remove burned residue, soot, and spatter from the exposed side. Weld-through primer helps the hidden seam, but it does not replace epoxy primer, seam sealer, topcoat, or cavity wax.
Note: Rust converter is not a normal step on clean welded steel. Use it only for firmly attached residual rust when full removal is impossible and only if your primer maker allows it.
Seal Hidden Cavities With Wax
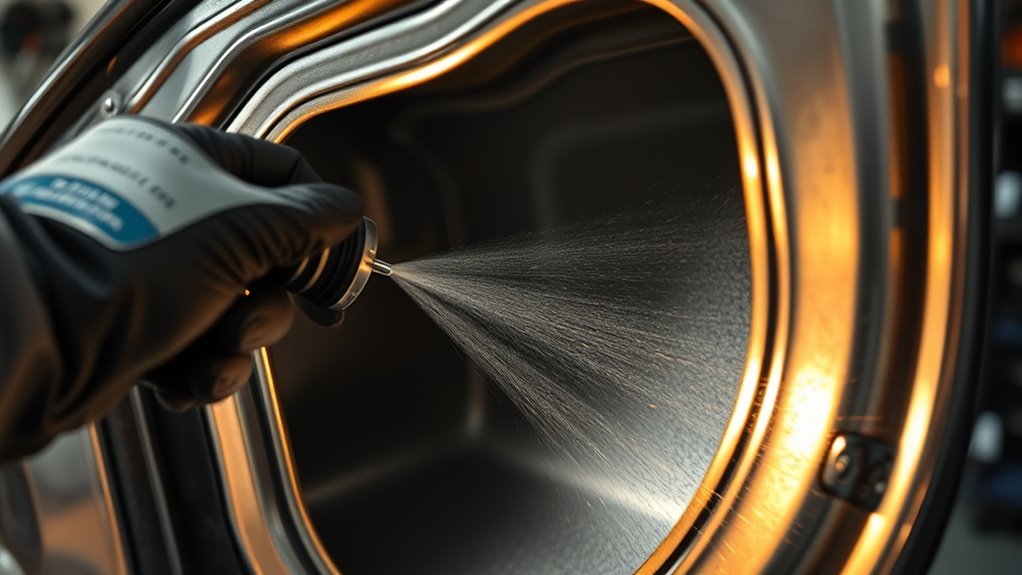
Hidden cavities need extra protection because boxed sections, lap seams, rocker panels, and inner braces can trap moisture. Primer and topcoat often cannot reach these spaces after the repair is welded shut.
Use cavity wax after welding, cleaning, priming, seam sealing, and painting steps are complete enough that wax overspray will not interfere with adhesion. Inject it through drain holes, factory access holes, service openings, or drilled access points fitted with plugs.
Move the wand slowly so the wax fogs the inside surface instead of dumping a heavy puddle in one spot. Keep factory drain holes open. A blocked drain can hold water and speed corrosion.
Wax Injection Access Points
| Access Point | Tool | Best Use |
|---|---|---|
| Factory drain hole | Wax gun with flexible wand | Rocker panels, doors, lower body seams |
| Service opening | Extension hose | Quarter panels, tail panels, inner braces |
| Slot or seam opening | Fan-spray cavity wand | Lap seams and enclosed flanges |
| Drilled access hole | Injection nozzle plus body plug | Closed repairs with no factory opening |
| Hidden pocket | 360-degree spray probe | Deep cavities where direct brushing is impossible |
Long-Term Cavity Protection
Inspect cavity wax periodically, especially on vehicles exposed to winter salt, coastal air, mud, or frequent washing. Reapply when the coating looks thin, dry, cracked, or washed away.
Do not spray wax onto areas that still need primer, filler, seam sealer, adhesive, or paint. Wax is a final hidden-area corrosion step, not a base for later coatings.
Brush or Spray Epoxy Primer on Bare Steel
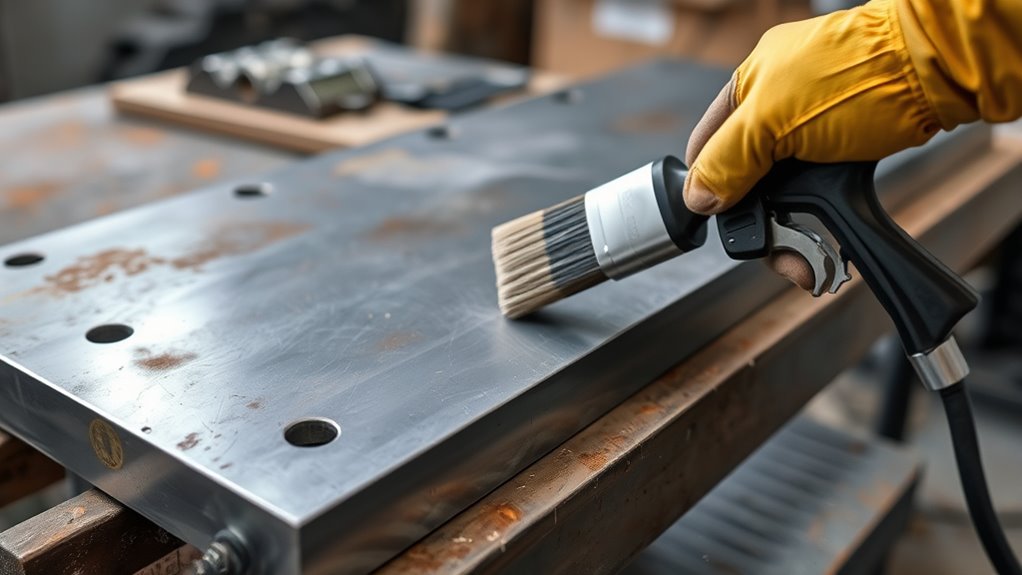
Apply epoxy primer after the weld area is clean, dry, and cool. If the steel has been sitting exposed, inspect it again before priming. Even light flash rust should be removed so the primer bonds to metal, not oxidation.
Spraying usually gives the smoothest film and better coverage around edges. Brushing can work for small hidden repairs, brackets, floor patches, and areas that will not be visible, but brush marks and uneven film build are more likely.
Mix two-part epoxy primer exactly as directed. Respect induction time, pot life, spray-gun setup, film thickness, flash time, and recoat window. If the primer’s recoat window closes, you may need to scuff it before filler, surfacer, sealer, or topcoat.
Note: Temperature and humidity affect coating cure. Manufacturer directions for automotive fillers and putties commonly warn that drying time changes with humidity, low temperature, and heavy application thickness.
Apply Body Filler Over Cured Epoxy Primer
Body filler can be applied over epoxy primer when the epoxy has cured or flashed according to the primer maker’s instructions and the surface is prepared with the correct grit. This method keeps a corrosion-resistant barrier between the steel and filler.
Scuff the epoxy to remove gloss if the product sheet requires it. Blow off sanding dust, wipe with a compatible cleaner if allowed, and let the surface dry before spreading filler.
Mix filler accurately and apply it in thin layers. Press the first pass firmly into the repair so it keys into the sanded surface, then build shape gradually. Heavy filler can shrink, crack, trap heat, or take longer to cure.
After shaping, seal the repair again as required by your paint system. Bare filler can absorb moisture, so do not leave it exposed longer than the product maker allows.
Recoat Before Moisture Can Set In
Do not leave cleaned bare steel overnight if you can avoid it. Prime the repair the same day, and sooner in humid shops, cold garages with condensation, or coastal areas.
If you cannot prime right away, keep the part indoors, dry, and off damp concrete. Do not touch the cleaned metal with bare hands because skin oils and salts can cause adhesion problems and small rust spots.
Before recoating, inspect the surface under good light. Remove any orange haze, dust, or residue, then clean again. The cleaner the steel is when epoxy goes on, the better the coating system can protect it.
Add Surfacer, Sealer, and Topcoat
After epoxy primer has cured or flashed as directed, build the finish with surfacer, sealer, and topcoat. Each layer has a job.
- Surfacer fills sanding scratches, minor waves, and small imperfections.
- Sealer creates a uniform base and helps isolate repaired areas before color or final coating.
- Topcoat provides weather, UV, chip, and appearance protection.
Sand surfacer smooth before sealer. Keep edges and seams covered, but do not overload them. Thick paint at seams can crack, while thin paint at sharp edges can rust early.
For exterior automotive repairs, use a coating system designed for the exposure. A temporary shop primer is not the same as a finished exterior system.
Troubleshooting Common Coating Problems After Welding
If the repair fails early, the cause is usually surface contamination, missed rust, poor timing, or incompatible products. Use the symptoms below to correct the process before the final paint goes on.
- Flash rust appears before primer: Abrade the surface again, clean it, dry it, and prime sooner.
- Primer peels or scratches off easily: The metal may have oil, dust, oxide, or the wrong sanding profile. Strip the loose coating and prep again.
- Fisheyes appear: Silicone, oil, wax, or grease is present. Stop and clean the surface instead of adding more paint.
- Pinholes show after filler: Spread filler in thinner passes and press the first coat firmly into the sanded surface.
- Brush marks show in epoxy: Use a spray application on visible areas, or sand and surfacer-prime after the epoxy cures.
- Rust returns at seams: Check whether the seam was sealed and whether cavity wax reached the hidden side.
- Wax drips from drains: Wipe excess, keep drain paths open, and avoid spraying wax before paint or sealer work is done.
Frequently Asked Questions
How do you protect metal after welding?
Let the weld cool, remove slag and spatter, grind or wire-brush the heat-affected area, degrease, dry the metal, then apply epoxy primer. Use weld-through primer on mating faces before welding and cavity wax inside hidden seams after the repair is sealed.
Will WD-40 prevent rust on bare metal?
WD-40 can displace moisture and leave temporary rust-preventive film, but it is not a durable coating system for welded repairs. Use it only for short-term storage or light protection, then remove it completely before primer, filler, sealer, or paint.
What is the best sealer for bare metal after welding?
For clean bare steel, epoxy primer is usually the best first sealer because it bonds well and creates a moisture-resistant base. Seam sealer, surfacer, sealer, topcoat, and cavity wax can then be added in the correct order for the repair.
How long does it take for a metal weld to cure?
A metal weld does not cure like paint or adhesive. It solidifies as it cools, but the part may still be hot, stressed, or unsafe to handle right away. Primers, fillers, seam sealers, and topcoats have their own cure times, so follow each product’s technical data sheet.
Can you put body filler directly on bare welded metal?
Some filler systems allow direct-to-metal use, but many collision and restoration repairs last longer when clean steel is sealed with epoxy primer first. Check the filler and primer instructions, scuff the epoxy if required, and apply filler within the approved window.
Should you use rust converter after welding?
Use rust converter only when some tight residual rust cannot be fully removed and the coating system allows it. On fresh welds and clean bare steel, mechanical cleaning followed by epoxy primer is usually the better route.
Conclusion
You have a short window to protect bare metal after welding. Clean the weld area, remove slag, spatter, rust, mill scale, and grease, then seal the steel before moisture can settle in. Use weld-through primer only on mating faces before welding, epoxy primer on clean bare steel after welding, and cavity wax inside hidden sections once the repair is sealed.
Do not guess on coating compatibility. Follow the product data sheets for grit, mix ratio, flash time, film build, recoat window, and cure time. That disciplined order gives the weld the best chance to stay strong, dry, and rust-free.
Sources
- OSHA 1910.252, General Requirements for Welding, Cutting, and Brazing — supports fire prevention, guarding, fire watch, and eye protection guidance.
- NIOSH, Welding Fumes and Manganese — supports fume, manganese, and confined-space welding exposure cautions.
- AMPP, What Is Corrosion? — supports corrosion basics and the role of protective coatings.
- 3M Acryl Putty Product Directions — supports clean primed surface guidance, thin application, and variable dry times based on conditions.


