
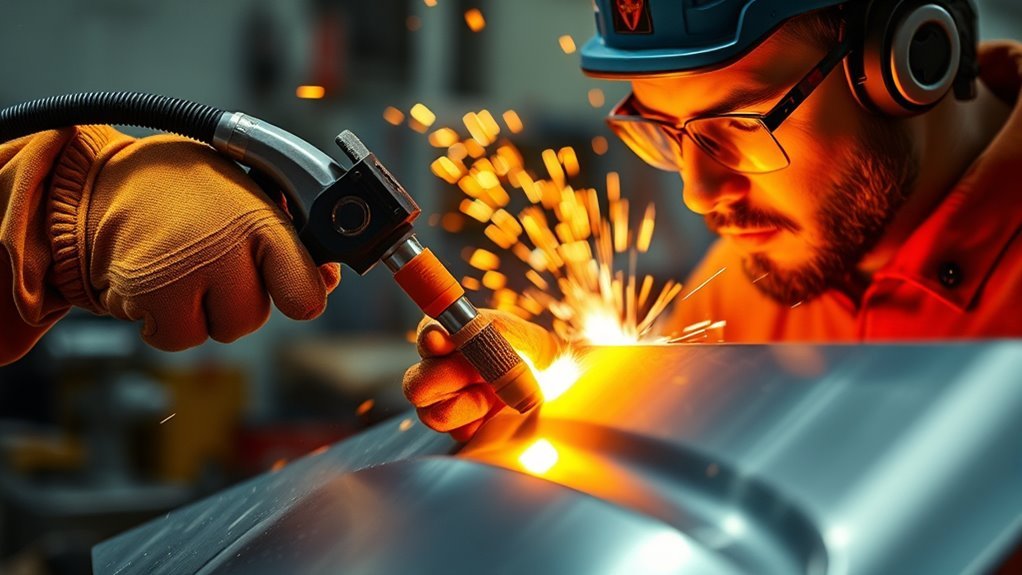
Warped welded panels can throw off fit, alignment, and finish quality, but heat is not always the right cure. Before you warm the metal, identify the alloy, panel function, coating, and repair limits. This guide focuses on controlled shrinking of non-structural, weldable low-carbon steel panels. Structural parts, vehicle safety structures, aluminum, and unknown or heat-treated metals need an approved repair procedure.
Quick Answer
To straighten a warped welded steel panel with heat, first confirm that heating is allowed. Mark the stretched high area, support the panel without overloading it, apply the smallest approved heat pattern, monitor temperature with a reliable tool, let the metal cool as specified, and measure again before repeating.
Key Takeaways
- Heat straightening shrinks selected areas through restrained expansion followed by contraction during cooling.
- Do not heat an automotive, structural, heat-treated, or unknown panel until the OEM, engineer, or qualified repair procedure allows it.
- Use temperature crayons, a contact probe, or a correctly configured infrared instrument. Do not judge temperature by color alone.
- Ambient-air cooling is the safest default. Water or forced cooling belongs only in a documented procedure for the exact material.
- Make one small correction, let the panel cool, measure it, and stop if the metal cracks, oil-cans, overcorrects, or moves unpredictably.
At a Glance
| Time Required | No fixed time. Allow for repeated heat, full-cool, and measurement cycles without rushing. |
| Difficulty | Advanced. Practice on matching scrap before touching the finished panel. |
| Tools Needed | Approved heat source, temperature indicator, straight edge, marker, clamps or fixture, hammer and dolly when appropriate, PPE, ventilation, and fire-control equipment. |
| Cost | Varies with the equipment you already own. A one-off professional repair may cost less than buying a complete safe setup. |
What’s in This Article
- Is Heat Straightening Safe for This Panel?
- How Warping Occurs in Welded Panels
- What You Need for Heat Straightening
- Before You Begin
- Heat Straightening Step by Step
- Techniques for Maintaining Control
- Troubleshooting Common Problems
- How to Prevent Warping Next Time
- Top Mistakes to Avoid
- When to Seek Professional Help
- Frequently Asked Questions
Is Heat Straightening Safe for This Panel?
Start with material identification, not the torch. Heat straightening may be suitable for a simple warp in a non-structural low-carbon steel panel, but it is not a universal repair method.
- Automotive body or frame parts: Check the vehicle maker’s body repair manual first. Many advanced high-strength and ultra-high-strength steels have strict heat limits or prohibit heated straightening. For example, I-CAR’s summary of General Motors guidance shows that permission depends on the steel grade, while recent Honda/Acura repair guidance prohibits heat during straightening of specified high-strength structures.
- Load-bearing or code-controlled parts: Do not improvise. A qualified engineer or welding professional should specify the heating pattern, temperature limit, restraint, cooling method, and inspection.
- Aluminum, stainless steel, cast iron, and unknown alloys: Each responds differently to heat. This general steel-panel procedure does not transfer safely to those materials.
- Bonded, coated, or seam-sealed panels: Heat can damage adhesive, corrosion protection, paint, sealer, wiring, trim, and nearby components even when the steel itself remains sound.
Warning: Stop if you cannot positively identify the material or confirm that heat is permitted. A panel can look straighter while losing strength, corrosion protection, or crash performance.
How Warping Occurs in Welded Panels: Key Causes Explained

Welding places intense heat into a narrow zone. The hot metal expands, but the cooler surrounding metal restrains it. As the weld and heat-affected zone cool, they contract. If the contraction is uneven, the panel bends, twists, cups, or develops a loose oil-can area.
The common distortion modes include longitudinal shrinkage along the weld, transverse shrinkage across it, angular distortion through the panel thickness, bowing, dishing, buckling, and twisting. The TWI overview of weld distortion explains how non-uniform contraction creates these different shapes.
Heat straightening does not push a panel flat. It creates a controlled shrink in selected metal so the surrounding panel pulls toward the intended shape.
Thin sheet moves quickly because it has little mass and stiffness. Poor fit-up, excessive weld size, long continuous beads, one-direction welding, and uneven cooling add more shrinkage than the panel can resist. Air movement or a cold shop may change cooling behavior, but weld size, heat input, joint geometry, restraint, and weld sequence are usually the more useful factors to control.
What You Need for Heat Straightening: Tools and Materials
Choose tools around the approved repair procedure. An oxy-fuel torch can deliver focused heat, but it is not automatically the correct tool. Some procedures permit induction heaters, resistance tools, shrinking discs, copper heating tools, or heat guns while limiting or banning open flame.
- Approved heat source: Use the method allowed for the exact material and component. If an oxy-fuel torch is permitted, use the correct tip and review proper flame adjustment.
- Temperature control: Use temperature-indicating crayons, a contact thermocouple, or another calibrated method listed in the procedure. An infrared thermometer can help only when its range, distance-to-spot ratio, and emissivity settings suit the surface.
- Measurement tools: Use a straight edge, square, contour gauge, feeler gauges, tram gauge, or laser appropriate to the panel.
- Markers: Mark the weld line, high and low areas, heat-zone boundaries, and reference points that will survive handling.
- Support and restraint: Use a stable bench, fixture, clamps, dollies, or controlled jacking equipment. Restraint must guide movement without overstressing the hot metal.
- Surface-preparation tools: Remove dirt, rust, paint, undercoating, seam sealer, and unsafe coatings from both sides of the heat zone. Follow suitable zinc removal techniques and provide proper fume control.
- Safety equipment: Wear flame-resistant clothing, gloves, suitable eye protection, and other PPE required for the heat source. Keep ventilation, an extinguisher, and a trained fire watch available when conditions require them.
Note: Shiny bare metal can give a falsely low infrared reading because of low emissivity. Fluke’s infrared measurement guidance recommends accounting for emissivity, target size, and reflective surfaces. When the procedure calls for temperature crayons or contact measurement, use them.
Warning: Open-flame work can ignite hidden insulation, undercoating, seam sealer, fuel residue, or material on the opposite side of the panel. Follow OSHA hot-work precautions, inspect concealed spaces, remove or shield combustibles, and maintain a fire watch when required.
Products Worth Considering

Complete Kit: Medium-Duty Cutting & Welding - This versatile Oxy Acetylene Torch Kit is built for medium-duty projects. Achieve clean cuts up to 6 inches and precise welding/brazing on materials up to 1/2 inch thick with the appropriate tips

Powerful Flame Temperature Heat up to 5252°F (2900°C)

Complete Kit: Ideal for HVAC & Light Duty Brazing - Designed specifically for light-duty brazing and welding jobs, this kit is your go-to tool for HVAC repairs, metal crafts, and other precision tasks. Its portable design is perfect for on-the-go professionals
Before You Begin: Check the Panel and Plan the Repair
Do not set a universal temperature or number of heat cycles. The safe limit depends on the alloy, strength grade, thickness, prior heat treatment, coating, component function, and governing repair procedure.
- Identify the material and component. Confirm the alloy or steel grade and decide whether the panel is cosmetic, structural, bonded, or part of a safety system.
- Inspect both sides. Look for cracks, torn welds, thinning, stretched edges, hidden reinforcements, wiring, hoses, fuel lines, adhesives, undercoating, and trapped flammable residue.
- Record the starting shape. Measure gaps, diagonals, crown, edge position, and high or low areas. Photograph and mark reference points.
- Find the stretched zone. Do not assume the weld itself is the only problem. A broad bulge may contain stretched metal beyond the bead.
- Choose the correction method. Decide whether the job needs cold planishing, hammer-and-dolly work, a shrinking disc, controlled heat, cutting and rewelding, or replacement.
- Plan the heat pattern and cooling method. Match them to the direction of movement you need and to the written limits for the material.
- Practice first. If possible, reproduce the joint on matching scrap and test the heat source, temperature indicator, and sequence.
Pro Tip: Draw a simple cross-section of the warp before heating. Mark the convex side, concave side, weld, stretched zone, supports, and intended movement. If the drawing does not make the heat location clear, the repair plan is not ready.
Heat Straightening: Step-by-Step Process to Correct Warps
Use this sequence only after confirming that the panel may be heated. It is a general workflow for a small, non-structural low-carbon steel panel, not a substitute for an OEM, code, or engineered procedure.
- Measure and mark the warp. Locate the high area, low area, weld line, and reference points. Record the gap under a straight edge or the offset from the target plane.
- Clean the work zone. Expose clean metal on both sides far enough to reveal coatings, cracks, and heat-sensitive materials. Basic clean base metal practices also help you inspect the joint before correction.
- Support the panel. Place the panel on a stable fixture. Apply only the restraint or mechanical force allowed by the plan. Do not clamp so hard that the hot metal yields under the fixture.
- Select the smallest effective pattern. Use a small spot or short line for localized sheet-metal stretch. Use vee, strip, or combined patterns only when the part, thickness, and qualified procedure call for them.
- Apply heat progressively. Keep the torch or approved heater moving. Bring the intended zone to the specified temperature without letting one point run far hotter than the rest.
- Verify temperature. Check with the approved indicator. Do not wait for visible red color on thin sheet, and do not trust an uncorrected infrared reading from shiny metal.
- Let the metal move. Maintain the planned support or light corrective force during heating, then allow the intended contraction during cooling. Do not hammer glowing or overheated metal unless a qualified procedure specifically requires it.
- Cool as specified. Ambient air is the safest default. Do not press a wet rag onto hot unknown steel or quench it with water unless the written procedure permits that exact cooling method and temperature range.
- Let the panel cool fully enough to measure. Remove force only as the repair plan directs. Check the same reference points after the panel settles.
- Repeat in small increments. Shift or resize the heat zone only when the measurements show why another cycle is needed. Stop before the panel passes the target shape.
- Inspect and refinish. Check for cracks, loosened welds, thinning, new oil-canning, damaged coatings, and hidden heat damage. Dress only proud areas that truly need it, then restore corrosion protection and finish coatings.
Products Worth Considering

Accurate, fast, low-cost method for measuring surface temperatures
Accurate, fast, low-cost method for measuring surface temperatures
Accurate, fast, low-cost method for measuring surface temperatures
Choose the Correct Heat Pattern
Heat patterns are not interchangeable. The current FHWA heat-straightening manual describes spot, line, vee, edge, and strip patterns for engineered steel work. Those patterns illustrate the mechanics, but structural bridge procedures should not be copied blindly onto thin automotive or decorative sheet.
- Spot heat: A small circular zone used for a local bulge, dish, or stretched high spot. Keeping the spot small reduces the risk of creating a larger buckle.
- Line heat: A controlled pass used to create bending across a narrow path. For a simple plate bend, the heated side and travel direction must match the required rotation.
- Vee heat: An engineered wedge-shaped pattern used mainly on heavier plate or structural members. It needs controlled geometry, temperature, restraint, and inspection.
- Strip heat: A rectangular or band-shaped zone used for broader local damage or as part of a combined pattern.
Cool the Panel Without Creating a Second Problem
Cooling is part of the straightening cycle, not an afterthought. Rapid cooling from a high temperature can create steep temperature gradients and may alter material properties. For unknown steel, heat-treated steel, and safety-related parts, use only the specified method.
Ambient air gives the most predictable default. Compressed air, water mist, wet rags, or direct water may be allowed in some controlled structural or sheet-metal procedures, but they are not universal shortcuts. Steam can burn you, runoff can spread contaminants, and uneven cooling can create a new hard spot, buckle, or residual stress pattern.
Measure After Every Complete Cycle
Use the same tool, points, panel support, and measurement direction each time. A changing setup can make the panel appear better or worse when the shape has not actually changed.
- Check edge alignment and diagonal dimensions.
- Measure the maximum gap under a straight edge.
- Press lightly around the crown to detect oil-canning.
- Compare both sides when the panel should be symmetrical.
- Record each heat location so you do not repeatedly overwork one area.
Techniques for Maintaining Control During Heat Application

Control comes from small heat zones, known temperature limits, stable support, repeatable measurement, and patience. It does not come from holding the flame in one place until the panel suddenly moves.
- Work from evidence: Heat the identified stretched or convex zone according to the repair plan. Do not use “always heat the backside” as a rule.
- Keep the source moving: A stationary torch creates a sharp hot spot that can buckle thin sheet.
- Use a neutral, correctly adjusted flame when oxy-fuel is approved: An incorrect flame can add soot, oxidation, or excess localized heat.
- Limit mechanical force: Restraint should guide contraction, not force the hot panel beyond its reduced strength.
- Track every cycle: Mark completed spots and record the result before adding more heat.
- Protect surrounding systems: Move or shield hoses, wiring, trim, glass, adhesives, and painted surfaces. Do not rely on a nylon sleeve as a substitute for distance, removal, or a rated welding blanket.
Pro Tip: Stop while the correction still looks small. The panel can continue moving as heat spreads and the zone cools, so measuring too early often leads to overcorrection.
Troubleshooting Heat Straightening Problems
No movement after a heat cycle
Let the panel cool and confirm that the heat reached the intended zone. Recheck the warp direction, restraint, temperature indicator, and pattern size. Do not respond by simply heating hotter. The metal may be constrained in the wrong direction, the stretched zone may be elsewhere, or the repair may need a different method.
The panel oil-cans after straightening
Oil-canning usually means the sheet still contains stretched metal or has lost its original crown. Map the loose area with light hand pressure. Small controlled shrinking and planishing may help on approved low-carbon sheet, but a large unstable area often needs an experienced panel technician or replacement.
The panel moved past the target
Stop heating and let it cool completely. Re-measure before attempting a reverse correction. Alternating heat back and forth can work-harden, thin, or destabilize the panel and may turn a minor warp into permanent damage.
Paint, seam sealer, or undercoating starts smoking
Stop immediately, shut down the heat source safely, and inspect both sides. Smoking coating means the hot zone or heat spread reached material that should have been removed or protected. Ventilate the area and reassess the fire and fume hazards before continuing.
A crack, torn weld, or sharp crease appears
Stop the repair. Do not heat over the defect and hope it closes. The part needs crack assessment, weld repair, metal replacement, or professional inspection before more straightening.
How to Prevent Welded Panels From Warping Again
The easiest warp to straighten is the one you prevent. Reduce total shrinkage and spread it evenly during the original weld.
- Fit the joint closely so the weld does not need to bridge large gaps.
- Use the smallest weld that meets the design. Review the relationship between plate thickness and maximum fillet weld size instead of over-welding.
- Place evenly spaced tacks before filling the joint.
- Use short, separated welds on thin sheet instead of one continuous bead.
- Alternate locations and sides so shrinkage does not build in one direction.
- Use back-step or skip sequences when appropriate.
- Keep heat input as low as the qualified weld still allows.
- Allow the panel to cool between short welds without blasting one area with water.
- Use backing bars, chill bars, or fixtures only when they suit the joint and do not trap the panel in a stressed shape.
Top Mistakes to Avoid When Straightening Warped Panels
- Heating an unknown material: You may weaken high-strength, heat-treated, bonded, or specialty metal without a visible warning.
- Treating oxyacetylene as mandatory: The approved method may limit open flame or require a different heat source.
- Using visible color as the temperature gauge: Lighting, scale, alloy, and surface condition make color unreliable, especially on thin sheet.
- Quenching by habit: A wet rag or water spray can create thermal shock, steam burns, contamination, and an unwanted hardness or stress change.
- Heating the wrong side: The correct side depends on the stretched zone, bend direction, material, and heat pattern.
- Over-clamping or over-jacking: Hot steel has lower strength, so excessive force can add a new permanent bend.
- Repeating heat without records: Multiple cycles in one area can change properties and make the response less predictable.
- Grinding the panel flat: Heavy grinding can hide the high spot by thinning the metal instead of correcting the shape.
- Applying steel advice to cast iron: Cast iron needs a different repair strategy. Review material-specific heat absorption issues before attempting any cast repair.
- Ignoring the opposite side: Heat can ignite coatings, insulation, adhesives, or debris that you cannot see from the working face.
When to Seek Professional Help for Welding Distortions
Bring in a qualified welding, collision-repair, bodywork, or structural professional when any of these conditions apply:
- The panel is part of a frame, chassis, suspension mount, roll structure, pressure vessel, lifting device, bridge, building, machine guard, or other safety-critical assembly.
- You cannot confirm the alloy, strength grade, heat treatment, or OEM repair limits.
- The warp affects mounting points, door or hood gaps, wheel alignment, drivetrain alignment, sealing surfaces, or load paths.
- The metal has cracks, tears, torn welds, deep creases, thinning, corrosion, or previous heat-straightening repairs.
- The panel needs strong jacking force, broad heating, repeated cycles, or a vee/strip pattern.
- The part is aluminum, advanced high-strength steel, ultra-high-strength steel, quenched-and-tempered steel, stainless steel, or cast iron.
- You lack temperature-control tools, ventilation, fire protection, or oxy-fuel training.
Safety Disclaimer: This article provides general information for non-structural steel-panel work. It does not replace an OEM body repair manual, a welding procedure specification, engineering approval, code requirements, hands-on training, or professional inspection. Follow the heat-source manufacturer’s instructions and applicable hot-work rules.
Frequently Asked Questions
How do you fix a warped panel from welding?
First identify the material and confirm that heat is allowed. Measure the warp, locate the stretched area, support the panel, apply the smallest approved heat pattern, cool it as specified, and measure again. Cold planishing, cutting and rewelding, or replacement may be safer than heat for some panels.
How do you heat metal to straighten it?
Use a heat source and pattern approved for the material. Keep the heat moving, monitor temperature with the specified tool, and apply only the restraint needed to guide movement. The correct spot, line, vee, or strip pattern depends on the damage and part thickness.
How do you correct distortion after welding?
Minor distortion may respond to planishing, controlled restraint, localized shrinking, or a combination of these methods. Severe or structural distortion needs a planned repair that accounts for steel grade, weld condition, load path, temperature limits, and inspection.
Can you heat treat welded steel?
Some welded steels receive controlled preheat, postheat, or postweld heat treatment, but that is different from informal torch straightening. The correct cycle depends on the alloy, thickness, weld procedure, code, and service conditions. Do not improvise a heat-treatment cycle.
Can heat straightening make a panel worse?
Yes. Overheating, heating the wrong zone, excessive restraint, rapid cooling, or repeated cycles can create buckling, oil-canning, cracks, property changes, or overcorrection. Stop when the panel moves unpredictably or passes the target shape.
How hot should the panel get?
There is no universal temperature for welded panels. Use the limit in the OEM repair manual, welding procedure, engineering plan, or material specification. If no reliable limit is available, do not heat the part.
Should you cool a heated panel with water?
Use water, water mist, or a wet rag only when the written repair procedure permits it for that material and temperature range. Ambient-air cooling is the safest general default. Direct quenching of unknown or heat-treated steel can create harmful property changes and thermal stress.
Can you use a propane torch instead of oxyacetylene?
Heat output alone does not decide whether a torch is suitable. The approved process must provide the required heat pattern and temperature control without damaging the part. Some repairs prohibit open flame entirely, so follow the material- or vehicle-specific procedure.
Conclusion
Heat straightening can correct a welded steel panel when the material is known, the part is suitable, and every heat cycle is measured and controlled. The safest workflow is to identify the stretched zone, use the smallest approved pattern, monitor temperature, cool as specified, and recheck the panel after it settles.
Do not turn a cosmetic warp into a strength or fire problem. When the panel is structural, heat-treated, bonded, made from advanced steel, or simply unknown, stop and use an OEM procedure or qualified professional.
Sources
- Federal Highway Administration, Manual for Heat Straightening, Heat Curving and Cold Bending of Bridge Components — engineered heat patterns, temperature control, restraint, cooling, and inspection principles.
- OSHA 29 CFR 1910.252, General Welding, Cutting, and Brazing Requirements — hot-work fire prevention, PPE, ventilation, coatings, and concealed-space hazards.
- OSHA 29 CFR 1910.253, Oxygen-Fuel Gas Welding and Cutting — oxygen-fuel equipment, cylinders, piping, hoses, and operating safeguards.
- TWI, Distortion: Types and Causes — longitudinal, transverse, angular, bowing, dishing, buckling, and twisting mechanisms.
- I-CAR, Straightening and Heat: General Motors — examples of OEM material-specific heat restrictions.
- Fluke, How to Get Great Results With an Infrared Thermometer — emissivity, reflective-metal, target-size, and measurement-distance limitations.




