Welding a fender apron on a classic car takes more than cutting out rusty metal and running a bead. The apron helps position nearby panels and often ties into the radiator support, shock tower area, inner fender, or front structure. Start with careful inspection, safe prep, accurate measurements, and small welds that control heat.
Quick Answer
To weld a fender apron on a classic car, remove rusted metal, drill factory spot welds, test-fit the replacement apron, clamp it in alignment, then use tack welds, plug welds, and short stitch welds. Keep heat low, check panel fit often, and seal every bare seam after welding.
Key Takeaways
- Measure and mock up the fender, hood, door, radiator support, and nearby structure before final welding.
- Use plug welds where factory spot welds were removed, and use short stitch welds to limit heat distortion.
- Clean to bare metal only where needed, apply weld-through primer on hidden flanges, and protect finished seams with primer, seam sealer, and cavity wax.
- Do not weld near fuel, wiring, old coatings, or flammable trim until the area is made safe and well ventilated.
At a Glance
| Time Required | A full day for a small patch; 1 to 3 days for apron replacement with fitting, welding, grinding, and sealing |
| Difficulty | Intermediate to advanced sheet-metal repair |
| Tools Needed | MIG welder, shielding gas, sheet-metal wire, spot weld cutter, grinder, clamps, drill, body hammer, dolly, measuring tools, PPE |
| Cost | About $75 to $400 for patch metal, abrasives, wire, primer, seam sealer, and coatings; more if a full apron panel is needed |
Warning: Welding on a car body is hot work. Disconnect the battery, move fuel and vapor hazards away from the weld area, protect wiring and glass, remove flammable trim, and keep a fire extinguisher nearby. Follow OSHA welding, cutting, and brazing safety guidance, and use ventilation or fume extraction when welding old coated metal.
Identifying Common Fender Apron Problems Before Welding
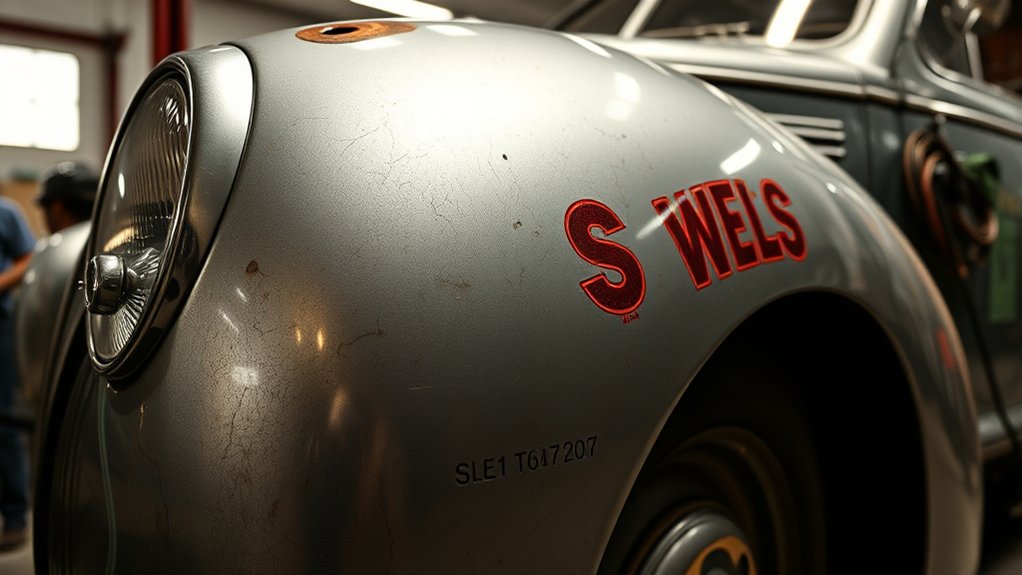
Before welding your fender apron, inspect the whole repair area instead of only the hole you can see. Classic cars often rust at overlapping seams, battery tray areas, splash zones, spot-weld flanges, and the lower sections near road spray. On some vintage Mustangs and similar cars, small pitted rust spots can look like “chicken pox” across the apron surface.
Check the front apron, shock tower area, radiator support, frame rail edge, hood hinge area, and inner fender seams. If the rust reaches a suspension pickup point, frame rail, or shock tower, stop and check the vehicle service manual before welding. That type of repair may need a fixture, exact measurements, or a trained collision repair technician.
Mark every factory spot weld before cutting. Most apron removal starts by drilling spot welds with a spot weld cutter, separating the old flange, and cleaning the mating surfaces. Save reference points before removing metal, including bolt holes, bracket locations, hood hinge marks, fender gaps, and radiator support measurements.
Note: Take photos before disassembly. Pictures of wiring clips, ground straps, brackets, seam sealer paths, and bolt locations make reassembly much easier.
What Tools Do You Need for Fender Apron Welding?
Fender apron welding needs sheet-metal tools, measuring tools, and safety gear. A small MIG welder with shielding gas is usually the easiest choice for steel body panels because it gives good control on thin metal. Use the wire size and settings recommended by your welder for the panel thickness, then test on scrap metal before touching the car.
- MIG welder with shielding gas: Use short-circuit settings for thin steel body panels.
- Sheet-metal wire: Many body-panel repairs use small wire such as 0.023 or 0.024 inch, depending on the machine and panel thickness.
- Spot weld cutter and drill: Needed to remove factory spot welds without destroying the lower panel.
- Angle grinder and discs: Use cut-off wheels, flap discs, and small grinding discs carefully so you do not thin the surrounding metal.
- Clamps and temporary fasteners: Panel clamps, locking pliers, Cleco fasteners, and sheet-metal screws help hold alignment.
- Body hammer and dolly: Useful for small shape corrections before welding.
- Measuring tools: Tape measure, straightedge, tram gauge, marker, and factory reference dimensions when available.
- Rust protection products: Weld-through primer for hidden flanges, epoxy primer, seam sealer, and cavity wax or rust preventive coating.
- PPE: Welding helmet, safety glasses, welding gloves, flame-resistant clothing, hearing protection, and respiratory protection when needed.
Do not rely on a grinder and welder alone. Apron repair is a fit-up job first and a welding job second. If the panel is clamped in the wrong position, strong welds will only lock in bad gaps.
Preparing the Area for Welding and Repairs
Good preparation prevents weak welds, poor panel fit, and rust returning under the repair. Work slowly here. The time you spend cleaning, measuring, and test fitting usually saves hours of grinding and rework later.
Tools Needed for Preparation
Gather your spot weld cutter, drill, grinder, wire wheel, scraper, clamps, temporary fasteners, marker, measuring tools, and PPE before you cut. Keep a fire extinguisher close. Remove the battery or disconnect it, protect nearby glass, and move wiring, hoses, carpet, insulation, and plastic parts away from the heat zone.
If the car has old paint, unknown coatings, undercoating, or seam sealer, avoid breathing the smoke or dust. The CDC/NIOSH welding fumes guidance notes that welding fumes are made of metals and may include manganese. Use ventilation, fume extraction, and proper respiratory protection when the coating history is unknown.
Surface Cleaning Techniques
Clean the weld area to bright bare steel where the weld will be made. Remove rust, paint, grease, seam sealer, and undercoating from both sides of the joint when you can reach them. Oil, paint, and trapped rust can cause porosity, weak fusion, and future corrosion.
- Expose the joint: Strip the weld zone with a clean abrasive disc or wire wheel.
- Remove spot welds: Drill factory spot welds without cutting through the support panel below.
- Dress the flange: Grind high spots flat and straighten bent edges with a hammer and dolly.
- Protect hidden overlap areas: Apply weld-through primer only on mating flanges that will be hidden after welding.
- Leave weld edges clean: Keep the exact weld point clean enough for a stable arc.
Pro Tip: Make a few test welds on scrap from the old apron or matching sheet steel. Tune wire speed, voltage, and travel speed until the weld is flat, fused, and not burning through.
Importance of Proper Alignment
Proper alignment of the fender apron with nearby panels is critical. The apron can affect hood fit, fender gaps, radiator support position, bumper bracket alignment, and accessory mounting. Before welding, loosely install or mock up the fender, hood, door edge, radiator support, and any braces that depend on the apron.
Use temporary screws, Cleco fasteners, or clamps so you can adjust the panel. Check gaps and measurements more than once. If the replacement apron has shipping bends or stamping differences, correct them before welding. A snug fit reduces the chance of warping and helps plug welds fill cleanly.
How to Tack, Plug, and Stitch Weld a Fender Apron
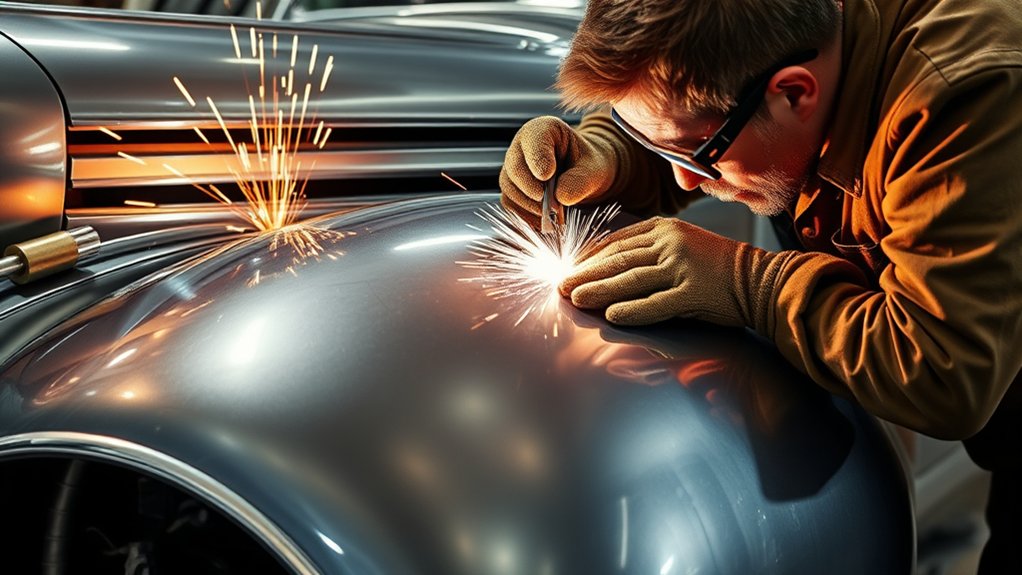
Once the apron fits correctly, start with small tack welds. Do not run a long continuous bead across thin body metal. Long welds put too much heat into one area and can pull the apron out of shape. Use tack welds to hold the panel, plug welds to replace factory spot welds, and short stitch welds where a seam must be joined.
Tack Welding Basics
Tack welding holds the fender apron in position while you confirm alignment. Place tacks at corners, flange ends, and key reference points. After the first few tacks, stop and check the fender, hood, and radiator support fit again.
- Start at reference points: Tack areas that control alignment first, such as bolt-hole zones and flange ends.
- Spread the heat: Move around the panel instead of welding one area at a time.
- Recheck fit: If a gap changes, cut the tack and correct it before adding more welds.
Plug Welding Factory Spot Weld Locations
Factory aprons were often attached with spot welds. When you drill those welds out, plug welds are a common way to attach the replacement panel in the same flange areas. Drill or punch clean holes in the top panel, clamp the panels tight, then fill each hole with weld so it fuses to the lower panel.
Good plug welds need tight contact. If the panels have a gap, the weld can sit on top without bonding well to the lower layer. Clamp close to each plug weld, clean the hole edge, and grind only enough to smooth the finished weld without thinning the panel.
Stitch Welding Techniques
For seam areas that require a bead, use stitch welding instead of one long pass. Make a short weld, then move to another area and let the first spot cool. Keep the heat low enough that the surrounding metal does not oil-can, buckle, or pull the apron out of position.
- Use short welds about 1/2 inch or less when joining thin sheet metal.
- Skip around the seam so heat spreads across the panel.
- Let each area cool before adding the next stitch.
- Use compressed air carefully if needed, but avoid shocking the metal with extreme cooling.
Achieving Strong Joints
Strong apron welds come from clean metal, tight fit-up, correct machine settings, and steady movement. A tall blob on top of the panel does not mean the weld has fused. Look for full tie-in at the edges, no pinholes, no burn-through, and no loose lap areas.
After welding, grind only what you need for clearance and appearance. Do not grind the weld so thin that you weaken it. If you find pinholes or gaps, clean the spot and repair it with small welds rather than burying the defect under filler or seam sealer.
Techniques for Proper Fender Alignment During Welding
Alignment should be checked before, during, and after welding. The fender apron may look correct by itself but still cause poor hood gaps or fender bolt alignment. Mock up nearby panels before final welding whenever possible.
- Measure before cutting: Record diagonal measurements, bolt-hole spacing, and support locations.
- Use reference holes: Line up factory holes and brackets before clamping the apron tight.
- Install temporary fasteners: Use screws or Clecos so the apron can be adjusted before final welding.
- Check the outer panels: Test fit the fender and hood before locking the apron in place.
- Watch for movement: Recheck measurements after tack welding and again after plug welding.
If the car was hit in the front, do not assume the old apron position was correct. Cross-measure the engine bay and compare both sides. A new panel welded to a bent structure will not fix the underlying alignment problem.
Top Mistakes to Avoid During Fender Apron Welding
Most fender apron welding problems come from rushing the prep or using too much heat. Avoid these mistakes to get a cleaner repair.
- Skipping measurements: Cutting first and measuring later can ruin hood and fender alignment.
- Welding over dirty metal: Paint, rust, oil, and seam sealer can cause porosity and weak welds.
- Using long beads on thin steel: Long welds can warp the apron and pull nearby panels out of place.
- Forgetting plug weld fit-up: Plug welds need tight clamping so the weld bonds both layers.
- Grinding too much: Over-grinding can thin the weld and surrounding sheet metal.
- Leaving seams unsealed: Bare overlapping metal can trap moisture and rust again.
- Ignoring hidden fire risks: Old undercoating, insulation, seam sealer, and debris can smolder after welding.
Warning: If the apron repair reaches a frame rail, shock tower, suspension mount, steering box area, or crash-load path, follow the vehicle service manual or use a qualified repair shop. These areas affect vehicle structure and safety.
Post-Welding Inspection for Fender Apron Repairs
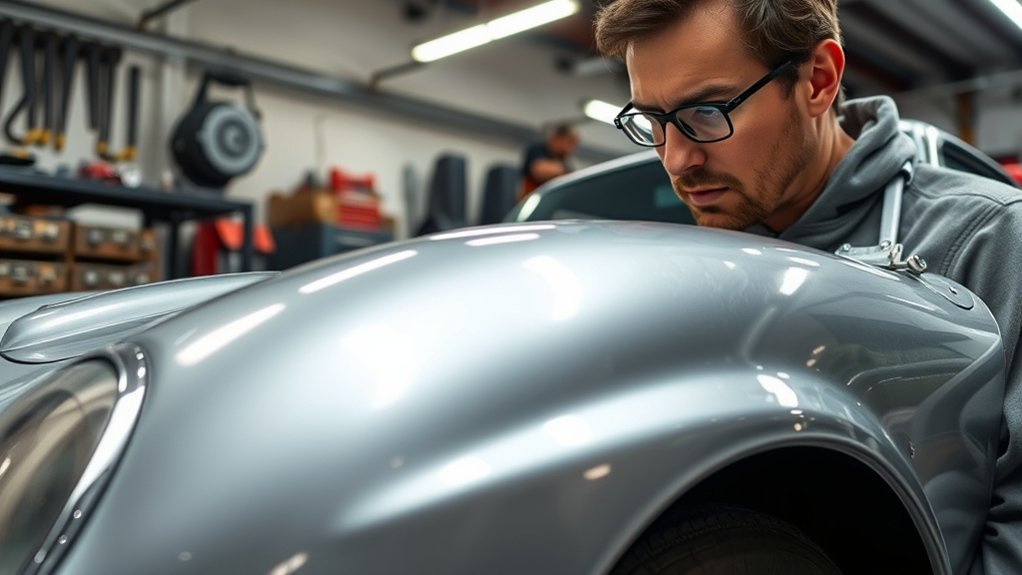
A careful post-welding inspection confirms that the repair is strong, aligned, and ready for corrosion protection. Start with a visual check. Look for pinholes, missed plug welds, undercut, burn-through, cracks, and areas that did not fuse to both panels.
Next, check the fit. Reinstall the fender, hood, brackets, battery tray, radiator support connections, and other parts that attach to the apron. Confirm that bolt holes line up without forcing the panel. If any ground straps, harness clips, or electrical parts were attached to the apron, clean the mounting points and reinstall them as they were.
Before paint or filler, finish the metal correctly:
- Grind welds only as much as needed.
- Clean dust, oil, and residue from the repair area.
- Apply epoxy primer or the primer required by your paint system.
- Seal lap joints and seams with automotive seam sealer.
- Coat hidden cavities with cavity wax or rust preventive coating after primer and paint steps allow it.
- Inspect the backside of the weld area when access allows.
Long-Term Maintenance and Rust Prevention Tips
Welding repairs restore the fender apron, but rust prevention keeps the repair from failing again. The most important step is sealing moisture out of the seams. Bare steel, open lap joints, and cracked seam sealer invite rust back into the same area.
A fender apron repair is not finished when the weld cools. It is finished when both sides of the metal are primed, sealed, coated, and protected from trapped moisture.
- Prime bare metal quickly: Do not leave clean steel exposed in a damp garage.
- Seal welded seams: Use automotive seam sealer after primer when your paint system calls for it.
- Protect hidden cavities: Use cavity wax inside closed areas after welding and coating work is complete.
- Keep drain paths open: Clogged drains trap water behind panels.
- Inspect yearly: Look for bubbling paint, cracked sealer, loose undercoating, and rust staining.
Store the vehicle in a dry space when possible. If the car sees rain, road salt, or damp storage, inspect the apron and inner fender seams more often.
Frequently Asked Questions
What is the best welder for fender apron repair?
A MIG welder with shielding gas is usually the best choice for steel fender apron repair because it is easier to control on thin sheet metal. Use the correct wire size and machine settings for your panel thickness, then test on scrap before welding the car.
What is a fender apron?
A fender apron is an inner body panel inside the front fender area. It helps support nearby panels, brackets, splash protection, wiring clips, and engine-bay parts. On many classic cars, it also affects hood and fender alignment.
How do you prevent warping when welding a fender apron?
Prevent warping by using tight clamps, short tack welds, plug welds at factory spot-weld points, and small stitch welds. Move around the panel instead of welding one long area. Let each section cool before adding more weld.
Can you flux-core weld a fender apron?
You can flux-core weld some body steel, but it is harder to control on thin panels and usually creates more spatter and cleanup. For clean fender apron work, gas-shielded MIG is usually easier for most DIY welders.
Do you need weld-through primer for a fender apron?
Use weld-through primer on hidden mating flanges where two panels overlap and cannot be coated after welding. Do not use it as a substitute for cleaning the actual weld point. After welding, still apply primer, seam sealer, paint, and cavity protection.
When should you avoid doing this repair yourself?
Avoid DIY repair if rust reaches a frame rail, shock tower, suspension mount, steering mount, or crash-load area. Also stop if the car is visibly twisted from collision damage. Those repairs need exact measurements and may require professional equipment.
Conclusion
A well-welded fender apron repair starts with inspection and alignment, not the welder trigger. Remove the rust, clean the metal, clamp the apron in the correct position, and use tack welds, plug welds, and short stitch welds to control heat. After welding, inspect the joints, confirm panel fit, then seal and coat every exposed seam. Done carefully, the repair restores strength, fit, and long-term rust protection to your classic car.
Sources
- OSHA 1910.252, Welding, Cutting, and Brazing — supports fire prevention, PPE, eye protection, and ventilation safety guidance.
- CDC/NIOSH Welding Fumes and Manganese — supports fume and manganese exposure cautions.
- American Welding Society Standards — supports using recognized welding standards and proper procedure guidance.
- I-CAR Repairability Technical Support — supports checking repair procedures and collision repair guidance for structural vehicle areas.


