Butt Joint vs Lap Joint: Which Weld Is Better for Sheet Metal?
A clean sheet metal repair can fail later if you choose the wrong joint. A butt joint gives you the flattest finish on visible panels, while a lap joint helps when fit-up is harder or speed matters more. Use a butt joint for quarter panels and other visible body work. Use a lap joint for floor patches, hidden panels, and factory-style repairs when you can seal the overlap well.
Quick Answer
Choose a butt joint when you want a smooth, flush repair with less filler and a cleaner paint finish. Choose a lap joint when you need easier alignment, more overlap support, or a faster patch on a hidden area. Clean metal, careful heat control, and proper sealing matter more than the joint name alone.
Key Takeaways
- Use butt joints on visible body panels when you need a flat finish.
- Use lap joints on floors and hidden patches when easier fit-up matters.
- Seal lap seams carefully because overlap areas can trap moisture.
- Weld only clean, bare metal so contamination does not weaken the joint.
- Control heat with small tacks to reduce warping on thin sheet metal.
Quick Verdict: Butt Joint vs Lap Joint
Pick a butt joint if the repaired area will show after paint. It gives you a flush panel, cleaner finish work, and fewer hidden rust traps.
Pick a lap joint if the repair sits in a hidden or low-visibility area. The overlap helps with alignment, but you must seal the seam on every exposed edge.
| Feature | Butt Joint | Lap Joint |
|---|---|---|
| Panel finish | Flush and easier to hide | May leave extra buildup |
| Fit-up difficulty | Needs accurate cuts | More forgiving |
| Rust risk | Lower when finished well | Higher if the overlap stays unsealed |
| Best use | Quarter panels, doors, roofs, visible repairs | Floors, hidden patches, factory-style seams |
What’s the Difference Between Butt and Lap Joints?
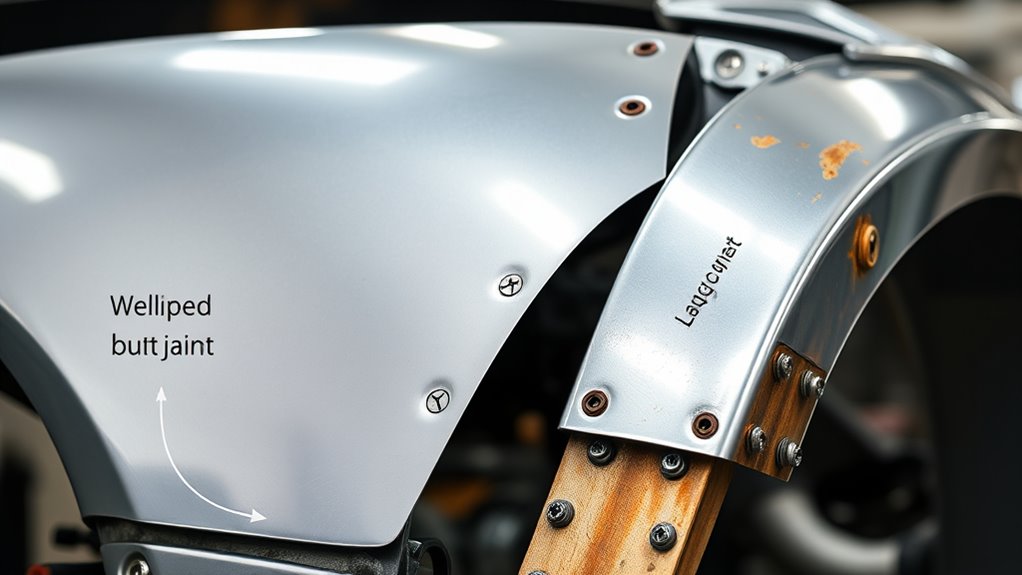
At its core, a butt joint puts two metal panels edge to edge in the same plane. A lap joint places one panel over another, so the weld sits along the overlap.
With butt joints, you create a single-ply weld joint that usually looks cleaner. You also spend less time hiding seams with filler.
Butt joints create a cleaner, flatter repair with less time spent hiding seams.
Lap joints are simpler to fit because the overlap gives you room for small trimming errors. You can also hold the panels with clecos, clamps, or temporary fasteners during assembly.
Butt joints demand precise cuts and tight fitment. Poor gaps can make the weld harder to control and may add more filler work.
Lap joints give you more forgiveness, but the overlap can trap moisture. That hidden channel can raise rust risk if you skip primer, seam sealer, or paint.
Butt welding also makes paint prep easier because you do not need to level an overlap. Lap welding can need more sealing and more finish work.
Use each weld joint with intent, not habit. Also consider maximum fillet weld size when the joint carries load.
Choose a Butt Joint If…
Choose a butt joint if you want the cleanest finish on a visible panel. It works best when you can cut accurately and control heat with small, spaced tacks.
- You want a flush surface with less filler.
- You need a clean paint finish on a visible panel.
- You want fewer hidden moisture pockets.
- You can take time to trim and fit the patch well.
Products Worth Considering
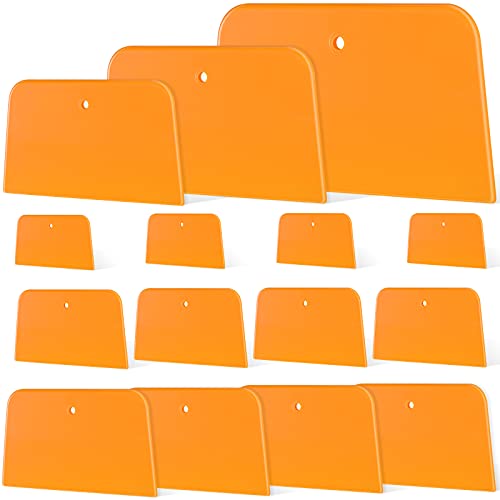
What You Will Receive: you will receive 2 sets of body filler spreaders with the shape of trapezoid, each set of 3 pieces, 6 pieces in total; The body filler spreaders are sufficient to meet your various applying needs, and you can share them with your family members

Original formula for repairing dents, dings, holes, large rusted areas and scratches in vehicles

J-B Weld Body Filler: is a two-component filler system that provides waterproof, durable repairs to cracks and rust-outs on automotive bodies and home surfaces made of metal, wood, & more
When Is a Butt Joint Best?
You’ll want a butt joint when you need cleaner paint prep. It leaves a flush surface with minimal seam buildup.
It’s also the better choice for high-visibility panel repairs where you need a seamless look that matches factory lines.
When you fit and weld it precisely, you get a stronger repair that’s easier to finish smoothly. Using low heat input also helps reduce distortion during the welding process.
Cleaner Paint Prep
A butt joint often works best when cleaner paint prep matters most. You get a single-ply panel, so the surface stays cleaner and easier to finish.
Without overlapping metal, you reduce rust traps and corrosion risk. When you cut and fit accurately, the seam blends smoothly and looks right on a quality restoration.
You’ll also grind and finish it more easily than many lap welds. That means you can use less filler and fewer sealing steps.
That smooth profile can improve paint adhesion because the repair has fewer ridges and edges. If you want the panel to stay free of extra buildup, a butt joint keeps the surface honest.
High-Visibility Panel Repairs
When the repair sits in plain view, a butt joint usually makes the better choice. You get better aesthetic quality, cleaner lines, and less filler work.
- You can prep the panel for a smoother paint finish.
- You avoid the moisture-trapping channel that hurts rust prevention.
- You can weld for full penetration when the fit-up stays tight.
- You need accurate fit-up, so use it when your skill matches the job.
A butt joint also gives you a more professional result on doors, quarters, and roofs. If people will see, touch, and judge the panel, choose the method that keeps the surface true.
Choose a Lap Joint If…
Choose a lap joint when the repair needs easier alignment or more support during fit-up. It can work well on hidden panels, but only when you protect the overlap from moisture.
- You need a faster patch on a floor or hidden section.
- You have small trimming errors that make a butt joint hard.
- You want more support while tacking thin sheet metal.
- You can seal, prime, and coat both sides of the repair.
Warning: Do not leave a lap seam unsealed because the overlap can hold moisture and start rust.
Products Worth Considering

Creates a secure, secondary seal along the roof’s edges, air vents, vent pipes and screw heads

PROFESSIONAL AUTOMOTIVE SEAM SEALER — BLACK — WON'T SHRINK OR CRACK — Polyurethane formula in black seals body panel seams, weld joints, and gaps with a durable, flexible compound. Black color blends with dark undercarriage surfaces, rocker panels, and wheel wells where visible sealant lines need to disappear.

PROFESSIONAL AUTOMOTIVE SEAM SEALER — WON'T SHRINK OR CRACK — Polyurethane formula seals body panel seams, weld joints, and gaps with a durable, flexible compound that stays put. Unlike generic fillers, this seam sealer maintains flexibility through temperature extremes and road vibration without cracking or pulling away.
When Should You Use a Lap Joint?
You should use a lap joint when you’re repairing floor patches or other hidden floor sections. The overlap gives you more weld area and better support in stressed areas.
It also works well for factory-style body repairs where you need easier fit-up and a stable connection between panels.
Because it’s simpler to align and weld, it’s a practical choice when you want solid results without extra complexity. Clean the surface before welding to help prevent porosity and inclusions that can weaken the joint.
Floor Patches and Floors
For floor patches, a lap joint often works better because it’s easier to align. It also forgives minor trimming mistakes and usually fits faster than a butt joint.
- Use a lap joint on floor patches when you want simpler fit-up and fewer gap problems.
- Seal the overlap so moisture and rust stay out.
- Weld both sides when you have safe access and the repair calls for it.
- Use weld-through primer where suitable, then finish with seam sealer and paint.
Factory-Style Body Repairs
Factory-style body repairs often call for a lap joint because it lines up easily. It also tolerates small fit-up mistakes and can match how some panels were first assembled.
In factory-style repairs, you can use lap welding to move faster on sheet metal while keeping the joint stable. The overlap helps reduce burn-through on thin gauges because it adds backing at the seam.
You still have to seal the seam well. Trapped moisture can start rust under the overlap if you leave the edge open.
Use a lap joint when you want speed, alignment forgiveness, and structural consistency with the original build.
Butt vs Lap Joints for Quarter Panels
When repairing quarter panels, butt joints usually make the better long-term choice. They leave a cleaner, more durable seam that’s easier to finish and less likely to trap moisture.
You’ll need accurate cuts and tight fitment. But the result gives you a single-ply panel that’s simpler to paint and easier to shape along body lines.
- Butt joints: Best for lasting repairs and classic-vehicle restoration.
- Lap joints: Faster to fit and useful when you need speed over finish.
- Weld control: Butt welding demands precision, while lap welding gives you more margin.
- Surface risk: Overlaps can hide moisture and invite corrosion.
If you want the cleanest quarter panels, choose the joint that supports the finish. Do not choose the joint that only covers the gap.
Proper surface preparation matters, especially when working with coated metal. For galvanized steel, grinding off zinc helps improve weld quality and reduce harmful fumes.
How Do You Prep Sheet Metal for Either Joint?
Start by stripping both panels back to clean, bare metal. Rust, paint, oil, and coating residue can weaken the weld.
For either lap or butt work, keep the surface clean and dry. Good metal contact gives you better control and a cleaner bead.
On a butt joint, cut the edges precisely and remove burrs. The panels should meet tightly so the weld stays consistent.
For a lap joint, overlap the sheets enough to support the weld and match the repair design. Trim extra metal so you can avoid bulky edges and poor fit.
Round corners on holes or patches to spread heat and reduce warpage. Sharp corners can concentrate heat and make thin sheet metal harder to control.
If you’re doing a lap joint, apply welding primer where the panels overlap if the product suits the job. After welding, seal the edge, coat the metal, and protect the back side when you can reach it.
Pro tip: Test your settings on scrap metal with the same thickness before welding the repair panel.
What Welding Mistakes Cause Rust?
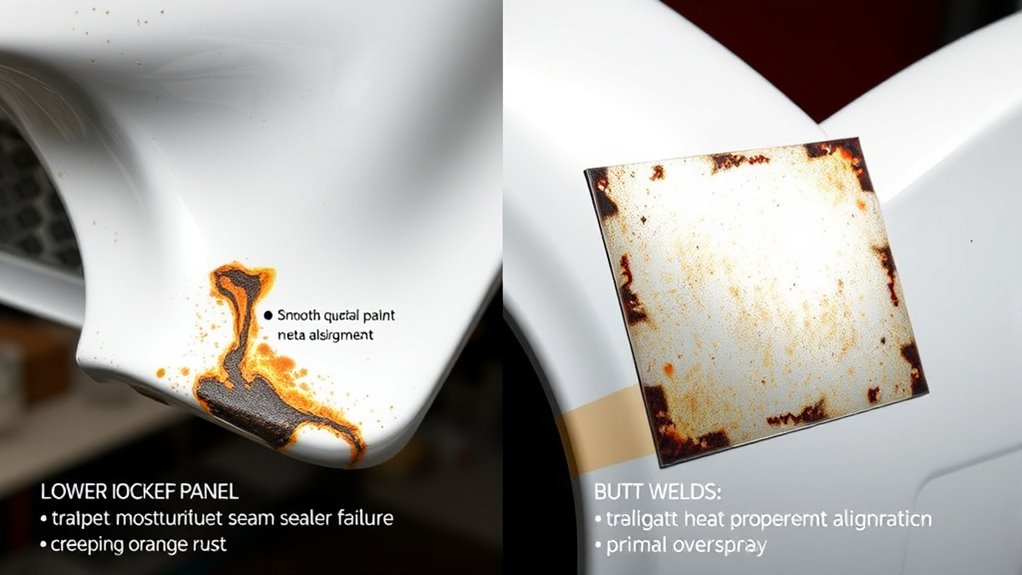
Rust usually starts with a few welding mistakes you can avoid. Common problems include trapping moisture in lap joints, skipping seam sealer, welding over dirt, and leaving bare metal exposed.
When you weld lap panels, any hidden channel can hold moisture and feed rust. Clean both surfaces to bare metal because contaminants weaken the joint and invite corrosion.
Control heat so you do not overheat the seam and damage the area around the weld. Use weld-through primer where suitable, then finish with sealant and paint.
- Seal every lap edge to block moisture paths.
- Remove rust, paint, and oil before welding.
- Keep heat low enough to reduce warping and burn-through.
- Recoat exposed metal soon after finishing.
Do not weld over heavy rust and expect the repair to last. If you ignore heavy rust, you can weaken weld integrity and raise corrosion risk.
Frequently Asked Questions
When would you use a lap joint?
You’d use a lap joint when you need easier fitment, forgiving trimming, and stable support in patch panels. It suits floor sections, hidden panels, and some factory-style repairs when you can seal the overlap well.
What is a disadvantage of a lap joint?
A lap joint can trap moisture between the panels if you do not seal it well. It can also leave more buildup, which may require more grinding, sealing, and finish work.
Are lap joints better for thicker plates?
Lap joints can work well when two pieces have different thicknesses or need more overlap support. You still need proper joint design, clean metal, and enough weld size for the load.
Is a butt joint stronger than a lap joint?
A well-made butt joint can create a strong, flush repair when the fit-up and penetration are right. A lap joint can also be strong, but poor sealing can create rust that weakens the repair later.
Should you use weld-through primer on lap joints?
You should use weld-through primer when the product matches your metal, process, and repair plan. After welding, you still need seam sealer, paint, and coating because primer alone does not fully protect the seam.
Safety Disclaimer: This article is for informational purposes only and does not replace hands-on welding training or professional repair advice. Wear proper personal protective equipment, control fire risk, and follow the welder, primer, coating, and vehicle manufacturer’s instructions before you weld.
Conclusion
Your best joint depends on where the repair sits and how clean the finish must look. Use a butt joint when you need a flat, paint-ready repair on visible sheet metal.
Use a lap joint when fit-up, speed, or hidden support matters more than a perfectly flush seam. Prep the metal well, weld it clean, and seal every edge that can hold moisture.
A careful joint choice now can save you from rust, filler cracks, and repeat repairs later.


