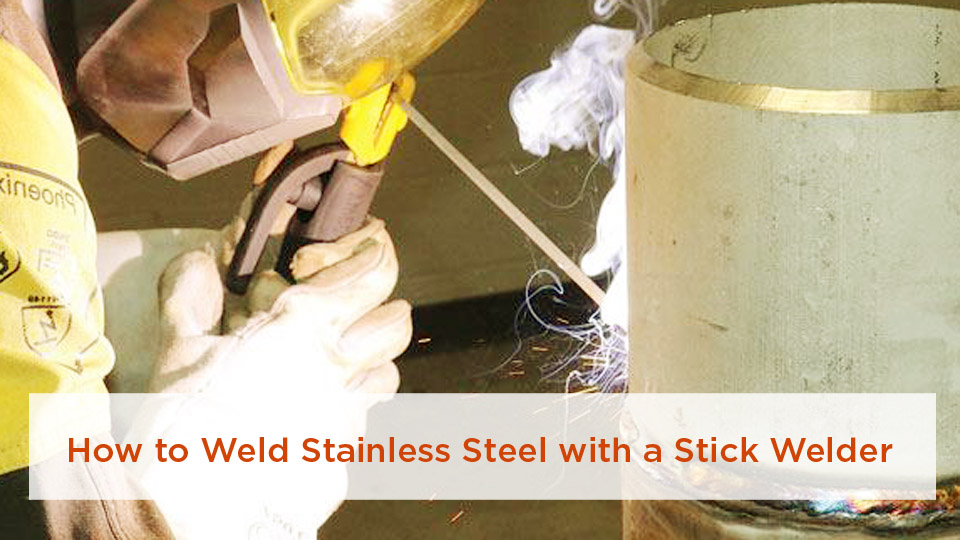
You can weld stainless steel with a stick welder, but you need the correct stainless electrode, clean joint surfaces, a short arc, and tighter heat control than you normally use on mild steel. The process works best for repairs, outdoor work, and material thick enough to tolerate SMAW’s concentrated heat.
My first stainless stick weld ran much hotter than I expected. The bead was uneven, the plate distorted, and the heat tint spread well beyond the joint. The machine was not the main problem. I had treated stainless like mild steel instead of controlling filler selection, fit-up, arc length, sequence, and interpass temperature.
This guide shows you how to select an electrode, prepare the joint, set the machine, run each pass, diagnose common defects, and clean the surface afterward. It focuses mainly on common austenitic grades such as 304 and 316. Ferritic, martensitic, duplex, precipitation-hardening, structural, pressure-retaining, and hygienic work may require a qualified welding procedure. Reviewed and updated July 20, 2026.
Quick Answer
To stick weld stainless steel, identify the alloy, choose a matching stainless electrode, clean the joint with stainless-only tools, and follow the electrode data sheet for polarity and amperage. Use a short arc and stringer beads, limit heat buildup, remove all slag and heat tint, then inspect and passivate the cleaned surface when the service requires it.
Key Takeaways
- Use E308L for many 304/304L joints, E316L for matching 316/316L applications, and E309L for many stainless-to-carbon-steel joints.
- Most common
-16stainless electrodes run on DCEP or AC, but the exact product data sheet controls. - Keep the arc short, use narrow stringer beads, and allow the joint to cool within the procedure’s interpass limit.
- Use tools dedicated to stainless steel so carbon-steel particles do not become embedded in the surface.
- Passivation does not replace heat-tint or scale removal. Clean or descale the weld first.
- Stainless welding fumes can contain hexavalent chromium, so source-capture ventilation and a workplace exposure assessment are essential.
At a Glance
| Time Required | About 30–90 minutes for a small practice joint, plus cooling, inspection, and any required surface treatment |
| Difficulty | Intermediate; difficult on thin sheet and critical joints |
| Tools Needed | Stick welder, correct stainless electrodes, clamps, dedicated stainless brush and abrasives, temperature indicator, slag hammer, PPE, and suitable fume extraction |
| Cost | Low to moderate if you already own the welder and PPE; consumable cost varies by electrode, abrasives, purge gas, and post-weld treatment |
What Makes Welding Stainless Steel Different from Mild Steel?
Stainless steel contains at least 10.5% chromium. Oxygen reacts with chromium at the surface to form a thin passive film that helps the metal resist corrosion. The British Stainless Steel Association explains that different amounts of chromium, nickel, molybdenum, carbon, and other elements create stainless grades with different properties.
Common austenitic grades such as 304 and 316 conduct heat less efficiently and expand more when heated than carbon steel. Heat therefore remains concentrated near the weld, while the surrounding metal expands and contracts enough to pull a lightly restrained part out of shape.
You control that movement with:
- Short weld sections instead of one long continuous pass
- Narrow stringer beads instead of wide weaving
- Balanced and staggered tack welds
- Firm clamping and a planned welding sequence
- Clean copper backing or chill bars where the joint allows them
- Interpass-temperature checks rather than guessing by color
Stainless also requires strict contamination control. A grinding disc, wire brush, workbench, or clamp that carries carbon-steel particles can embed free iron in the stainless surface. Those particles may rust even when the underlying stainless alloy is sound.
SMAW supplies its shielding through the electrode’s flux coating, so it handles wind better than gas-shielded MIG or TIG. The tradeoff is more slag, more cleanup, and less control on very thin material.
Before You Start: Identify the Stainless Grade
Do not choose the rod by appearance alone. Confirm the base-metal grade from a material stamp, drawing, purchase record, positive material identification test, or other reliable documentation.
Note: A magnet cannot reliably identify every stainless grade. Cold-worked 304 can become partly magnetic, while several ferritic and martensitic grades are naturally magnetic.
- Austenitic stainless: Includes common grades such as 304, 304L, 316, and 316L. These are the main focus of this guide.
- Ferritic stainless: Includes grades such as 409 and 430. Excessive heat can cause grain growth and loss of toughness, so use a grade-specific procedure.
- Martensitic stainless: Includes grades such as 410 and 420. These can harden and crack after welding unless preheat, filler, and post-weld heat treatment are properly controlled.
- Duplex stainless: Requires controlled heat input, interpass temperature, filler selection, and shielding to preserve the intended ferrite-austenite balance.
- Precipitation-hardening stainless: Requires a procedure that accounts for the material’s condition and required post-weld properties.
Warning: Do not use a “problem solver” electrode to guess at an unknown alloy on a structural, pressure-retaining, lifting, vehicle-safety, hygienic, or life-safety component. Identify the material and follow an approved procedure.
Choosing the Right Electrode for Stainless Steel Stick Welding
The electrode must be compatible with the base metal, the other side of the joint, the required strength, the corrosive environment, and the service temperature. The following choices are common starting points, not substitutes for a WPS or engineering specification.
| Electrode | Common Use | Important Limit |
|---|---|---|
| E308L-16 | Many 304 and 304L joints; also used for certain stabilized 18-8 grades when the procedure allows | Not the normal choice for stainless-to-carbon-steel joints or molybdenum-bearing 316 service |
| E309L-16 | Many stainless-to-carbon-steel joints, transition joints, and buffer layers | Dilution and service conditions still need procedure review |
| E316L-16 | Many 316 and 316L joints where molybdenum-assisted pitting resistance is needed | Does not make the completed joint immune to chloride attack |
| E312-16 | Selected repair, high-strength, and dissimilar-metal applications where crack resistance is important | It is not a chemistry match for ordinary 304 or 316 work. The cited manufacturer limits its use below 800°F because brittle secondary phases can form at elevated service temperatures. |
Lincoln Electric’s E308L-16 product information identifies it for austenitic stainless grades including 302, 304, and 304L. For E316L-16, Hobart’s data sheet specifies AC or DCEP and a short arc.
Use the smallest electrode that can produce the required fusion without becoming difficult to control. A 3/32-inch electrode gives you better control on smaller joints and out-of-position work. A 1/8-inch electrode deposits metal faster but also adds more heat.
Pro Tip: Photograph the electrode label or data sheet before opening the package. You will have the correct polarity, amperage, storage, redrying, and interpass information available even after the box is damaged or discarded.
Products Worth Considering

Product Type :Tools

MODEL: E308L-16 is for stainless steel welding, widely used in metal fabrication, maintenance and repair work.

Premium quality E309L-16 stainless steel stick welding electrode rods
Essential Equipment for Stick Welding Stainless Steel
- A stick welder capable of the current and polarity required by the selected electrode
- Dry stainless electrodes in the correct alloy and diameter
- Sound welding leads, holder, and work clamp
- A dedicated stainless wire brush
- Dedicated stainless grinding and flap discs
- Degreaser or cleaner approved for the work and used according to its SDS
- Clamps, fixtures, and clean backing bars as needed
- A temperature crayon, contact thermometer, or suitable infrared instrument
- A slag hammer and inspection light
- Local exhaust ventilation positioned to capture fume without disrupting the arc
- Welding helmet, safety glasses, leather gloves, flame-resistant clothing, and dry insulated footwear
- Argon purge equipment when the procedure requires root protection
An adjustable hot-start or arc-force control can make starts easier, but it does not correct an oversized electrode, dirty joint, loose work clamp, or wrong amperage.
Products Worth Considering

Size - Diameter: 1.6mm / 1/16", Length: 250mm / 10"; 10 x E308L-16 Welding Rod

Most commonly used for all-position welding of low carbon 19% chromium – 9% nickel austenitic stainless steels such as 304L as well as stabilized grades such as 321 and 347

Brief Description: E308L-16 is a kind of stainless steel welding sticks used in MMA welding, contain extra low carbon for the welding of austenitic, low carbon 18%Cr - 8%Ni stainless steels such as AISI 304-ELC. NICETECH 308L-16 electrodes have a high deposition rate resulting in excellent efficiency.
Safety First: Protecting Yourself When Stick Welding Stainless
Warning: Stainless welding fumes can contain hexavalent chromium, nickel compounds, and other hazardous constituents. Capture fumes close to the arc, keep your head out of the plume, and never assume that an open door or portable fan has reduced exposure below an occupational limit.
OSHA’s permissible exposure limit for airborne hexavalent chromium is 5 micrograms per cubic meter as an eight-hour time-weighted average.
The OSHA Chromium (VI) standard requires covered employers to determine employee exposure and apply the required controls. Use local exhaust ventilation close enough to capture the plume before it crosses your breathing zone.
OSHA’s general welding rule includes a mechanical-ventilation provision of at least 2,000 cubic feet per minute per welder under specified circumstances, with exceptions for qualifying local exhaust or supplied-air protection. Airflow is not a substitute for confirming that toxic contaminants remain below their applicable limits.
When respiratory protection is required, the employer must select equipment from an exposure assessment and implement the requirements of 29 CFR 1910.134. Required users need medical evaluation, training, and fit testing for tight-fitting respirators. Air-purifying filters do not supply oxygen and do not protect against every gas produced during welding or cleaning.
Remove combustible material from the hot-work area or shield it properly. OSHA requires a trained fire watcher when welding or cutting is performed under listed fire-hazard conditions, such as when appreciable combustibles are close enough to ignite. When a fire watch is required, it must continue for at least 30 minutes after welding or cutting ends. Review the full conditions in 29 CFR 1910.252.
Do not weld on a used drum, tank, pipe, or closed container until it has been properly isolated, cleaned, tested, vented, and released under the applicable hot-work procedure. Do not weld in a confined space without the required ventilation, atmospheric controls, attendant, rescue arrangements, and permit process.
Keep chlorinated degreasers and their vapors away from welding. Follow the cleaning product’s SDS. Pickling and passivation chemicals can cause severe burns and may release hazardous vapors, so use only an approved procedure with the specified chemical PPE, ventilation, rinsing, neutralization, and waste handling.
Preparing Your Stainless Steel for a Solid Stick Weld
- Confirm the material and procedure. Identify both base metals, the required filler, the joint drawing, and any governing code or WPS.
- Inspect the material. Check for cracks, laminations, coatings, heavy scale, moisture, oil, and previous repairs.
- Degrease before grinding. Removing oil first prevents an abrasive from spreading contamination across the joint.
- Prepare the edges. Use tools dedicated to stainless and remove burrs, oxide, and embedded iron.
- Set the joint dimensions. Follow the drawing or WPS for bevel angle, included angle, root face, and root opening.
- Clamp and tack. Use small, balanced tacks and verify alignment before completing the seam.
- Prepare a test coupon. Use the same grade, thickness, joint, position, electrode, and approximate restraint as the real part.
- Set up root shielding when required. Purge tubing, pipe, or enclosed roots when the procedure or corrosion service requires protection from oxidation.
For a 1/4-inch butt joint, a roughly 60-degree included groove is a common starting concept, but it is not a universal dimension. The correct root face and opening depend on penetration requirements, electrode access, position, and procedure qualification.
Austenitic grades such as 304 and 316 generally do not need preheat for ordinary fabrication. Martensitic, ferritic, duplex, hardenable, highly restrained, and dissimilar joints can require different controls. Do not apply a generic preheat temperature across stainless families.
For open-root pipe or tubing, an efficient back purge can reduce root heat tint and oxidation. TWI recommends controlling oxygen in the backing shield and maintaining the purge for the passes or cooling period required by the specification. See TWI’s heat-tint guidance.
Step-by-Step Guide to Stick Welding Stainless Steel
The following example describes a practice butt joint on 1/4-inch 304 plate with an E308L-16 electrode. Production settings must come from the electrode data sheet, approved procedure, and test coupon.
1. Connect the Correct Polarity
Most common E308L-16, E309L-16, and E316L-16 electrodes operate on DCEP or AC. Connect DCEP when the selected data sheet calls for electrode positive. Use AC only when both the electrode and machine are suitable. Some AC electrodes need enough open-circuit voltage for stable starting and restriking.
2. Start at the Low End of the Allowed Range
Set the current near the low end of the manufacturer’s range for the electrode diameter and welding position. Strike an arc on the test coupon. Increase current only enough to obtain a stable arc, proper toe fusion, and a manageable puddle.
3. Place Balanced Tack Welds
Use short tacks distributed along the joint. Alternate sides or positions where possible so shrinkage does not pull the assembly in one direction. Grind out any cracked, porous, oversized, or poorly fused tack before welding over it.
4. Run the Root Pass
Hold a short arc without burying the electrode in the puddle. A slight drag angle is normal for many stainless stick electrodes. Use a narrow stringer bead unless the procedure calls for a controlled weave.
Watch the leading edge of the puddle and both toes. If the puddle becomes wide and sluggish, increase travel speed or reduce current within the permitted range. If the rod repeatedly sticks and fusion is poor, check current, arc length, work-clamp contact, and joint cleanliness.
5. Fill the Crater Before Breaking the Arc
Pause briefly or step back into the crater as permitted by your technique so you do not leave a deep termination crater. Grind out any crater crack before restarting.
6. Remove All Slag
Let the bead solidify, then chip and brush the slag with stainless-only tools. Clean the toes, crater, and restart area. Do not trap glassy slag under the next pass.
7. Check Interpass Temperature
Measure the joint before placing the next bead. Some E308L-16 manufacturer guidance specifies a maximum interpass temperature of 150°C or 300°F, but the value for your job must come from the applicable WPS and consumable data sheet.
8. Add Fill and Cap Passes
Use overlapping stringers to fill the groove without excessive reinforcement. Reduce current as needed for vertical or overhead welding while remaining within the electrode manufacturer’s permitted range. Tie each pass into clean metal at both toes.
9. Clean and Inspect the Completed Weld
Remove slag, spatter, arc strikes, and unacceptable surface defects. Inspect the entire weld and heat-affected zone before grinding or polishing hides a defect.
Best Machine Settings for Stick Welding Stainless Steel
No single amperage chart fits every stainless electrode. Coating type, manufacturer, diameter, position, joint, machine output, and welder technique all affect the usable range.
| Setting | Starting Guidance | What to Watch |
|---|---|---|
| Polarity | DCEP or AC when approved for the exact -16 electrode |
Unstable starts, excessive spatter, or poor penetration from incorrect setup |
| 3/32-inch electrode | Use the product’s printed range; many products place this size near the lower-current end of stainless SMAW | Sticking at insufficient current or overheating from slow travel |
| 1/8-inch electrode | Use the product’s printed range and test on matching scrap before welding the part | Large puddle, undercut, distortion, or lack of sidewall fusion |
| Arc length | Short, often less than half the electrode diameter for products that specify it | Long-arc spatter, porosity, wandering arc, and heavy oxidation |
| Travel pattern | Straight stringers or a narrow controlled weave | Excessive bead width and heat input |
| Interpass temperature | Follow the WPS and consumable data sheet; 150°C or 300°F is one common manufacturer limit for certain austenitic electrodes | Heat accumulation, spreading tint, distortion, and changed weld behavior |
A setting is too hot when the puddle outruns your control, the toes undercut, the bead becomes excessively wide, or distortion increases quickly. A setting may be too cold when the rod sticks repeatedly, the bead sits high with poor wetting, or the toes do not fuse.
Can You Stick Weld Thin Stainless Steel?
You can use SMAW on thin stainless, but the margin between fusion and burn-through becomes narrow. Small electrodes still need enough current to maintain a stable arc, and each restart adds concentrated heat.
Stick is usually more practical on brackets, plate, pipe, and repair work than on thin decorative sheet. TIG gives you finer heat control, while properly configured MIG can be faster on repetitive sheet-metal work.
When SMAW is your only option:
- Use the smallest suitable stainless electrode.
- Fit the joint closely and remove gaps that are not part of the procedure.
- Clamp the work to a clean copper backing bar when possible.
- Use short tacks and skip around the joint.
- Run short stringers at the lowest stable current permitted by the electrode.
- Stop before heat spreads through the whole panel.
Do not quench the joint with water as a substitute for a controlled sequence unless the approved procedure specifically permits it. Rapid, uneven cooling can increase distortion and introduce contamination.
Common Mistakes When Stick Welding Stainless Steel and How to Fix Them
| Symptom | Likely Causes | Corrective Action |
|---|---|---|
| Rod sticks repeatedly | Current too low, poor work connection, long leads with voltage loss, damp electrode, or poor starting technique | Check connections, confirm polarity, use the permitted current range, and replace or recondition electrodes only as the manufacturer directs |
| Excessive spatter | Long arc, current too high, wrong polarity, contamination, or unstable AC operation | Shorten the arc, verify the data sheet, reduce current within range, and clean the joint |
| Porosity | Oil, moisture, coating, damp rods, long arc, or welding over slag | Remove the defect to sound metal, reclean, use dry electrodes, and maintain a short arc |
| Slag inclusion | Incomplete cleaning, narrow groove, poor bead placement, or excessive weaving | Grind out the inclusion, improve access, clean each pass, and use narrower stringers |
| Undercut | Excessive current, long arc, incorrect angle, or travel that is too fast for toe fill | Reduce current, shorten the arc, stabilize the angle, and pause enough for the toes to fill |
| High rope-like bead | Insufficient current, travel too fast, cold plate, or poor sidewall access | Confirm current and joint preparation, then adjust on a test coupon |
| Crater or toe cracks | Unfilled crater, incorrect filler, hardenable alloy, excessive restraint, or unsuitable heat treatment | Stop work, identify the alloy and cause, remove the crack fully, and correct the procedure before rewelding |
| Heavy blue, purple, or black tint | Excessive heat, poor root shielding, long arc, or slow travel | Correct heat input and shielding, then remove the affected oxide and chromium-depleted surface by an approved cleaning process |
| Rust spots after fabrication | Embedded free iron, shared abrasives, contaminated work surface, or incomplete cleaning | Remove contamination, clean and passivate under the required procedure, and dedicate tools to stainless |
Advanced Techniques for Stick Welding Stainless Steel
Vertical-Up Welding
Reduce current as permitted by the data sheet and keep the puddle small. Use a narrow weave or controlled step pattern only when needed to support the puddle and fuse both toes. Clean every shelf of slag before the next pass.
Overhead Welding
Use a short arc, small stringers, and an electrode diameter you can control. Avoid a large fluid puddle. Position yourself so sparks and slag do not fall into clothing or footwear.
Dissimilar-Metal Joints
E309L is commonly selected for joining austenitic stainless to carbon or low-alloy steel, but the procedure must account for dilution, restraint, service temperature, corrosion exposure, and the properties required on both sides.
Restarting a Bead
Chip and brush the crater, taper or feather the end when the procedure allows it, then restart slightly ahead and move back into the previous bead before continuing forward. This helps eliminate an unfused notch at the tie-in.
Avoiding Stray Arc Strikes
Strike the arc inside the joint or on an approved run-on tab. A stray arc can create a local metallurgical and corrosion defect. Remove and inspect accidental strikes according to the governing procedure.
Hybrid Welding Workflows
A project may use SMAW for access or field repairs and TIG or MIG for other passes, but only when the WPS permits the process combination and matching filler metals.
Inspecting a Stainless Steel Stick Weld
After slag removal, inspect the weld under good lighting. Look for:
- Cracks at the crater, toes, starts, stops, and tack locations
- Visible porosity or slag pockets
- Undercut or overlap
- Incomplete tie-in at restarts
- Excessive reinforcement or an undersized bead
- Arc strikes outside the joint
- Distortion or loss of required dimensions
- Heavy heat tint on the face or root
- Incomplete root penetration where full penetration is required
Visual appearance cannot prove internal soundness. Critical work may require liquid penetrant testing, radiography, ultrasonic testing, leak testing, ferrite measurement, corrosion testing, or other acceptance methods specified by the drawing, code, purchaser, or engineer.
Magnetic-particle testing is not a general substitute for penetrant testing on austenitic stainless because fully austenitic material has low magnetic permeability. Select the inspection method for the actual alloy and expected defect type.
Post-Weld Cleaning, Heat-Tint Removal, and Passivation
Slag and heat tint are not cosmetic issues when corrosion resistance matters. TWI notes that heat tint can leave a chromium-depleted surface with greater susceptibility to pitting and crevice corrosion.
Use the correct sequence:
- Remove slag and spatter. Use dedicated stainless tools without thinning the base metal.
- Degrease the surface. Remove oil, marker, adhesive, and polishing residue.
- Remove harmful oxide and scale. Use an approved mechanical, chemical pickling, electrochemical, or combined process suitable for the grade and service.
- Rinse and neutralize as required. Follow the chemical manufacturer’s instructions and SDS.
- Passivate the chemically clean surface. Use the specified citric, nitric, or electrochemical treatment.
- Rinse, dry, and verify. Apply the acceptance test required by the procedure or purchaser.
Note: Passivation mainly removes contaminant iron and promotes a clean passive surface. It does not automatically remove thick weld scale or the chromium-depleted layer beneath severe heat tint.
ASTM A380/A380M-25 covers cleaning, descaling, pickling, and passivation practices. ASTM A967/A967M-25 covers chemical passivation treatments and qualitative tests for confirming treatment effectiveness.
Real-World Applications of Stick Welding Stainless Steel in the USA
Stainless SMAW is useful for field maintenance, outdoor fabrication, repair of thicker stainless components, equipment frames, marine hardware, exhaust work, and locations where wind makes gas shielding difficult.
The process can also be used in qualified structural work. For stainless structural fabrication, follow the applicable contract documents and AWS D1.6/D1.6M:2017-AMD1 when that code governs.
Food, pharmaceutical, pressure, chemical, marine, and sanitary applications may impose additional requirements for filler-metal traceability, purge quality, surface finish, ferrite, cleaning chemicals, passivation tests, documentation, and inspection. A visually smooth bead alone does not establish suitability for service.
Conclusion
You can produce a sound stainless weld with a stick welder when you treat material identification, filler selection, cleanliness, heat input, slag removal, and post-weld treatment as one connected process.
Start with a matching test coupon. Use the electrode manufacturer’s polarity and amperage range, maintain a short arc, build the joint with controlled stringers, and measure interpass temperature. After welding, inspect before grinding, remove damaging oxide and contamination, and passivate the clean surface when the service or specification requires it.
For critical work, your settings must come from an approved WPS rather than a general internet chart. The procedure, welder qualification, inspection, and acceptance criteria determine whether the completed weld is suitable for service.
Frequently Asked Questions
Can you weld stainless steel with an AC stick welder?
Yes. Many stainless electrodes with a -16 suffix are designed for AC or DCEP. Confirm the exact electrode data sheet and make sure the AC welder provides the open-circuit voltage required for reliable starts. Keep the arc short and test the settings on matching scrap.
What is the best stick rod for welding 304 stainless steel?
E308L-16 is a common match for welding 304 and 304L stainless. The final choice still depends on the other base metal, service environment, design requirements, and approved procedure.
What rod should you use to weld stainless steel to mild steel?
E309L-16 is commonly used for many austenitic-stainless-to-carbon-steel joints because its higher alloy content tolerates dilution better than E308L. Critical joints still need a procedure that addresses base-metal strength, restraint, service temperature, and corrosion exposure.
How do you prevent warping when stick welding stainless steel?
Use small balanced tacks, firm clamping, short stringer beads, a staggered sequence, and clean copper backing where appropriate. Measure interpass temperature and stop long enough for the joint to cool within the procedure limit. Avoid oversized electrodes and unnecessary weaving.
Is stick welding stainless steel stronger than MIG?
Neither process is automatically stronger. Joint design, base metal, filler classification, penetration, procedure qualification, defects, and inspection determine weld performance. Stick is portable and wind tolerant, while MIG is often faster and easier to automate.
Do you need to preheat stainless steel before stick welding?
Ordinary 304 and 316 fabrication generally does not require preheat. Martensitic, ferritic, duplex, precipitation-hardening, highly restrained, and dissimilar joints may require grade-specific preheat, interpass, cooling, or post-weld heat treatment. Follow the WPS.
Why does a stainless stick weld turn blue or black?
Blue, purple, or black heat tint indicates substantial oxidation. Common causes include excessive heat input, long arc length, slow travel, and poor root shielding. Correct the welding conditions, then remove the harmful oxide and affected surface layer with an approved cleaning process.
Do stainless steel welds always need passivation?
Not every informal repair receives chemical passivation, but corrosion-sensitive, hygienic, pharmaceutical, food-contact, marine, chemical, and specified work often requires controlled cleaning and passivation. Follow the drawing, purchaser specification, governing standard, and service environment.
Sources
- British Stainless Steel Association: General Principles for Selection of Stainless Steels — chromium content, stainless families, thermal conductivity, and thermal expansion
- Lincoln Electric: Excalibur 308/308L-16 — E308L-16 applications and electrode classification
- Hobart Brothers: 316/316L Sterling AP Data Sheet — AC/DCEP polarity, arc length, storage, positions, and manufacturer settings
- OSHA 29 CFR 1910.1026 — hexavalent chromium exposure requirements and the 5 µg/m³ eight-hour PEL
- OSHA 29 CFR 1910.252 — welding ventilation, hot-work precautions, and conditional fire-watch requirements
- TWI: Avoiding Heat Tint During Welding of Stainless Steels and ASTM A380/A380M-25/ASTM A967/A967M-25 — root shielding, oxide removal, cleaning, pickling, passivation, and verification