As an Amazon Associate, Garage Welding may earn from qualifying purchases. This does not change the price you pay.
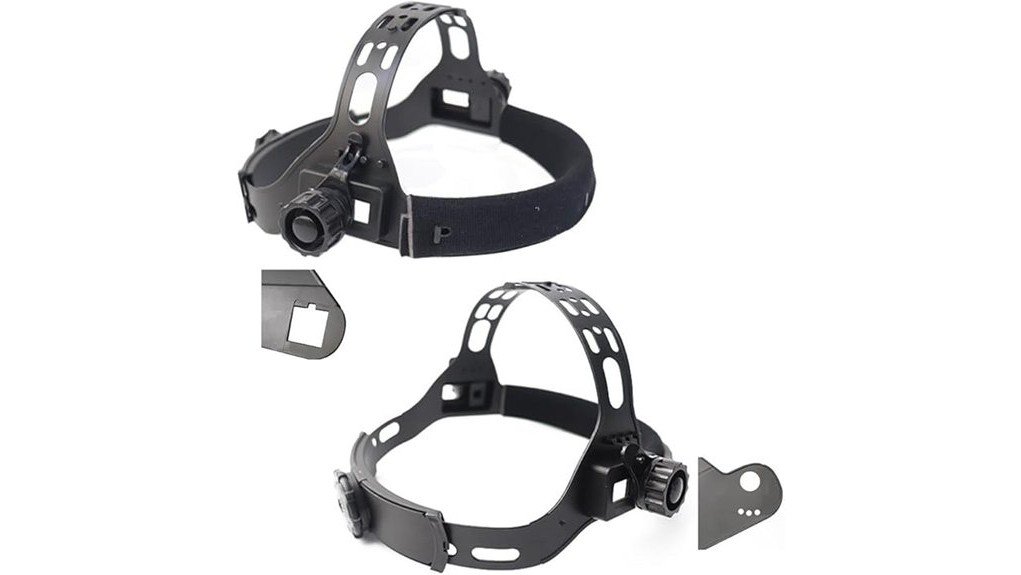
This 2-pack welding helmet headgear replacement is a pair of adjustable headbands with a ratchet-style adjustment knob, foam forehead padding and two connection modes (one square, one round), per the Amazon listing. It is aimed at owners of solar-powered “true color” auto-darkening helmets whose original headband has stretched, cracked or lost its pad. Buy it only after you have matched the connector style on your own helmet, because that is the part that decides whether it fits.
Welding helmet headgear replacement at a glance
| Item | Detail |
|---|---|
| Product | 2-pack adjustable welding helmet headgear |
| Connection | Two connection modes, one square and one round, per the listing |
| Adjustment | Head ring with a rear adjustment knob |
| Padding | Thick foam sweat pad at the forehead |
| Listed weight | About 5.6 oz per headband (the listing also lists about 0.5 lb for the package) |
| Intended helmets | Listed for true-color, solar-powered auto-darkening helmets; confirm yours |
| Not for | Premium helmets with proprietary headgear mounting, which usually need the maker’s own parts |
Why replace helmet headgear instead of the helmet
The headband controls balance, height and tilt. When the ratchet slips, a pivot cracks or the sweat pad wears out, the helmet flops or presses on your forehead even though the shell and filter are fine. A replacement costs far less than a new helmet and takes a few minutes to fit.
Because the pack gives you two headbands, you can keep a spare in the toolbox or swap one when the foam gets soaked and starts to smell.
How to check the headgear will fit your helmet
- Look at how your current headgear attaches. Note whether the pivot points are square-shaped posts, round ones, or a bolted bracket.
- Compare against the listing images and the two connection types included. Make sure there is a matching mode for your shell.
- Check the helmet shell’s mounting holes or slots, and the width between left and right pivots.
- Check if the helmet has side tilt-tension knobs. Some headgear does not include a tension knob, and a loose pivot can let the helmet drop.
- Confirm the helmet brand and model. If it is a premium brand, check the maker’s part number before using generic headgear.
- Make sure the new headgear leaves room for the filter to clear your face and glasses.
Pros and limitations
Pros
- Two headbands in a pack, so you have a spare.
- Adjustable ring and knob let you tune fit and tightness.
- Foam pad can be a comfort improvement over a worn-out stock band.
- Two connector styles raise the odds of a match.
Limitations
- Not universal. Some helmets need brand-specific headgear.
- Generic headgear may not match the original tilt and tension adjustment.
- Foam and plastic parts wear out with sweat, heat and UV, so expect to replace them again.
- Weight listings are inconsistent, so do not judge comfort from them.
Fitting and adjusting the new headgear
- Remove the old headband from the shell by releasing the pivots and keeping any washers or screws.
- Fit the new headband with the matching connector, and confirm both sides click or seat the same way.
- Set the head ring size with the rear knob so the band feels snug but not tight.
- Adjust the helmet height and distance from your face, so the filter sits where you can see through it with the hood down.
- Test the flip-up and flip-down motion. It should stay where you leave it.
- Put the helmet on with your safety glasses on, and check that nothing presses on your nose or temples.
Wipe foam pads with mild soap and water, and replace them or the whole headgear when they harden or crumble. A headband that slips during welding is a safety risk, so replace it at the first sign.
Alternatives and related guides
- Adjustable headband replacement – another generic headband to compare
- Rear sweatband – adds comfort at the back of the head
- 3M Speedglas 9100 headband – for owners of that specific helmet
- True color welding helmet – a complete helmet if replacing the headgear is not enough
Frequently Asked Questions
Will this headgear fit my welding helmet?
Maybe. The listing mentions two connection modes, square and round, and says it suits true-color solar helmets. Check how your current headband attaches and compare it with the listing photos. Premium brands often need their own parts.
How do I tighten a welding helmet headband?
Turn the adjustment knob at the back of the head ring until the band is snug without pressing hard on your forehead. Then adjust the helmet’s height and distance, and check that the hood stays where you leave it.
How often should I replace helmet headgear?
Replace it when the ratchet slips, the pivots crack, the foam crumbles or the helmet no longer stays in position. Sweat, heat and UV wear plastic and foam over time, so heavy daily users replace bands more often than hobbyists.
Can I clean the sweat pad?
Wipe it with mild soap and water and let it dry before use. Avoid solvents, which can break down foam. If the pad is hard, torn or has a persistent smell, replace the headgear or fit a new sweatband.
Conclusion
This 2-pack headgear is a sensible fix for a generic auto-darkening helmet with a worn-out band. Match the connector type and shell mounting first, then adjust the fit before you strike an arc.