
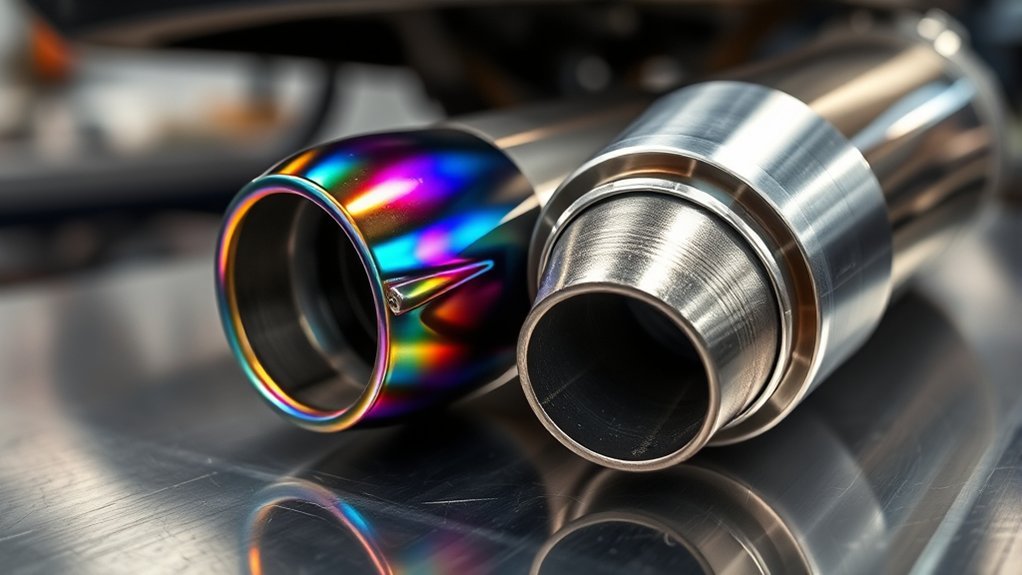
Choosing between titanium and stainless steel exhaust welding comes down to weight, cost, repairability, and how well you can control shielding gas. Both materials can make strong exhaust systems, but titanium punishes contamination quickly, while stainless steel is easier for most shops and DIY welders to fit, weld, and repair.
Quick Answer
Use TIG with full argon shielding, trailing coverage, and back-purging for titanium exhausts. Use TIG with argon back purge for the cleanest stainless exhaust welds, or MIG for quicker non-show work. Titanium saves weight but costs more and is harder to repair. Stainless is cheaper, tougher, and more forgiving.
Key Takeaways
- Titanium exhaust welding is best handled with TIG, pure argon, back purge, trailing shield coverage, clean filler, and tight heat control.
- Stainless exhaust welding is more forgiving, but clean TIG welds on thin tubing still benefit from argon back purging to prevent sugaring and corrosion loss.
- Pie cuts are not mandatory for titanium. They help with tight routing, but every pie cut adds another weld that must be purged and inspected.
- Use filler that matches the base metal: ER308L for most 304 stainless, ER316L for 316 stainless, and the correct ERTi filler for the titanium grade.
- Stainless is usually the better choice for daily drivers and repairs. Titanium fits high-end race or performance builds where weight savings justify the extra cost and skill.
At a Glance
| Time Required | 1–4 hours for a small exhaust repair; a full custom exhaust can take a full day or more |
| Difficulty | Intermediate for stainless steel; advanced for titanium |
| Tools Needed | TIG welder, argon cylinder, purge caps or dams, gas lens, stainless or titanium filler, dedicated wire brush, clamps, tube fit-up tools, PPE, and ventilation |
| Cost | Stainless is lower cost and easier to source; titanium tubing, filler, purge gear, and labor cost more |
Introduction to Exhaust Welding: Key Differences
When you compare titanium vs stainless exhaust welding, the biggest difference is not just the metal. It is the level of control needed around cleanliness, shielding gas, heat input, and post-weld inspection.
Titanium is reactive when hot. The weld, heat-affected zone, root side, and nearby hot metal must stay protected from air while they are above the contamination range. TWI notes that titanium exposed to high welding temperatures can absorb oxygen and nitrogen, which can reduce ductility and lead to cracking if shielding is poor. TWI’s titanium welding guidance also stresses scrupulous cleaning of the joint and filler wire.
Stainless steel is more forgiving, but it is not careless-work friendly. Thin stainless exhaust tubing can warp, sugar on the inside, or lose corrosion resistance if the root side gets too much oxygen. For high-quality TIG root passes on austenitic stainless steel, TWI recommends an inert back purge, usually argon, to prevent chromium loss and protect corrosion resistance. That matters on exhaust tubing because the inside of the tube sees heat, moisture, and corrosive condensate.
Warning: Do not weld an exhaust while it is hot, contaminated with fuel or oil, or installed near flammable parts without proper fire control. Welding stainless can also produce hazardous chromium-containing fumes, so use ventilation, respiratory protection when required, and follow workplace safety rules.
Titanium vs Stainless Exhaust Welding Comparison
| Factor | Titanium Exhaust | Stainless Steel Exhaust |
| Best welding process | TIG/GTAW for most thin exhaust work | TIG for clean work; MIG can work for quicker fabrication or repairs |
| Shielding need | Very strict: torch shield, trailing shield, back purge, and post-flow | Moderate to strict: back purge is best for clean TIG roots and corrosion resistance |
| Filler choice | Match the titanium grade, such as ERTi-2 for Grade 2 or ERTi-5 for Grade 5 when appropriate | ER308L for most 304/304L stainless; ER316L for 316/316L stainless |
| Fit-up tolerance | Very tight fit-up needed; gaps increase burn-through and contamination risk | More forgiving, but tight fit-up still improves bead quality |
| Repair difficulty | Harder; contaminated welds usually need to be removed and rewelded | Easier; damaged or oxidized areas are usually simpler to cut, clean, and reweld |
| Best use | Race, premium performance, and weight-sensitive builds | Daily drivers, street performance, budget builds, and serviceable repairs |
Products Worth Considering

ER308L: Most popular stainless rod for general-purpose applications where corrosion is moderate and applications at cryogenic temperatures.

Premium Material: Crafted from high-grade stainless steel, ER308L rods ensure superior strength & durability for professional welding work

er308l stainless steel tig welding rods 1 16 x 16 1 6mm tig filler rod thin stainless sheet tubing handrail kitchen equipment low splatter corrosion resistant stainless steel welding wire tig welding accessories gta w argon arc
Essential Techniques for Strong Titanium Exhaust Welds
Strong titanium exhaust welds start before the arc. Titanium needs clean metal, clean filler, controlled argon coverage, and careful heat input. A bright bead is not just cosmetic. Weld color is often used as a quick warning sign for shielding problems.
Hot titanium must be shielded from air until it cools enough to avoid oxygen and nitrogen pickup. Poor shielding can make the weld harder, less ductile, and more prone to cracking.
Products Worth Considering

Purging Kit: Includes 7 pairs of purging plugs covering sizes from 0.9" to 4.0" (3.5"-4.0", 3.0"-3.5", 2.5"-3.0", 2.0"-2.5", 1.5"-2.0", 1.2"-1.5", 0.9"-1.2"). Yellow and purple pieces form standard pairs. Comes with a 5-meter heavy-duty welding hose and a durable storage case for easy carry.

AP02 Flamethrower Kit Dual Exhaust BFTKAFK-Dual is designed for universal vehicles and motorcycles
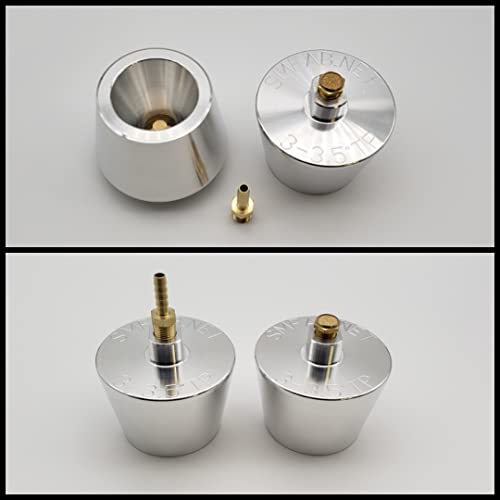
Easy Installation and Removal. Simply tap them into the pipe/tube, since they are tapered, they lock in place and you are ready to start back purging. For removal you can either tap the side of the raised wrench flats at the top of the plug, or you can put a wrench on the flats and twist them out.
The Three Shielding Zones Titanium Needs
- Primary torch shielding: Use pure argon, a clean cup, and a gas lens so the weld pool is fully covered.
- Trailing shield coverage: Protect the cooling bead and heat-affected zone behind the torch until the metal is no longer hot enough to absorb air.
- Root-side back purge: Seal the tube ends with purge caps, purge dams, or tape designed for welding, then fill the inside of the tube with argon before welding.
- Post-flow: Keep shielding gas flowing after the arc stops so the crater and nearby hot metal do not oxidize.
Titanium Exhaust Prep
Cleanliness is the difference between a strong titanium weld and a brittle one. Degrease the tube ends and filler rod, remove oxide with a clean dedicated abrasive or stainless brush used only for titanium, then handle the parts with clean gloves. Do not touch the cleaned joint with bare fingers.
Fit the joint as tightly as possible. Thin titanium exhaust tube does not tolerate large gaps. If you need tight bends, pie cuts can help with routing, but they are not required just because the material is titanium. Mandrel bends reduce weld count and can be better when you have the right bend available. Pie cuts add flexibility, but every cut adds another joint that must be purged, welded, and inspected.
Pro Tip: Before welding the actual exhaust, weld a short scrap coupon from the same titanium tube and filler. Check the bead color, root side, and fit-up first. If the test weld turns gray, chalky, or heavily blue, fix your shielding before touching the real part.
Basic Titanium Exhaust Welding Steps
- Cut and deburr the tube. Keep the cut square so the joint closes evenly.
- Clean the joint and filler. Remove oil, fingerprints, oxide, dust, and abrasive residue.
- Set up the purge. Seal the tube, flow argon through the inside, and allow enough purge time before striking an arc.
- Use a trailing shield. Make sure the cooling bead stays covered behind the torch.
- Tack under purge. Keep tacks small and clean. Dirty tacks can contaminate the final weld.
- Weld in short controlled sections. Use steady travel speed, short arc length, and enough post-flow at every stop.
- Inspect both sides. Look for color, sugaring, cracks, porosity, and any dull gray or powdery contamination.
Proven Methods for Welding Stainless Steel Exhausts
Stainless steel exhaust welding is usually easier than titanium welding, but the best results still come from clean prep and purge control. Stainless can be welded with TIG or MIG. TIG gives the cleanest control on thin exhaust tubing. MIG is faster and can work for practical repairs, but it usually produces more spatter and less cosmetic control.
Proven Techniques for Stainless Steel
- Use TIG for clean thin-wall tubing. TIG gives better puddle control and makes it easier to manage heat on visible exhaust joints.
- Back purge the root side. Argon back purge helps prevent sugaring, oxidation, and corrosion loss on the inside of the tube.
- Use the right filler. For common 304 or 304L stainless exhaust tubing, ER308L stainless filler is a common match. Use ER316L for 316/316L stainless and match specialty grades when needed.
- Control heat input. Thin stainless expands and distorts. Use short weld sections, good fit-up, and enough amperage control to avoid overheating.
- Clean with stainless-only tools. Do not use a carbon-steel brush or grinder disc that can embed iron into stainless.
Essential Welding Equipment Needed
For high-quality stainless exhaust welds, use a TIG welder set for DCEN, pure argon shielding, a sharp tungsten, stainless filler, purge caps or dams, and clamps that hold the tube without pulling it out of alignment. For MIG welding stainless, use stainless wire and a shielding gas suited to stainless MIG, not a random mild-steel setup.
The root side matters. If the inside of the tube turns black and crusty, that is commonly called sugaring. TWI explains that heat tint and oxidation on stainless can impair corrosion resistance, and an efficient back purge helps reduce that problem. This is why purge quality matters even when the outside bead looks clean.
Best Practices for Strong Joints
- Cut the tube square and deburr the inside edge.
- Remove oil, marker residue, polish, paint, and road grime before welding.
- Keep the joint gap small and even.
- Use small tacks around the tube so it does not pull out of round.
- Back purge before the first tack and keep purge flow stable while welding.
- Use small filler and avoid overwelding thin tube.
- Let the joint cool naturally. Do not quench a hot stainless exhaust weld.
Note: A shiny outside bead does not prove the weld is clean inside. On exhaust tubing, inspect the root side whenever possible, especially on stainless TIG welds and all titanium welds.
Common Challenges in Welding Titanium Exhausts and Solutions
Welding titanium exhausts presents unique challenges because the metal is sensitive to contamination while hot. A small leak in the purge, a dirty filler rod, or a poor trailing shield can ruin the joint even if your hand control is good.
Welding Techniques for Titanium
- Use TIG for thin exhaust tubing. TWI notes that MIG can be used on titanium, but it is harder to manage manually and does not generally match TIG quality for demanding work.
- Use pure argon shielding. Protect the front, back, and cooling zone of the weld.
- Keep travel smooth. Stopping too long overheats the joint and increases contamination risk.
- Use matched filler. Match the filler to the titanium grade rather than grabbing a generic rod.
- Keep tools dedicated. Separate titanium tools from carbon steel work to avoid embedded contamination.
Common Pitfalls in Welding
Poor purge coverage is the most common titanium mistake. If the root side is not shielded, the inside of the weld can oxidize and become brittle. If the bead cools outside the trailing shield, the outside can discolor heavily and lose quality.
Bad fit-up is another issue. Gaps make thin tubing harder to control and can cause burn-through. Pie cuts make tight routing possible, but they multiply the number of welds. That means more setup time, more purge points, and more chances for a leak in the purge system.
Overheating also causes trouble. Titanium does not need a huge bead on thin exhaust tube. Use a controlled puddle, short arc, and enough travel speed to fuse the joint without soaking the metal.
How Do Titanium and Stainless Steel Welds Stack Up?
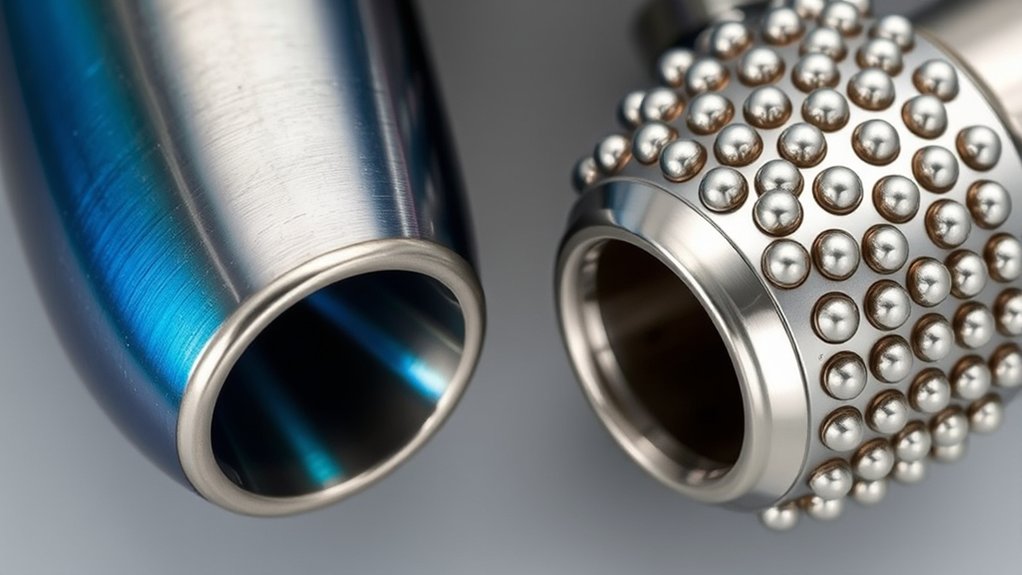
Both titanium and stainless steel can produce strong, durable exhaust welds. The difference is how narrow the margin for error is.
- Titanium welds can be light, strong, and clean, but they demand excellent shielding and clean handling from start to finish.
- Stainless welds are heavier but cheaper, easier to repair, and more tolerant of real-world shop conditions.
- Titanium contamination is usually a cut-out-and-redo problem, not something you fix by polishing the bead.
- Stainless heat tint can often be improved with proper cleaning and passivation methods, but heavy sugaring inside the tube is still a quality problem.
- Exhaust performance depends more on tube diameter, routing, mufflers, resonators, collectors, and restrictions than on weld appearance alone.
For a daily driver, stainless steel is usually the practical winner. For a race car or high-end performance build where every pound matters, titanium can be worth the extra cost if the welder has the right equipment and skill.
Best Practices for Quality Exhaust Welds
Quality exhaust welds come from preparation, fit-up, shielding, and inspection. The same habits help both materials, but titanium gives you less room for mistakes.
Choose the Right Filler
Use filler that matches the base metal and service conditions. ER308L is a common match for 304/304L stainless. ER316L is used for 316/316L stainless. For titanium, use the correct ERTi filler for the tube grade. TWI notes that titanium filler metals are solid wires and should match the composition of common titanium alloys under the relevant filler specifications.
Control Fit-Up and Tack Welds
A clean final weld starts with clean tacks. Purge before tacking titanium and high-quality stainless. Use enough tacks to prevent movement, but keep them small enough that they melt cleanly into the final bead.
Manage Heat
Thin exhaust tubing does not need a wide, overheated bead. Use steady travel, tight arc length, and short weld sections. Stainless can warp when overheated. Titanium can lose quality if the hot zone is not shielded while it cools.
Inspect the Weld
- Good titanium weld: clean, smooth, fully shielded, and free from gray, chalky, or crusty contamination.
- Bad titanium weld: dull gray, powdery, cracked, porous, or heavily oxidized.
- Good stainless weld: smooth bead, clean root, no heavy sugaring, and minimal heat tint.
- Bad stainless weld: black root oxidation, porosity, burn-through, sharp undercut, or heavy distortion.
Troubleshooting Exhaust Weld Defects
| Problem | Likely Cause | Fix |
| Titanium bead turns gray or chalky | Air contamination, poor trailing shield, weak post-flow, or dirty metal | Cut out the bad weld, improve shielding, clean again, and reweld |
| Black crust inside stainless tube | No back purge or too much oxygen in the purge | Seal the tube better, purge longer, and keep argon flowing during the weld |
| Burn-through | Too much heat, wide gap, slow travel, or filler too large | Tighten fit-up, reduce heat, use smaller filler, and move steadily |
| Porosity | Dirty joint, contaminated filler, poor gas coverage, or drafts | Clean the joint, check gas flow, block drafts, and use clean filler |
| Warped tube or poor alignment | Too few tacks, uneven heat, or poor clamping | Add balanced tacks, weld in sections, and support the tube before welding |
Safety Notes for Exhaust Welding
Exhaust welding creates heat, fumes, UV radiation, and fire risk. Stainless steel welding can expose workers to chromium-containing fumes, including hexavalent chromium under hot-work conditions. OSHA identifies welding on stainless steel and other chromium-containing metals as a major source of hexavalent chromium exposure and requires employers to control welding fumes and smoke within safe limits. OSHA’s chromium guidance and welding ventilation standard explain these hazards.
- Use a welding helmet, gloves, flame-resistant clothing, and eye protection for grinding and cutting.
- Keep fuel, solvents, brake cleaner, oily rags, plastic trim, and wiring away from the weld zone.
- Do not weld near a fuel tank, fuel lines, or battery without proper vehicle-specific safety steps.
- Use local exhaust ventilation or respiratory protection when ventilation is not enough.
- Remember that argon can displace oxygen in enclosed spaces. Do not purge or weld in a confined space without proper monitoring and rescue procedures.
- Avoid welding near chlorinated solvents or brake cleaner residue. Clean parts safely and let solvents fully evaporate before welding.
Frequently Asked Questions
Is stainless steel or titanium better for exhausts?
Stainless steel is better for most street cars because it is cheaper, easier to repair, and more forgiving to weld. Titanium is better when weight savings matter enough to justify higher material cost, stricter purge control, and more skilled welding.
What is the best metal for welding exhaust?
For most exhaust systems, 304 stainless steel is the best balance of durability, corrosion resistance, cost, and weldability. Mild steel is cheaper but rusts faster. Titanium is excellent for premium lightweight builds, but it is harder and more expensive to weld correctly.
What are the disadvantages of titanium exhaust?
Titanium exhaust systems cost more, require stricter TIG shielding, are harder to repair, and are less forgiving of contamination. A poor titanium weld can become brittle, so bad welds often need to be cut out instead of touched up.
Does a titanium exhaust sound different?
Yes, titanium exhausts often sound sharper or more metallic, partly because titanium systems are commonly thinner and lighter. The final sound still depends more on tube diameter, wall thickness, mufflers, resonators, catalytic converters, and engine layout than on material alone.
Do you need to back purge stainless exhaust welds?
For the cleanest TIG welds, yes. Back purging stainless exhaust tubing protects the inside of the joint from heavy oxidation and sugaring. Some quick repairs are done without purge, but the root side will usually be rougher and less corrosion resistant.
Can you MIG weld titanium exhaust tubing?
Titanium can be MIG welded in some industrial settings, but it is not the normal choice for thin manual exhaust fabrication. TIG is preferred because it gives better control over heat, filler, shielding, and bead quality.
Conclusion
Titanium exhaust welding rewards precision, clean handling, and excellent argon shielding. It is the better choice when weight savings and premium performance matter more than budget or easy repair. Stainless steel exhaust welding is the practical choice for most builds because it is easier to source, easier to weld, and easier to fix later.
If you are building a daily-driver or street-performance exhaust, stainless steel is usually the smarter material. If you are building a lightweight race exhaust and have the skill and purge setup to protect every weld, titanium can deliver excellent results. Either way, fit the tube carefully, match the filler, control heat, purge the root, and inspect the weld before you call the job finished.
Sources
- TWI — Welding of Titanium and its Alloys, Part 1 — titanium contamination, cleaning, filler handling, and shielding requirements
- TWI — Welding of Titanium and its Alloys, Part 2 — titanium welding processes, TIG quality, MIG limitations, and inert welding chambers
- TWI — Welding of Austenitic Stainless Steel, Part 2 — stainless root-pass back purging and corrosion resistance
- TWI — Avoiding Heat Tint During Welding of Stainless Steels — heat tint, root oxidation, and corrosion resistance
- Lincoln Electric — Lincoln ER308/308L TIG Filler — ER308/308L stainless filler classification and use
- OSHA — Controlling Hazardous Fume and Gases during Welding — welding fumes, hexavalent chromium, and shielding gas hazards



