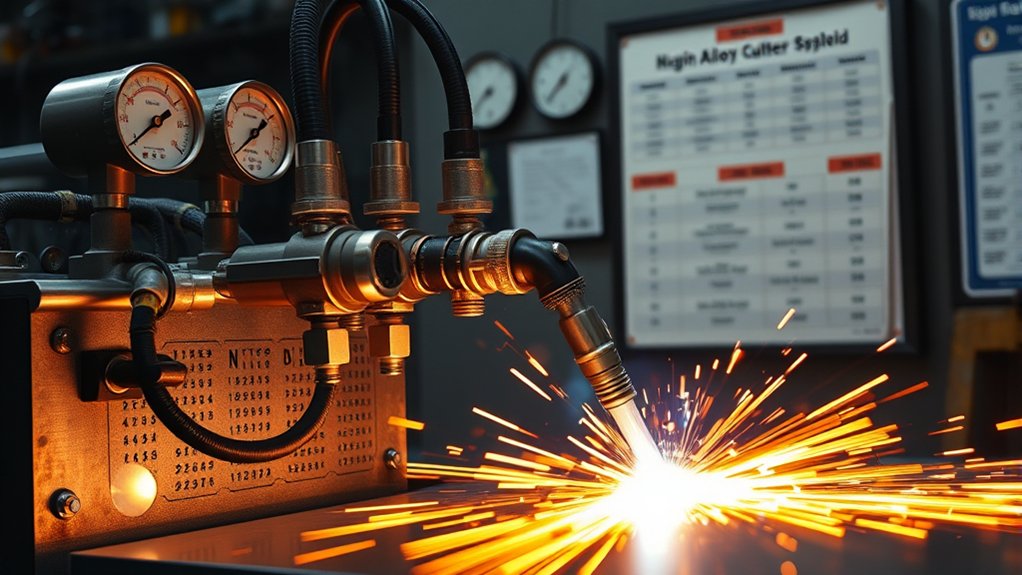
Choosing the wrong plasma cutter gas can leave you with heavy dross, rough edges, excess oxidation, and short consumable life. The right choice depends on the metal, thickness, plasma system, available shield gas, and finish you need. This guide compares compressed air, oxygen, nitrogen, F5, H-35 argon-hydrogen, and nitrogen-water processes without treating one gas chart as universal.
Quick Answer
For most handheld plasma cutters, clean, dry compressed air is the practical choice. Supported multi-gas systems may use oxygen for faster mild-steel cuts, nitrogen or F5 for stainless steel, and H-35 argon-hydrogen for thick stainless or aluminum. Always use the exact gases, consumables, pressures, and speeds in your machine’s cut chart.
Key Takeaways
- Choose gas only after confirming what your plasma system, torch, gas console, and consumables support.
- Clean, dry compressed air offers the lowest-cost general-purpose option for many handheld cutters.
- Oxygen can improve mild-steel speed and edge quality on compatible dual-gas or multi-gas systems.
- Nitrogen, F5, H-35, and water shielding serve different stainless-steel and aluminum thickness and finish targets.
- Thickness limits, gas pressure, flow, pierce height, and travel speed must come from the OEM cut chart rather than a universal online chart.
At a Glance
| General handheld cutting | Use clean, dry compressed air when the cutter is designed for air. |
| Mild-steel production | A supported oxygen-plasma and air-shield process can increase speed and reduce dross. |
| Stainless steel | Air is economical; nitrogen, F5, H-35, or water shielding may improve finish on compatible systems. |
| Aluminum | Air works for general cutting; nitrogen, H-35, or supported water-shield processes may improve edge quality. |
| Final authority | Use the OEM cut chart for gas type, purity, pressure, flow, amperage, consumables, height, and speed. |
| Major safety limit | Do not use unsupported gases, cut aluminum-lithium alloys with water, or use H-35 for underwater cutting. |
What’s in This Article
- How Plasma Cutting Works
- Plasma Gas vs. Shield Gas
- Factors That Influence Gas Selection
- How to Choose Plasma Cutter Gas
- Plasma Cutter Gas Comparison
- Compressed Air
- Oxygen
- Nitrogen
- F5 Gas
- Argon-Hydrogen Mixtures
- Nitrogen-Water Combination
- Material-Specific Recommendations
- Gas Quality, Pressure, and Flow
- Cost and Consumable Considerations
- Equipment Compatibility and Setup Requirements
- Cut Quality Signs That Your Gas Choice Is Wrong
- Safety and Gas Handling Basics
- Frequently Asked Questions
- Conclusion
- References
How Plasma Cutting Works

A plasma cutter sends an electric arc through a fast-moving gas. The arc ionizes part of that gas, turning it into an electrically conductive plasma jet.
Create a controlled electric arc, ionize the approved gas, and use the high-speed plasma jet to melt and remove metal from the kerf.
The torch nozzle constricts the arc into a narrow column. Heat from the arc melts the conductive workpiece, while gas velocity blows molten metal out of the cut.
Amperage, torch height, travel speed, gas flow, gas composition, and consumable condition all affect the kerf. A gas change cannot correct a worn nozzle, poor work-lead connection, wrong torch height, or travel speed that is far outside the cut chart.
The process works on electrically conductive metals such as mild steel, stainless steel, aluminum, copper, and brass. The exact capacity comes from the power supply and torch—not from the gas name alone.
Plasma Gas vs. Shield Gas
Industrial plasma systems may use two separate gas streams:
- Plasma gas: Passes through the electrode and nozzle area, becomes ionized, and forms the cutting arc.
- Shield or secondary gas: Flows around the plasma jet to cool torch parts, shape the process, protect consumables, and influence edge quality.
A shield fluid may also be water on equipment designed for that process. The correct pairing can include oxygen with air, nitrogen with air, nitrogen with carbon dioxide, F5 with nitrogen, or H-35 with nitrogen.
Many handheld air plasma cutters use one compressed-air inlet. The torch manages the required airflow internally, so you do not select separate plasma and shield gases. Multi-gas mechanized systems may have a gas console, separate regulators, and gas-specific consumables.
Pro tip: When a cut chart lists two gases, read the order carefully. “Oxygen/air,” for example, normally means oxygen plasma gas with air as the shield gas.
Factors That Influence Gas Selection
Start with the plasma system rather than the material. A portable air cutter may accept only compressed air or approved bottled nitrogen. An industrial gas console may support oxygen, nitrogen, F5, H-35, water shielding, or manufacturer-specific mixtures.
After compatibility, consider these factors:
- Base metal: Mild steel, stainless steel, and aluminum respond differently to oxygen, nitrogen, hydrogen blends, and air.
- Thickness: Use the thickness column in the exact OEM cut chart. Do not apply another machine’s limit to your cutter.
- Cut-quality target: Decide whether you need low dross, a square edge, low oxidation, weld-ready surfaces, or only a fast separation cut.
- Production rate: A more expensive gas may reduce travel time and secondary grinding enough to lower total cost per part.
- Piercing needs: Recommended cutting capacity, edge-start capacity, pierce capacity, maximum cut, and severance capacity are different ratings.
- Consumables: Electrodes, nozzles, shields, swirl rings, and cartridges may change with gas and amperage.
- Gas availability: Cylinder supply, regulator flow capacity, bulk-gas service, compressor output, and dryer performance can limit the process.
How to Choose Plasma Cutter Gas
- Open the machine manual and cut chart. Confirm the gases approved for the power supply, torch, and gas console.
- Identify the metal and grade. Note coatings, plating, alloy type, and whether the cut edge will be welded or coated.
- Find the exact thickness row. Use the listed amperage, consumables, plasma gas, shield gas, pressure, flow, pierce height, cut height, and speed.
- Choose the quality target. General repair work may favor air, while production stainless may justify F5, nitrogen, H-35, or water shielding.
- Confirm the gas supply can maintain flow. Measure pressure while gas is flowing, not only from a static cylinder or compressor gauge.
- Install the correct consumables. A gas-specific chart may call for a different nozzle, shield, electrode, swirl ring, or cartridge.
- Make a test cut. Check dross, bevel, kerf width, edge color, top-edge rounding, and consumable condition before cutting the full sheet.
The Hypertherm plasma gas selection guide also emphasizes cut quality, productivity, and economy as the main selection factors.
Plasma Cutter Gas Comparison
| Gas or Process | Common Materials | Main Strength | Main Tradeoff |
|---|---|---|---|
| Compressed air | Mild steel, stainless steel, aluminum | Low cost and broad handheld compatibility | More oxidation or nitriding and strong dependence on air quality |
| Oxygen with approved shield gas | Mild or carbon steel | High speed, low dross, and good weldability on supported systems | Not a general choice for stainless or aluminum; higher gas and consumable cost |
| Nitrogen | Stainless steel and aluminum | Stable process and potentially cleaner nonferrous edges | Costs more than air and does not guarantee lower dross on every system |
| F5 | Stainless steel on approved systems | Bright metallic cut face and controlled oxidation | Slower and more expensive than air; contains hydrogen |
| H-35 argon-hydrogen | Thick stainless steel and aluminum | High heat transfer, smooth face, and straight edges | High cost, flammability, and special equipment requirements |
| Nitrogen with water shield | Stainless steel and aluminum on designed systems | Improved squareness, finish, and top-surface cooling | Special torch and water system plus added water-related hazards |
Compressed Air
Compressed air offers the widest everyday use for handheld plasma cutting. It can cut mild steel, stainless steel, aluminum, and other conductive metals when the machine is designed for air.
Air avoids bottled process-gas costs, but it is not free. The compressor, dryer, filters, drains, hoses, and maintenance all contribute to operating cost.
Do not use a universal “air plasma cuts one inch” rule. A small portable cutter and a high-amperage industrial air system have very different recommended, maximum, and severance capacities.
Versatility Across Metals
Compressed air lets a mixed-metal shop move between mild steel, stainless steel, and aluminum without changing cylinders. Miller notes that ordinary air is the standard cutting gas for many handheld systems. You can review its handheld plasma cutter operating guide.
Air can leave a dark oxidized surface on stainless steel and an oxidized cut face on aluminum. Air cutting can also introduce nitrogen into a mild-steel edge. Whether that matters depends on the next process and its quality requirements.
If the part will be welded, remove loose dross and follow the welding procedure’s edge-preparation requirements. Critical fabrication may require grinding to clean, sound metal rather than assuming every plasma-cut edge is weld-ready.
Cost and Maintenance
A compressor must deliver the required cubic feet per minute or liters per minute at the specified inlet pressure for the full cutting cycle. Tank pressure alone does not prove adequate airflow.
Use the filter and drying arrangement required by the cutter maker. A shop setup may include a water separator, refrigerated or desiccant dryer, particulate filter, coalescing filter, and automatic drains.
Inspect compressor intake filters, drain receivers, check dryers, and replace filter elements before contamination reaches the torch.
Thickness Limitations
Air-plasma capacity is a machine rating, not a fixed property of compressed air. Check whether the number you are reading means:
- Recommended cut: The range intended for productive, repeatable cutting.
- Pierce capacity: The thickness the system can pierce without an edge start.
- Maximum cut: A slower cut near the upper practical limit.
- Severance cut: A very slow separation cut with rougher quality and more cleanup.
Near the machine’s upper range, expect lower speed, a wider kerf, more bevel, and heavier dross. An edge start may also be required where piercing would damage consumables.
Oxygen

Use oxygen as a plasma gas only when the power supply, gas console, torch, and cut chart approve it. Oxygen reacts with iron in mild steel, adding heat to the process and helping remove molten metal from the kerf.
A common mechanized pairing is oxygen plasma gas with air shield gas. The exact shield gas, consumables, flow, and pressure must come from the equipment chart.
Oxygen is not a general-purpose choice for stainless steel or aluminum. It can create unwanted oxidation and poor cut-face chemistry on those materials.
Best for Mild Steel
On compatible systems, oxygen can provide high travel speed, a narrow kerf, low dross, and a clean mild-steel edge. These benefits make it useful when production rate and secondary cleanup matter.
- Confirm that the system supports oxygen plasma cutting.
- Install the gas-specific electrode, nozzle, shield, and other consumables.
- Use the plasma-gas and shield-gas combination in the exact thickness row.
- Set pierce height, pierce delay, cut height, amperage, and travel speed from the chart.
- Inspect electrodes and nozzles at the interval recommended by the manufacturer.
Fast, Clean Cutting
The oxygen reaction can reduce bottom dross and improve cut speed, but only when the motion system can maintain the listed travel rate and torch height.
Moving too slowly can create low-speed dross and a wider heat-affected area. Moving too fast can leave high-speed dross, trailing arc lines, incomplete separation, or excess bevel.
Warning: Oxygen strongly supports combustion. Keep oxygen equipment free of oil and grease, use oxygen-rated regulators and fittings, and store cylinders according to applicable fire and compressed-gas rules.
Nitrogen
Nitrogen is a common plasma gas for stainless steel and aluminum on compatible air, dual-gas, and multi-gas systems. It can support a stable arc and a less oxidized cut face than air in some applications.
Nitrogen can improve stainless-steel and aluminum edge appearance, but the result still depends on the torch, shield gas, thickness, speed, and cut chart.
Nitrogen does not automatically eliminate dross. On some air-plasma stainless processes, it may reduce dark oxidation while increasing cost, slowing production, or producing more dross than compressed air.
Possible shield choices include air, nitrogen, carbon dioxide, or water, depending on the machine. Never substitute one because it appears in another manufacturer’s chart.
- Confirm nitrogen purity, inlet pressure, and flow requirements.
- Use a regulator and hose system capable of maintaining the listed flow.
- Install nitrogen-compatible consumables.
- Run a test coupon and compare dross, bevel, edge color, and surface roughness.
Pro tip: Save the successful gas, consumable, amperage, height, and speed settings with the material grade and thickness. This gives the next operator a repeatable starting point.
F5 Gas
F5 is a blend of 95% nitrogen and 5% hydrogen. It is used for stainless-steel cutting on specific compatible systems and torch combinations.
F5 can produce a brighter, silver-colored stainless cut face than air. On supported multi-gas systems, manufacturers may recommend it for a middle thickness range where it provides a useful balance of finish, speed, and operating cost.
F5 is not a universal replacement for air or nitrogen. It may require a lower travel speed, gas-specific consumables, a high-flow regulator, and careful leak control. Do not use it on mild steel or aluminum unless the OEM chart expressly lists that application.
Because F5 contains hydrogen, treat it as a flammable-gas mixture. Follow the gas supplier’s safety data sheet, ventilation requirements, storage rules, regulator requirements, and leak-test procedure.
Argon-Hydrogen Mixtures

Argon-hydrogen blends provide high heat transfer for thick stainless steel and aluminum on systems designed for them. The common H-35 blend contains 65% argon and 35% hydrogen.
Manufacturers commonly position H-35 for stainless steel and aluminum above about 1/2 inch on compatible multi-gas equipment. That threshold is guidance for specific systems, not permission to use H-35 in an unsupported torch.
H-35 can create a straight edge and a smooth, almost polished cut face. Nitrogen is often used as the shield gas. Jagged bottom dross can still occur when speed, height, flow, or consumables are incorrect.
| Parameter | Typical Practice | Purpose |
|---|---|---|
| Blend | 65% argon and 35% hydrogen | Stable, high-heat plasma process |
| Common scope | Thick stainless steel or aluminum on approved equipment | Smooth face and straighter cut edge |
| Common shield gas | Nitrogen where listed by the manufacturer | Torch cooling and process control |
| Quality checks | Bottom dross, bevel, surface roughness, and color | Repeatable production cuts |
Warning: H-35 contains a high percentage of hydrogen and is flammable. Use only equipment designed for it. Do not use H-35 for underwater plasma cutting because gas can collect beneath the plate and create an explosion hazard.
Nitrogen-Water Combination
Some mechanized systems use nitrogen as the plasma gas and water as the shield fluid. Water injection, water shielding, vented water injection, and underwater cutting are related but distinct processes. Do not assume one machine can perform all of them.
On supported stainless-steel and aluminum processes, water shielding can improve cut squareness, reduce top-edge heat, and create a smooth cut face. It may also reduce noise, glare, or visible smoke in some configurations.
Water does not replace proper fume extraction. The cutting table, filters, ventilation system, and water-management equipment must be designed for the process.
Process and Benefits
Water near the nozzle can help constrict and cool the plasma process. The operator still needs the correct current, gas flow, water flow, torch height, pierce settings, and travel speed.
- Arc control: The designed water flow can help shape the plasma column.
- Edge finish: Supported processes may reduce angularity and improve surface smoothness.
- Top-surface cooling: Water shielding may reduce the heat-affected area near the upper cut edge.
- Process-specific setup: Use only the torch, nozzle, water system, and cut chart built for the process.
Best Material Uses
Water-shield processes are commonly used for stainless steel and aluminum when edge appearance and squareness justify the equipment complexity.
They may suit architectural panels, food-processing equipment, precision fabrication, and weld-preparation profiles. The cut face and suitability for service still need inspection under the job’s fabrication procedure.
Critical water-process warning:
- Do not plasma cut aluminum-lithium alloys in the presence of water unless the alloy supplier and equipment manufacturer provide an approved safe procedure.
- Aluminum cutting over or under water can generate hydrogen. Prevent gas accumulation with the mitigation required by the table and plasma-system manufacturer.
- Do not use flammable plasma gases such as H-35 for underwater cutting.
- Never assume that a water table, water shield, or water-injection torch makes ventilation unnecessary.
Material-Specific Recommendations
Match the gas process to the metal, but let the approved cut chart decide the final gas pair, consumables, pressure, flow, height, and speed.
Mild Steel
- Handheld repair and mixed work: Clean, dry compressed air is the common economical choice.
- Mechanized production: Oxygen plasma with the approved shield gas can improve speed, dross control, and edge quality.
- Welding afterward: Clean dross and condition the edge as required by the welding procedure.
Stainless Steel
- Air systems: Air is simple and economical but often leaves a darker oxidized edge.
- Nitrogen: May reduce dark oxidation and improve the cut face on compatible systems.
- F5: Can produce a bright metallic surface on approved stainless processes.
- H-35 or manufacturer-specific hydrogen mixtures: Used for thicker stainless where supported.
- Water shield: May improve squareness and surface finish on designed mechanized systems.
See Hypertherm’s stainless-steel plasma gas guidance for examples of how gas recommendations change by system and thickness.
Aluminum
- General handheld cutting: Air is usually the available choice and can produce good practical cuts.
- Nitrogen: Can improve cut-face appearance on compatible systems.
- H-35: Commonly used for thick aluminum where the system supports it.
- Water processes: Can improve edge quality but require strict hydrogen and alloy safety controls.
Hypertherm’s aluminum plasma cutting guide explains air, nitrogen, H-35, F5, and shield-gas roles in more detail.
Gas Quality, Pressure, and Flow
The right gas composition will not help if the supply is wet, oily, contaminated, or unable to maintain flow. Follow the specified purity and contamination class where the manual provides one.
- Check pressure dynamically: Read the machine or regulator while gas is flowing through the torch.
- Meet the flow requirement: A regulator may show enough pressure but still be unable to deliver the required volume.
- Use adequate hose size: Long, narrow, damaged, or sharply bent hoses create pressure drop.
- Control moisture and oil: Drain receivers and maintain separators, dryers, and filters.
- Use gas-rated components: Regulators, hoses, fittings, valves, and seals must suit the gas and pressure.
- Leak-test safely: Use the approved leak-detection method; never use a flame.
Too little flow can destabilize the arc and overheat consumables. Excess flow may also disturb the arc or prevent correct torch operation. Do not raise pressure beyond the manual to compensate for worn parts, an undersized compressor, or restricted plumbing.
Cost and Consumable Considerations

Compare plasma processes by cost per finished part, not cylinder price alone.
Include:
- gas or compressed-air cost;
- compressor power and maintenance;
- electrode, nozzle, shield, and cartridge life;
- cut speed and machine time;
- pierce failures and rejected parts;
- dross removal, grinding, and edge preparation;
- downtime for gas or consumable changes.
Compressed air often wins on direct gas cost. Oxygen may lower mild-steel cost per part by increasing speed and reducing cleanup. Nitrogen and F5 may be justified by stainless finish requirements. H-35 carries a higher gas and equipment cost but can improve thick stainless or aluminum productivity.
Record starts per electrode, cut length per nozzle, gas use, rework time, and rejected parts. This gives a more useful comparison than assuming the cheapest gas is the cheapest process.
Equipment Compatibility and Setup Requirements

Verify gas compatibility before buying cylinders or changing any connection. The power supply, torch, gas console, software, consumables, and table must all support the process.
- Confirm approved plasma and shield gases in the operator manual.
- Match the torch and consumable part numbers to the selected amperage and gas.
- Check required gas purity, inlet pressure, dynamic flow, and regulator capacity.
- Confirm that hoses, fittings, seals, and valves are compatible with oxygen or hydrogen blends.
- Check CNC software, process databases, and cut-chart revisions for mechanized equipment.
- Verify water-table, water-shield, downdraft, filter, and ventilation compatibility.
- Retest the process after changing a torch, consumable design, gas console, firmware version, or motion setting.
Warning: Never run a gas that the machine manual does not approve. An unsupported gas can damage the torch, overheat components, create leaks, shorten consumable life, or introduce fire and explosion hazards.
Cut Quality Signs That Your Gas Choice Is Wrong
Gas may be part of a cut-quality problem, but rule out the more common setup causes before changing gas.
- Check consumables: Replace a damaged nozzle, deeply pitted electrode, cracked swirl ring, or incorrect cartridge.
- Check the work lead: Clean the contact point and confirm a secure electrical path.
- Check amperage and consumable rating: Do not run a nozzle outside its listed current.
- Check torch height: Wrong pierce height or cut height changes bevel, dross, and consumable wear.
- Check travel speed: Slow cuts and fast cuts produce different dross patterns.
- Check dynamic gas pressure and flow: Watch for pressure drop when the torch opens.
- Check gas quality: Look for water, oil, rust, cylinder contamination, or the wrong blend.
- Confirm the gas pair: Make sure both plasma and shield gases match the cut chart.
Heavy bottom dross may come from slow travel, low current, excess standoff, worn consumables, or poor gas flow. High-speed dross tends to be harder and more firmly attached.
Excess bevel may indicate wrong torch height, wrong travel direction, worn consumables, incorrect speed, or an unsuitable process for the required tolerance.
Short consumable life can point to wet or oily air, excessive pierce height errors, piercing beyond capacity, wrong gas, incorrect assembly, or inadequate cooling flow.
Safety and Gas Handling Basics
Plasma cutting combines hazardous voltage, ultraviolet and infrared radiation, hot metal, sparks, noise, compressed gas, and potentially harmful fumes. Follow the equipment manual, gas supplier’s safety data sheet, workplace hot-work procedure, and applicable regulations.
- Ventilation: Use local exhaust or adequate mechanical ventilation to capture fumes near the source. Water shielding does not replace fume control.
- Stainless and coated metals: Chromium-bearing stainless, galvanized steel, paint, plating, and unknown coatings can create hazardous fumes. Identify the material before cutting.
- Cylinders: Keep cylinders upright, secured, protected from damage, and capped during transport.
- Regulators: Use only regulators and fittings approved for the gas. Do not use adapters to force incompatible connections.
- Oxygen: Keep oxygen fittings, gloves, tools, and work areas free of oil and grease. Separate oxygen storage from fuel gas and combustible materials as required.
- Hydrogen blends: Ventilate the area, prevent leaks, remove ignition sources, and never use H-35 underwater.
- Confined spaces: Do not cut in a confined or enclosed area without the required atmospheric testing, ventilation, respiratory protection, attendant, and rescue procedure.
- PPE: Wear the correct eye and face shade, hearing protection, flame-resistant clothing, gloves, and suitable footwear.
- Fire prevention: Remove combustibles, inspect the opposite side of the cut, provide a fire watch where required, and keep the correct extinguisher nearby.
OSHA’s ventilation requirements for welding and cutting call for sufficient general or local exhaust ventilation to keep fumes and smoke within safe limits.
Frequently Asked Questions
What Is the Most Common Gas Used for Plasma Cutting?
Compressed air is the most common gas for handheld plasma cutters because it is economical and works on mild steel, stainless steel, and aluminum. The air must be clean, dry, oil-free, and supplied at the pressure and flow listed by the manufacturer.
Can You Use Compressor Air for a Plasma Cutter?
Yes, when the cutter is designed for compressed air. The compressor must maintain the required flow and pressure while cutting. Add the drying and filtration required by the manual, and check pressure with gas flowing through the torch.
Do You Need Special Gas for a Plasma Cutter?
Many handheld cutters need only compressed air. Industrial dual-gas and multi-gas systems may use oxygen, nitrogen, F5, H-35, carbon dioxide, or water shielding to improve speed or edge quality on specific materials.
What Is F5 Gas for Plasma Cutting?
F5 is a mixture of 95% nitrogen and 5% hydrogen. Compatible systems use it for stainless steel when a bright metallic cut face is important. Because it contains hydrogen, use approved equipment, ventilation, regulators, storage, and leak-control practices.
Which Plasma Gas Is Best for Stainless Steel?
Air is economical for general handheld cutting. Depending on the system and thickness, nitrogen, F5, H-35, manufacturer-specific hydrogen mixtures, or nitrogen with water shield may provide a cleaner or squarer edge. Use the approved cut chart for the final choice.
Which Plasma Gas Is Best for Aluminum?
Compressed air works for general aluminum cutting on many handheld systems. Nitrogen may improve edge appearance, while H-35 and supported water-shield processes are used for demanding or thicker work. Never apply another machine’s thickness chart to your system.
How Does Moisture in Compressed Air Affect Plasma Cutting?
Moisture can destabilize the arc, increase dross, damage the electrode and nozzle, and shorten consumable life. Drain the compressor receiver and maintain the separator, dryer, filters, and automatic drains before water reaches the cutter.
Can You Use H-35 or Cut Aluminum Underwater?
Do not use H-35 for underwater cutting because the flammable gas can collect beneath the plate. Most aluminum alloys may be cut over water only with the manufacturer’s hydrogen-control measures. Aluminum-lithium alloys must not be cut in the presence of water without an approved alloy-specific procedure.
Conclusion
The best plasma cutter gas depends first on your equipment and then on the metal, thickness, finish target, production rate, and cost per finished part.
Use clean, dry compressed air for broad handheld versatility. Choose an approved oxygen process for productive mild-steel cutting. Consider nitrogen or F5 for stainless steel, and use H-35 or supported water-shield processes only where the equipment and cut chart call for them.
Before production, confirm gas compatibility, purity, dynamic pressure, flow, consumables, torch height, and speed. Make a test cut and inspect dross, bevel, edge color, and consumable condition. That disciplined setup will do more for cut quality than relying on a universal gas or thickness rule.
References
- Hypertherm Gas Selection Guide — plasma and shield-gas choices for mild steel, stainless steel, and aluminum.
- Hypertherm Plasma Cutting Stainless Steel — air, nitrogen, F5, H-35, hydrogen-mix, and water-shield guidance.
- Hypertherm Plasma Cutting Aluminum — aluminum gas choices, shield gases, and edge-quality considerations.
- OSHA 29 CFR 1926.353 — ventilation and protection requirements for welding and cutting.
- OSHA 29 CFR 1926.350 — compressed-gas cylinder storage and handling requirements.
- ESAB Aluminum Water-Table Safety — hydrogen accumulation and aluminum-lithium alloy hazards.


