
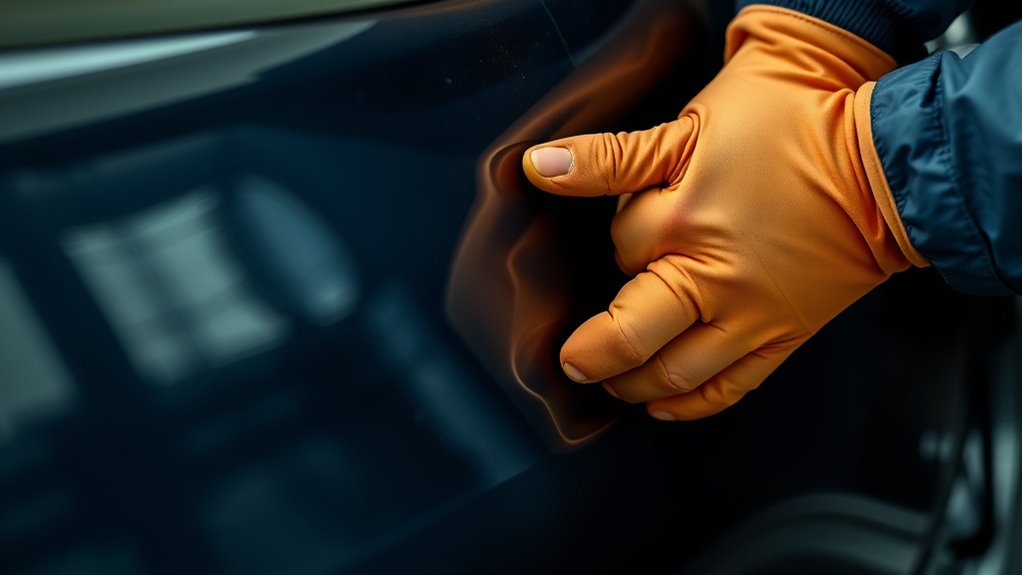
Oil canning in auto body panels is broad, springy waviness that appears when thin sheet metal loses its stable shape. It is most noticeable on hoods, roofs, doors, and quarter panels under reflected light. The visible wave may come from stretched metal, forming stress, welding heat, weak support, damaged bracing, or incorrect panel fit.
Quick Answer
Oil canning is broad, springy waviness in an auto body panel caused by unstable stress, stretched metal, heat distortion, poor support, or incorrect fit. Diagnose it under reflected light, then identify the panel material and check the vehicle maker’s repair procedure before shrinking, welding, pulling, or applying heat.
Key Takeaways
- Oil canning spreads across a broad area and may pop between two positions; an impact dent is usually more localized.
- Loss of panel crown, stretched metal, welding heat, mounting stress, and damaged braces are common causes.
- Do not shrink or straighten a panel until you identify its material and check the vehicle-specific body repair procedure.
- Heat that is acceptable on one mild-steel outer panel may be prohibited on another panel, HSS, UHSS, aluminum, or a safety-related part.
- A lasting repair restores stable metal, correct support, proper attachment, corrosion protection, and a smooth reflected-light pattern.
At a Glance
| Time Required | About 15–30 minutes to diagnose; repair may take several hours or require panel replacement and refinishing. |
| Difficulty | Basic to diagnose; advanced to repair without stretching, overheating, or damaging the finish. |
| Tools Needed | Clean inspection light or reflection board, straightedge, clean gloves, masking tape, and the OEM-specified repair equipment. |
| Cost | Inspection may cost nothing if you already own a light and straightedge. Repair cost varies with material, access, paint damage, bracing, labor, and replacement needs. |
What’s in This Article
- What Is Oil Canning in Auto Body Panels?
- How to Tell Oil Canning From Dents
- What Causes Oil Canning on Flat Panels?
- Why Flat Panels Show Oil Canning Most
- How Oil Canning Affects Panel Fit and Finish
- Check the Panel Material Before Repair
- How to Prevent Oil Canning During Forming and Welding
- How to Reduce Oil Canning in Repairs
- When to Repair or Replace the Panel
- Oil Canning Troubleshooting
- Frequently Asked Questions
- Conclusion
- Sources
What Is Oil Canning in Auto Body Panels?

Oil canning is visible waviness or unstable movement in a sheet-metal panel. The panel may look smooth from one angle and wavy from another. In some cases, light pressure makes the metal snap inward or outward before it returns or settles in a second position.
The term is commonly used for elastic buckling or stress wrinkling in broad metal surfaces. The Metal Construction Association’s technical explanation of oil canning concerns architectural panels, but its description of visible waviness and elastic instability also helps explain the general sheet-metal behavior.
Oil canning describes how a panel behaves. It does not, by itself, identify whether the cause is stretched metal, forming stress, heat distortion, poor support, or hidden collision damage.
On a vehicle, mild oil canning in an undamaged outer skin may be mainly cosmetic. However, do not assume every moving or wavy panel is harmless. Damaged braces, separated adhesive, incorrect mounting, previous repairs, or structural misalignment can create a similar appearance.
Panel thickness matters, but thickness alone does not prevent the problem. A shallow crown, bead, body line, brace, hem, or bonded reinforcement can add stiffness. When that shape or support is lost, a wide panel can become unstable even if it has no obvious impact crater.
How to Tell Oil Canning From Dents
A dent is normally a localized high or low spot caused by impact or pressure. Oil canning affects a broader field and may move or pop when the surrounding panel is lightly loaded. Use reflected light and gentle observation rather than pressing hard enough to create more damage.
Diagnose Oil Canning Step by Step
- Clean the surface. Dirt, wax streaks, and uneven polish can distort reflections and hide the true panel shape.
- Use low-angle reflected light. Move a long inspection light, striped reflection board, or bright straight object across the panel. Watch for lines that bend or ripple.
- Mark the full affected area. Use removable masking tape outside the suspected high and low zones. The unstable area is often larger than it first appears.
- Apply only light fingertip pressure. Note whether the panel stays fixed, flexes normally, or snaps between two positions. Do not repeatedly pop the panel for demonstration.
- Check the panel edges and nearby gaps. Misaligned hood, door, deck-lid, or quarter-panel gaps may point to mounting or structural problems rather than a simple skin defect.
- Inspect the backside when accessible. Look for a detached brace, broken adhesive, damaged sound deadener, prior welds, stretched metal, or contact between the skin and reinforcement.
- Compare with an undamaged area. Some large panels have limited normal flexibility. Compare similar areas without forcing either panel.
| Observation | Oil Canning | Typical Dent or Other Issue |
|---|---|---|
| Affected area | Broad, shallow field | More localized high or low spot |
| Movement | May flex or snap between positions | Often remains in one fixed shape |
| Reflection | Long waves or changing ripples | Concentrated distortion around an impact |
| Likely cause | Lost crown, stretch, stress, heat, support, or fit | Impact, crease, brace contact, or mounting damage |
A straightedge can help reveal a broad high or low area, but do not drag a bare metal edge over finished paint. Protect the surface and remember that many vehicle panels are intentionally crowned rather than perfectly flat.
Note: A panel that moves when pushed is not automatically defective. The key questions are whether its movement is normal for that panel, whether the reflected shape is acceptable, and whether its support, attachment, and underlying structure are intact.
What Causes Oil Canning on Flat Panels?
Oil canning develops when stress within the sheet overcomes the stiffness provided by the panel’s thickness, crown, body lines, braces, hems, and attachments. More than one cause may be present.
- Stretched metal: An impact, aggressive hammering, direct on-dolly work, repeated pulling, or excessive grinding can increase the surface area of the sheet. The extra area has nowhere stable to sit.
- Lost panel crown: A hood, roof, door skin, or quarter panel may look flat but normally has a shallow compound curve. Flattening that crown removes stiffness.
- Welding heat: A weld and the nearby base metal expand while hot and contract while cooling. Uneven heating, long welds, poor sequencing, and excessive restraint can leave distortion and residual stress.
- Manufacturing strain and springback: Formed sheet changes shape slightly when tooling pressure is released. NIST describes springback as a long-standing issue in formed automotive sheet components.
- Incorrect fit or attachment: Forcing a replacement panel into place, uneven clamping, incorrect fastener pressure, or attachment points that are out of position can preload the skin.
- Damaged or separated reinforcement: A brace, anti-flutter adhesive, hem, or bonded support may no longer stabilize the outer skin.
- Uneven substrate or hidden contact: Adhesive buildup, sound-deadening material, filler, a high brace, or debris behind the skin can push the panel outward.
- Temperature change: Temperature can change how visible an unstable wave appears, but it should not be used as the only explanation for a repaired panel that fits poorly or repeatedly pops.
Dark and high-gloss paint does not necessarily cause oil canning, but it makes small shape changes easier to see. Long, sharp reflections reveal waviness that may be difficult to notice on matte, light-colored, or dirty finishes.
Why Flat Panels Show Oil Canning Most
Flatness Amplifies Waviness
Shape gives sheet metal stiffness. A bead, body line, flange, or shallow crown resists bending more effectively than a wide, nearly flat span. When a broad skin loses its intended crown or support, a small amount of extra surface area can create a visible wave.
This is why hoods, roofs, door skins, deck lids, and wide quarter panels often show the problem first. They contain long uninterrupted areas and are viewed under reflections from the sky, shop lights, windows, and nearby vehicles.
Broad Panels Reveal Distortion
A large panel also provides more distance for a reflection line to bend. The same shallow shape change that is hidden by a narrow body line can become obvious across the center of a hood or door.
Manufacturers limit this tendency through panel contour, beads, reinforcement, material selection, adhesive, hems, and controlled forming. During repair, preserving or restoring those features is usually more important than trying to make the sheet mathematically flat.
How Oil Canning Affects Panel Fit and Finish

Oil canning mainly affects appearance, but the underlying cause can also affect panel fit, noise, attachment, and durability. A cosmetic wave in the center of an otherwise correctly installed skin is different from a wave caused by a bent opening, detached brace, or forced replacement panel.
| Condition | Possible Result |
|---|---|
| Broad waviness | Distorted reflections and lower finish quality |
| Lost crown | Panel that feels soft or pops when lightly loaded |
| Mounting or opening distortion | Uneven gaps, flushness problems, or closing issues |
| Brace or adhesive separation | Popping, drumming, vibration, or recurring movement |
| Unstable metal under filler | Cracks, edge mapping, or finish failure |
| Removed factory coatings | Corrosion risk unless protection is restored |
Oil canning alone does not automatically create a water leak or structural defect. Those risks arise when the same repair also has damaged seams, poor attachment, incorrect sealing, corrosion, or misaligned structure.
Check the Panel Material Before Repair
Before hammering, pulling, welding, or shrinking, identify the panel material and confirm what the vehicle maker allows. Do not rely on panel appearance, age, thickness, or a magnet alone.
I-CAR’s steel repairability guidance notes that some exterior panels use high-strength steel and that technicians should consult vehicle-specific OEM information. The I-CAR OEM Technical Information Matrix can help locate manufacturer information, but the applicable body repair manual remains the controlling source.
| Material or Area | Important Repair Limit |
|---|---|
| Non-structural mild-steel outer panel | Often repairable, but heat, welding, attachment, and corrosion requirements still depend on the OEM procedure. |
| High-strength steel | Straightening and heat limits vary by tensile strength, component, location, and manufacturer. |
| Ultra-high-strength or press-hardened steel | Frequently subject to strict no-straightening, no-heat, or replacement rules. |
| Aluminum outer panel | Requires aluminum-compatible tools, contamination control, temperature control, and vehicle-specific repair limits. |
| Structural or safety-related area | Do not apply cosmetic-panel methods without the exact OEM procedure, measurements, equipment, and training. |
Warning: Do not use an oxy-acetylene torch, shrinking disc, stud welder, hydraulic pull, or weld sequence merely because it worked on an older mild-steel panel. Current OEM restrictions may prohibit heat or straightening and may require replacement. FCA and Honda guidance both show why the material, component, and model-specific procedure must be verified first.
How to Prevent Oil Canning During Forming and Welding
Preventing oil canning is easier than correcting stretched or heat-distorted sheet. The goal is to preserve an even strain pattern, the intended crown, and the panel’s designed support.
Products Worth Considering

Non-Scratch Pry Tools: Made from durable nylon, this auto trim removal tool kit protects your car’s surfaces from scratches while offering strong leverage for trims, panels, and dashboards

Nylon Material: Made of impacted resistant nylon fiber material with high level craftsmanship, it’s non-toxic, durable and not like brittle material which is prone to bent or crack

3 Pcs Clip Pliers Set and Fastener Remover Set Includes:1 pcs 2 in 1 clip pliers of 9 inches and 2 pcs fastener removal tool of 8.7 & 11.8 inches
During Design and Forming
- Use beads, ribs, body lines, contours, or shallow crown to stiffen broad areas.
- Control blank holding, draw depth, tooling alignment, and lubrication so the sheet does not stretch unevenly.
- Use forming simulation, test panels, or strain measurement when designing production tooling.
- Account for springback rather than forcing a formed part into position after release.
- Protect panels during handling and storage so wide spans are not bent or supported at isolated points.
During Fit-Up and Installation
- Dry-fit the panel before final attachment.
- Confirm the opening, hinges, flanges, braces, and adjacent structure are correctly positioned.
- Do not pull a panel flat with clamps or fasteners when the underlying structure is out of specification.
- Use the OEM-specified adhesive, weld, rivet, fastener, or combined attachment method.
- Maintain the intended panel gap and flushness throughout attachment.
During Welding
Weld distortion develops as the weld and surrounding metal expand and contract. Lincoln Electric’s weld-distortion guidance explains how heating and cooling create shrinkage and residual stress.
- Use the exact joining process, weld size, location, and test method required by the body repair manual.
- Keep fit-up tight enough for the specified process without forcing the panel into a stressed position.
- Use a balanced sequence rather than completing one long area before moving elsewhere, when the OEM procedure allows it.
- Avoid unnecessary weld length and repeated reheating.
- Pause as needed to control accumulated heat; do not use an unapproved quenching method.
- Inspect reflections and fit throughout the operation instead of waiting until final finishing.
Pro Tip: Place a long reflection light across the panel before welding and photograph the pattern. Check the same angle after each attachment stage. A changing reflection often reveals distortion before it becomes difficult to correct.
How to Reduce Oil Canning in Repairs
The correct repair depends on why the panel is unstable. Do not begin by striking the center of the visible wave. First find the panel’s crown, support, material, and stretched area.
Products Worth Considering

This Body Hammer Set uses high quality fiberglass shaft, covering all body repair and panel beating requirements. High quality fiberglass shaft panel percussion hammer. Long lasting quality.

Auto Body Repair Kits contain all the tools necessary for automobile fender, bumper, and large or small body car dent repairs.

Automotive Bodywork and Rust Repair
1. Confirm Repairability and Make the Area Safe
Locate the vehicle-specific body repair procedure and identify the panel material, tensile-strength restrictions, attachment method, and heat limits. Determine whether the area is an outer cosmetic skin or part of a structural or safety-related assembly.
Before welding, cutting, grinding, stud pulling, or heating, follow the manufacturer’s power-down procedure. Inspect both sides of the work area for wiring, fuel components, restraint-system parts, high-voltage cables, batteries, trim, foam, seam sealer, adhesive, sound insulation, and other combustible materials.
Use suitable eye, face, skin, hearing, and respiratory protection. Provide ventilation and fire protection appropriate to the task. OSHA’s general welding, cutting, and brazing requirements address protective equipment, ventilation, hazardous coatings, and hot-work controls.
Warning: A normal 12-volt battery disconnect is not a substitute for the vehicle maker’s hybrid or EV disable procedure. Do not cut, weld, pull, or heat near high-voltage components, fuel-system parts, restraint mounting areas, or hidden combustible material without the required procedure and training.
2. Remove External Stress Before Reshaping Metal
Check whether the wave changes when nearby bolts, hinges, braces, clamps, or temporary fasteners are released according to the repair procedure. A replacement skin that was forced into place may flatten when attachment stress is corrected.
Inspect anti-flutter adhesive and bonded braces. Do not simply pack an unknown adhesive or filler between the skin and reinforcement. Use the specified product, bead size, location, and cure method.
3. Map the Crown and Stretched Area
Use reflected light to locate the broad high and low zones. Work from the undamaged panel shape toward the center rather than chasing every small ripple.
An oil-canned panel often contains excess surface area, but the stretched metal may not be at the deepest-looking point. A flattened crown or displaced edge can make the center appear low even when the main correction belongs elsewhere.
4. Use Controlled Cold Metalwork When Permitted
For an approved repairable panel, gentle hammer-and-dolly work may restore the crown. Off-dolly technique can move a low area while reducing direct stretching, but poor tool placement can still add damage.
- Use light, closely controlled blows rather than heavy impacts.
- Support the panel without trapping it between two hard tools.
- Correct ridges, crowns, and displaced edges before repeatedly working the center.
- Recheck reflections and panel stability after every short pass.
- Stop if the affected area grows, the metal thins, cracks appear, or the panel becomes less stable.
Hydraulic equipment may be appropriate for measured pulls or larger collision damage, but it is not a general-purpose cure for a loose outer skin. The vehicle must be anchored, measured, and repaired within the OEM procedure by a trained technician.
5. Shrink Stretched Metal Only When Approved
A shrinking disc creates localized frictional heat, and a torch creates much more concentrated heat. Either can alter the panel, coatings, adhesive, and nearby materials. Their use requires skill, temperature control, backside access, and explicit permission for the material and component.
FCA’s 2025 use-of-heat position statement requires technicians to verify the steel and follow model-specific restrictions. Honda and Acura’s Summer 2026 high-strength-steel guidance prohibits cold or heated straightening of UHSS and requires replacement after prohibited straightening.
Do not assume a painted outer panel is mild steel. If the procedure does not clearly permit the proposed shrinking method, stop and obtain qualified repair information.
6. Control Welding Distortion
When welding is required, use the vehicle maker’s specified process and attachment pattern. Continuous welding, excessive plug-weld size, poor fit-up, unnecessary grinding, and repeated rework can add heat and stretch.
The principles in this guide to welding sheet metal on a car may help explain thin-metal heat control, but the vehicle-specific body repair manual must determine the actual process, wire, weld location, and test requirements.
7. Restore Corrosion Protection and Finish
Metalwork, grinding, stud pulling, and welding can remove factory coatings on both sides of a panel. Restore the required primer, seam sealer, adhesive, cavity wax, undercoating, and other corrosion protection after the metal repair.
I-CAR’s corrosion-protection guidance recommends checking the body repair manual before, during, and after repair so the correct materials are restored in the correct locations.
Before refinishing, confirm that the panel remains stable under normal handling. Body filler can refine a stable surface, but it should not be used to hold an oil-canned panel in one position. Movement beneath the filler can cause cracking, mapping, or adhesion failure.
8. Perform Final Quality Checks
- Inspect the panel under long reflected light from several angles.
- Check gaps, flushness, opening dimensions, and latch or hinge operation.
- Listen for popping, drumming, or contact with a brace.
- Confirm all attachments, adhesives, sealers, coatings, trim, wiring, and safety systems are restored as required.
- Verify that no heat, sparks, or smoldering material remain after hot work.
- Complete any scans, calibrations, measurements, or post-repair inspections required by the vehicle maker.
When to Repair or Replace the Panel
A repair may be reasonable when the issue is confined to an accessible, non-structural outer panel; the material is repairable; the support is intact or can be restored; and the metal has not been severely thinned, torn, creased, or overheated.
Professional replacement or a different OEM-approved procedure is usually the safer choice when:
- The body repair manual prohibits straightening, heat, sectioning, or the planned attachment method.
- The panel or reinforcement contains non-repairable HSS, UHSS, press-hardened steel, cast aluminum, or another restricted material.
- The area involves an intrusion beam, restraint mounting point, occupant safety structure, rollover structure, or other safety-related component.
- The panel has severe stretch, a sharp crease, cracks, tears, thinning, extensive corrosion, or repeated finish failure.
- A brace, hem, bonded joint, or structural opening is damaged beyond the approved repair limit.
- The panel repeatedly snaps after the support and crown have been corrected.
- Access is too limited to perform and inspect a complete repair.
- The repair would leave unacceptable gaps, flushness, corrosion protection, or surface quality.
Note: Replacing an outer panel is not automatically easier or safer. Replacement may disturb factory welds, adhesive, sealing, corrosion protection, glass, electronics, and adjacent structure. Compare both options using the OEM procedure.
Oil Canning Troubleshooting
| Problem | Likely Cause | Next Step |
|---|---|---|
| Panel pops back after hammering | Stretched metal, lost crown, or correction in the wrong area | Stop hammering, remap the full crown, and verify whether shrinking is permitted. |
| Waviness appears after welding | Heat accumulation, shrinkage, poor fit-up, or excessive restraint | Stop adding welds, allow controlled cooling, inspect fit, and review the required weld sequence. |
| Wave changes when bolts are tightened | Mounting stress or misaligned support | Check the opening, hinges, flanges, fastener sequence, and specified torque. |
| Panel drums or rattles | Brace separation, failed anti-flutter adhesive, or skin-to-brace contact | Inspect the backside and restore the support with the specified material and placement. |
| Filler cracks over the area | The metal is still moving or the repair is too thick | Remove the failed material, stabilize the metal correctly, and reassess repairability. |
| Door, hood, or deck-lid gaps changed | Hinge, latch, opening, brace, or structural misalignment | Measure the vehicle and follow the OEM structural diagnosis procedure before cosmetic work. |
| Wave is visible only under one light angle | Very shallow cosmetic distortion or reflection sensitivity | Use consistent lighting and compare with the opposite or an undamaged panel before deciding on invasive repair. |
Frequently Asked Questions
How Do You Stop a Panel From Oil Canning?
Find and correct the cause rather than repeatedly pushing the center. Restore the intended crown, remove mounting stress, repair approved supports or adhesive, and correct stretched metal only with a method allowed for that material and vehicle.
Does Oil Canning Go Away on Its Own?
A very shallow wave may look different as temperature, lighting, or panel load changes. A panel with lost crown, excess stretch, damaged support, or incorrect fit usually will not become permanently stable without correcting the cause.
How Do You Fix Oil Canning?
Diagnose the full affected area, identify the panel material, check OEM repairability, remove external stress, restore the crown and support, and correct stretched metal only with an approved technique. Recheck the panel after every short repair pass.
Is Oil Canning a Structural Defect?
Not always. Oil canning in an intact outer skin is often an appearance issue. It requires further inspection when it appears with changed panel gaps, damaged braces, separated adhesive, collision damage, corrosion, or movement in a structural or safety-related component.
Can Welding Cause Oil Canning in Auto Body Panels?
Yes. The weld and nearby metal expand while heated and contract while cooling. Excessive heat, long welds, poor sequencing, incorrect fit-up, or unnecessary rework can leave shrinkage and residual stress that distort thin sheet.
Can Body Filler Fix Oil Canning?
Body filler can refine a stable metal surface, but it cannot safely stabilize a panel that still snaps or flexes. Movement under the filler may cause cracking, mapping, loss of adhesion, or recurring visible waves.
Will a Shrinking Disc Fix Oil Canning?
A shrinking disc may help an experienced technician correct approved stretched metal, but it is not suitable for every panel. It adds heat and can damage coatings, adhesive, aluminum, HSS, UHSS, or nearby components. Verify the OEM procedure first.
Should You Use a Torch on an Oil-Canned Panel?
Do not use a torch unless the vehicle-specific repair procedure clearly permits heat on that exact material, component, and location. Many modern high-strength or safety-related parts have strict heat restrictions and may require replacement if heated.
Conclusion
Oil canning is broad waviness or snap-through movement caused by unstable sheet metal, lost crown, stretch, heat distortion, incorrect fit, or weak support. Reflected light and gentle inspection help distinguish it from a fixed impact dent.
The most important repair step happens before any hammering or heating: identify the material and read the vehicle-specific body repair procedure. A successful repair restores stable shape, correct support, panel gaps, attachment, corrosion protection, and finish without weakening the vehicle or creating new distortion.
Sources
- Metal Construction Association — Oil Canning in Metal Roof and Metal Wall Systems — General definition of visible waviness and elastic buckling in sheet-metal panels.
- National Institute of Standards and Technology — Springback — Forming strain, residual stress, and elastic shape change in automotive sheet components.
- I-CAR — Steel Repairability — Material identification and the need for vehicle-specific OEM repair guidance.
- FCA US LLC — Use of Heat Position Statement — Heat restrictions for structural, high-strength, and non-structural components.
- Occupational Safety and Health Administration — Welding, Cutting, and Brazing Requirements — PPE, ventilation, hazardous coatings, and hot-work precautions.
- I-CAR — Corrosion Protection Inspection During the Repair Process — Restoration of seam sealer, cavity wax, coatings, and other corrosion protection.




